


This article details the steps to install ConfigMgr Distribution Point on Windows 11. By installing the SCCM DP on Windows 11, you can deploy the content files to devices and users.
When you plan for a ConfigMgr DP role, the most important prerequisite is the operating system. The operating system should support the installation of ConfigMgr DP role. The good news is you can install SCCM distribution point role on Windows 11 OS.
Windows 11 Client OS is among the versions that are supported for use as a ConfigMgr distribution point. You can also install SCCM client on Windows 11 PC and manage them via SCCM 2111 and above.

SCCM Distribution points play a key role in the delivery of packages, programs, endpoint protection
updates, applications, software updates, and operating system deployment (OSD).
Not just Windows 11, you can also install SCCM DP role on Windows 10. In remote sites where you don’t have a physical server, you can install SCCM DP on Windows 11 running on a laptop.
Windows 11 as Remote Distribution Point
Consider a remote site with just few users, and this site doesn’t have a distribution point server yet. Usually remote sites are difficult to manage when there is no system administrator available.
Now that you have few users in office, you can either have a new distribution point server in this site or use a neighbor SCCM DP to download the content.
Read: How to Install SCCM Secondary Site
Even with few users in the office, sometimes you don’t have enough hardware resources to set up a DP on Windows Server. In such situations, you can install Windows 11 on a laptop and install the ConfigMgr DP role on it.
The primary reason for installing the ConfigMgr DP role on Windows 11 is to serve the content files to SCCM clients. Not just that, you can also enable PXE responder service on Windows 11 and image the machines.
Prerequisites for Windows 11 Distribution Point
Before you install ConfigMgr DP role on Windows 11, read the following prerequisites:
- Install Remote Differential Compression
- Application Development: ISAPI Extensions
- Security: Windows Authentication
- IIS 6 Management Compatibility: IIS 6 Metabase and IIS 6 WMI Compatibility.
- PowerShell – On Windows Server 2012 or later, install PowerShell 3.0 or 4.0 as prerequisite before you install the SCCM distribution point.
- Windows 11 Enterprise or Pro version supports installation of DP role.
- Firewall ports (135, RPC Dynamic TCP 49152-65535, 80) should be opened between SCCM site server and remote Windows 11 DP machine.
- Visual C++ Redistributable – SCCM installs the Microsoft Visual C++ 2013 Redistributable Package prerequisites on each computer that hosts a distribution point.
- To support PXE or multicast, you can enable a PXE responder on a distribution point without Windows Deployment Service.
- You must also add the SCCM site server computer account to the Local Administrators group on Windows 11 PC.
- The distribution point must have the following inbound rules configured in the Windows firewall-Windows Management Instrumentation (DCOM-In) and Windows Management Instrumentation (WMI-In).
Read: List of SCCM Distribution Point Prerequisites
Prepare Windows 11 for DP Role Installation
Before you install ConfigMgr distribution point on Windows 11, you must install Windows 11 first. The Windows 11 OS can be installed on either a VM or a laptop that is located in a remote site.
Windows 11 requires TPM 2.0 to be enabled before installation. So, if you are installing Windows 11 on a VM, read how to enable Trusted Platform Module on a Virtual Machine.
I also recommend reading Windows 11 specifications before installing Windows 11 on any computer or VM.
Once you encrypt the VM, power on the VM and boot it from Windows 11 ISO. Choose the OS language, time and currency format, keyboard or input method and complete the Windows 11 installation.
Read: Upgrade to Windows 11 using multiple methods
I would also recommend installing the latest updates on Windows 11. You can also deploy the Windows 11 updates using ConfigMgr ADR.
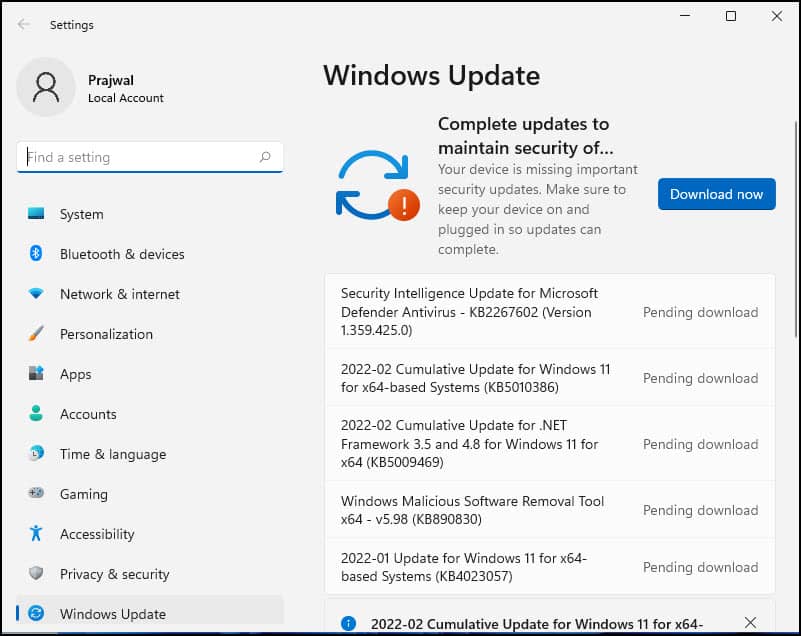
After installing the latest updates on Windows 11, you must restart the computer. The next step is to activate your Windows 11 PC. You can refer to the following article to understand Windows 11 Activation methods.
Since the Windows 11 will be your remote ConfigMgr distribution point, you must join the Windows 11 to your Active Directory domain. Read the following article to know how to join Windows 11 PC to AD domain.
Add SCCM Site Server Computer Account to Windows 11
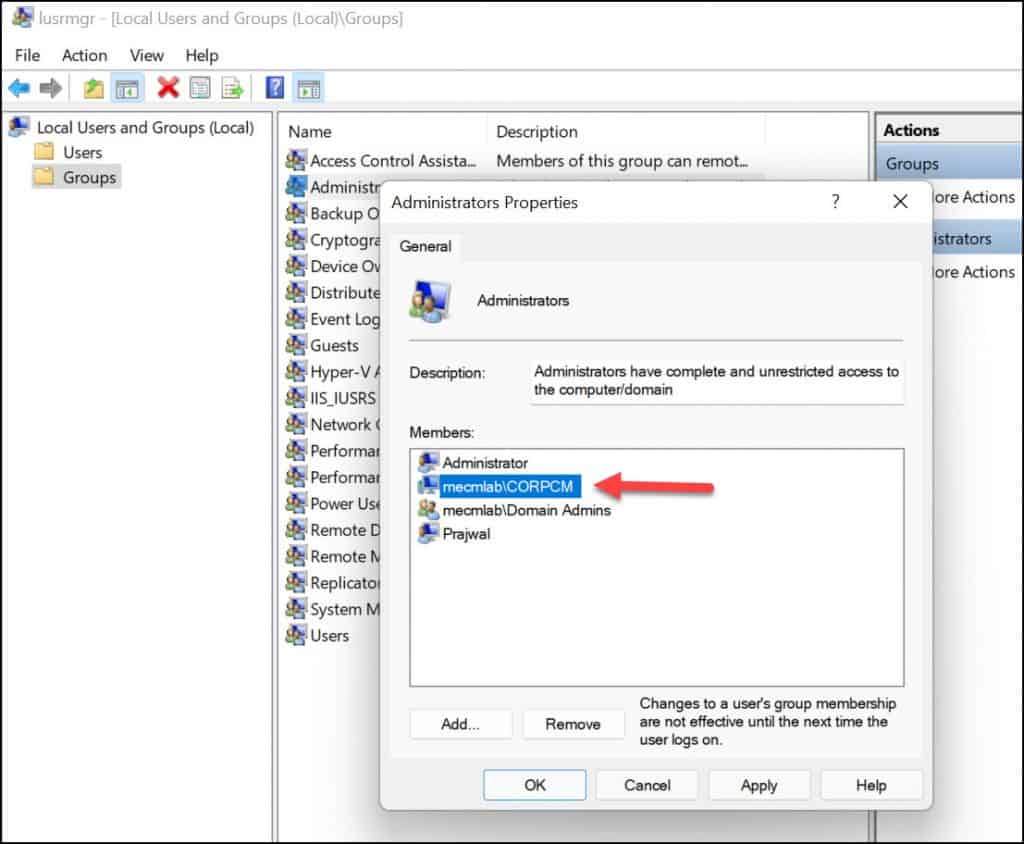
You must add the SCCM site server computer account to the Local Administrators group on Windows 11 PC. This step must be done before you install ConfigMgr DP role on Windows 11.
On your Windows 11 PC, open the Local Users and Groups (Local). You can use the shortcut command lusrmgr.msc. Double-click the Administrators group and add your ConfigMgr Site Server to this group.
Click Apply and OK. You must restart your Windows 11 PC after making the above changes.
When you install ConfigMgr Distribution Point on Windows 11 PC, you need to specify the locations for content library and package share. It is not recommended to use C:\ drive as your content library location.
Therefore, you can add another drive to your Windows 11 VM and use that to store the ConfigMgr content.
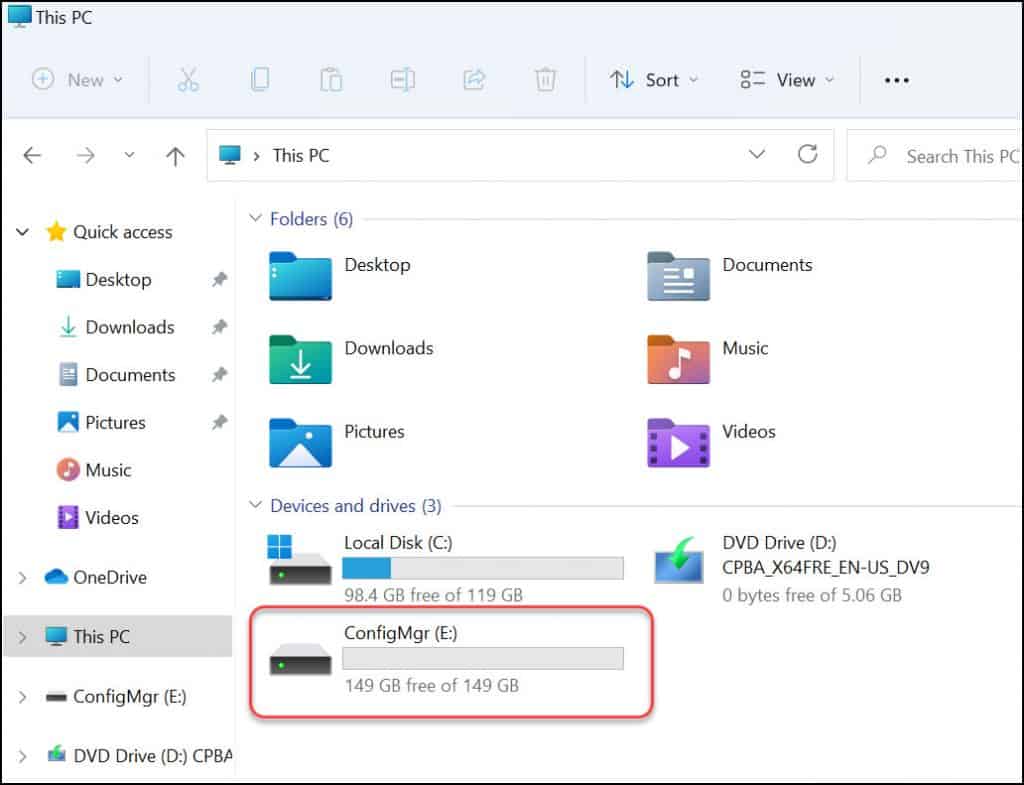
Note: To prevent Configuration Manager from installing on a specific drive, create an empty file named NO_SMS_ON_DRIVE.SMS and copy it to the root folder of the drive before you install the distribution point.
Install ConfigMgr Distribution Point on Windows 11
Let’s look at the steps to install SCCM DP role on Windows 11 PC:
- Launch the SCCM console.
- Click Administration > Site Configuration. Right click Servers and Site System Roles.
- Select Create Site System Server.
- The Create Site System Server Wizard opens and this should help you to install ConfigMgr distribution point role on Windows 11.

In the Create Site System Server Wizard, you must select the server to use as a site system. Click Browse and select the Windows 11 computer from Active Directory DP to install ConfigMgr DP role.
If you haven’t joined the Windows 11 PC to Active Directory domain, you will not find the computer object in AD.
Next, you must select a site code. If you have a primary site and secondary sites, you get to choose the site codes for those sites. With a single primary site, you have only one site code. For site code, click the drop-down and select the Site Code of primary site.
Site System Installation Account
During the installation of SCCM DP on Windows 11, you are required to select a option for site system installation account. The site system installation account is used to install and configure SCCM DP on Windows 11 PC.
- Use the site server’s computer account to install the site system – Select this option to use the Site Server computer account to install the ConfigMgr DP role.
- Use another account for installing the site system – Select this option when you want to install SCCM DP on Windows 11 PC that is domain joined into an untrusted forest.

On the Proxy page, specify the internet proxy server if you have one in your setup. If you are setting up SCCM DP on Windows 11 and if the remote site doesn’t use any proxy, don’t specify anything here. Click Next to continue.

ConfigMgr DP Role – System Role Selection
The System Role Selection page in site system server wizard displays all the available roles that you can install on Windows 11. From the list of available roles, enable the “Distribution Point” role for Windows 11. Click Next.

SCCM Windows 11 Distribution Point Settings
The Distribution Point option in Site System Server wizard displays several settings that you can enable while installing ConfigMgr DP role.
- Description – You can enter a brief description about the Windows 11 DP.
- Install and Configure IIS if required by Configuration Manager – Enable this option even if you have enabled the IIS before installing the DP role.
- Enable and configure BranchCache for this distribution point – Choose this setting to let Configuration Manager configure Windows BranchCache on the distribution point server.
- Adjust the download speed to use the unused network bandwidth (Windows LEDBAT) – Enable distribution points to use network congestion control.
- Enable this distribution point for prestaged content – This setting enables you to add content to the server before you distribute software.
- Enable this distribution point to be used as Microsoft Connected Cache server – Use this option to install a Microsoft Connected Cache server on your distribution point.

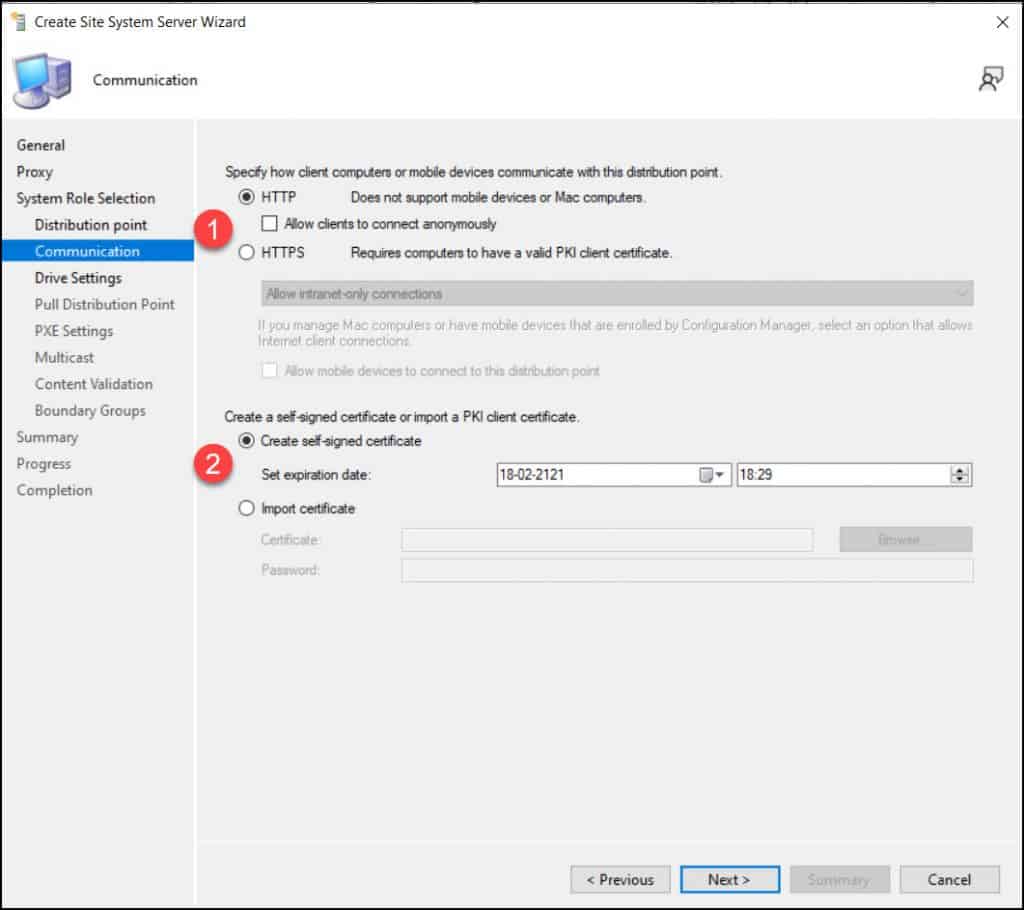
Windows 11 DP Communication Settings
The communication settings determine how client computers or mobile devices communicate with Windows 11 distribution point.
There are two options to configure how client devices communicate with the distribution point:
- HTTP – Select the option if you don’t have a PKI setup. This option doesn’t support Mac devices.
- Allow clients to connect anonymously: This setting specifies whether the distribution point allows anonymous connections from Configuration Manager clients to the content library.
- HTTPS – This is a secure option and recommended option which secures the traffic between the clients and distribution points.
If you are selecting the DP communication protocol as HTTPS, you must have a valid PKI certificate and the PKI setup must be in -place. Refer to the following article to configure PKI certificates for SCCM.
Note: When you configure all your management points in the site for HTTP, select the option to Create self-signed certificate. When you configure the management points for HTTPS, use the option to Import certificate from PKI.
ConfigMgr Distribution Point Drive Settings
- Drive Settings: you specify the drive settings for Windows 11 distribution point. Set the drive reserve space to at least 500 MB or more. This value determines the amount of free space on a drive before the Configuration Manager chooses a different drive and continues the copy process to that drive.
- Content locations: Specify the locations for the content library and package share on this distribution point. By default, all content locations are set to Automatic. You can choose the drive letter for primary content library location and package share location.
Click Next.

You can configure the Windows 11 DP as Pull distribution point. This option can be enabled later. So let’s skip this and continue with DP installation. Click Next.
Read: How to Configure SCCM Pull Distribution Point

SCCM Windows 11 PXE Settings
You can enable the PXE support for clients on Windows 11 distribution point. You can use PXE to start OS deployments on clients.
You can enable the PXE responder without requiring the Windows Deployment Service. Read the detailed guide on how to enable PXE responder without WDS.
We will enable the PXE settings after we set up the Windows 11 distribution point. Click Next.

Do not specify multicast settings as we will use the PXE responder service on Windows 11 DP. Click Next.

Content Validation Settings for Windows 11 DP
Content validation is a feature that validates the content on a SCCM distribution point. Read the detailed guide on how to enable content validation in SCCM.
You can later enable the content validation from the distribution point server properties. Click Next.

If you want to associate the Windows 11 distribution point with boundary groups, you can do that on the Boundary Groups page. Click Next.

Review the ConfigMgr DP role settings for Windows 11 and click Next.

On the Completion page, click Close. This completes the steps to install ConfigMgr distribution point on Windows 11.

Monitor Distribution Point Installation Progress on Windows 11
To monitor the Windows 11 DP role installation, you can use both Monitoring workspace and SCCM log files. There are two important log files to monitor the distribution point installation progress.
- Distmgr.log – Records the details for installation and configuration of distribution points.
- SMSdpusage.log – Located on distribution point, this log file is useful to monitor the usage of the DP. The location of this log file is Drive:\SMS_DP$\SMS\logs.
- SMSPXE.log – Records details about the responses to clients that use PXE boot, and details about the expansion of boot images and boot files.
On the site server, open the Distmgr.log file. This file records details about package creation, compression, delta replication, and information updates. It can also include other activities from the distribution manager component.

Currently using 0 out of 3 allowed package processing threads.
Started package processing thread for package 'MEM00004', thread ID = 0x2A00 (10752)
Start adding package MEM00004 to server ["Display=\\WIN11DP.mecmlab.local\"]MSWNET:["SMS_SITE=MEM"]\\WIN11DP.mecmlab.local\...	SMS_DISTRIBUTION_MANAGER
Created DP processing thread 7712 for addition or update of package MEM00004 on server ["Display=\\WIN11DP.mecmlab.local\"]MSWNET:["SMS_SITE=MEM"]\\WIN11DP.mecmlab.local\
Waiting for all DP threads to complete for package MEM00004 processing thread.
DP Thread: Attempting to add or update package MEM00004 on DP ["Display=\\WIN11DP.mecmlab.local\"]MSWNET:["SMS_SITE=MEM"]\\WIN11DP.mecmlab.local\
The distribution point ["Display=\\WIN11DP.mecmlab.local\"]MSWNET:["SMS_SITE=MEM"]\\WIN11DP.mecmlab.local\ is not installed or upgraded yet.
Handling DP config change for distribution point ["Display=\\WIN11DP.mecmlab.local\"]MSWNET:["SMS_SITE=MEM"]\\WIN11DP.mecmlab.local\ with ID - 2, Config change 8
Calling IIS config change handler for DP
Handling IIS config change for distribution point ["Display=\\WIN11DP.mecmlab.local\"]MSWNET:["SMS_SITE=MEM"]\\WIN11DP.mecmlab.local\ with ID - 2
The distribution point ["Display=\\WIN11DP.mecmlab.local\"]MSWNET:["SMS_SITE=MEM"]\\WIN11DP.mecmlab.local\ is marked for install or upgrade..
DP configuration thread done for distribution point WIN11DP.MECMLAB.LOCAL
DP thread for package MEM00004 with thread handle 0000000000003EB8 and thread ID 7712 ended
DP settings have been updated to WIN11DP.MECMLAB.LOCAL.
DP configuration thread done for distribution point WIN11DP.MECMLAB.LOCAL
DP config change processing thread: thread completion event.
You can monitor the ConfigMgr DP role installation on Windows 11 from SCCM console:
- Go to Monitoring workspace.
- Click Distribution Point Configuration Status.
- From the list of distribution point servers, select the Windows 11 SCCM distribution point machine.
- The status icon is important here. A green circle confirms the Windows 11 remote DP installation is successful.
During the distribution point role installation, you may encounter error 0x800706BA. The DP role fails to install, and you must examine the distrmgr.log for errors. Refer to the following article to fix error 0x800706BA failed to install Distribution Point.
Enable PXE Responder on Windows 11 Distribution Point
While installing the DP role on Windows 11, if you haven’t enabled PXE responder, you can enable it with following steps:
- Launch the Configuration Manager console.
- Navigate to Administration\Overview\Distribution Points.
- Right click Windows 11 distribution point system and select Properties.
- Click the PXE tab and enable “PXE support for client” and enable “PXE responder without Windows Deployment Service“.
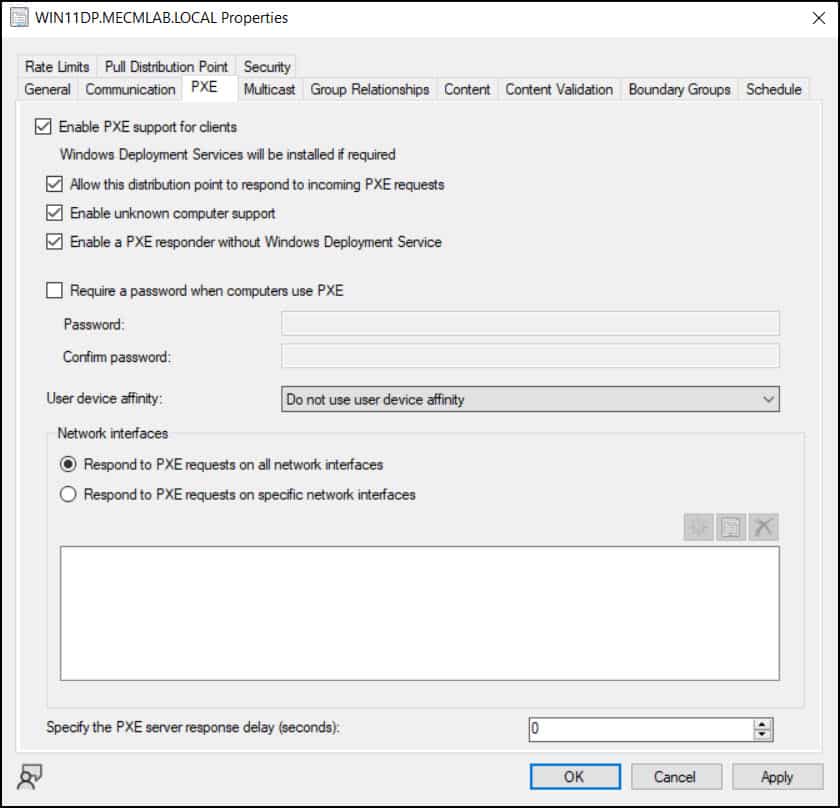
Note: Once you enable PXE responder, notice that all the options under Multicast tab are greyed out. That makes sense because previously whenever you enabled multicast, WDS was installed on the servers.
To confirm PXE responder service installation on Windows 11 DP, launch services.msc. You will find ConfigMgr PXE Responder Service in the list of services.
Read: How to enable PXE Responder on Windows Server Core
Suggested Reading
Let me suggest you some guides that shall help you to install and configure distribution point role.
- To install a new SCCM Distribution Point in your setup, refer to the distribution point install guide.
- Guide to install ConfigMgr distribution point using PowerShell.
- To install SCCM DP IIS base components manually, refer to Install IIS base components on DP.

Could just be my environment, but to make a Windows 11 24h2 device into a DP, I had to manually enable IIS to finally get files to copy to the DP.