

In this article, I will demonstrate the steps to deploy Windows 11 23H2 using ConfigMgr task sequence. We’ll cover the steps to download the Windows 11 23H2 ISO, add the Windows 11 2023 update to SCCM, and use the task sequence to deploy it.
Deploying the Windows 11 2023 update and upgrading to Windows 11 23H2 are two different things. When it comes to upgrading existing Windows 11 systems to version 23H2, organizations can use SCCM or Intune. A task sequence is always a recommended method for bare-metal deployment of Windows 11 23H2.
After the release of Windows 11 22H2, the latest version of Windows 11 is version 23H2, and the update is also offered to customers via Windows Update. Listed below are some guides that will help you upgrade to Windows 11 23H2 in production.

- Upgrade to Windows 11 using multiple methods
- Upgrade to Windows 11 23H2 using Intune
- Windows 11 23H2 upgrade using SCCM
Bare-Metal Deployment of Windows 11 version 23H2
Before assigning laptops and desktop computers to staff members in any organization, you image the devices. If the device is brand new, you install the most recent version of Windows using the bare-metal deployment method, which allows you to install the most recent version of Windows on a new device by erasing the previous operating system.
The following steps are involved in the bare-metal deployment of a Windows 11 23H2 image using a task sequence:
- Insert the boot media, which can be either a USB bootable device, a physical DVD or PXE booting the device.
- The task sequence wipes the partitions on the hard drive and creates a new volume for OS installation
- Install the operating system image (for example, Windows 11 23H2)
- Apply the device drivers by using a WMI logic to detect the model and using the task sequence to apply all the applicable drivers
- Apply OS customizations such as wallpaper, icon shortcuts, and time zone settings
- Installing applications based on their requirements and updating the operating system with the most recent updates
- Finally, assign the computer to the user.
Prerequisites for Deploying Windows 11 23H2 using SCCM
Listed below are some important prerequisites that you must read before you use a task sequence to deploy Windows 11 version 23H2:
- The device must meet the minimum system requirements for installing Windows 11 (23H2). We recommend reading the Windows 11 specifications before deploying any version of Windows 11 on computers.
- If you proceed with installing Windows 11 on a PC that does not meet the requirements, that PC will no longer be supported and won’t be entitled to receive updates.
- You must be using ConfigMgr 2203 and above to deploy Windows 11 version 23H2.
- Ensure the PXE role is enabled on distribution points before you create and deploy a task sequence. We recommend using the ConfigMgr PXE responder service instead of multicast.
- Windows 11 version 23H2 requires TPM 2.0 to be enabled on the PC, and this is an important prerequisite to be considered before you deploy Windows 11 23H2 using SCCM.
- You can uninstall the older version of Windows 10 ADK and install the latest version of Windows 11 ADK. Follow this step-by-step guide to upgrade the version of ADK on SCCM server.
Use ConfigMgr Task Sequence to Deploy Windows 11 23H2
The entire deployment involves too many steps, and therefore we believe breaking them into steps will help you follow more easily.
Step 1: Download Windows 11 23H2 ISO
If you are using a task sequence to perform the bare-metal deployment of Windows 11 version 23H2, you’ll need the operating system files. As a first prerequisite, you’ll need to download the 23H2 ISO either from VLSC or MSDN (Visual Studio Subscription).
If you are downloading the Windows 11 23H2 ISO file from the Visual Studio site, we recommend you download the Windows 11 business editions. That’s because business edition media includes both Windows 11 Pro and Windows 11 Enterprise editions.

Step 2: Extract Windows 11 23H2 OS Files
Once the ISO file for Windows 23H2 has been downloaded, copy it to the sources folder on the SCCM server or a shared folder on the server. On the server, mount the Windows 11 23H2 ISO file and copy all the files to a folder on the ConfigMgr server. To import the 23H2 OS into Configuration Manager, this folder will serve as a source location.

Step 3: Import Windows 11 23H2 OS in ConfigMgr
Use the following steps to add or import the Windows 11 23H2 operating system into the ConfigMgr console.
- Launch the Configuration Manager console.
- Go to Software Library > Overview > Operating Systems.
- Select Operating System Images, and on the top bar, select Add Operating System Image.

On the Data Source tab, click Browse and specify the path of the Windows 11 23H2 install.wim file. The install.wim file is present inside the sources folder of the Windows 11 installation media.
The Windows 11 ISO that we downloaded contains multiple editions. Extracting all the editions will increase the size of the image file. You can extract a particular version of Windows 11, like the Enterprise edition. Select the option “Extract a specific image index from the specified WIM file.” Next to the image index, click on the drop-down and select Windows 11 Pro edition.

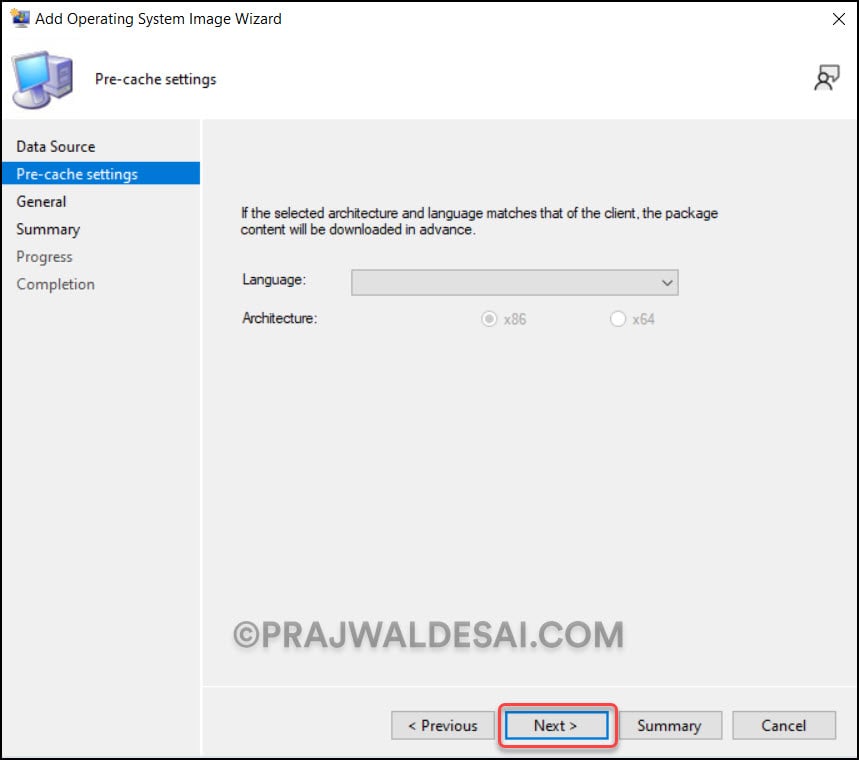
On the Pre-cache Settings window, click Next.
On the General tab, specify the details of the Windows 11 23H2 operating system that will appear in the Configuration Manager console. You may specify the version as 23H2 and provide more details in the comment box. Click Next.

Review the settings in the Summary window and click Next. On the Completion window, click Close. This completes the steps to import the Windows 11 23H2 operating system into ConfigMgr for deployment.

Step 4: Deploy Windows 11 23H2 using ConfigMgr Task Sequence
In this step, we will create a new task sequence in SCCM to deploy Windows 11 23H2.
- In the ConfigMgr console, go to Software Library > Operating Systems > Task Sequences.
- Select Task Sequences, and in the top ribbon, click on Create Task Sequence.

On the Create New Task Sequence window, select Install an existing image package. Click Next.

On the Task Sequence Information window, specify the following details:
- Task Sequence Name: Deploy Windows 11 23H2
- Description: Add details about the task sequence
- Boot Image: Click Browse and select x64 boot image
Click Next.

On the Install Windows page, next to Image Package, click Browse and select Windows 11 23H2 Pro Image Package. The image index should be automatically populated, and in our case, it is Windows 11 Pro.
Select the option to partition and format the target computer before installing the operating system. You can also enable configure task sequence for use with BitLocker, but I will not be enabling it for my lab. To activate your copy of Windows 11 version 23H2, specify the product key. After creating the Windows 11 task sequence, you can edit it in the SCCM console to specify the key.
You can choose to randomly generate a local admin password or specify an administrator password. The choice is yours. Click Next.

On the Configure Network page, you select whether you want your Windows 11 23H2 to stay in Workgroup or join the AD domain. To learn more about the Windows 11 domain join process, read how to join Windows 11 to AD domain. Select Join a domain, specify the domain and domain OU. Specify the account that has permissions to join the machine to the domain. Click Next.

If you need to specify additional installation properties for installing SCCM client, you can do so here. Click Next.

We don’t intend to use this TS to capture user-specific settings. Hence, uncheck all the options on the State Migration tab and click Next.

You can include the latest Windows updates to version 23H2 in the task sequence. The updates will be installed along with the OS. We recommend choosing the option “Do not install any software updates“. Instead, use SCCM ADR to deploy the updates. Click Next.

If you wish to deploy applications for Windows 23H2 with the task sequence, you may specify them here. Click Next.

Review the task sequence settings on the Summary window and click Next. On the completion window, close the create task sequence wizard.

Step 5: Add Drivers to Windows 11 23H2 Task Sequence
In the above step, we created a task sequence for Windows 11 23H2 in the SCCM console. Now that the task sequence has been created, you can edit it and make the necessary changes, such as adding applications or drivers.
It’s crucial to add the pertinent drivers to the task sequence. If not, you will only have Windows 11 installed, without any drivers. If you want to download Windows 11 23H2 driver packages, you need to get in touch with the company that made the hardware. It’s worthwhile to check the driver download page to see if the latest Windows 11 drivers are offered for particular laptop models.
For example, if you are deploying Windows 11 23H2 to Dell laptops, you can refer to the guide on how to important CAB drivers from Dell in SCCM. There are multiple ways to deploy drivers and manage driver updates in SCCM. Each organization has its own method of distributing drivers and driver updates.
If we had to suggest a standard way to put drivers on laptops along with Windows 11 (23H2), it would be through the SCCM task sequence again. You must first import the drivers into SCCM, then change the task sequence and add the Drivers > Apply Driver Package step. The WMI can be used to figure out what kind of laptop you have and install the right drivers for it. If you need to, you can change the task order and add more steps after you add the drivers for Windows 11 (23H2). Once the Windows 11 23H2 task sequence is ready, you can send the content to all the distribution points and deploy it to devices.
Step 6: Distribute the Task Sequence content to Distribution Points
The task sequence content must be available at local distribution points before you begin the OSD. To distribute the task sequence content, go to Software Library\Overview\Operating Systems\Task Sequences. Right-click on the Windows 11 23H2 task sequence and select Distribute Content.

On the Content Distribution tab, add the distribution points for content distribution. Click Next and close the distribute content wizard.

Step 7: Deploy Windows 11 23H2 task sequence
In this step, we will assign the Windows 11 23H2 task sequence to a device collection for OSD. The computers within the collection will receive the task sequence and install Windows 11 version 23H2.
- Launch the Configuration Manager console.
- Go to Software Library\Overview\Operating Systems\Task Sequences.
- Right-click on the Windows 11 23H2 task sequence and select Deploy.

If you are looking to deploy the Windows 11 23H2 task sequence to existing device collections, you can use the below guides to create collections for Windows 10 and Windows 11 devices.
- Create Windows 11 device collection in SCCM (23H2, 22H2, 21H2)
- Create Windows 10 device collection in Configuration Manager
Click Next.

Specify the deployment settings for the Windows 11 23H2 task sequence. Select the purpose as Available and make the deployment available to only media and PXE. Click Next.

You do not need to change anything in the distribution points window; simply click Next.

Review the Windows 11 23H2 task sequence deployment settings and click Next. Finally, close the deployment software wizard.

Step 8: Test Windows 11 23H2 Deployment
In the above steps, we covered the steps to create and deploy the task sequence. It is now time to put the Windows 11 23H2 deployment to the test on client computers. To test the OSD, you can either connect a laptop to the network or create a new VM. If you are creating a virtual machine, ensure you enable TPM for VM before deployment.
We have enabled the ConfigMgr PXE responder service and the boot images are distributed to DP’s. Power on the VM and press F12 for network boot. The VM downloads the boot image from the distribution point.
Enter the PXE password (in case you have configured one on DP). Otherwise, click Next.

Select the Windows 11 23H2 task sequence and click Next.

The task sequence execution begins now. The task sequence downloads the Windows 11 23H2 OS from DP and installs it on the VM.
Step 9: Monitor the task sequence deployment
While the task sequence is running, a ConfigMgr administrator can monitor the TS progress using a status message query. This allows you to track task sequence start, end time, errors, and task sequence deployment.
When you monitor task sequence deployment using a status message query, you can know at what step the task sequence is currently at and if there were any errors during its deployment.
Allow the task sequence to complete all the steps, and Windows 11 23H2 should be installed on the VM now. According to the task sequence, the Windows 11 VM should be joined to the domain.
Step 10: Validate Windows 11 23H2 Installation
In this step, we will verify if the task sequence has installed Windows 11 23H2 and if the device is domain-joined. To confirm if Windows 11 23H2 has been installed, log in to the device with your domain user account.

Click Start and launch the Settings app. Go to System > About. Under the Windows specifications, we see the edition and version of Windows 11.
- Edition: Windows 11 Pro
- Version: 23H2
The task sequence that we created has successfully imaged the VM with Windows 11 23H2. This completes the steps to deploy Windows 11 23H2 using the ConfigMgr task sequence.

Troubleshooting the Task Sequence Failures
If the Windows 11 23H2 task sequence fails, you can troubleshoot the deployment failures by reviewing the SMSTS.log file. The location of SMSTS.log file changes during the operating system deployment as the task sequence progresses. Check out all the useful SCCM OSD log files.
When a Windows 11 23H2 deployment via SCCM fails, the task sequence displays the error code. If it doesn’t, always examine the SMSTS.log file because it logs the error codes that will help you troubleshoot installation issues related to Operating System Deployment (OSD).

If your .iso doesn’t have an install.wim file, you probably didn’t use the correct download source or revision of Windows. In this case, inside the iso\source folder you will have an install.esd file which you can convert to wim (Google to help) and use further according to the instructions
Step 3 says to grab the install.wim file from the sources folder.
The install.wim file does not exist anywhere on the install media.
Is this a file that can be generated, or does this process not work for 23H2?
As usual, a very nicely put together tutorial.
Unfortunately, it fails fairly early on.
Step 3 says:
“On the Data Source tab, click Browse and specify the path of the Windows 11 23H2 install.wim file. The install.wim file is present inside the sources folder of the Windows 11 installation media.”
There is exactly 1 *.wim file in the sources folder after coping the contents of the ISO, and it is “boot.wim”.
There is NO “install.wim” file to be found anywhere on the server.