


This post covers the steps to remove or uninstall Desktop Central agents using SCCM or Configuration Manager. Using Run Scripts feature we will uninstall the agents remotely from SCCM console.
When you have desktop central agents installed on client computers, you can uninstall the agents using multiple methods.
Methods to Remove Desktop Central Agents
You can use either of the below listed methods to uninstall the DC agents.

- Using the Desktop Central console.
- Manually uninstall the desktop central agent from computer.
- Uninstall desktop central agents using Group Policy.
- Remove desktop central agents using SCCM/ConfigMgr.
- Cleanup dekstop central using a dcagentuninstall.bat file.
The most easiest way to remove the DC agents is via the Manage Engine Desktop Central console itself. However agent uninstallation happens only when the clients are actively talking to distribution server.
In case your desktop central product is expired, agent uninstallation becomes difficult. So the best and easiest way is to use the SCCM Run Scripts feature to remove the agents.
With this feature you can create and run PowerShell scripts from the Configuration Manager console. The only prerequisite is you need a SCCM client agent running on the client computers.
Since the Run Scripts is a ConfigMgr feature, it works only if you have active SCCM agents on client computers. To run scripts, Configuration Manager clients must be running the client from the 1706 release, or later.
Find Desktop Central Agent Info
In order to uninstall the DC agents from client computers, we first need to determine the registered name of the product.
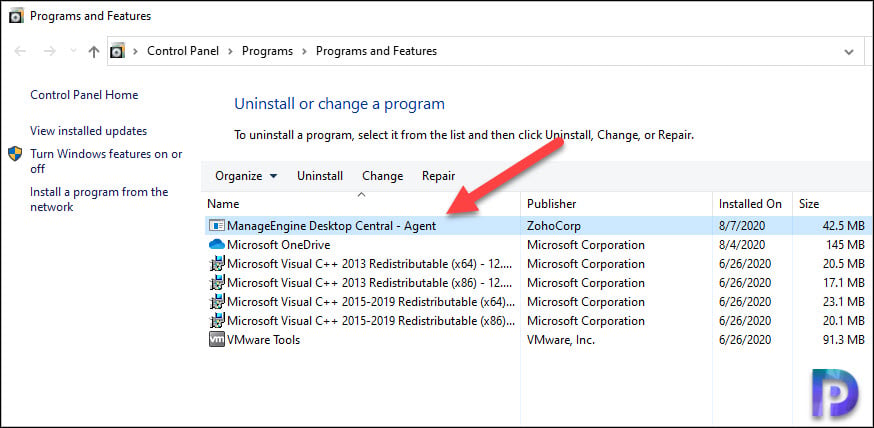
On the client computer that runs the DC agent, go to Programs and Features. Look for the registered name. For example, the product name listed here is – ManageEngine Desktop Central – Agent.
The same thing can be done using the PowerShell command. The below command finds the required product within the list of apps installed on the machine.
Get-WmiObject Win32_Product | where { $_.name -eq "ManageEngine Desktop Central - Agent" }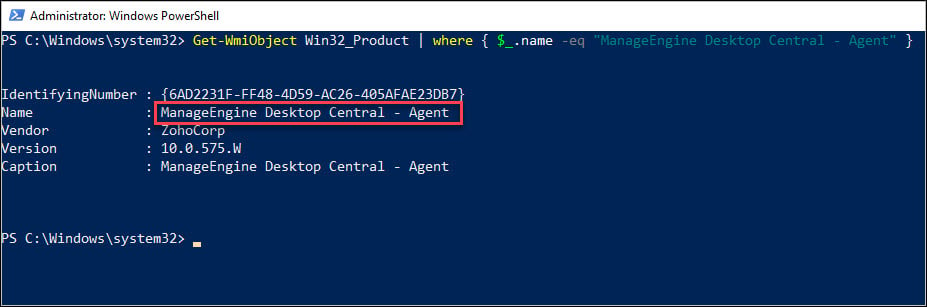
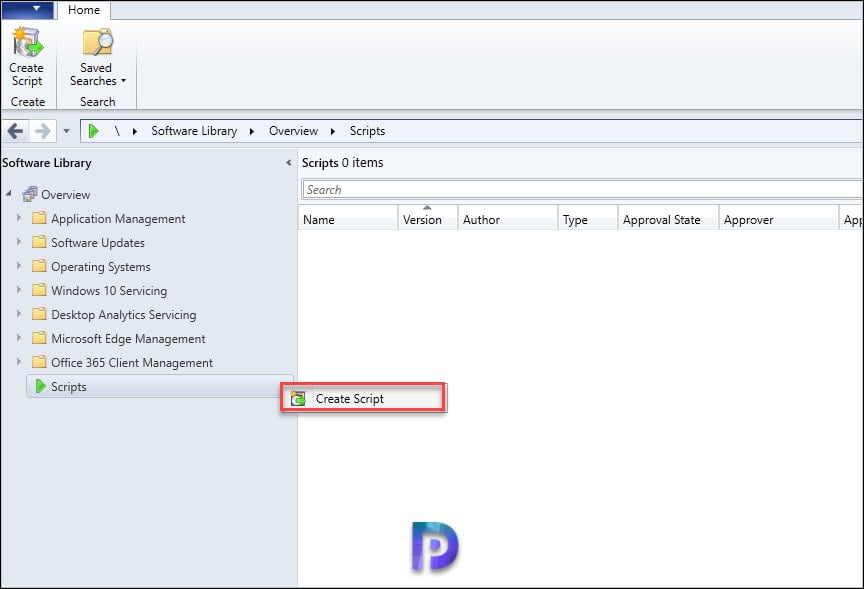
Create a Script in Configuration Manager
In the Configuration Manager console, go to Software Library > Scripts. Right click Scripts and click Create Script.
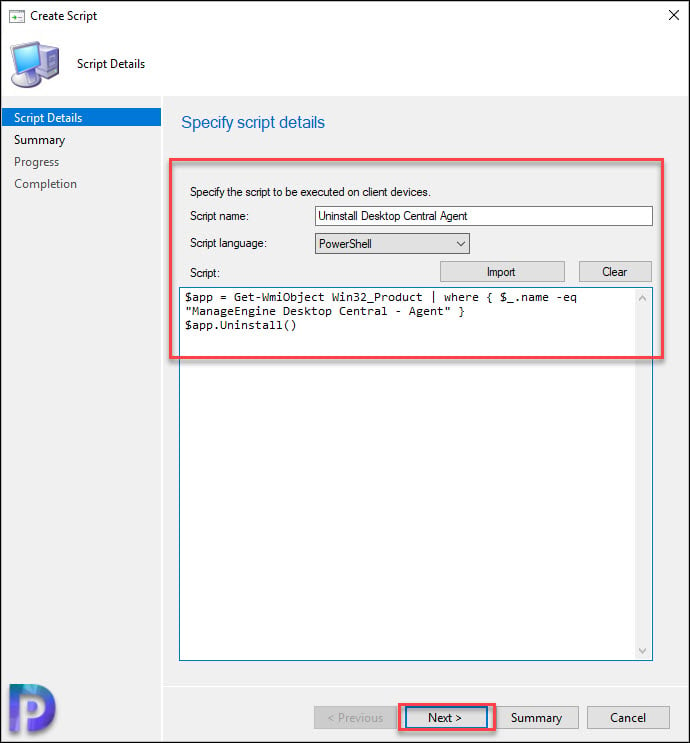
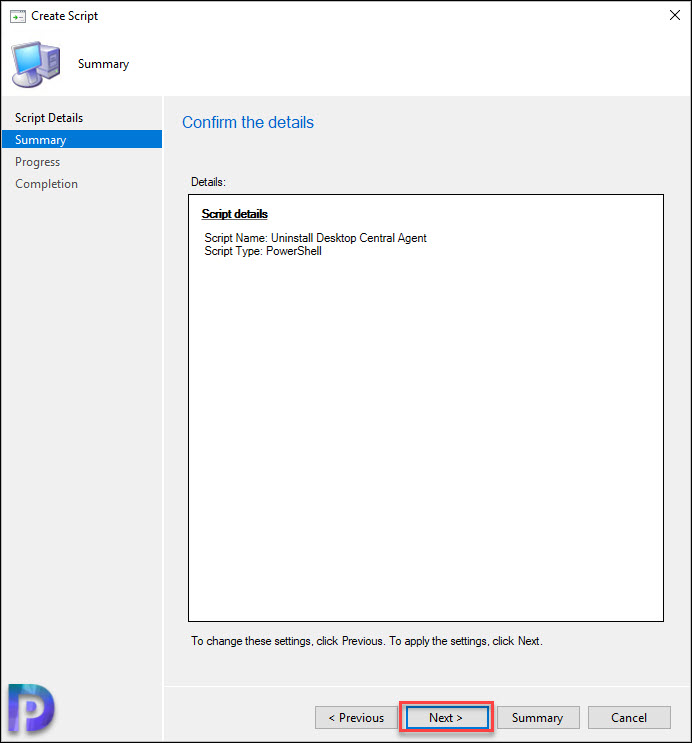
On the Script details page, enter the script name such as Uninstall Desktop Central Agent. The script language is PowerShell.
Enter the below PowerShell script.
$app = Get-WmiObject Win32_Product | where { $_.name -eq "ManageEngine Desktop Central - Agent" }
$app.Uninstall()
Click Next.
Click Next.
Click Close.

Approve the DC Agent Uninstall PowerShell Script
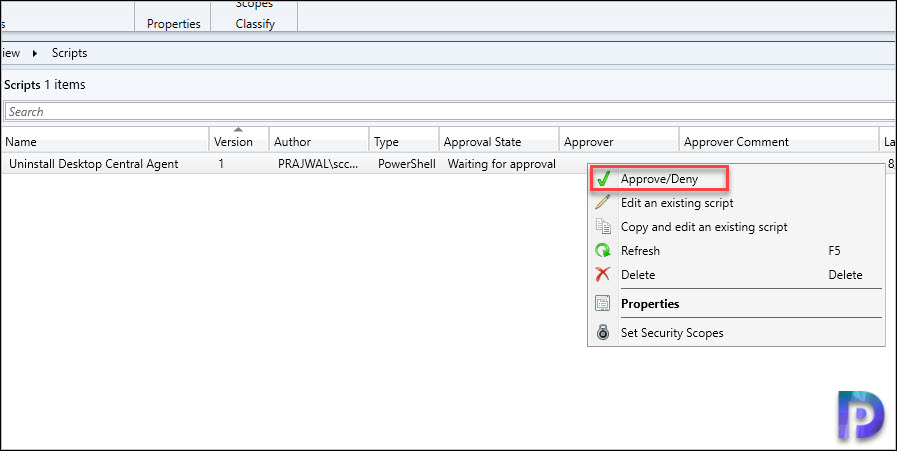
In the above step we added a PowerShell script to uninstall DC agents. In this step we will approve the script. This is a mandatory step because unless you approve the script, you cannot deploy it.
In the SCCM console, right click the Uninstall Desktop Central Agent script and click Approve/Deny.
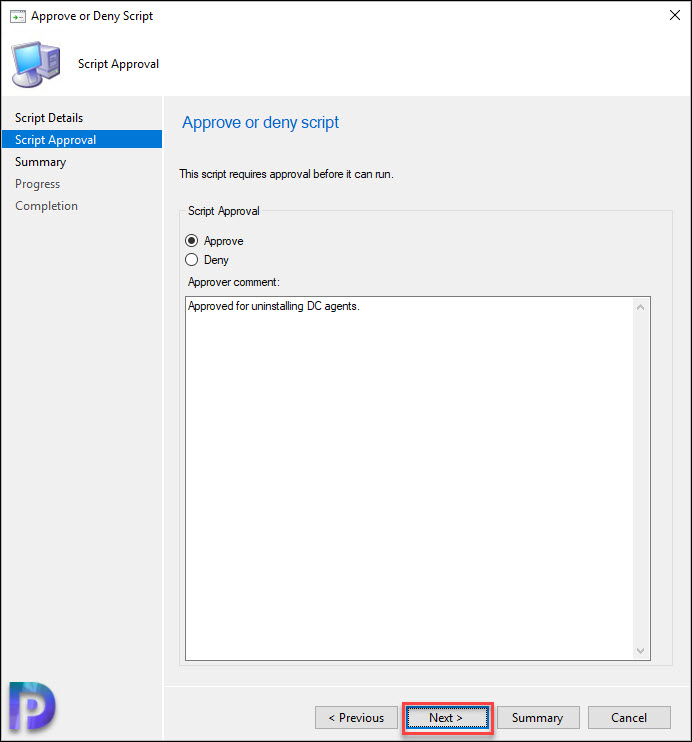
You should see the same script that you entered in the previous step. Click Next.

On the Script Approval window, click Approve. Click Next.
Finally on the Completion window, click Close.

Uninstall Desktop Central Agents using SCCM
In this final step we will uninstall the Desktop Central Agents using a PowerShell script in SCCM. First of all you can run the script on a single computer or a device collection.
I would recommend creating a ConfigMgr device collection for desktop central agents. You can refer my post on creating device collection for DC agents.
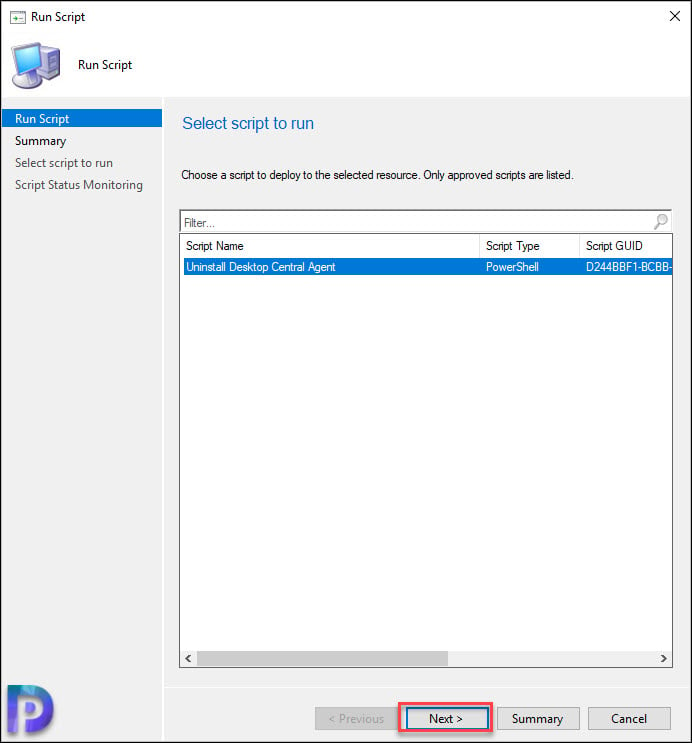
Once you have the device collection ready, right click the collection and click Run Script.

Select the Uninstall Desktop Central Agent PowerShell script and click Next.
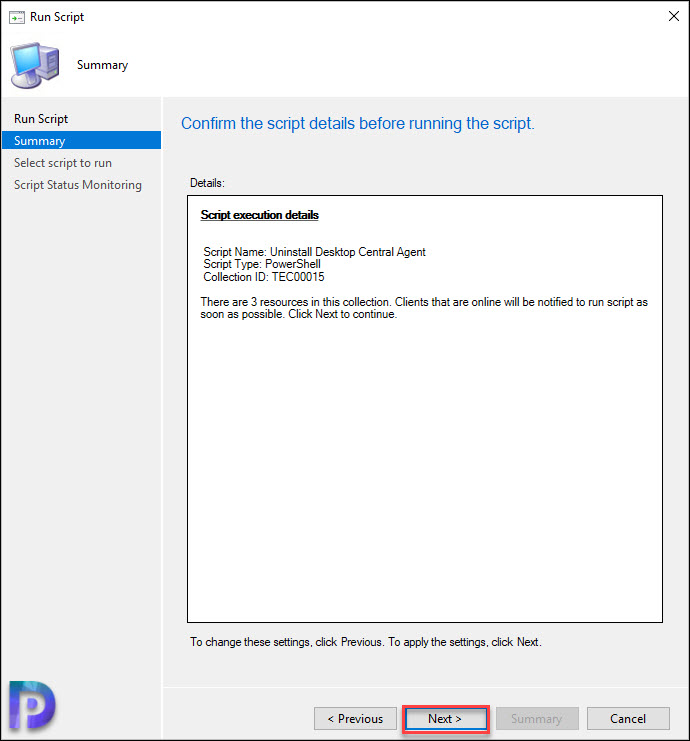
Verify the details on Summary page. Click Next.
Wait while the scripts runs on the devices and uninstalls the DC agent. On the Script Status Monitoring window, you can view the results.
You may see error if the computers are offline or not in the network. Click Close.

Furthermore update the desktop central device collection and you should see the member count as 0.


Hi Prajwal.How install desktop central agent with sccm?Please help about this
Hi, I can do that but why do you want to push the agents using SCCM when you can use desktop central console to deploy agents ?.