


In this post, I will show you how to enable Firefox SSO using Intune. When you enable Windows SSO login in Firefox for users, the browser will use credentials stored in Windows to sign in to Microsoft, work, and school accounts (Entra ID).
With Firefox version 91, Mozilla added the support for logging into Microsoft, work, and school accounts using Windows single sign-on. When enabled, the Windows SSO feature works without the need for installing an extension.
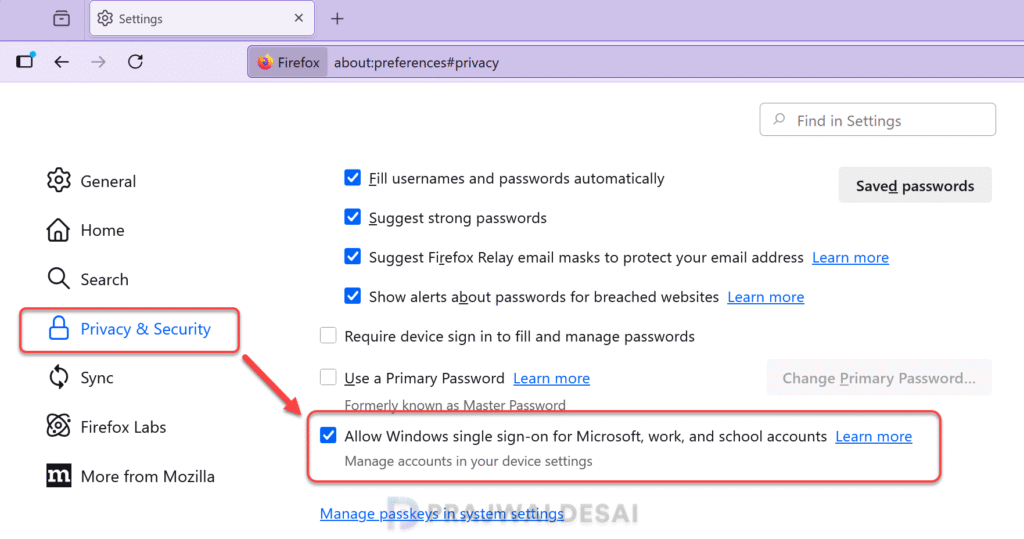
Users can manually turn on this setting by going to Firefox browser settings > Privacy & Security. Scroll down to the Passwords section and check the box next to the “Allow Windows single sign-on for Microsoft, work, and school accounts” setting.

To prevent users from manually enabling or disabling the Windows single sign-on (SSO) feature in the Firefox browser, you can enforce this setting using Group Policy or Microsoft Intune.
Note: If you’re an organization that uses Chrome for Enterprise, the Platform SSO can be configured in Chrome with Intune. Along with this, I recommend reading the guide on configuring platform SSO for macOS using Intune.
Prerequisites
To enable SSO in Firefox via Intune, the following are the prerequisites.
- Your devices must be Entra ID Joined, Hybrid-Joined, or Entra ID Registered.
- The Windows devices must be enrolled in Intune. See the Windows 11 device enrollment guide.
- The Mozilla and Firefox ADMX files must be imported into Intune for enabling Windows SSO.
- The latest version of Firefox browser must be installed on the target devices.
- Administrative access to Microsoft Intune and the Entra portal.
Steps to Enable Firefox SSO using Intune
Let’s go through the steps for enabling Windows Single Sign-On (SSO) for Firefox using Intune.
Step 1: Download Policy Templates for Firefox
To enable the Windows SSO settings for Firefox, you must first download the latest version of Mozilla ADMX templates and import them into Intune. If the templates are already imported, you can proceed to the next step. For those who haven’t imported the ADMX templates yet, here’s how to get started.
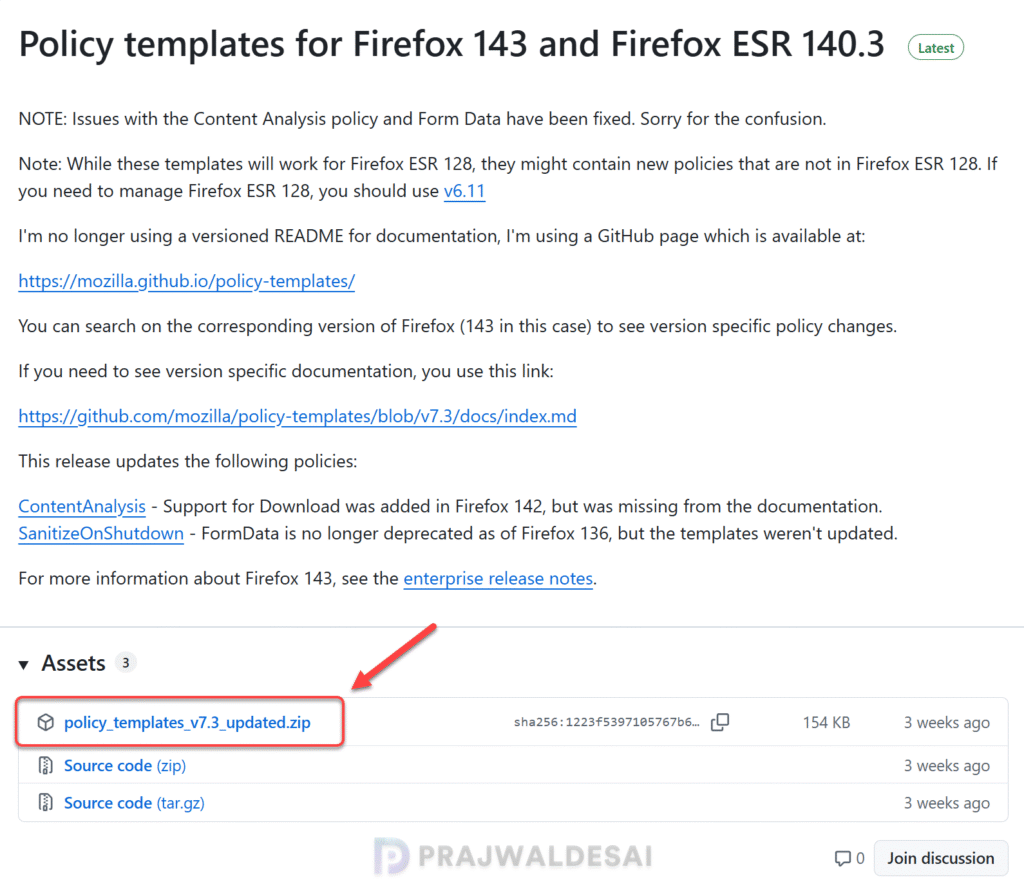
Open the browser and visit the Mozilla GitHub page to download the latest policy templates. Under Assets, click Policy_templates_version_updated.zip file to download it.
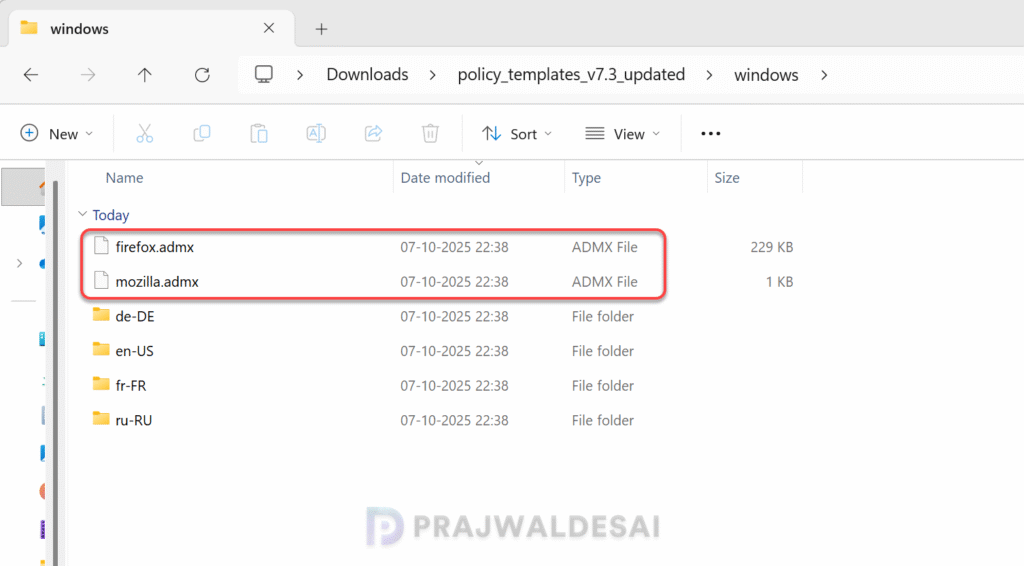
Using the built-in zip extractor tool in Windows 11, extract the Mozilla policy templates to a folder. The extracted folder contains two important files: firefox.admx and mozilla.admx. These two files should be individually imported into Intune along with the matching language files (.adml files).
Step 2: Import Firefox ADMX Templates into Intune
To import the Firefox ADMX templates into Intune, Sign in to Microsoft Intune at https://intune.microsoft.com. Go to Devices > Manage Devices > Configuration. Select the Import ADMX tab and click on + Import button to upload the mozilla.admx and mozilla.adml file. Click Next and select Create.

Next, upload the firefox.admx and firefox.adml file. Click Next and select Create.

Note: In case you encounter the weird “NamespaceMissing:Microsoft.Policies.Windows” error while importing the ADMX templates, ensure you import Windows.admx first and then the other ones.
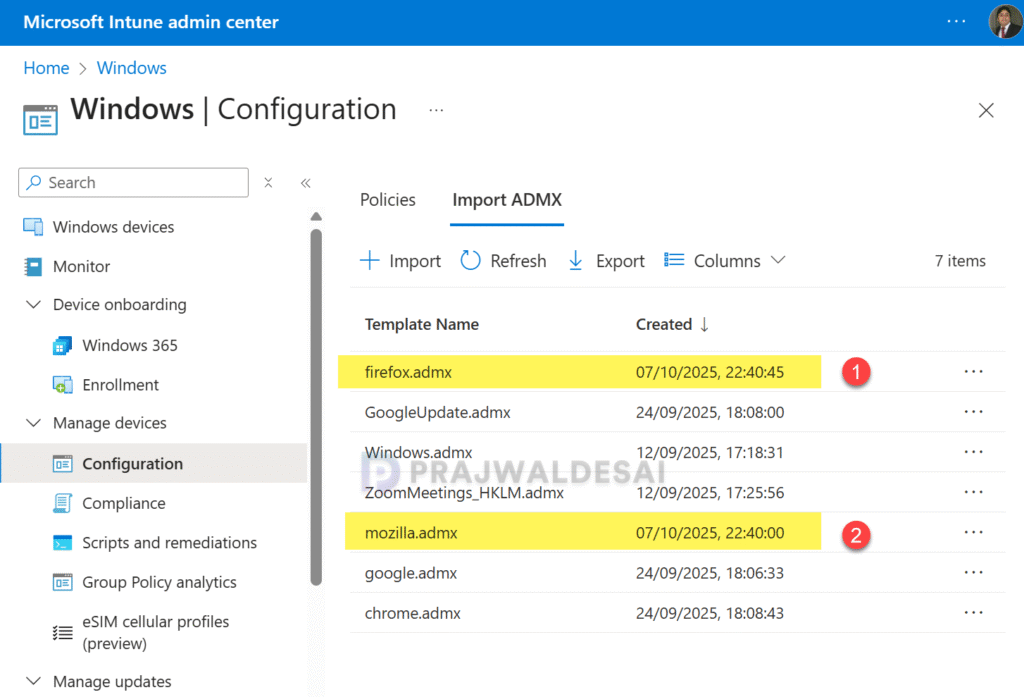
In the Import ADMX tab, click on Refresh to update the list of policy templates. Now we see the firefox.admx and mozilla.admx templates successfully imported into Intune.
Step 3: Enable Windows SSO for Firefox
Sign in to the Intune admin center. Go to Devices > Manage devices > Configuration > Create > New policy. Choose Windows 10 and later for the platform and Profile Type as Templates. From the list of Templates, select Imported Administrative templates and click Create.
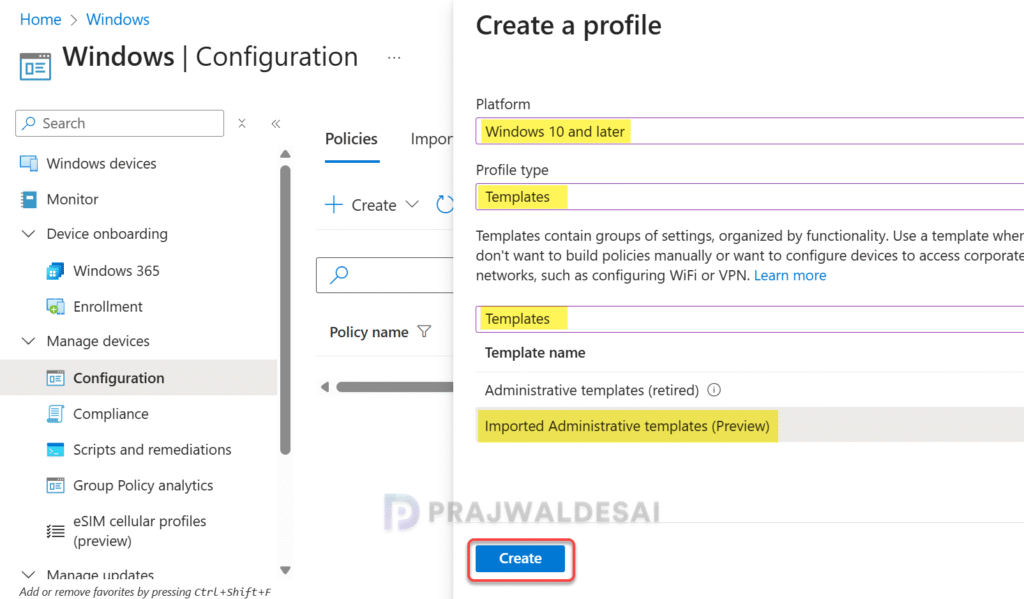
Enter the policy name and add a brief description about the policy.
- Name: Enable SSO for Firefox browser using Intune
- Description: Enter an optional description about the policy.
Click Next.

In the Configuration Settings tab, type ‘Windows SSO‘ in the search box. From the search results, select Windows SSO setting and select Enabled as shown in the below image. The Firefox will use credentials stored in Windows to sign in to Microsoft, work, and school accounts. Click OK and then click Next.

On the Scope tags page, you may select any desired scope tags to apply. This is optional and you can skip to the next page. Learn how to create new scope tags in Intune. Click Next.

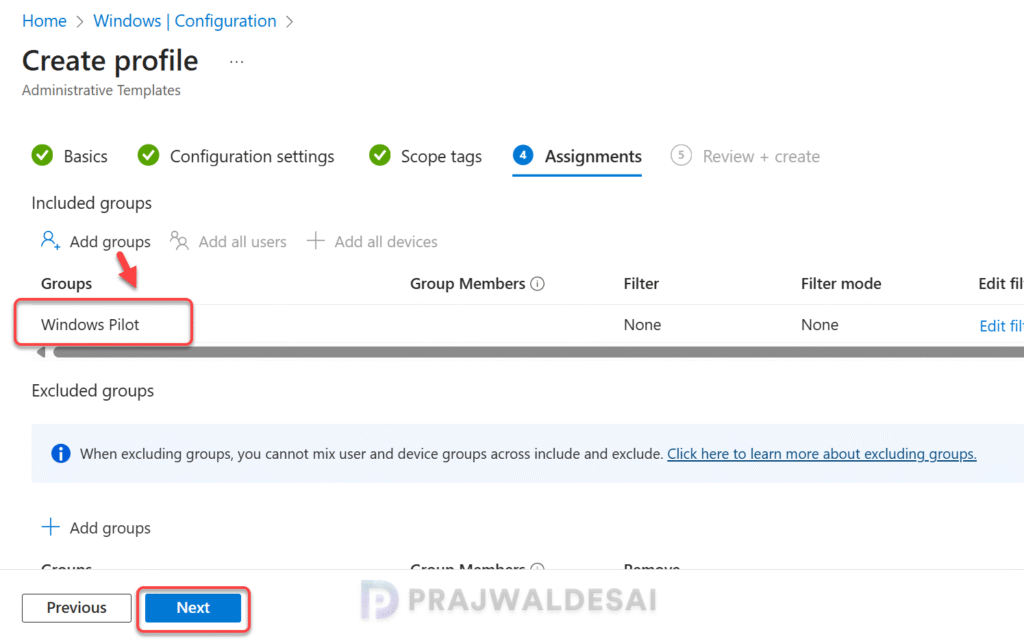
For Assignments, select the Entra ID user groups to target the Firefox SSO Intune policy. To continue, select Next.
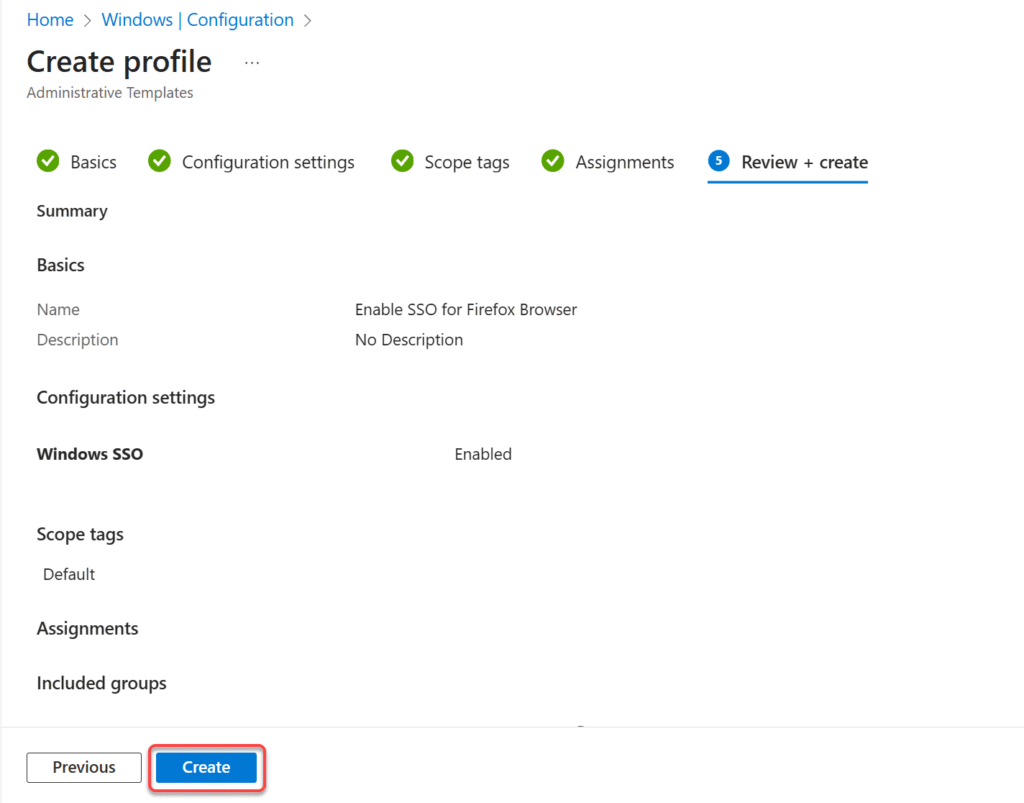
Review the policy settings on Review + create page and then click Save. The policy is now deployed to members of the assigned groups. This new policy is now displayed in Configuration > Policies tab in Intune admin center.
Step 4: Sync Intune Policies
To quickly apply the SSO policy settings for Firefox browser on targeted devices, you can manually sync Intune policies using various methods. This is typically performed to test an app or policy deployment and verify its functionality. The sync action prompts devices to instantly connect with Intune and apply the most up-to-date policies.
Step 5: Monitor Firefox SSO Intune Policy
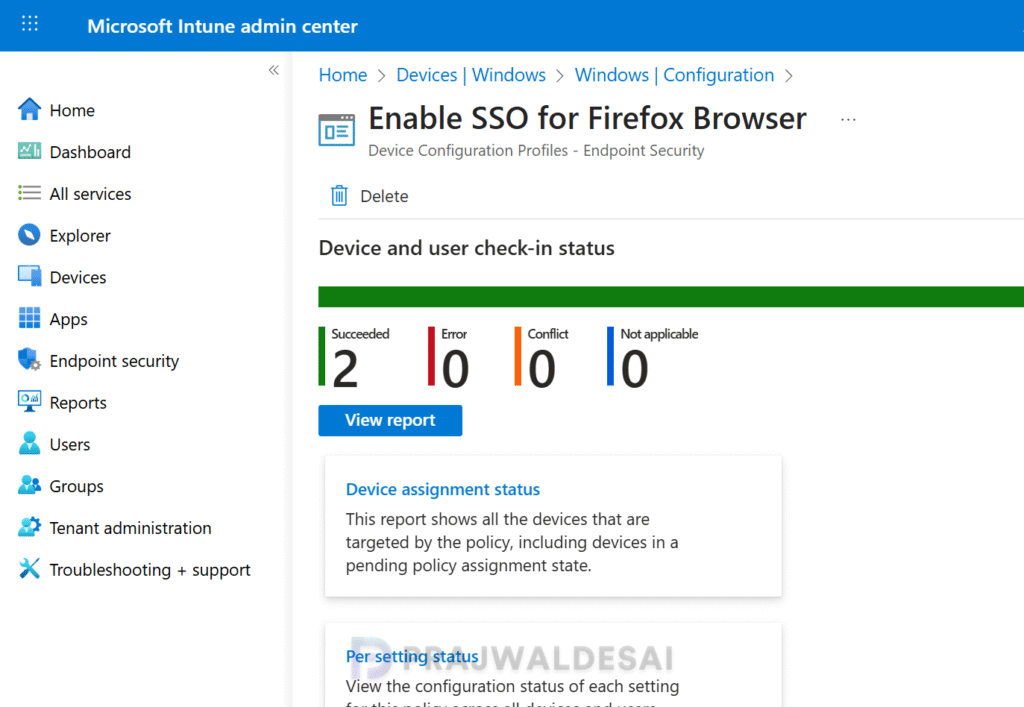
To monitor the Firefox SSO policy assignments in Intune, go to Devices > Windows > Configuration. Select the ‘Enable Firefox SSO‘ policy. On the Policy overview page, check the device and user check-in status. You can see the number of devices or users on which the policy has been applied successfully.
In the below image, we see the Firefox Windows SSO policy assignments are successful for multiple devices.
In some cases, the policy settings may fail to apply to certain users. To resolve these issues, you will need to troubleshoot the issue by reviewing Intune logs on Windows computers. These are essential IME logs that are useful for troubleshooting app and policy assignments failures on remote computers.
Step 6: End User Experience
Once Windows SSO is enabled for Firefox via Intune, you can verify its functionality and proper configuration using three different methods to ensure the SSO is working seamlessly on the Mozilla Firefox browser.
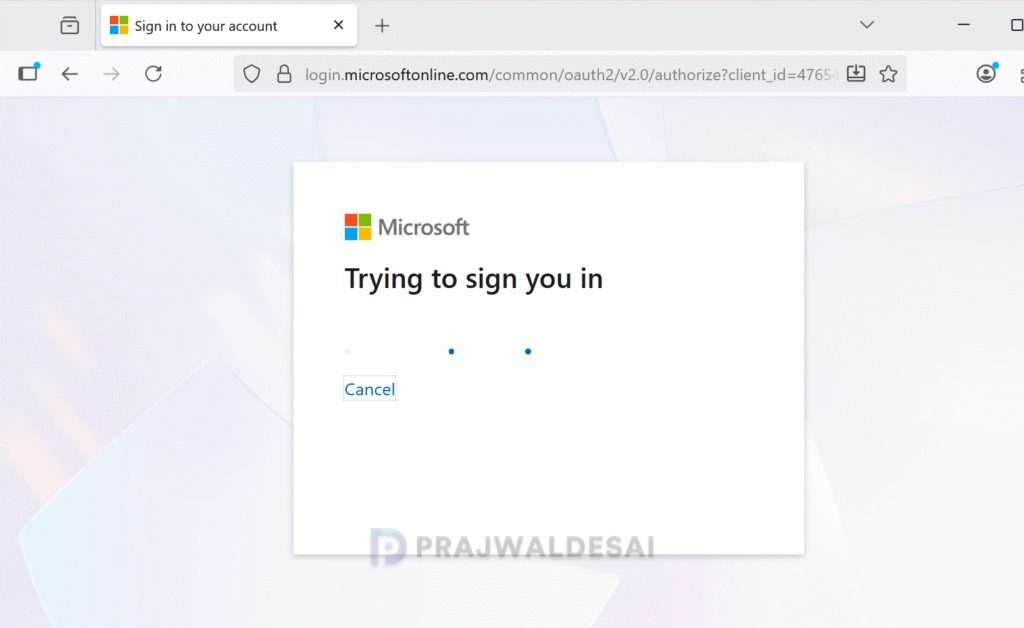
Method 1: Sign in to a Windows 11 device with your work account that is targeted with the SSO policy and launch the Firefox browser. Browse a website for ex. https://portal.office.com. The browser will not prompt to enter the username and password (Entra ID credentials) to access the portal. This confirms that Firefox Single sign-on configuration is working as intended on Windows 11.
If the Windows SSO for Firefox is not working in your case, then check the Method 2 and 3 to verify if the policy settings are applied correctly via Intune.
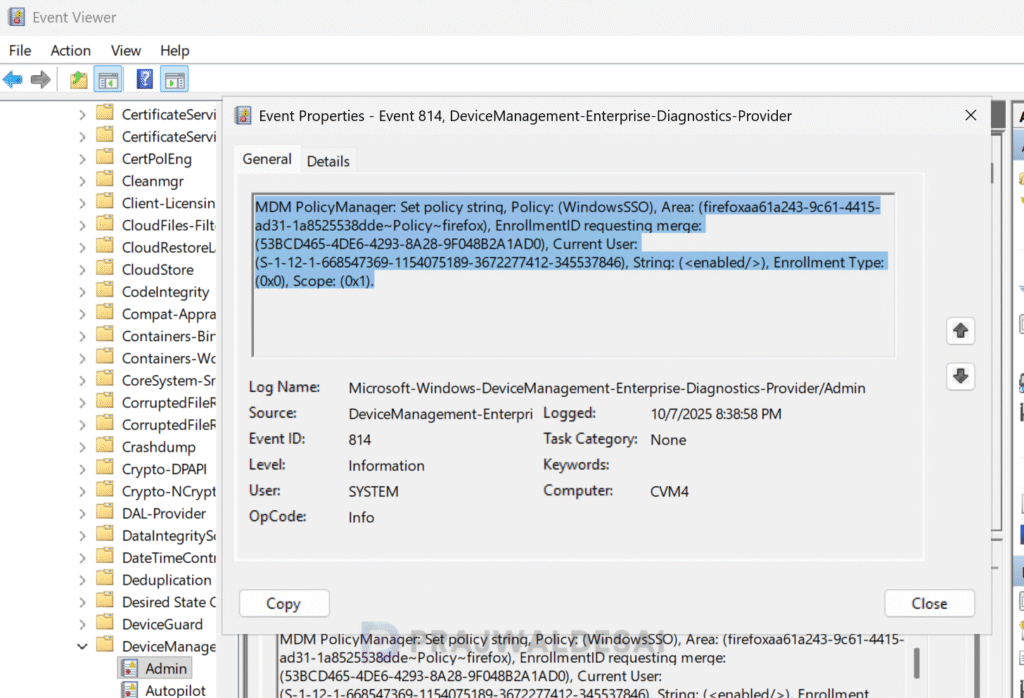
Method 2: Administrators can verify if the Firefox SSO policy settings are applied via Event Viewer. Launch the Event Viewer and navigate to Applications and Services Logs > Microsoft > Windows > Devicemanagement-Enterprise-Diagnostics-Provider > Admin. Here look for Event ID 814 to confirm if the SSO is enabled for Firefox.
The below screenshot shows the Event ID 814, where the WindowsSSO policy setting is successfully enabled via Microsoft Intune for Firefox browser.
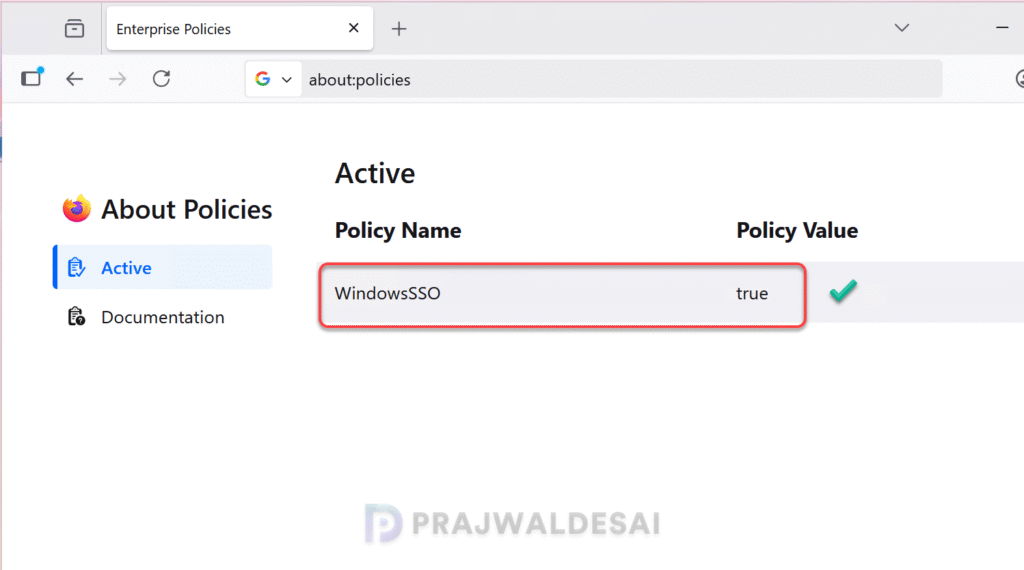
Method 3: To see active policies on Firefox for Enterprise, open the browser, type about:policies in the address bar and press enter. Look for the policy named WindowsSSO and if the policy value is shown as True, it confirms that you have enabled automatic user sign-in for accounts backed by a Microsoft® cloud identity provider for Firefox.
Further Reading
