This post is a SCCM 1710 upgrade guide. Microsoft announced version 1710 for current branch of Configuration Manager. While an update rollup was released recently for SCCM 1706, Microsoft is ready with version 1710.
Each of these updates bring lots of fixes and enhancements to existing version of configuration manager. This post is basically a SCCM Configuration Manager 1710 upgrade guide. We will also look at what’s new in version 1710 of Configuration Manager current branch.
Before you upgrade to SCCM 1710, go through the checklist once. The update installation is almost the same as we had seen in previous posts. If you have got multi-tier hierarchy, install the update on CAS first and then on each child site.
Most of all to upgrade to SCCM 1710, you must be running at least SCCM 1702. Before you upgrade, ensure you take a back up of your SCCM server. For SCCM Build numbers click here and for SCCM Technical preview build numbers click here.
SCCM 1710 New Features
I will be listing some of the key features that comes with SCCM 1710. You can find all the features in detail documented here.
- Peer Cache and managing Surface driver updates is no longer a pre-release feature.
- SCCM 1710 supports Windows 10 version 1709 deployment.
- You can now set icon size of apps in software center to 512×512 pixels.
- Enhanced Software center customization.
- New step in the task sequence to run another task sequence.
- You can now restart computers right from SCCM console.
- Co-management for Windows 10 devices. You can now concurrently manage Windows 10 devices by Configuration Manager and Intune as well as joined to Active Directory and Azure AD.
SCCM 1710 Upgrade Guide
Here are the steps that are part of SCCM Configuration Manager 1710 upgrade guide.
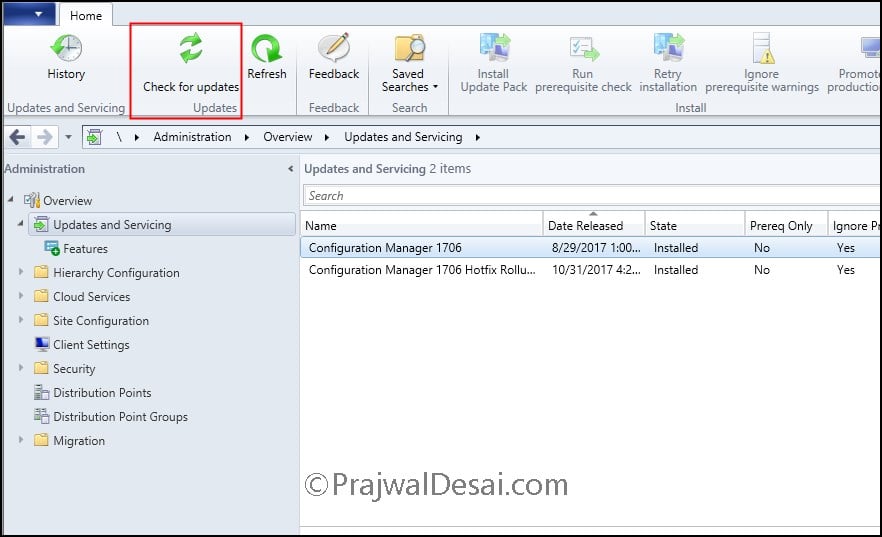
- Click Administration > Overview > Updates and Servicing.
- On the top ribbon click Check for updates.
- At this point open dmpdownloader.log file and monitor the download process. Wait for the update to appear in the console.
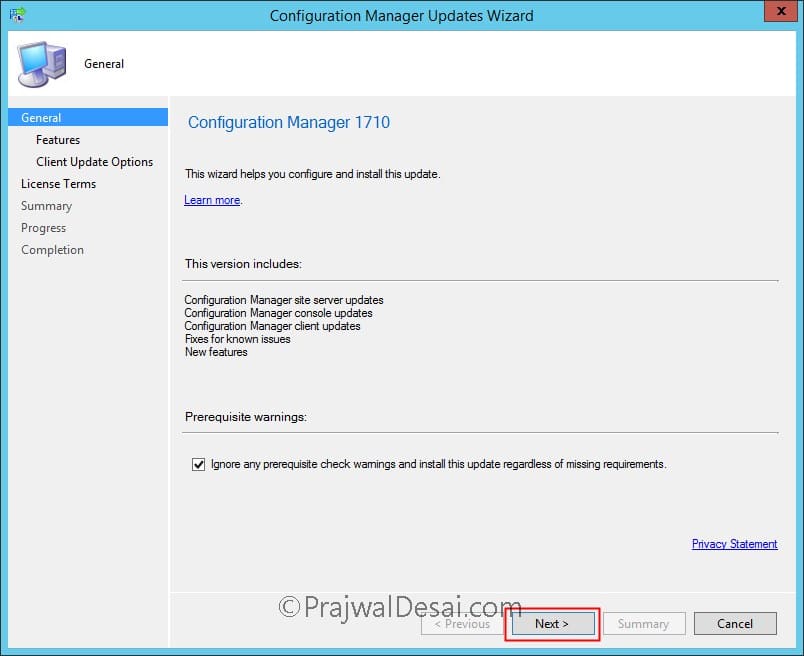
It is recommended to Run prerequisite check before installing this update. Since I am doing the upgrade on my lab setup, I will directly choose Install Update Pack. Right click Configuration Manager 1710 and click Install Update pack.
Ignore the prerequisite warnings and click Next.
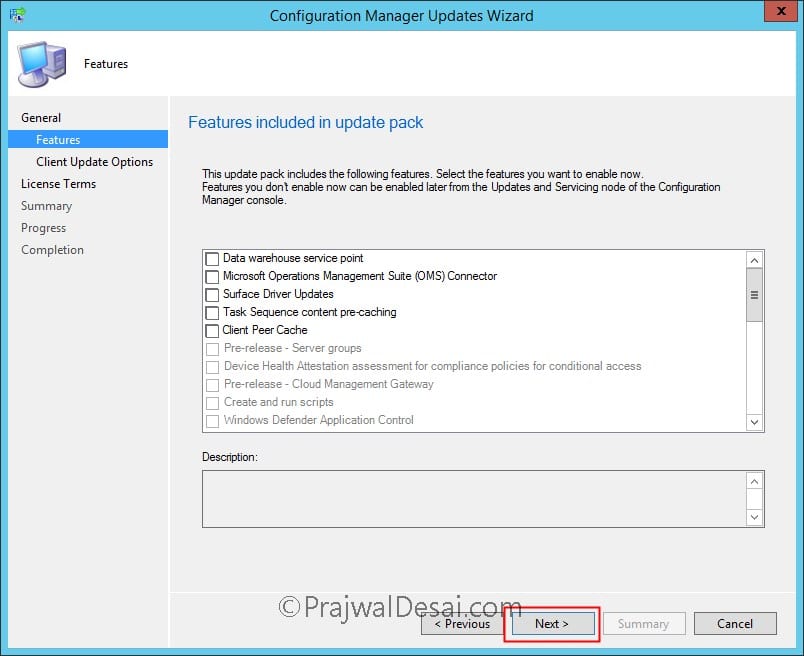
You can enable the features later, so don’t select anything here and click Next.
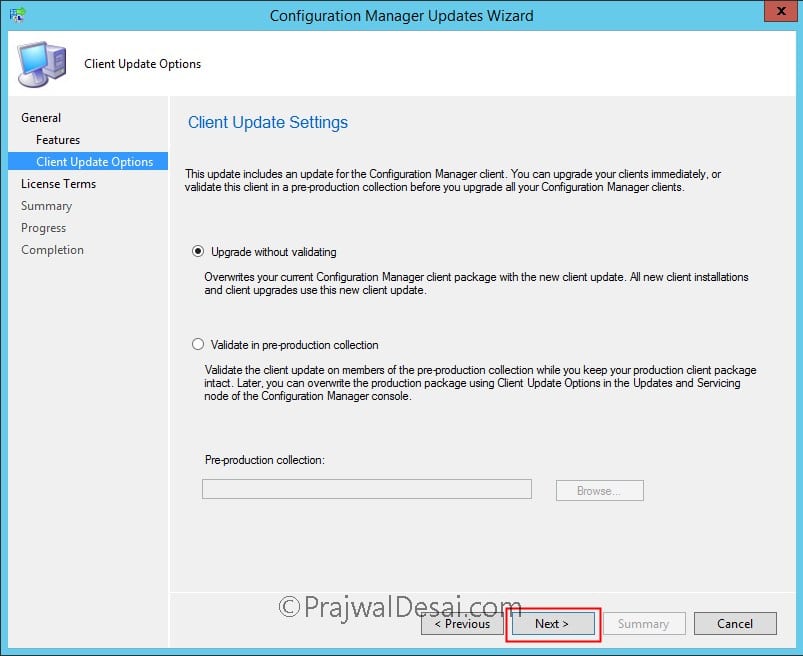
Choose the client update options wisely and click Next.
Finally on Completion page, click Close.
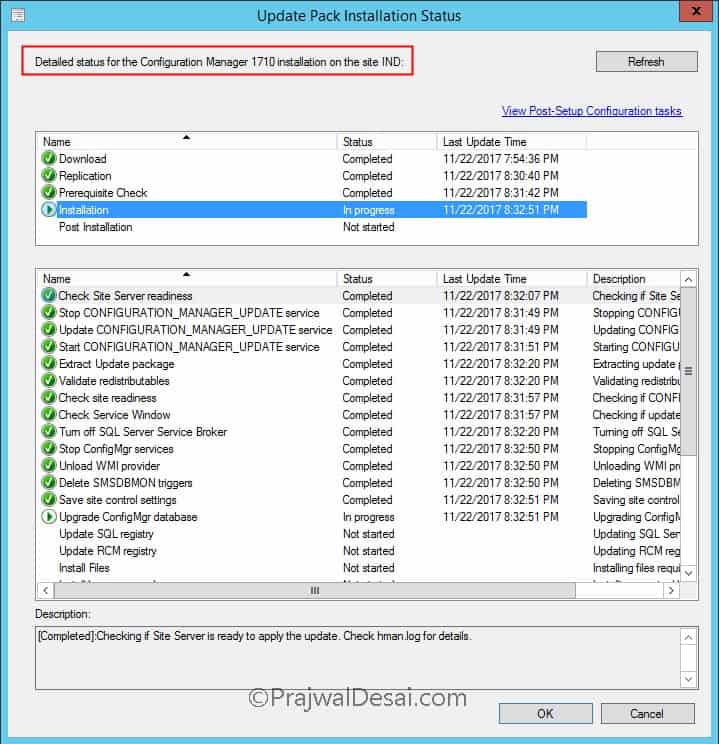
To monitor the upgrade progress, navigate to Monitoring > Updates and Servicing Status. Right click Update and click Show Status.You now see detailed status for Configuration Manager 1710 installation.
Click Refresh on top ribbon or close the console and open it. You will be presented with console upgrade box. Click OK to upgrade the SCCM console from version 5.00.8540.1611 to 5.00.8577.1100. Monitor ConfigMgrAdminUISetup.log located on C: drive to see the console upgrade process.
 Post Configuration Manager 1710 Upgrade
Once you complete SCCM Configuration Manager 1710 upgrade, the next steps are :-
- Update Boot Images to all the distribution points (if it’s not done).
- Ensure Configuration Manager client package is updated to all DP’s. You can check the content status to see last update.
SCCM Configuration Manager 1710 Client Upgrade
To upgrade the client agents, click Administration > Overview > Site Configuration > Sites. Click Hierarchy Settings and click Client Upgrade tab. If you have not configured this earlier, enable client upgrade as shown in the below screenshot. Choose the days within which all client agents are upgraded.
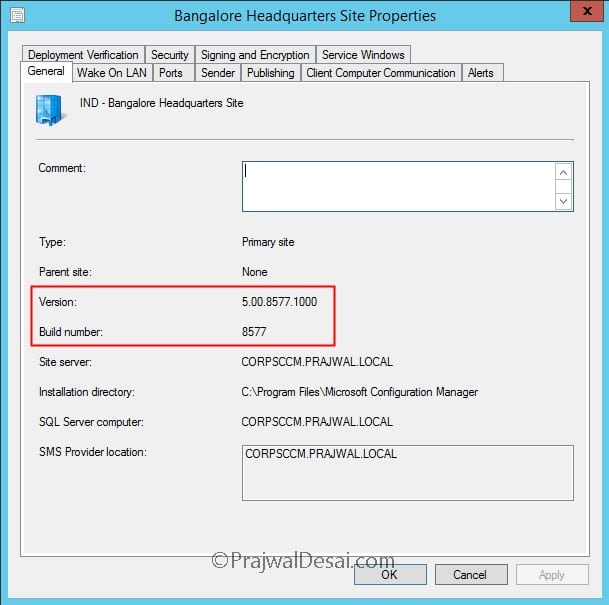
Checking the site properties reveals the version as 5.00.8577.1000 and build number 8577. Clicking About configuration manager should show site version as 5.0.8577.1000 and console version as 5.00.8577.1000.







Boa noite,
Tenho instalado a versão 1702 e quero instalar a 1706, a opção que fazer downloads do pacote não está disponível, o devo fazer?
You can upgrade to a higher version.
Nosso licenciamento suporta até a versão 1706.
Does upgrading to 1710 interfere with my current deployments of Windows 10 boot images?
I’ve also been having some issues with Dell driver deployment after upgrading. I had the issue where one machine is associated with the “unknown” computer record in SQL initially. After updating the ADK and all the boot wims, I was able to get around this. But now my task sequences fail to install Dell driver CABS, for whatever reason. I also updated the Dell Integration Suite too, with no success.
Try to run Prerequisite get bellow Error
ERROR: Failed to connect to SQL Server master database on server
SQL Server sysadmin rights; Error; Either the user account running Configuration Manager Setup does not have sysadmin SQL Server role permissions on the SQL Server instance selected for site database installation, or the SQL Server instance could not be contacted to verify permissions. Setup cannot continue.
I have installed 1710 and now running into an issue where the software in the deployment job are now failing.
Hi,
I have 1610 installed now and want to update sccm to 1710. I havent installed the other intermittent updates that were released so am wondering if I need to install those before I install 1710 or can I just go ahead and install 1710?
Updates I am thinking of skipping, 2 of the 1610 hotfixes, 1702, 1706.
You can directly upgrade to 1710.
After I updated to 1710, there is a problem on the Reporting. When I open the Software Metering in the Reporting, I choose the template, it gets an error below, therefore, I could not show it. Do you have any idea to solving it?
The attempt to connect to the report server failed. Check your connection information and that the report server is a compatible version.
There is an error in XML document (1, 55753).
”, hexadecimal value 0x03, is an invalid character. Line 1, position 55753.
Copy that invalid character in a notepad which will look like “|”. After then go to your Software Metering and paste that character in search tab. There will be a rule which will be contain that character. So to resolve the issue delete that rule and try to open the metering reports.