This guide covers the steps to enroll iOS iPadOS devices in Microsoft Intune (Endpoint Manager). Enroll your iOS/iPadOS device with the Intune Company Portal app to gain secure access to your organization’s email, files, and apps.
When you enroll your iOS/iPadOS device in Intune, it is called a managed device. Intune can manage Apple devices efficiently provided they fall under supported devices list. Your organization can assign policies and apps to iOS devices using MDM solution such as Intune.
The procedure to enroll iOS/iPadOS device in Microsoft Intune includes a series of steps that needs to be followed. After the successful enrollment of iOS device, you can apply policies and configuration profile from Intune Portal.
The enrollment process for Apple iPhone and iPad remains same. The overall method of enrolling a iOS device is different from that of Windows device enrollment in Intune.
In this article, I will show you how to manually enroll iOS/iPadOS device in Microsoft Intune. When you have many iOS devices, you can automatically enroll iOS/iPadOS devices by using Apple’s Automated Device Enrollment.
High-level Steps for Enrolling iOS devices in Microsoft Intune
An overview of enrolling iOS devices in Intune includes the following steps:
- Check the prerequisites and ensure you are using supported iOS devices for enrollment.
- Apple MDM Push certificate configuration – Involves downloading the Intune certificate signing request and creating a new push certificate. Later upload this push certificate in Intune portal.
- Install the Company Portal app on iOS device from App Store and authenticate.
- Set up iOS/iPadOS Device Access to your company resources.
- Manage iOS devices from Intune Portal.
Prerequisites for enrolling iOS devices in Intune
If you want to enroll iOS devices in Intune, following are the prerequisites:
- Your device must be running iOS 13.0 and later.
- You must Install Company Portal app from App Store.
- To log in to the company portal, you’ll need a user account with Intune license.
- Maintain a Wi-Fi connection until all steps are complete.
- Have access to Safari web browser on your device.
Step 1. Configure Apple MDM Push Certificate
An Apple MDM Push certificate is required to manage iOS/iPadOS and macOS devices in Microsoft Intune. You can configure Apple MDM push certificate with following steps:
- Sign-in to Microsoft Endpoint Admin Center.
- Navigate to Devices > Enroll Devices > Apple Enrollment and click on Apple MDM Push Certificate.

On the Configure MDM Push Certificate window, select I agree to give Microsoft permission to send data to Apple. This is a mandatory step.

Step 2. Download the Intune Certificate Signing request
In this step, you have to download the Intune certificate signing request required to create an Apple MDM push certificate. Select Download your CSR to download and save the request file locally. Refer to the above screenshot for more details.
Shortly, the IntuneCSR.csr file will be downloaded and saved to the default location on your computer. We will need this file to request a trust relationship certificate from the Apple Push Certificates Portal.

Step 3. Create an Apple MDM Push Certificate
On the Configure MDM Push Certificate window, click Create your MDM push certificate. A new link opens in your default browser and takes you to the Apple Push Certificates Portal.
You must Sign in with your company email address Apple ID, and then click Create a Certificate.

On the Terms of Use page, click Accept.

On the Create a new MDM Push Certificate page, select Choose File and browse to the Intune certificate signing request file (IntuneCSR.csr), and then choose Upload.

On the Confirmation page, select Download to download the certificate (.pem) file, and save the file locally. The Apple MDM push certificate file is saved with following name MDM_ Microsoft Corporation_Certificate.pem.

Step 4. Upload Apple MDM Push Certificate
In step, you have two things that you need to configure:
- Enter the Apple ID used to create your Apple MDM push certificate.
- Upload the Apple MDM Push certificate by clicking Browse icon and upload the MDM_ Microsoft Corporation_Certificate.pem file to Intune. By successfully uploading the Apple MDM push certificate, Intune can enroll and manage Apple devices.

We see another notification confirming that your MDM push certificate was successfully created.

After you configure Apple MDM push certificate, the bulk enrollment methods are activated in Intune portal. The Apple bulk enrollment methods include:
- Apple configurator
- Enrollment Program Tokens
We also see the enrollment options that allows you to manage user enrollment and device enrollment options for iOS and iPadOS devices.

Step 5. Enroll iOS iPadOS devices in Microsoft Intune
In this section, we will look at steps to enroll iOS/iPadOS devices in Intune. As an Intune admin, you can set up enrollment for iOS/iPadOS and iPadOS devices to access company resources. You can let users enroll personally owned devices, known as “bring your own device” (BYOD) enrollment.
Once again, before you enroll Apple devices in Intune, you must check the prerequisites. If an iOS/iPadOS device is not supported by Intune, you cannot enroll it.
Step 6. Install Intune Company Portal App from App Store
If you had to enroll a Windows device in Intune, you would use a company portal app. Similarly, to enroll iOS/iPadOS device in Intune, you have to install the company portal app on Apple device from App Store.
On your Apple device, launch the App Store and search for “Intune Company Portal” and click Get. You may be asked to enter the passcode or authenticate using face ID to install the app.

Step 7. Sign in to Intune Company Portal
On your iOS iPadOS device, launch the Intune Company Portal app and on the sign in screen, enter the Azure AD credentials. If you wonder which account should I enter here, you should create a user in Microsoft 365 Admin Center. This user should be assigned an Intune license.

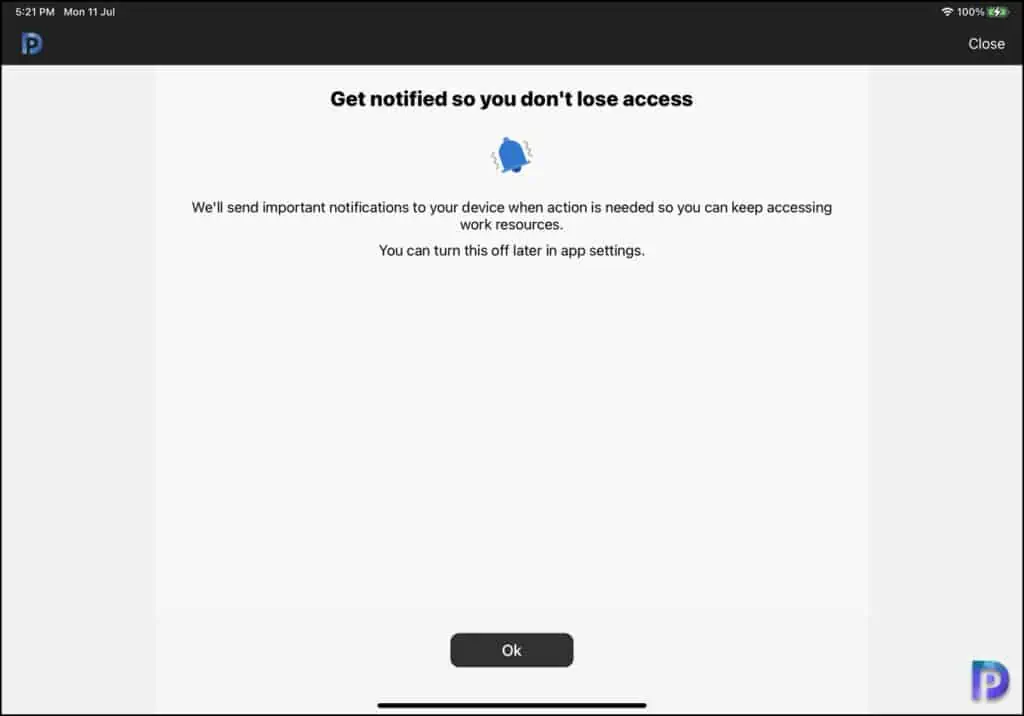
When you launch the company portal app, it requests for notifications access. If you want to allow the company portal app to show notifications, click Allow.

Step 8. Set up iOS/iPadOS Device Access to your company resources
There are few basic steps to set up iOS iPadOS device access to your company resources. You must complete these steps to access your email, devices, Wi-Fi, and apps for work.
After your device is enrolled, it becomes managed and your organization can assign policies and apps to the device via Intune. On the Set-up Organization access page, click Begin.
There are 4 steps included here:
- Review privacy information
- Download management profile
- Install Management Profile
- Check Device Settings

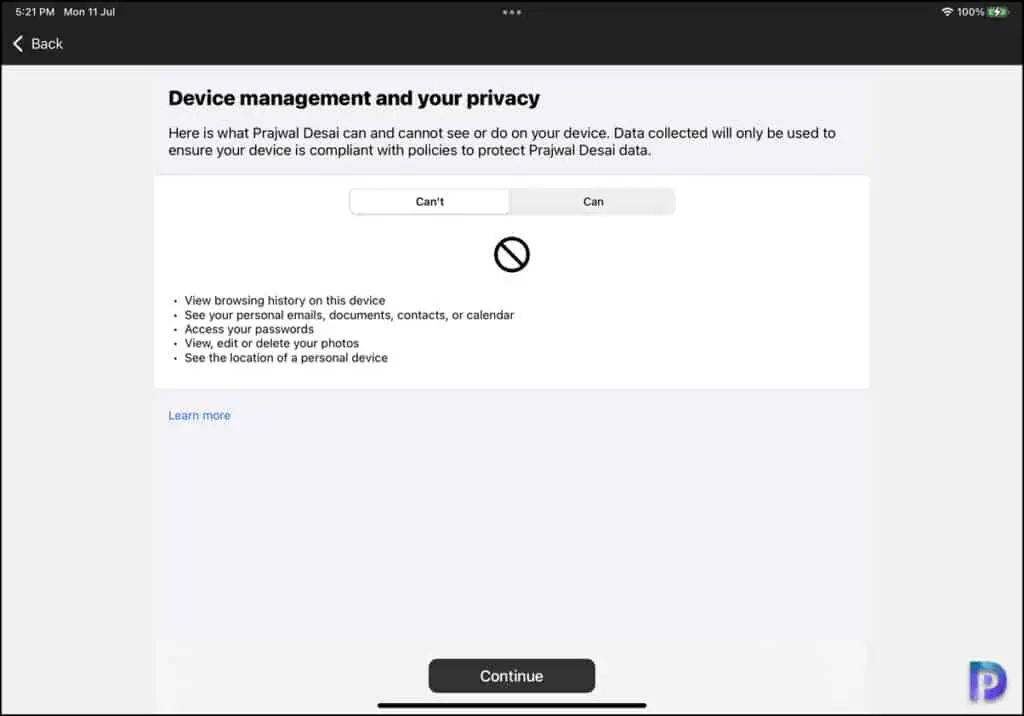
The Device Management and Privacy screen shows what your organization can see and cannot see on your device.
| What your organization cannot see | What your organization can see |
| View browsing history on this device | Device Model and Manufacturer |
| See your personal emails, documents, contacts, or calendar | Operating system and version |
| Access your passwords | App inventory and app names |
| View, edit or delete your photos | Device Owner, Name |
| See the location of a personal device | Device serial number, IMEI |
Click Continue on Device Management and your privacy page.

Review privacy information is completed, click on Continue to begin Download management profile.

To continue downloading a configuration profile, click Allow.

The green tick is seen for download management profile step which means it is completed successfully. Click Continue.

In this step, you have to install the Management Profile that was downloaded in previous step. You will get instructions on how to install management profile on your device screen.
On your iOS/iPadOS device, navigate to Settings > General > VPN & Device Management. Now tap on Management Profile and tap Install.

On the Install Profile box, click Install.

You should now see Remote Management window asking you if you trust the profile sources to enroll your iPad into remote management. Click Trust.

The management profile has been installed successfully on your device. By installing this profile, your iOS/iPadOS device can now access your company apps. Click Done to close the Management Profile window.

Go back to set up organization access window and complete the remaining steps. We see the Install management profile step is completed successfully. Click Continue.

The last step is Checking device settings and this should take a few seconds to complete. Finally, when all the steps are completed, click Done.

This completes the steps to enroll iOS iPadOS devices in Microsoft Intune. Launch the Intune Company Portal app and click on Devices. Here you can see the Device settings status, manufacturer, model, operating system details.

View Enrolled iOS/iPadOS Devices in Intune
After you enroll iOS iPadOS devices in Microsoft Intune, you can view those devices using following steps:
- Sign in to Microsoft Endpoint Manager admin center.
- Select Devices > iOS/iPadOS devices.
- In the right pane, you can see the list of all the enrolled iOS/iPadOS devices.


Thank you so much!