Deploying SCCM 2012 Part 8 – Installing Site System Roles.
In Part 1 we saw the installation of Active Directory Domain Services. In Part 2 we created the AD container and delegated the permissions on it. In Part 3 we installed pre-requisites for SCCM server. In Part 4 we installed SQL server, updated the service pack and cumulative update patch. In Part 5 we installed WSUS server role, Configured the firewall to add exceptions to allow the Client Push, Open the SQL ports 1433 and 4022. In Part 6 we installed the SCCM 2012. In Part 7 we saw how to configure Discovery and Boundaries. In this post we will Install few roles on our SCCM server.
Installing Application Catalog Website Point and Application Catalog Web Service Point Site System Role
Application Catalog Website Point site system role provides users with a list of available software. When the SCCM client is installed on a computer, the software center includes a link to Application Catalog. The Application Catalog shows the users, list of available softwares. This will be possible only when you install the roles. The Application Catalog Web Service Point system role provides information about available software from the Software Library to the Application Catalog website.
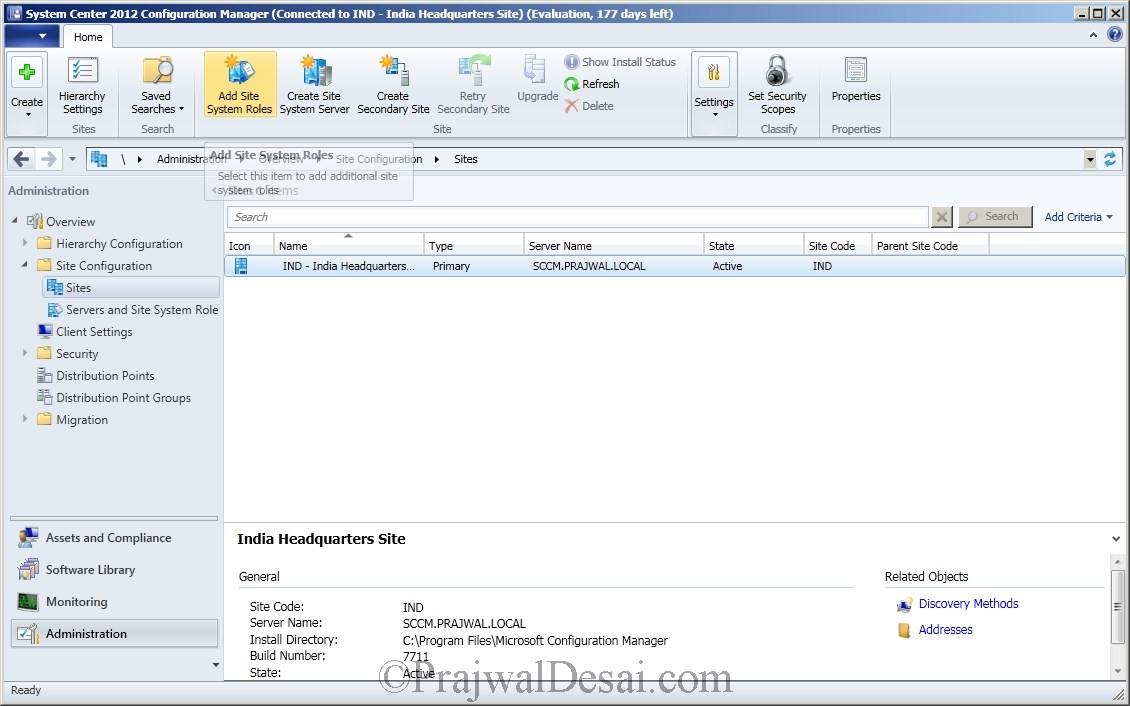
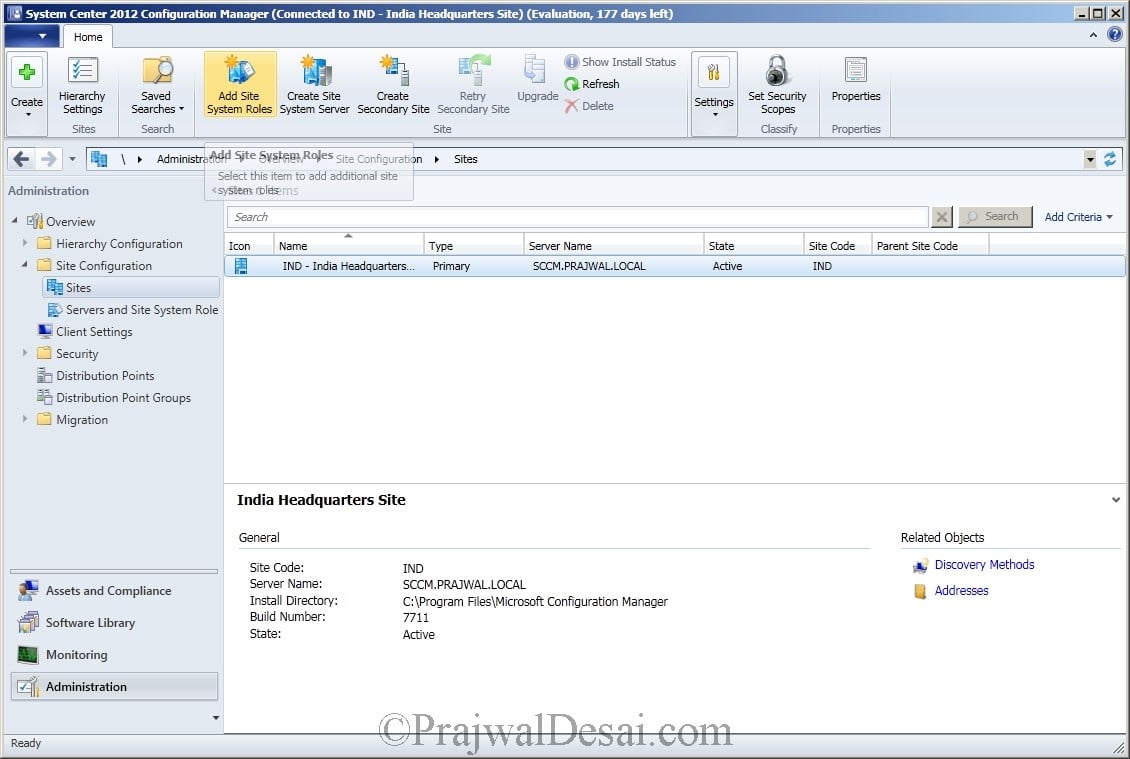
Open the configuration Manager console, Select Administration, Under Site Administration select Sites. Click on Add Site System Roles.
Leave this page to Default and click Next
Select Application Catalog Web Service Point and Application Catalog Website Point. Click Next.
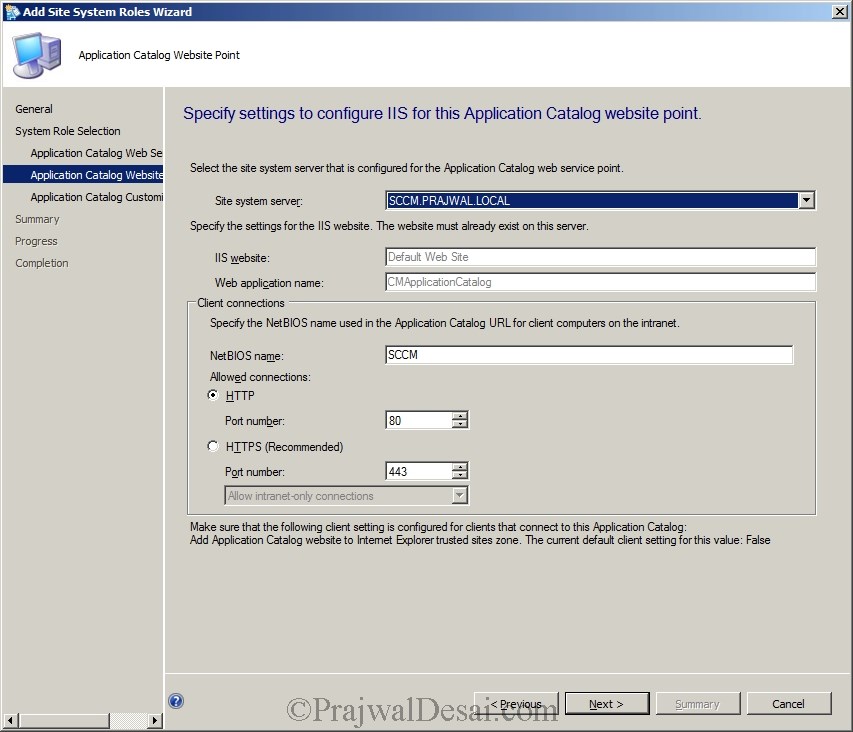
Application catalog websites communicate with Application catalog web service point using port 80. Do not change anything here, Click next.
Click Next.
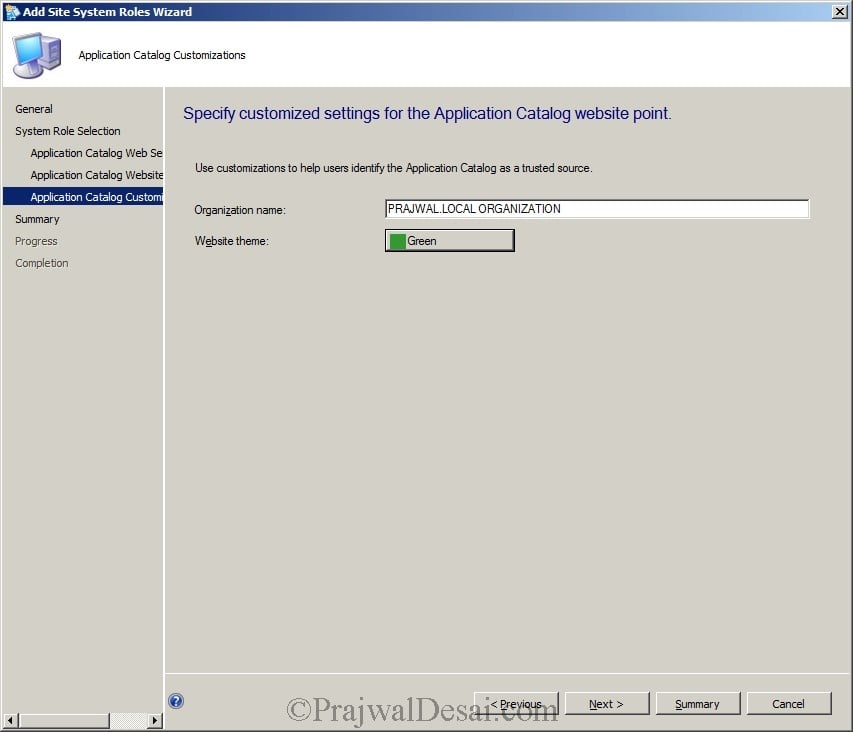
Provide the Organization Name and Choose the color. With the below customization when an user opens the Application Catalog link from his computer, user would see that website theme color is green and organization name is what we have entered. Click Next.
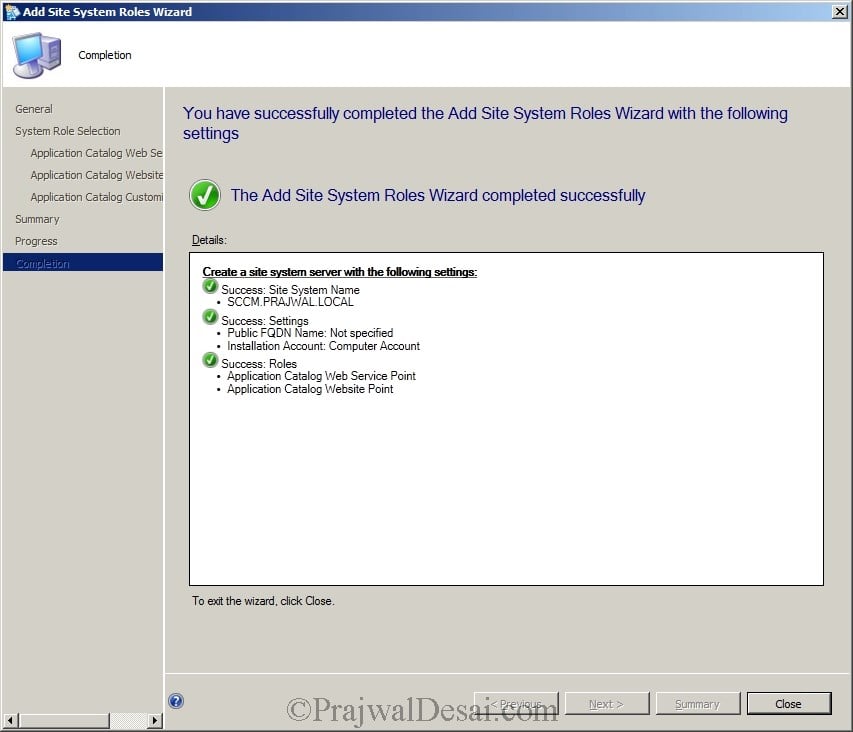
Confirm the settings and Click Next and close the Role Setup Wizard.
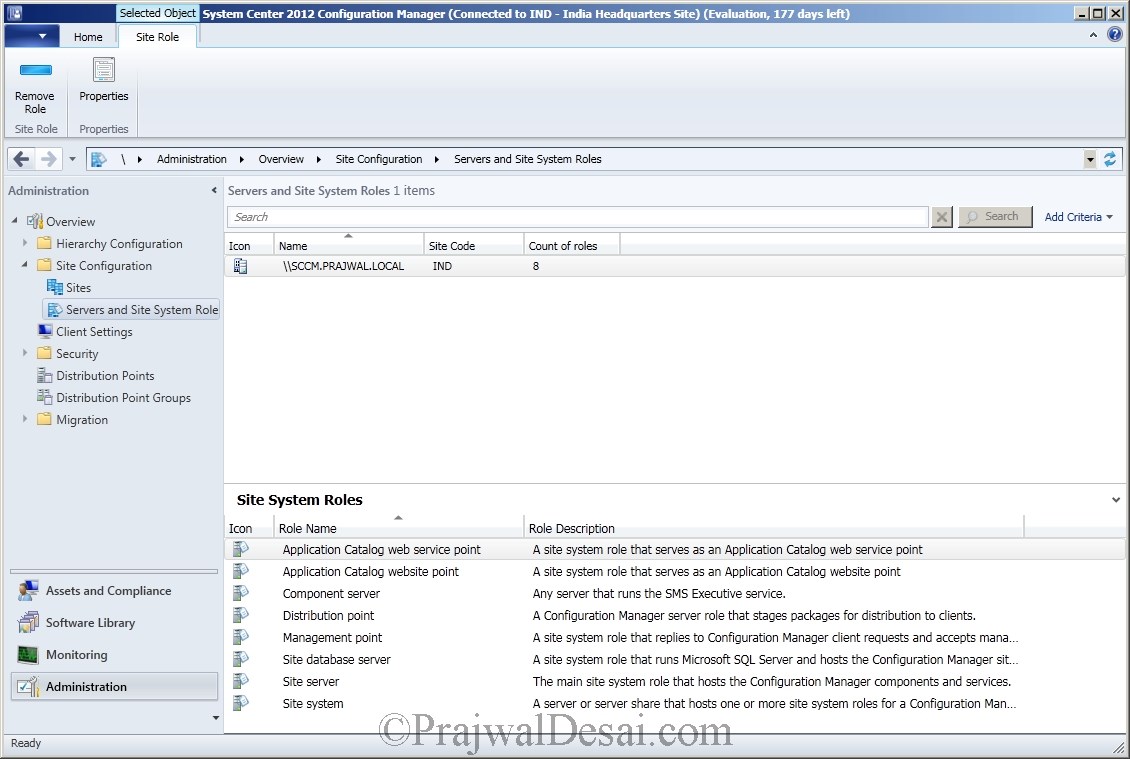
Anytime if you would like to see what sites roles are installed, then expand Site Configuration, click on Servers and Site System Roles, Select the SCCM server and below it you can find the Roles Installed.
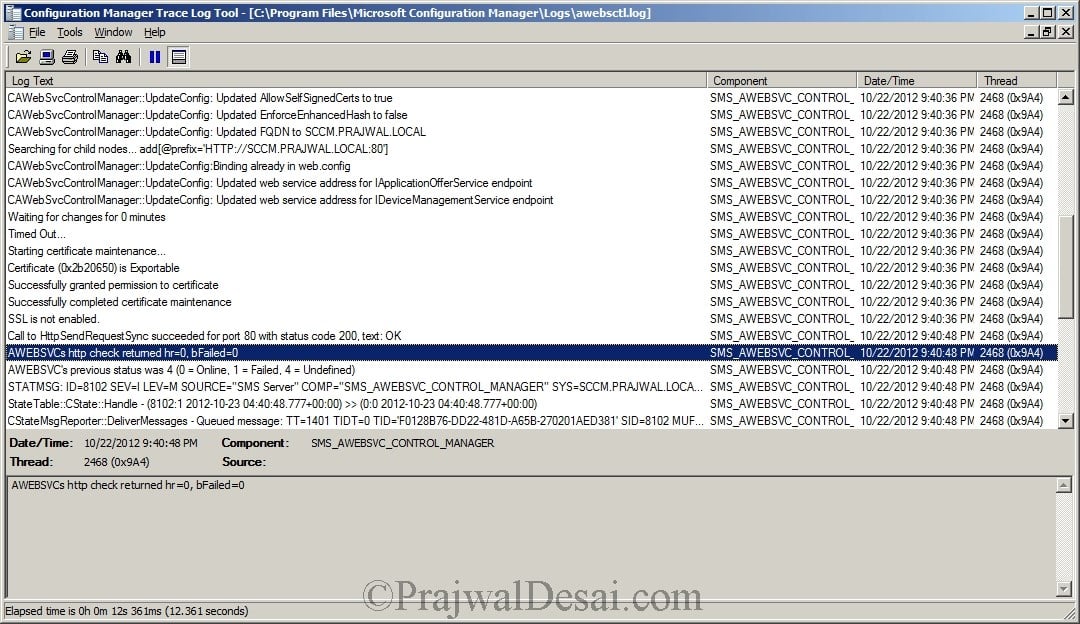
You can check logs of Application catalog website point by opening the log file named awebsctl.log. The log file is located in C:Program FilesMicrosoft Configuration ManagerLogs. Look for the line AWEBSVC’s http check returned hr=0, bFailed=0. Wait for few minutes ..
We now see that after few minutes AWEBSVC’s status has changed to Online.
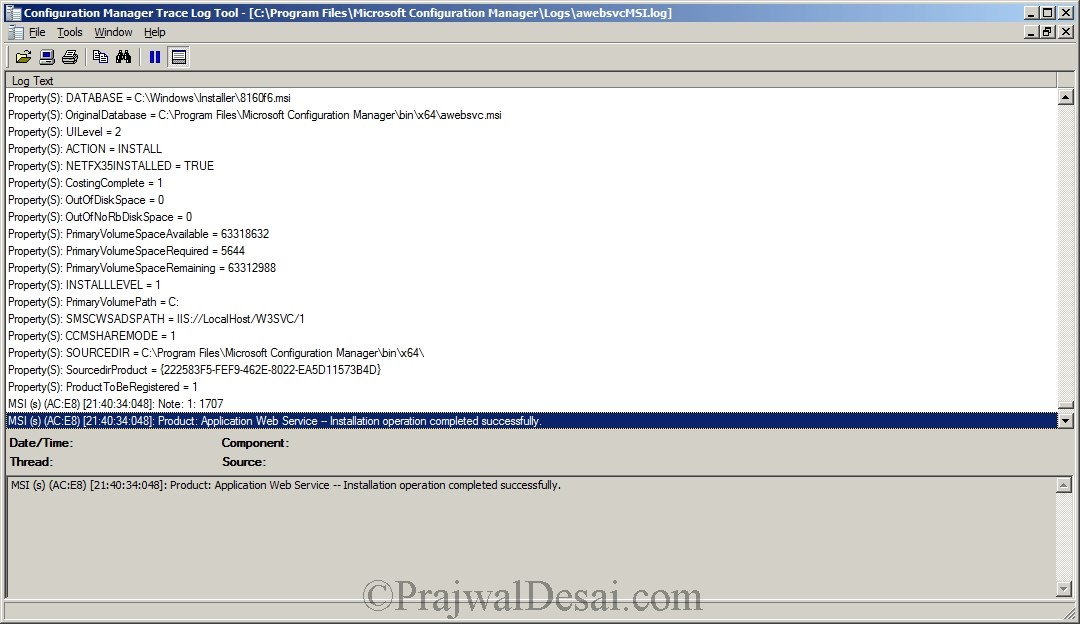
Similarly you can check the Application catalog Web service point log awebsvcMSI.log. Open the log file and look for the line Application Web Service — Installation Operation Completed Successfully.
Installing FallBack Status Point Site System Role
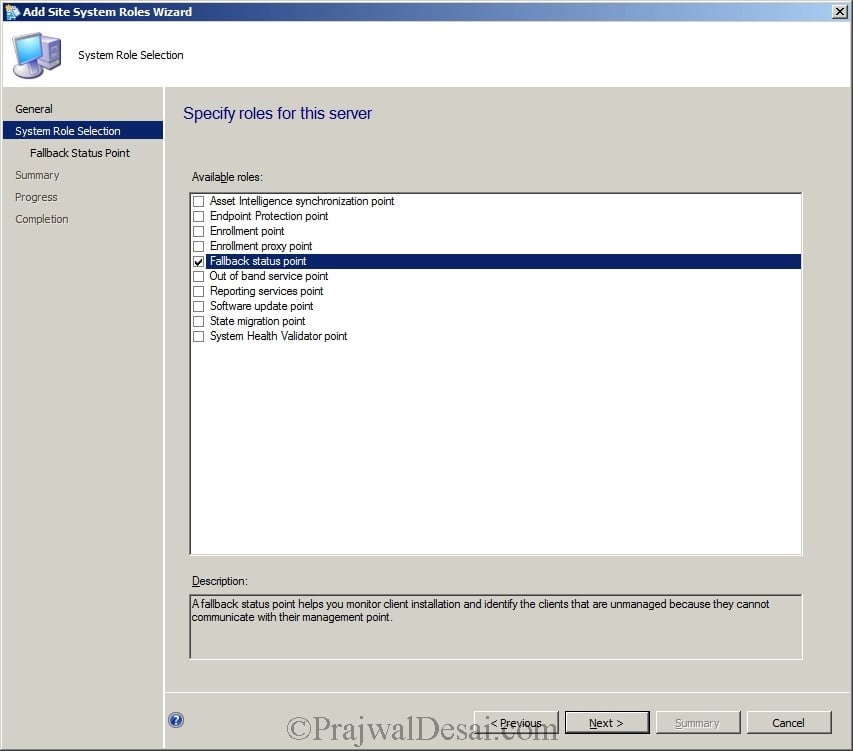
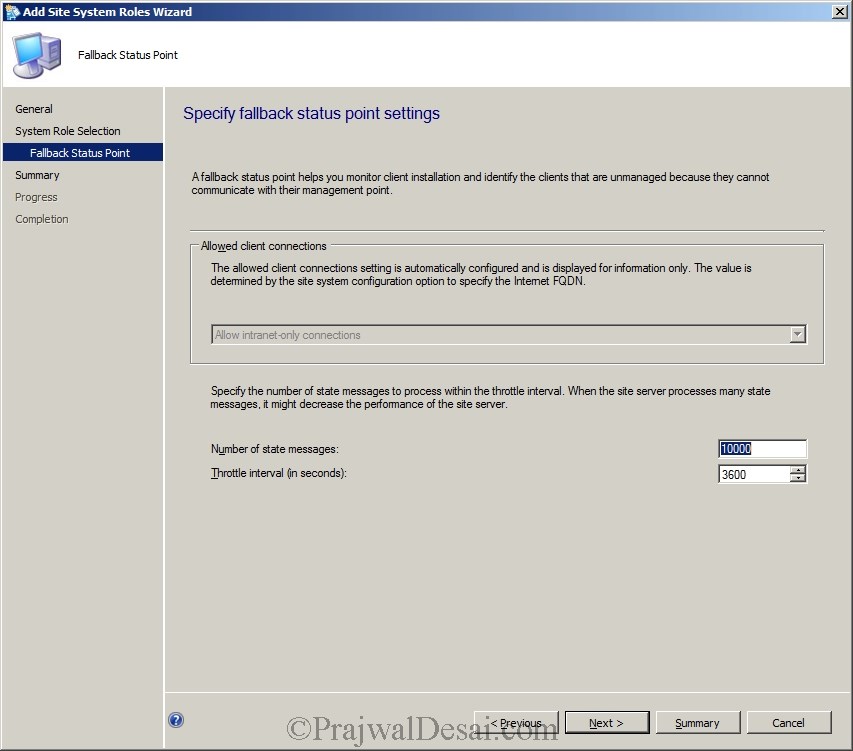
A fallback status point in Configuration Manager 2012 is a site system role that is used to help administrators monitor client deployment and identify any problems encountered during installation or assignment. It is also used to help identify clients that are unmanaged because they have problems communicating with their management point. Installation of FallBack Status Point role is optional, you may skip this role. If you have planned to install this role then make sure you install it before you do the configuration manager client deployment.
Click on Sites, Add Site System Roles.
Check Fallback Status Point and Click Next.
Click Next.
Click Next and Close the Role wizard.
Adding Software Update Point Role
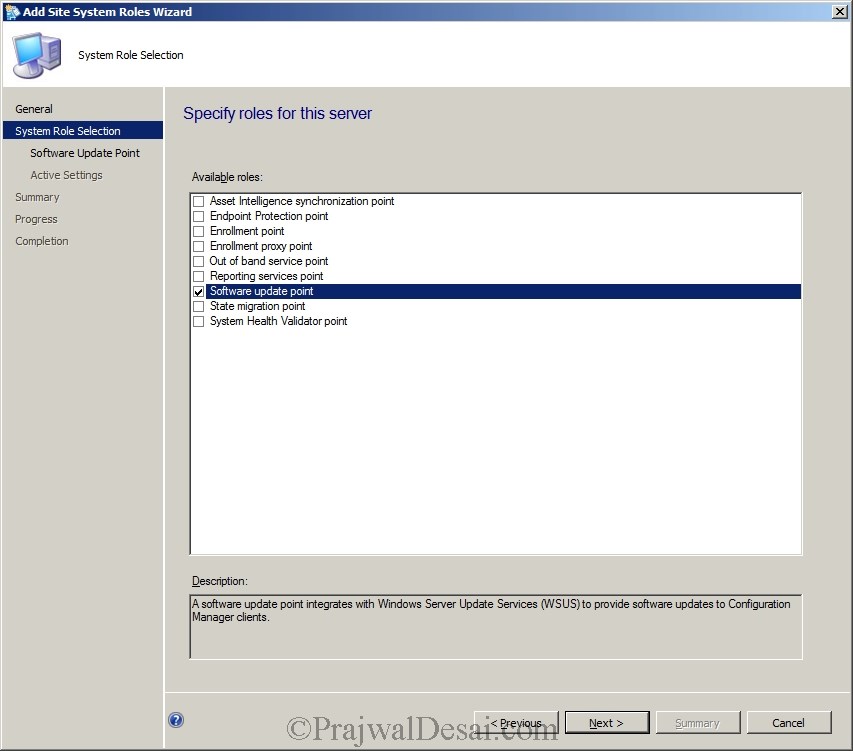
If you are planning to use SCCM 2012 to deploy windows updates to all your systems then you must install the Software Update Point Role. The software update point site system role must be created on a server that has Windows Server Update Services (WSUS) 3.0 installed. The software update point interacts with the WSUS services to configure update settings, to request synchronization to the upstream update source, and on the central site, to synchronize software updates from the WSUS database to the site server database. In Part 5 of this series we have seen the installation of WSUS.
To install the Software Update Point Role, click on Sites, Click Add Site System Roles.
check the role Software Update Point.
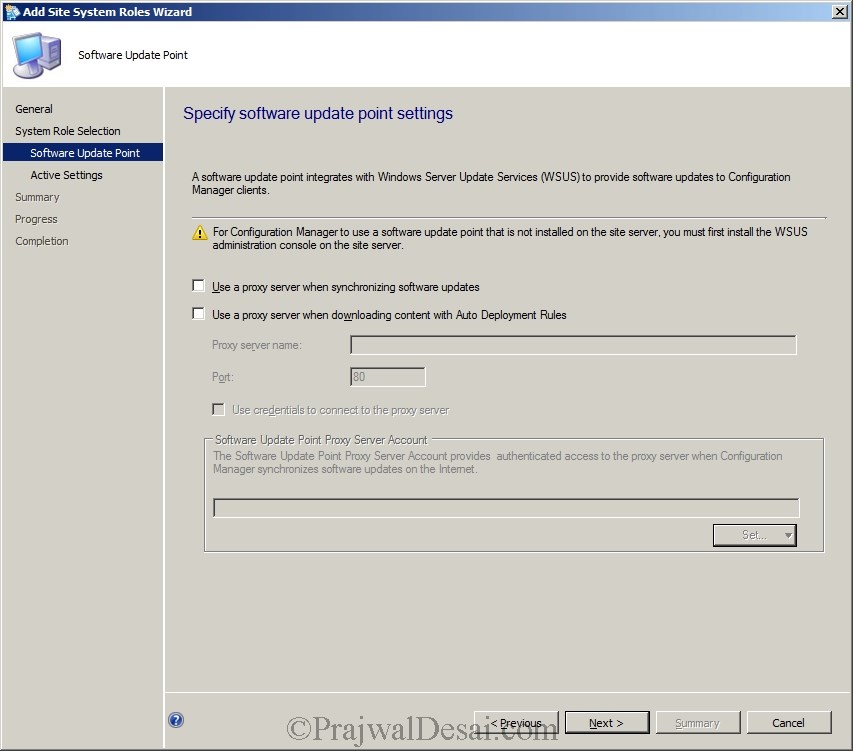
If you have a proxy server while you sync the updates then check the first box. If you have configured Content to Download via proxy server through an Auto Deployment Rule, then Check the second box and Specify the proxy server name and the port number. In our lab there is no Proxy server so click Next.
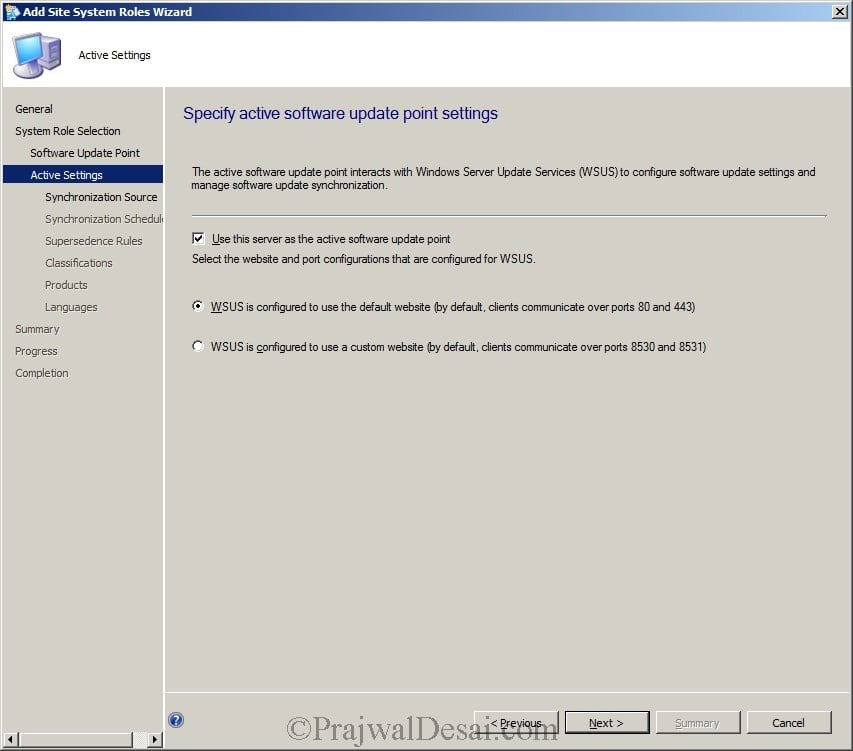
Check the box “Use this Server as Active Software Update Point”. Select the first Option “WSUS is configured to use the Default Website”. Click Next.
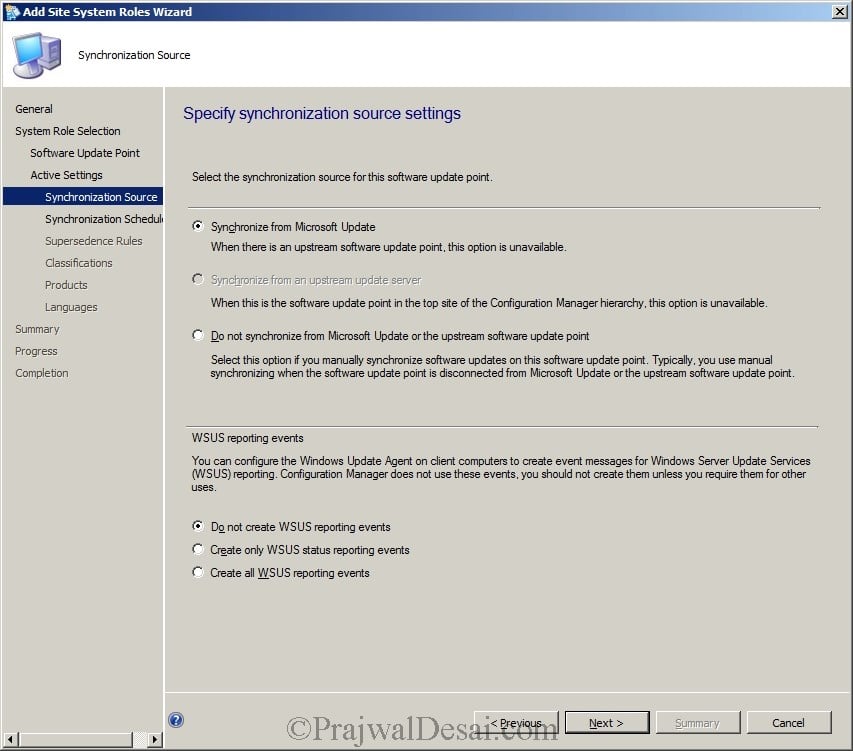
Select Synchronize from Microsoft Update, For WSUS reporting events we will select “Do not create WSUS reporting events” click Next.
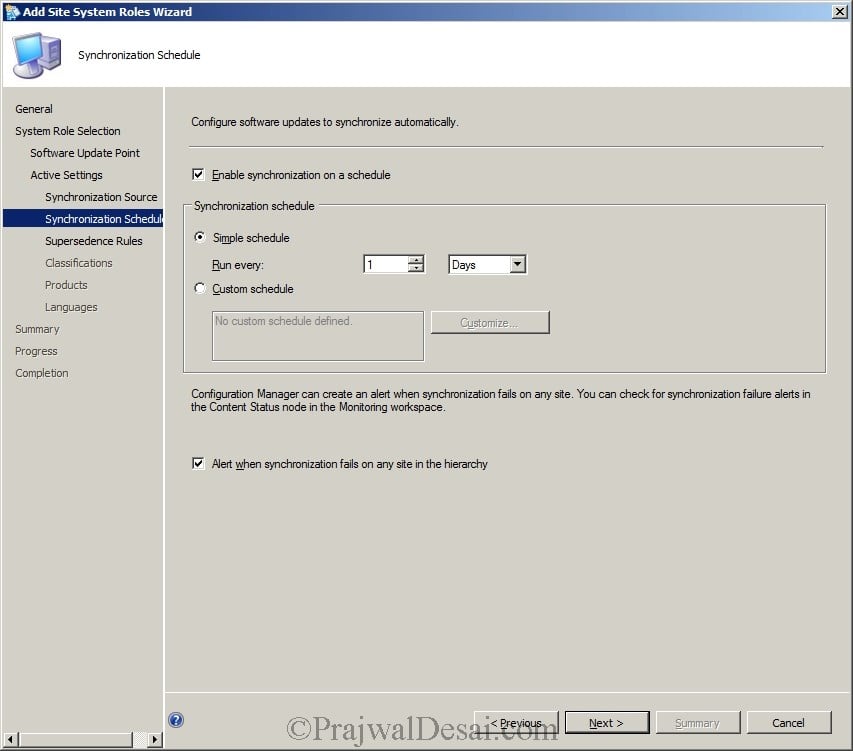
Enable the Synchronization on a schedule and set it to run every day. At the bottom check the box for “Alert when synchronization fails on any site in the hierarchy“. Click Next.
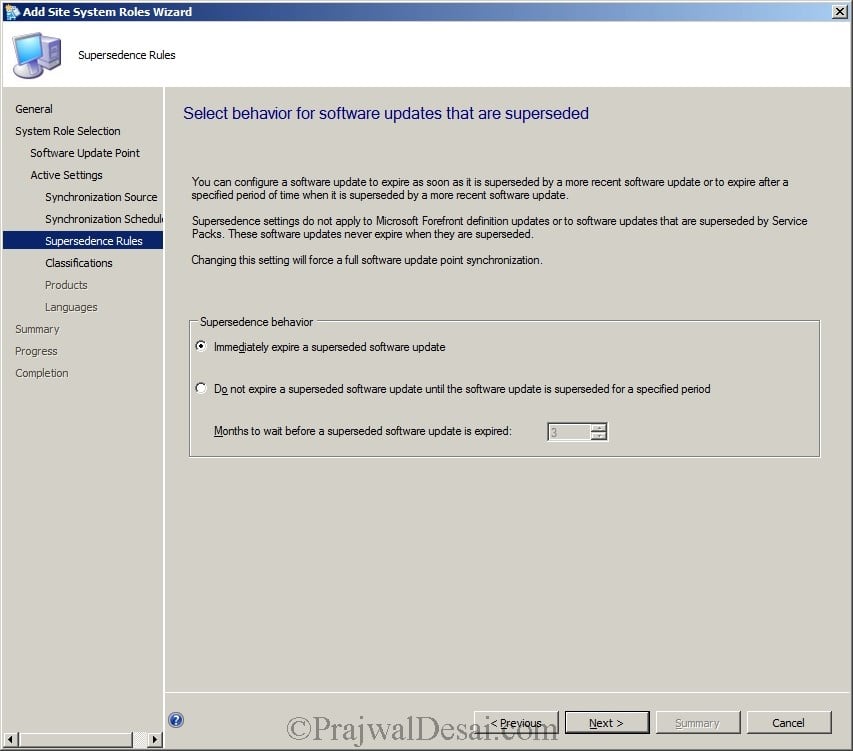
Select Immediately expire a superseded software update and click next.
We will select the Critical Updates, Definition Updates, Feature packs, Security Updates.
Note : If you are planning to deploy Endpoint protection updates to the clients, then make sure you select Definition Updates.
We will Choose the products later. Click Next.
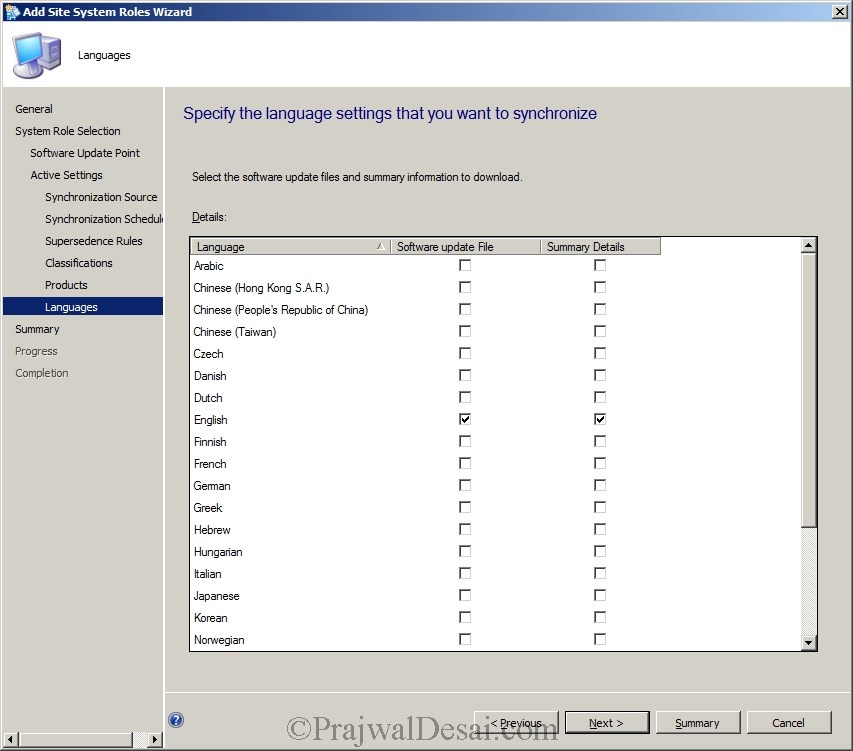
On Specify the Language Settings Page, choose the languages. Click Next.
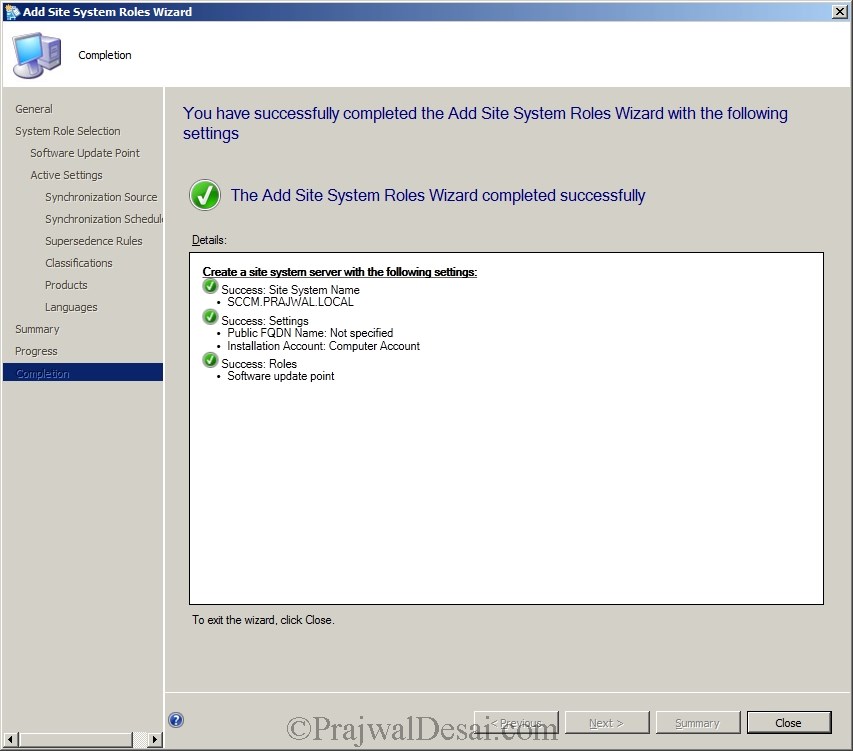
The Software Update Point Role has been Installed Successfully.










My SCCN 2012 R2 does not show the “Out of Band Service Point” as an available role. It just doesn’t list it. I tried installing on my primary server and ther eis not option. Any ideas where to start to make the role available for install?
Thank You
Thanks Prajwal, really like your site, lots of useful information.
Thank you AndrewHurst..
Can i use sccm to monitor applications that are installed on users devices
You can monitor the deployment of software, including software updates, compliance settings, applications, task sequences, and packages and programs. What exactly are you expecting when you say you want to monitor apps on user devices ?
http://technet.microsoft.com/library/gg682201