


Let’s look at the steps to deploy Adobe FrameMaker using SCCM. Adobe FrameMaker is a document processor for writing large complex documents. This also includes structured documents.
FrameMaker also supports XML, Non-XML, DITA support and more. FrameMaker is commonly used by technical SME’s when writing large technical documents. Be it a PDF or responsive HTML5, you can accelerate publishing using FrameMaker.
Before we go further, I assume you have purchased licenses for FrameMaker. If you are a single user, you can simply purchase an individual license.

You get an online subscription from Adobe and you can access FrameMaker. For large enterprise, you can always go with enterprise plans. Another link that I would like to suggest is FAQ’s. Most of the common questions about FrameMaker are answered here.
What is Adobe Creative Cloud Packager Tool
Creative Cloud Packager helps admins create packages that basically contain Adobe Creative Cloud products and updates. Once you create packages, you can use third-party tools to deploy the products to client machines.
Creative cloud packager is not available for all. It is available if you are either Creative Cloud team’s customer or enterprise customer. If you are an enterprise customer, you can download the tool from Adobe Licensing Website.
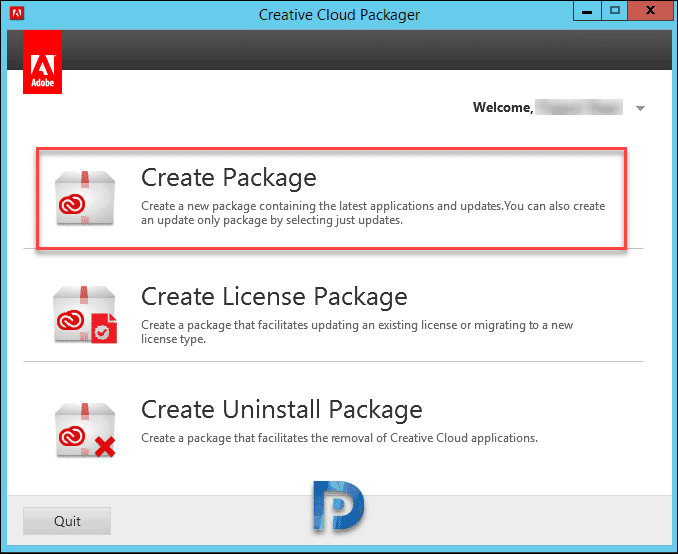
In this post we will package FrameMaker using creative cloud packager. The package will be deployed using SCCM. First of all run creative cloud packager as administrator. Enter your enterprise credentials and login. On welcome screen, click Create Package.
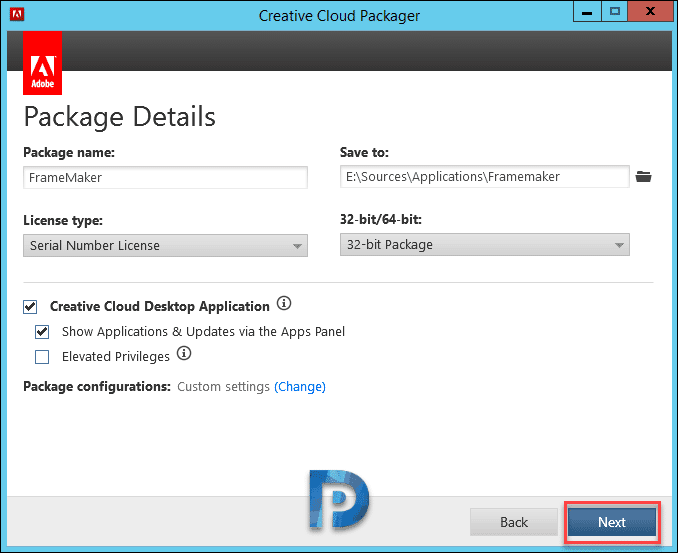
Enter package name and location to save the downloads. The license type is either Serial Number License or Named license. I will go with serial number license here. Selecting serial number license creates a package that is already licensed. When you deploy the package, there is no validation that runs on client machine. Therefore the user can directly run the program without worrying about entering key or license. Select 32-bit or 64-bit package as per your requirements.
Note that creative cloud desktop applications gets installed along with FrameMaker. Click Next.
Here is the section where you enter the license key. You enter the license key of a product and that product shall be seen in the next screen.

The key that I entered is for Adobe FrameMaker 2019 release. Choose the desired language and click Build.
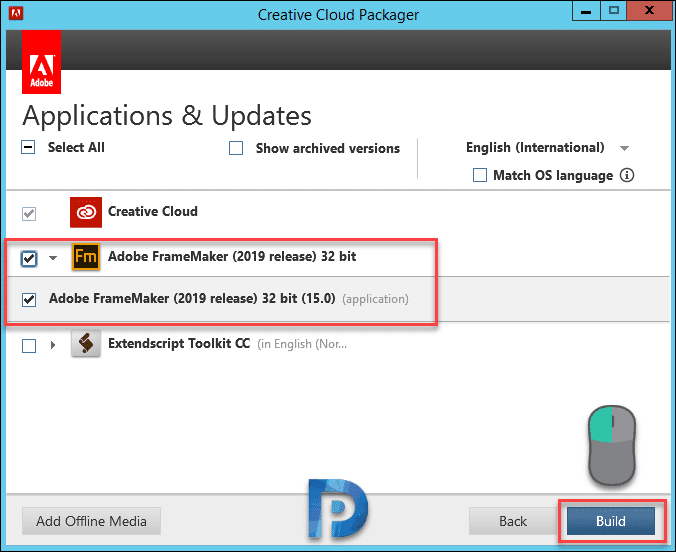
The build process takes some time as it downloads the product.

Finally the Adobe FrameMaker package is ready. The package also includes latest updates. Click Close. You can close the cloud packager tool as we have the package ready for deployment.

Deploy Adobe FrameMaker Using SCCM [Enterprise Deployment Guide]
To deploy Adobe FrameMaker using SCCM, we will use application deployment method. Most of all let’s look at what does the package contain. The Build folder contains the actual installation files.

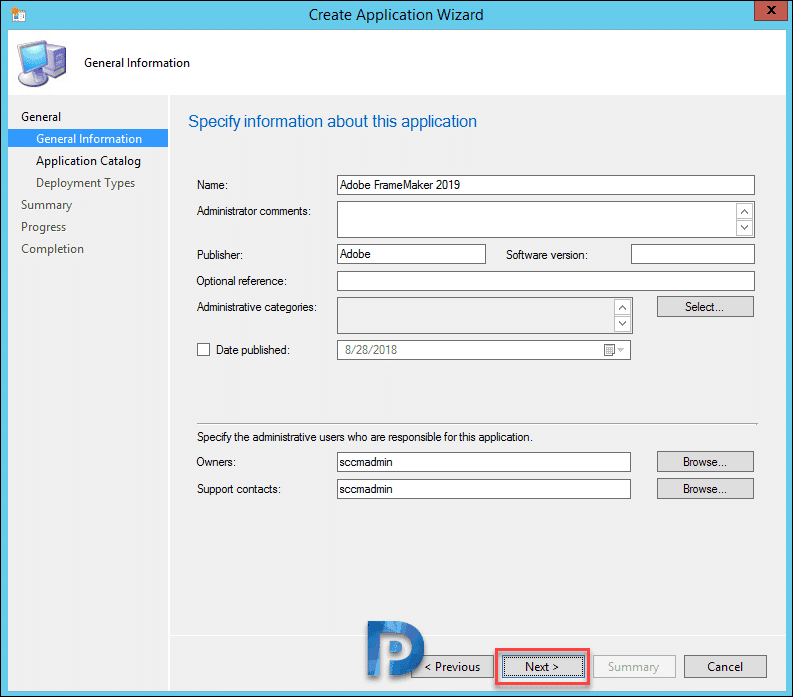
Launch Configuration Manager console and create a new application. Select Manually specify the application information and click Next.

Specify information about the app and click Next.
Add a new deployment type. Click Manually specify the deployment type information. Click Next.

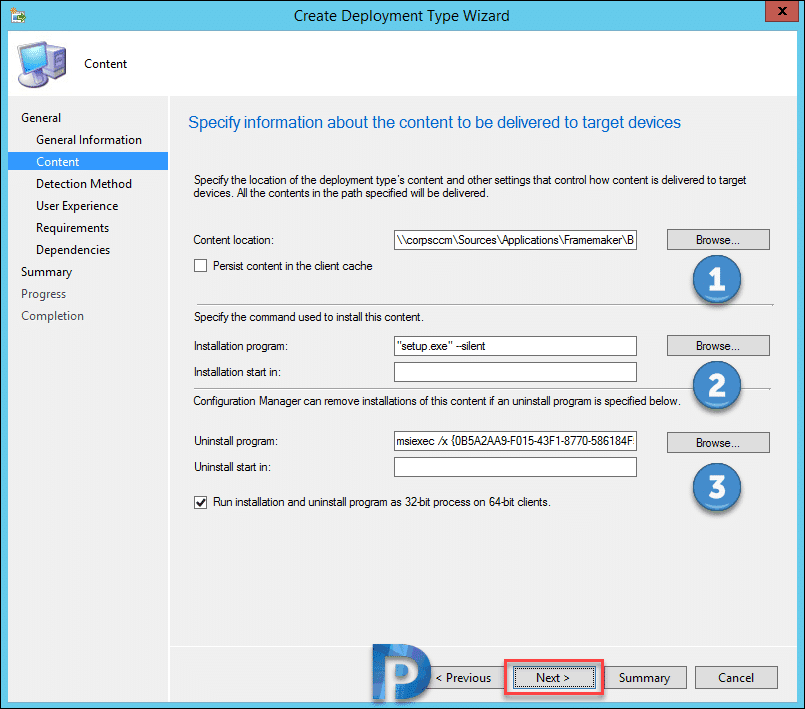
Specify the content location. Provide the path to Build folder as it contains source installation files. Specify install and uninstall commands as per below info.
Install Program
"setup.exe" --silent
Uninstall Program
msiexec /x {product code} /q
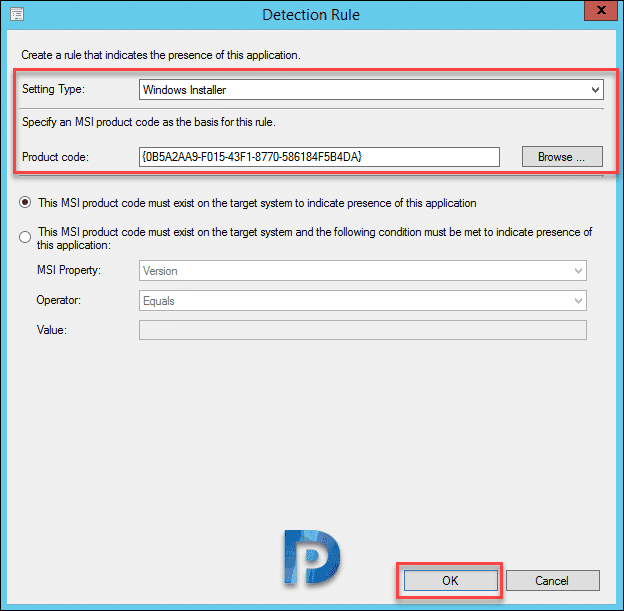
Add a detection method and select Windows Installer as Setting Type. Next, click Browse and select FrameMaker.msi file located in Build folder and that will pull the product code. Click OK.
Complete the remaining steps and close the wizard. Distribute the application to distribution points. Deploy Adobe FrameMaker to device collection.
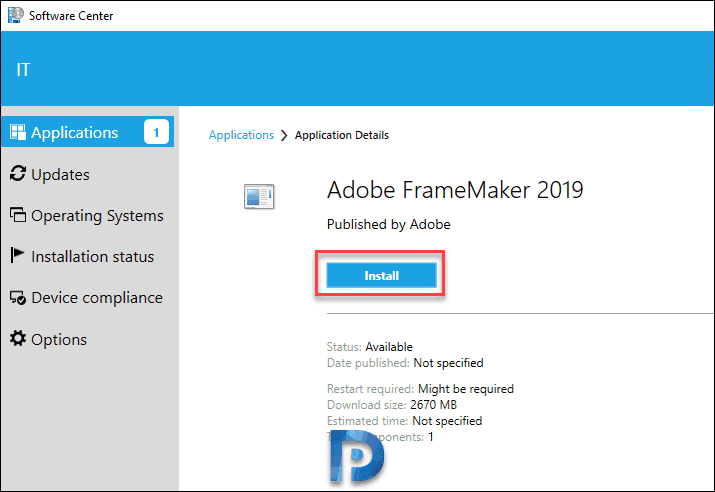
Time to open the Software Center, select the FrameMaker app and click Install.
Always peek in to AppEnforce.log file when you want to troubleshoot app installation issues. Note that the FrameMaker installed successfully. I have tested the uninstallation and even that works well.


I was following the same steps for Adobe Standard DC (licensed version) . Although it says installed in software center but I do not find it on my computer. I am using this installation program
msiexec /i “Adobe Standard DC.msi”
Can you please advise what needs to check?