


In this post, we will see how to create extra partition in MDT and save time when redeploy the system keeping the data partition.
During several interventions with the customer, we noticed that re-imaging takes a lot of time by copying the data to an external disk and then restoring it.
In most cases the customers request formatting C: drive while data on another drive remain as it is. Hence to save time we can create a D: (Data) partition where user documents will be redirected. Configure MDT to install new system on only partition C without formatting the Data drive.

Step 1 – Create Extra Partition in MDT
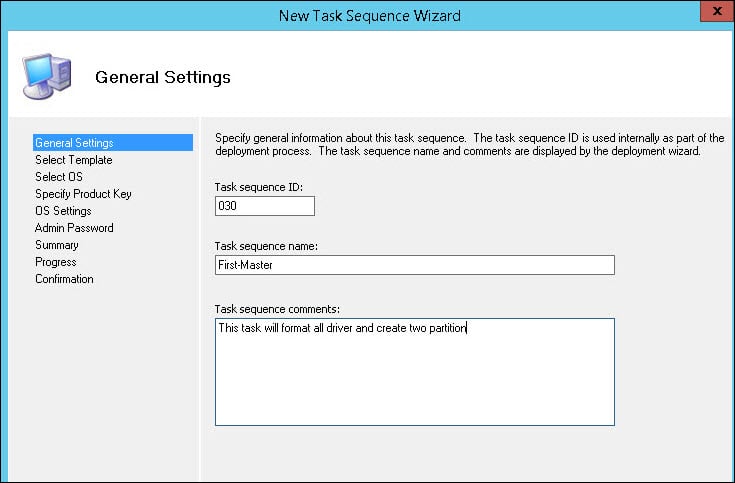
First we will look to create extra partition in MDT. We will create a new task sequence for a machine that doesn’t have an extra partition. Specify the TS name and comments. Click Next.
On the Select Template page, click the drop-down and select Standard Client Task Sequence. Complete the remaining steps.

Edit the task sequence and click the New Computer only step. Within that step, click Format and Partition Disk(BIOS) step and edit it.
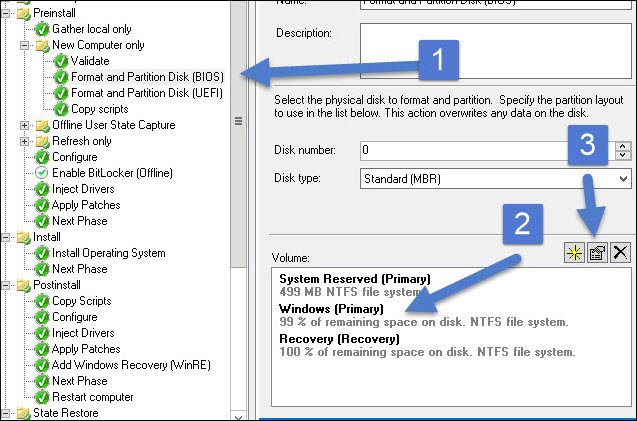
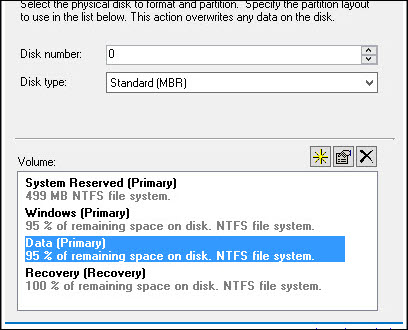
You can resize the Windows partition size either by specifying the size in GB or Percentage.
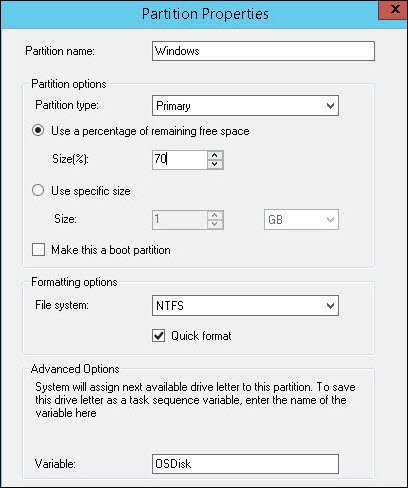
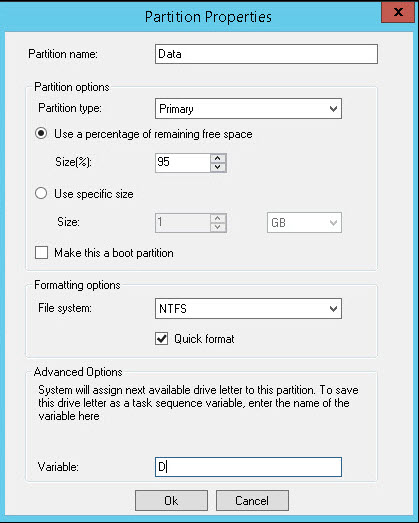
Create another partition and rename it Data for example. Chose a large part of the percentage. PS : 95% represents the totality of the part deducted after the first allocation. For example if we reserve 70% for first partition of a hard drive with 100GB, in the second partition data we will have 95% for rest 100gb. Then 95% of 30GB, about 28GB, the rest is for recovery partition.
This is how the your configuration should look like.
You have repeat the same steps for UEFI partition as well.
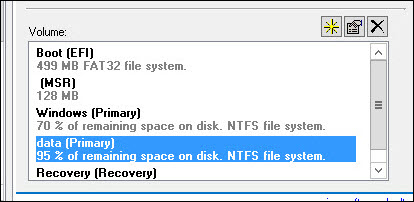
Deploy the task sequence to a machine. Notice that the MDT task sequence creates an extra partition and you can see that in the below screenshot.
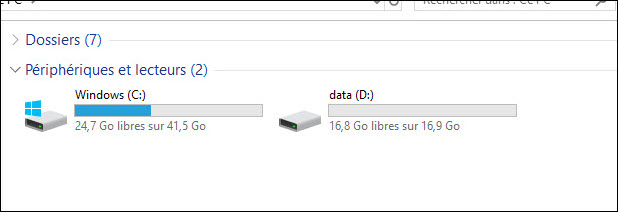
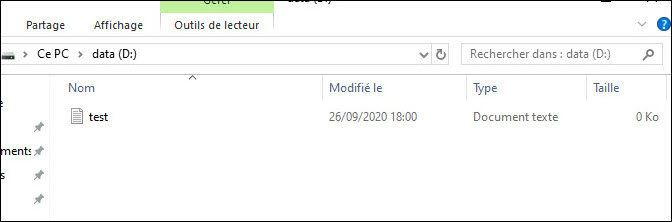
Create a new test file on the other drive (D: drive).
Step 2 – Create file and script .bat to save the data
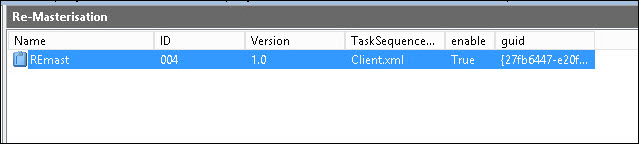
Now we will create another task sequence to keep our partition and data. Create a new Task sequence as the first task, and rename it Remast for example.
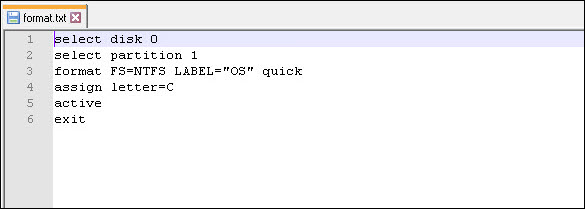
Create a new file and rename it format.txt. Place this file on the folder scriptroot on your MDT folder deployment directory. Edit format.txt and enter the below data and save the file.
Step 3 – Create a Second Task Sequence to keep data
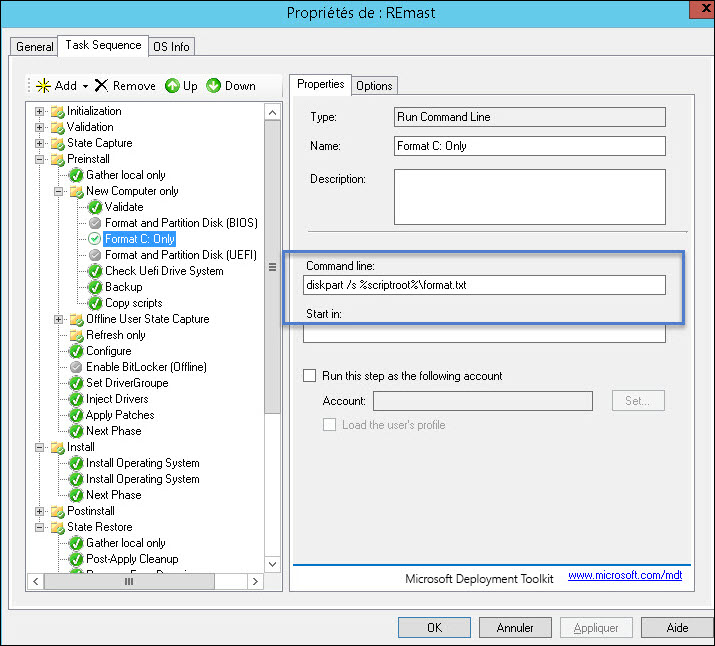
Edit the task sequence and change the settings as described in below screenshot. Disable the step: Format and partition (BIOS) and Format and partition (UEFI).

Select the step Format C: Only. Create new Run command Line with the parameters: Diskpart /s %scriptroot%\format.txt.
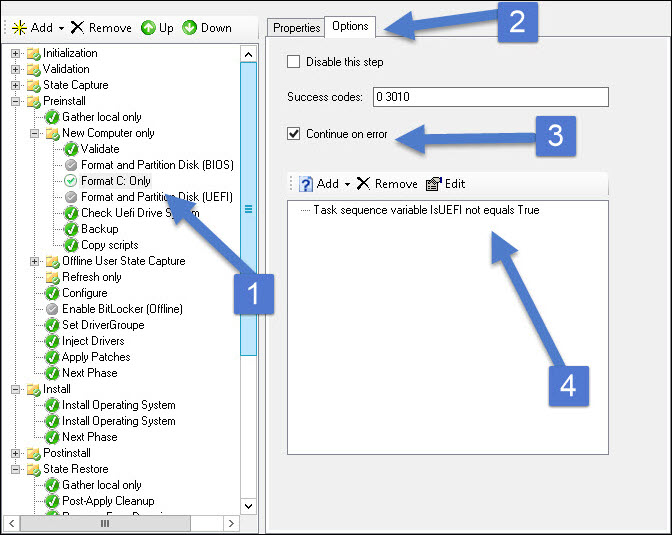
Click the Options tab and select Continue on error. Set the condition Task Sequence variable IsUEFI not equals True.
Step 4 – Apply the change and assign the script
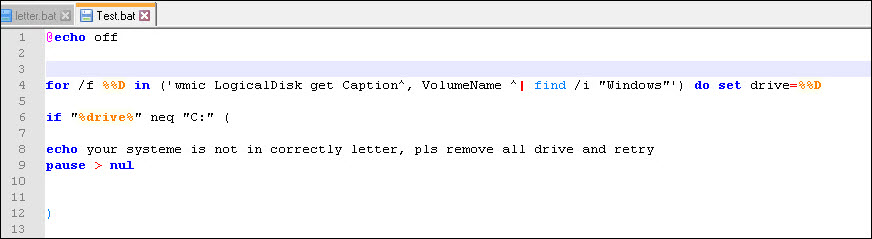
Create a new batch file and place it on scripts folder of MDT deployment share. I will be creating a new folder named ‘Master’ and place my batch file script.
This script will be stop the installation from UEFI mode if the system letter is not C: That can protect our task from an error. This is my script.
Edit the task sequence (remaster) and create a new command line, to launch our script.
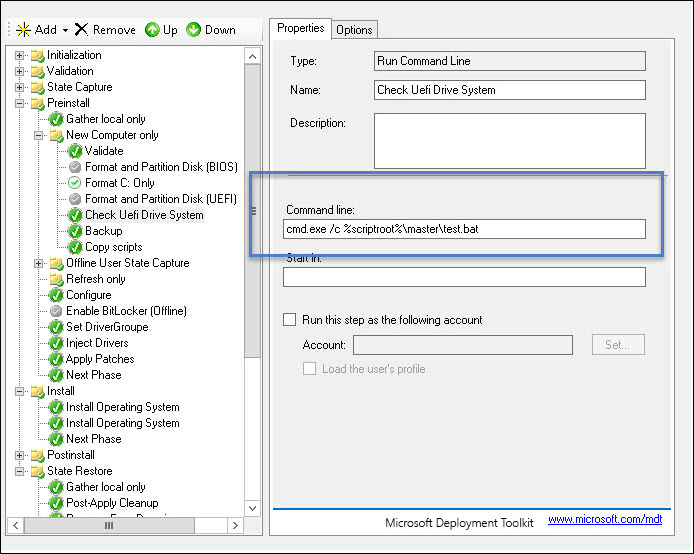
Ensure you select the same configuration as listed below.

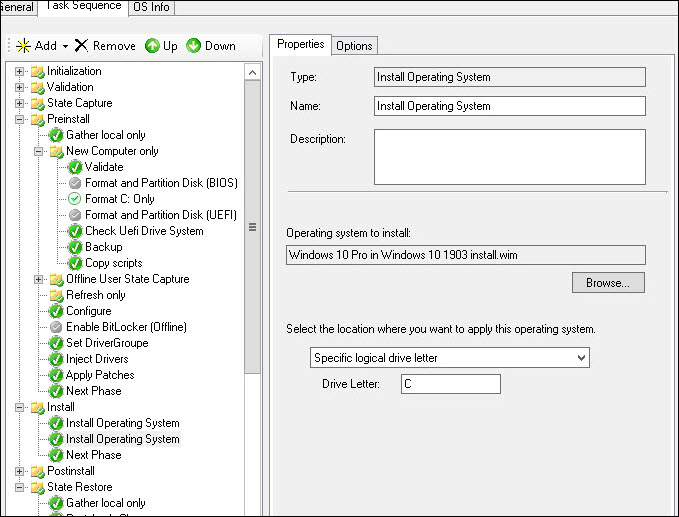
In the same task sequence, go to install operating system step, and change this parameters for Bios mode

Repeat the same for the UEFI mode, change the condition to specific logical drive and enter letter C:
Finally close the task sequence.
Step 5 – Deploy and Test
Deploy the Task Sequence. If you are re imaging the machine, select task ‘Remaster’.

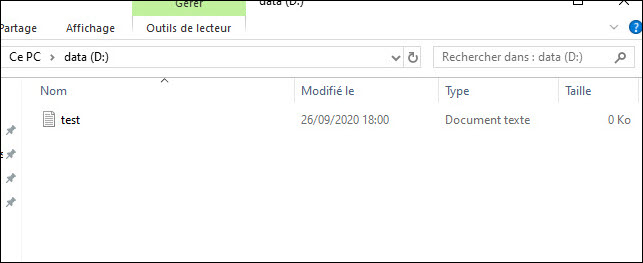
Once the imaging is complete, notice that data partition is still present and untouched. So we can conclude that the data is preserved in the data partition that we created.
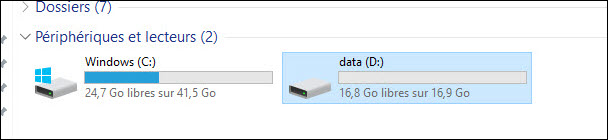
The text file is still present on the D: drive.

After TS complete, C and D are switched how can i fix it. please help
Thank you.
What exactly do you mean by switched?. You mean D holds the OS now?.
I’ve managed it thank you for your tutorials 🙂
I’m planning (as beginner) to deploy second partition for dual-booting with “custom” recovery partition for data restore and file backup utilities.
That will be helpful
Great stuff