This post is a Step by Step Guide to Install Exchange Server 2016. The installation considers a single server deployment of Exchange Server 2016 with the Mailbox role.
Before you install Microsoft Exchange Server 2016, I recommend that you install it in an isolated test environment.
That’s because this test environment will act as your proof of concept for your new Exchange 2016 design. Based on the results, you can either move forward or roll back any implementations before deploying into your production environments.
When it comes to installing Exchange Server 2016, you can install it in 2 ways. The first method is more of GUI based setup where you run setup without any command-line switches. This provides an interactive experience where you are guided by the Exchange 2016 Setup wizard.
While the second method is you run setup with command-line switches that facilitates you to install Exchange from an interactive command line or through a script.
Here are some of the topics that I strongly recommend you to go through first before setting up Exchange 2016.
Exchange Server 2016 system requirements
Exchange Server 2016 prerequisites
Deploy a new installation of Exchange 2016
Exchange Server 2016 can be installed on Windows Server 2012 and Windows Server 2012 R2. I prefer to install it on Windows Server 2012 R2 as it is more stable.
For both versions of Windows Server either the Standard or Datacenter edition can be used to run Exchange Server 2016.
Exchange Server 2016 Prerequisites
Before you install Exchange server 2016, you might have to install some prerequisites.
Microsoft .NET Framework 4.5.2 (Offline Installer)
Unified Communications Managed API 4.0 Runtime
Before you install Microsoft Exchange Server 2016, you need to prepare your Active Directory forest and its domains.
In my lab setup I am installing Exchange 2016 on a server that is running Windows Server 2012 R2 Datacenter edition. The account that is used to install exchange server is a member of Enterprise Admins group and Schema admins group.
Exchange needs to prepare Active Directory so that it can store information about your users mailboxes and the configuration of Exchange servers in the organization.
For Exchange 2016 setup, you need to install various Windows roles and features, .NET Framework 4.5.2 or later, and other required software.
Install Dot Net Framework 4.5.2
Let us start with installing Microsoft .NET framework 4.5.2 on the machine where Exchange 2016 is going to be installed. Download and install .net framework 4.5.2 and click Finish.
Open Windows PowerShell and run the following command to install the Remote Tools Administration Pack.
Install-WindowsFeature RSAT-ADDS
Prerequisites for Exchange Mailbox Server Role
In this section we will see the prerequisites that needs to be installed on a server running a standalone Exchange 2016 server with the Mailbox Server Role.
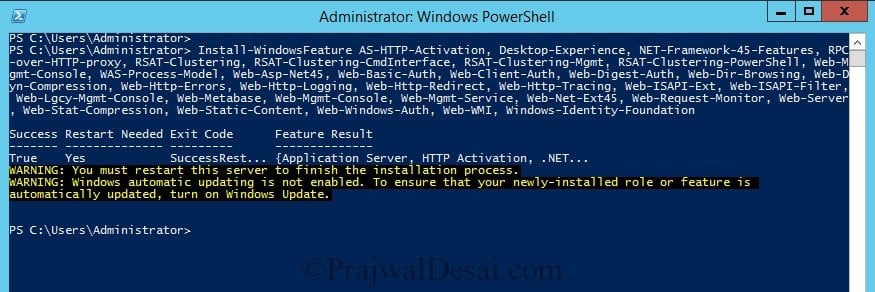
First of all launch the Windows PowerShell (run as administrator). Run the following command to install the required Windows components. You must restart after the server to complete the installation process.
Install-WindowsFeature AS-HTTP-Activation, Desktop-Experience, NET-Framework-45-Features, RPC-over-HTTP-proxy, RSAT-Clustering, RSAT-Clustering-CmdInterface, RSAT-Clustering-Mgmt, RSAT-Clustering-PowerShell, Web-Mgmt-Console, WAS-Process-Model, Web-Asp-Net45, Web-Basic-Auth, Web-Client-Auth, Web-Digest-Auth, Web-Dir-Browsing, Web-Dyn-Compression, Web-Http-Errors, Web-Http-Logging, Web-Http-Redirect, Web-Http-Tracing, Web-ISAPI-Ext, Web-ISAPI-Filter, Web-Lgcy-Mgmt-Console, Web-Metabase, Web-Mgmt-Console, Web-Mgmt-Service, Web-Net-Ext45, Web-Request-Monitor, Web-Server, Web-Stat-Compression, Web-Static-Content, Web-Windows-Auth, Web-WMI, Windows-Identity-FoundationPrerequisites for Edge Server Role
If you are planning to install Edge server role then run the following command to install the required Windows components.
Install-WindowsFeature ADLDS
Extend the Active Directory schema
Before you install Microsoft Exchange Server 2016, you need to extend the active directory schema and prepare your Active Directory forest and its domains.
So mount the Exchange Server 2016 installation Media. Launch Command Prompt (run as administrator) and navigate to path where setup files are present.
Once you successfully enter the below command, the prerequisite analysis and extending AD schema steps should shows the status as Completed.
Setup.exe /PrepareSchema /IAcceptExchangeServerLicenseTerms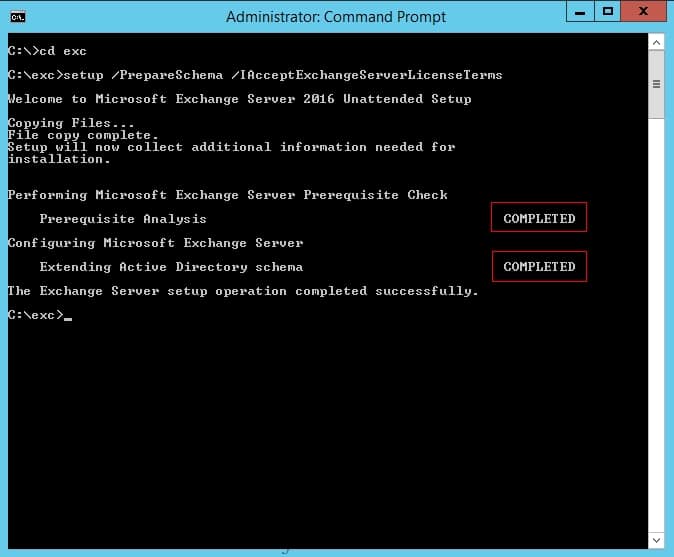
Prepare Active Directory for Exchange 2016
Next step is to prepare the Active Directory. In the same command prompt that you launched, run the below command by replacing organization name with a name.
Setup.exe /PrepareAD /OrganizationName:”” /IAcceptExchangeServerLicenseTerms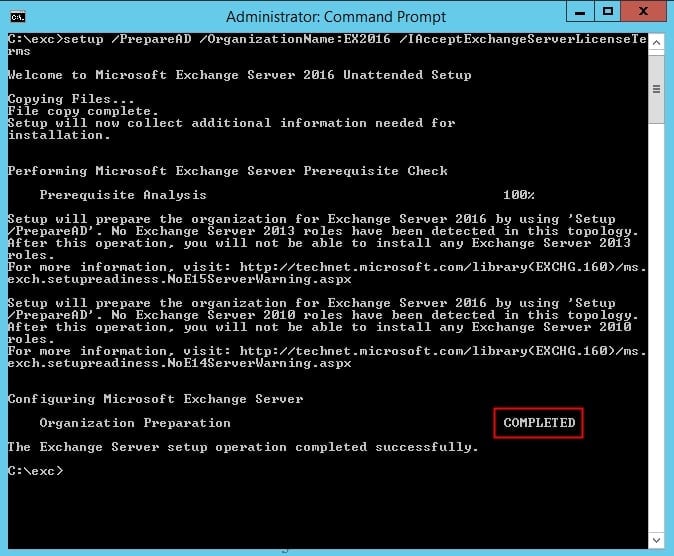
The next step is to download and install Unified Communications Managed API 4.0 Runtime.
Additionally, run the below command to avoid the Error: The Windows component RSAT-Clustering-CmdInterface isn’t installed on this computer and needs to be installed before Exchange Setup can begin.
Install-WindowsFeature RSAT-Clustering-CmdInterface You have now prepared your server to install Exchange Server 2016.
Install Exchange Server 2016
Download the Exchange 2016 installation files from the Microsoft Download Center. Log on to the computer on which you want to install Exchange 2016.
Navigate to the network location of the Exchange 2016 installation files. Start Exchange 2016 Setup by double-clicking Setup executable.
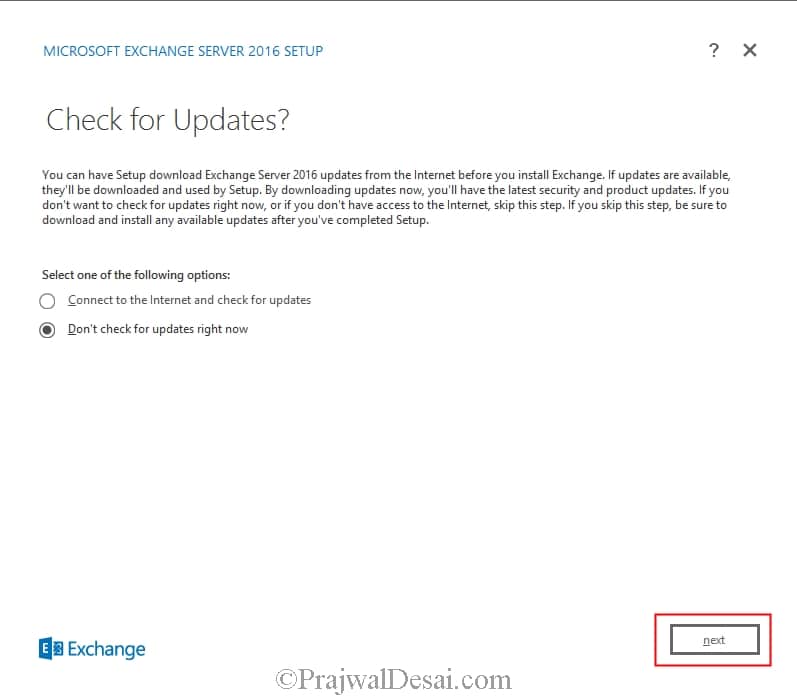
On the Check for Updates page, choose whether you want Setup to connect to the Internet and download product and security updates for Exchange 2016.
If you select Connect to the Internet and check for updates, Setup will download updates and apply them prior to continuing.
If you select Don’t check for updates right now, you can download and install updates manually later. Click Next to continue.
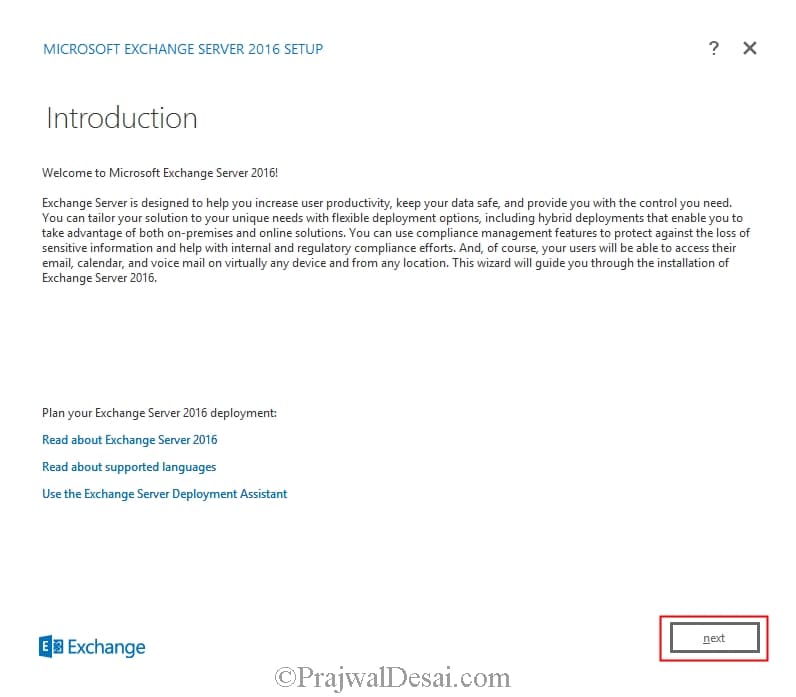
The Introduction page begins the process of installing Exchange into your organization. Click Next to continue.
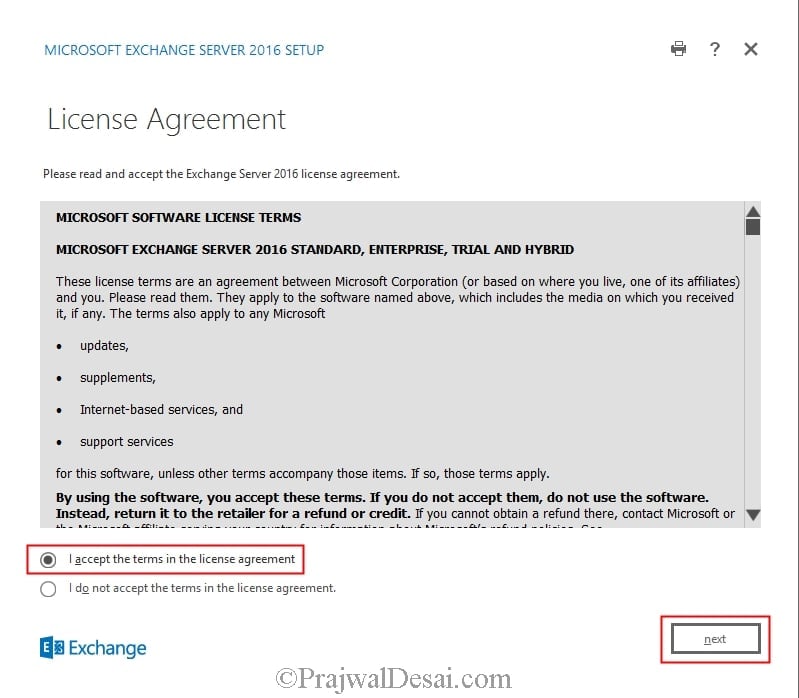
On the License Agreement page, review the software license terms. Select I accept the terms in the license agreement, and then click Next.
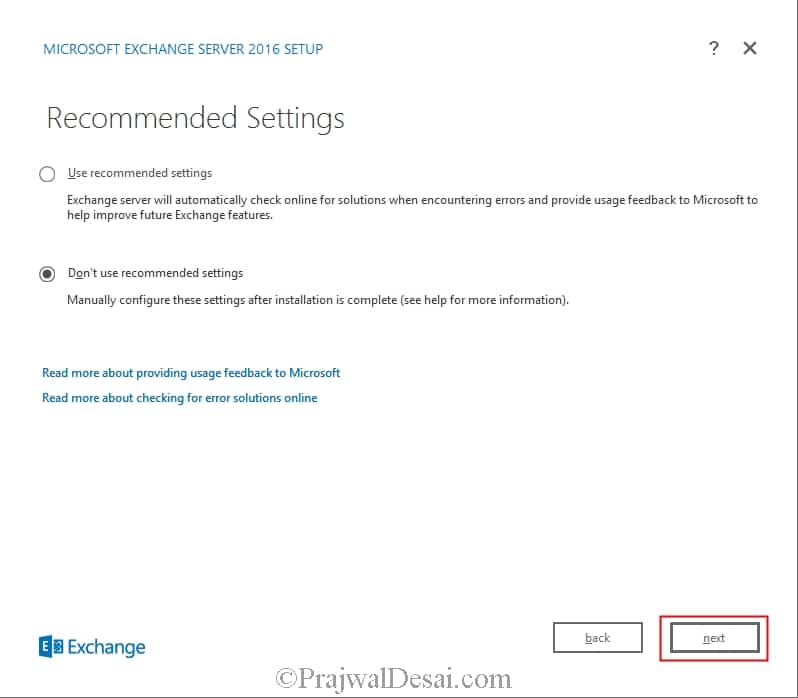
 On the Recommended settings page, select whether you want to use the recommended settings.
If you select Use recommended settings, Exchange will automatically send error reports and information about your computer hardware and how you use Exchange to Microsoft.
If you select Don’t use recommended settings, these settings remain disabled but you can enable them at any time after Setup completes. Click Next.
Exchange Server Role Selection
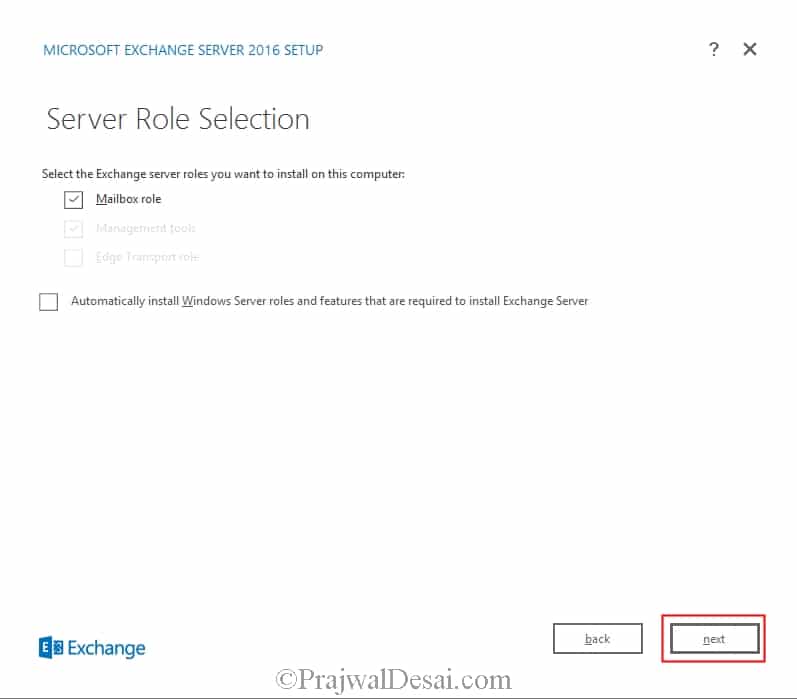
On the Server Role Selection page, choose whether you want to install the Mailbox role or just the Management Tools on this computer.
The management tools install automatically when you install the Mailbox server role. Select Automatically install Windows Server roles and features that are required to install Exchange Server to have the Setup wizard install required Windows prerequisites.
You may need to reboot the computer to complete the installation of some Windows features. If you don’t select this option, you need to install the Windows features manually. Click Next.
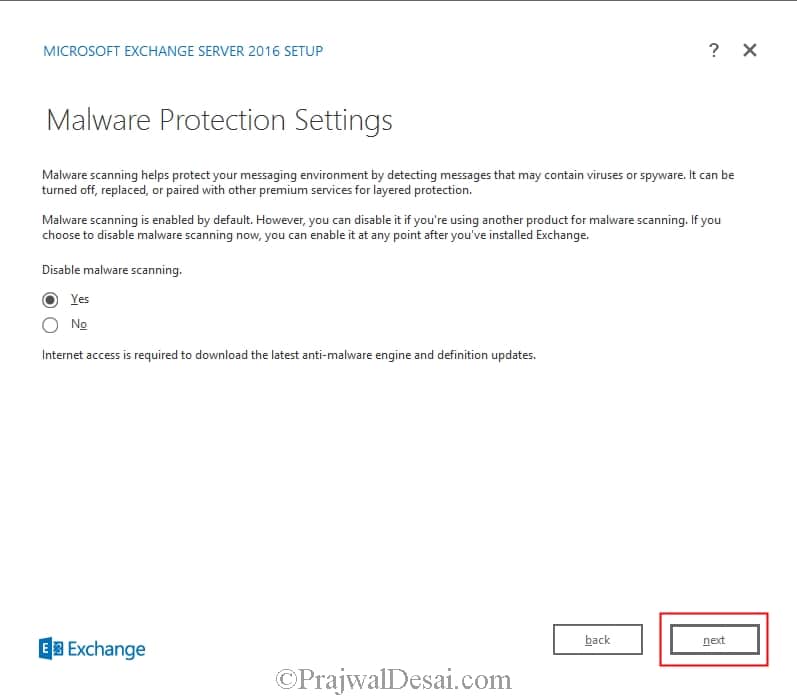
If you’re installing the Mailbox role, on the Malware Protection Settings page, choose whether you want to enable or disable malware scanning.
If you disable malware scanning, it can be enabled in the future. Click Next to continue.
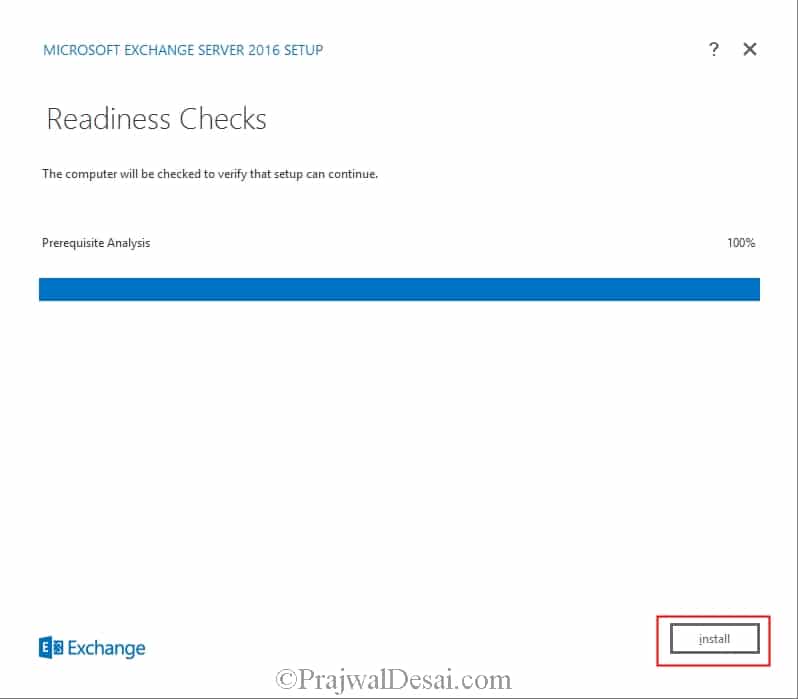
On the Readiness Checks page, ensure all readiness checks have completed successfully. To install Exchange Server 2016, click Install.
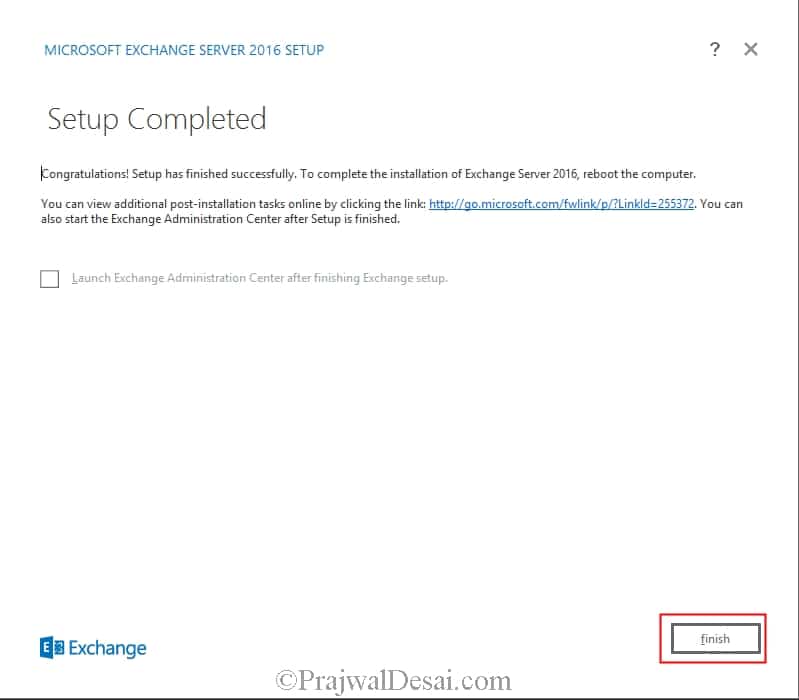
Once the setup is complete, click Finish. Restart the computer after Exchange Server 2016 has completed.
Exchange 2016 Admin Center
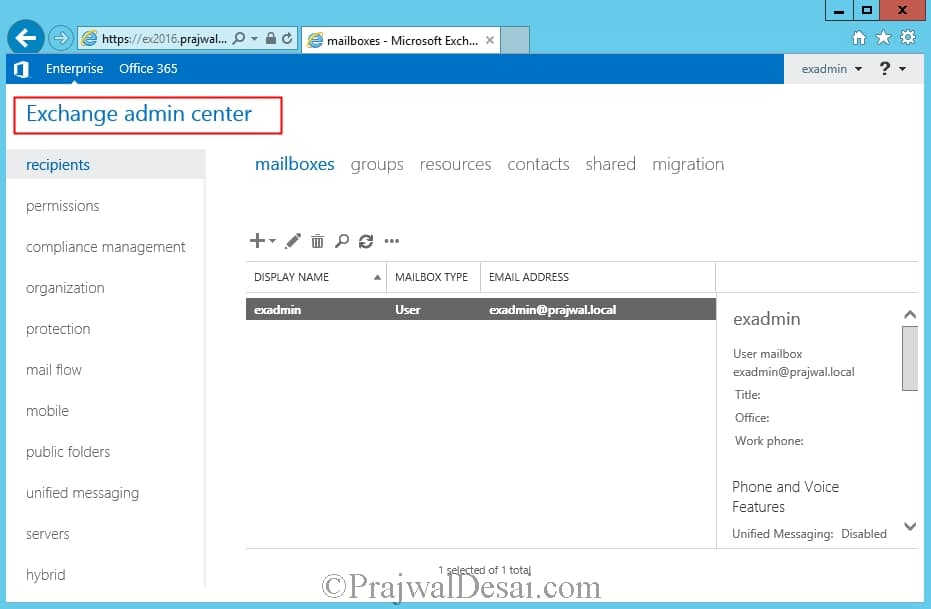
Let’s now open Exchange Admin Center. Open the web browser and type the below https://exchangeServerFQDN/ECP.
This link should load the Exchange Admin Center. Enter the username and password and click sign in.
You are now ready to explore the options available in Exchange admin center. Furthermore, you could also see Exchange 2016 post-installation tasks.





Can someone point me to a link where my students can download Exchange 2016 for their end of course project (free D/L all the way)
Thanks in advance.
Hi Prajwal,
We have installed and configured Exchange server Standard 2019 and is live. We have some issues which needs to be addressed as we are unable to contain phishing mails, Malware inspite of features enabled. The firewall installed is Sophos XG230. Sophos InterceptX Advanced antivirus has been installed in the exchange.
I would like to know if you could support us in giving a solution to address this issue.
Thanks in Advance
Anand GD
How do you have your policies configured on XG? and also in which mode are you running the XG i.e. MTA or Legacy?
PS E:\> .\Setup.exe /PrepareSchema /IAcceptExchangeServerLicenseTerms
Microsoft Exchange Server 2016 Cumulative Update 15 Unattended Setup
Copying Files…
File copy complete. Setup will now collect additional information needed for installation.
Performing Microsoft Exchange Server Prerequisite Check
Prerequisite Analysis COMPLETED
Configuring Microsoft Exchange Server
Extending Active Directory schema FAILED
The following error was generated when “$error.Clear();
install-ExchangeSchema -LdapFileName ($roleInstallPath +
“Setup\Data\”+$RoleSchemaPrefix + “schema0.ldf”)
” was run: “Microsoft.Exchange.Configuration.Tasks.TaskException:
There was an error while running ‘ldifde.exe’ to import the schema file
‘C:\Windows\Temp\ExchangeSetup\Setup\Data\PostExchange2003_schema0.ldf’. The error code is: 31. More details can be
found in the error file: ‘C:\Users\Administrator.SOMRT\AppData\Local\Temp\ldif.err’
at
Microsoft.Exchange.Configuration.Tasks.Task.ThrowError(Exception exception, ErrorCategory errorCategory, Object target,
String helpUrl)
at Microsoft.Exchange.Management.Deployment.InstallExchangeSchema.ImportSchemaFile(String
schemaMasterServer, String schemaFilePath, String macroName, String macroValue, WriteVerboseDelegate writeVerbose)
at
Microsoft.Exchange.Management.Deployment.InstallExchangeSchema.InternalProcessRecord()
at
Microsoft.Exchange.Configuration.Tasks.Task.b__91_1()
at
Microsoft.Exchange.Configuration.Tasks.Task.InvokeRetryableFunc(String funcName, Action func, Boolean
terminatePipelineIfFailed)”.
The Exchange Server setup operation didn’t complete. More details can be found in ExchangeSetup.log located in the
:\ExchangeSetupLogs folder.
PS E:\>
Could you please help
Check your DC, it should be online when installing Exchange on a standalone server or you can directly try installing Exchange on your DC
Thanks. please share link to download exchange server 2016. Also let me know backup and restore of exchange server, due to any disaster.
hi Could you please tell me the protocol used in exchange 2016.
is it mapi, http ? please reply.
Is it possible to have an exchange server farm where you have multiple exchange servers under one url namespace? I hope this isn’t a dumb question but I’m still learning and I’m just curious, that’s all. Thanks again for all you do!
super
Simple and Clearly presented, Thank you so much,
Thank you so much just because of you i was finally able to set up my lab without a single error finally….Thank you Prajwal from bottom of my heart…..
Glad to hear that.
What the .. is that i am trying to install the setup by same way its showing error, even you have missed one step where it ask for location.
Owesome guide, thanks!
PLease share ISO images too, so guys can learn, it is good to give info but how to work on it if resources are not available
This topic is helpful
Blessings for sharing this, was necessary to my success today
thank bro ! it helping for Other
I got to tell you, I love your write ups.. everytime I do a new install of Exchange (2013/2016) I consistently find your step by step guides to walk me through all of the installs. Thank you for sharing your knowledge and expertise, Prajwal.
I am trying to install Exchange 2016 CU4 in Server 2019. It is giving OS compatbililty error. How can use the ADSI edit to solve this.
Hey Prajwal, Thanks for sharing this information. However how to integrate SFB 2015 with Exchange 2016…
thank bro ! it helping for my setup lab 😀
Hi, i have installed Exchange 2016 fresh installation. everything is working fine except Outlook 2016 is not able to connect to the server.
Outlook 2013 is connecting to the server successfully. any idea what could be the issue.
I also Have Some errors while I’m in=stalling Exchange Server 2016
Hi, I’ve set up exchange server 2016 and my internal mail flow is fine, but the External mail flow(send & receive) won’t work
can you provide me with a procedure of what record need to created on domain providers website and the DNS setup for external mail flow to work
Thanks in advance.
Hi, I’ve setup exchange server 2016 and my internal mail flow is fine, but the External mail flow(send & receive) won’t work
can you provide me with a procedure of what record need to created on domain providers website and the DNS setup for external mail flow to work
Thanks in advance.
Reset iis and try again
I think you should entry two records in your isp end . One is webmail. Domain Name and another is auto discover.domainName.
I think in your firewall add the port numbers in both Incoming and out going. then just restart all exchange services and try I am sure i will work. At the same time please check your records which are mentioned in DNS entry as well as in your server records shoud match each other. then I am sure all out going mail will work and it will fetch all the mail from both in and out.
This is great guide to Install install Microsoft Exchange 2016.
Thank you
Thanks Praj, your Step by step guide is awesome.
have you got any plans to do the same for SharePoint?
No Chad, i had deployed Sharepoint only once and never worked on it.
After fighting through Microsoft’s confusing and incomplete documentation and having the install fail 2 times, damaging AD both times(Yes, I did have backups), I began searching for a third party step by step and found this page. I had decided that installing exchange was just stupidly complicated. But, after following the steps on this page. I was able to install the first time using the steps on this page. Prajwal Desai, you sir should be in charge of the Technical writing department and at Microsoft! Thank you sir!
Thank you so much.
I installed server 2016 core, and tried to install exchange 2016 cu5. Install failed. Server 2016 needs “desktop experience” version installed. Had to start over with fresh server 2016 install, choosing “desktop experience”.
(installing on server 2016 cu7)
I’ve found that the “install-windowsfeature as-http-activation…….” in powershell doesn’t work. Had to use this command instead:
Install-WindowsFeature NET-Framework-45-Features, RPC-over-HTTP-proxy, RSAT-Clustering, RSAT-Clustering-CmdInterface, RSAT-Clustering-Mgmt, RSAT-Clustering-PowerShell, Web-Mgmt-Console, WAS-Process-Model, Web-Asp-Net45, Web-Basic-Auth, Web-Client-Auth, Web-Digest-Auth, Web-Dir-Browsing, Web-Dyn-Compression, Web-Http-Errors, Web-Http-Logging, Web-Http-Redirect, Web-Http-Tracing, Web-ISAPI-Ext, Web-ISAPI-Filter, Web-Lgcy-Mgmt-Console, Web-Metabase, Web-Mgmt-Console, Web-Mgmt-Service, Web-Net-Ext45, Web-Request-Monitor, Web-Server, Web-Stat-Compression, Web-Static-Content, Web-Windows-Auth, Web-WMI, Windows-Identity-Foundation, RSAT-ADDS
I was stuck on this part and I came across your comment and it worked perfectly Thanks!!
This guide was pretty much 100% accurate. Thanks oodles for the writeup, Prajwal!
–Mark
I am getting the following error at “step 6 of 13 Mailbox Role – Transport Services” and i am installing on Windows Server 2016, I have disabled the IPV6 and also Started all the Exchange server services with automatic option. Please advise.
Error:
The following error was generated when “$error.Clear();
if ($exsSid -eq $null -or $exsSid -eq “”)
{
$exsSid = get-ExchangeServerGroupSID -DomainController $RoleDomainController
}
start-setupservice -ServiceName MSExchangeADTopology -ServiceParameters $exsSid,$RoleDomainController
” was run: “Microsoft.Exchange.Configuration.Tasks.ServiceDisabledException: Service ‘MSExchangeADTopology’ is disabled on this server. —> System.InvalidOperationException: Cannot start service MSExchangeADTopology on computer ‘.’. —> System.ComponentModel.Win32Exception: The service cannot be started, either because it is disabled or because it has no enabled devices associated with it
— End of inner exception stack trace —
at System.ServiceProcess.ServiceController.Start(String[] args)
at Microsoft.Exchange.Management.Tasks.ManageSetupService.StartServiceWorker(ServiceController serviceController, String[] serviceParameters)
— End of inner exception stack trace —
at Microsoft.Exchange.Configuration.Tasks.Task.ThrowError(Exception exception, ErrorCategory errorCategory, Object target, String helpUrl)
at Microsoft.Exchange.Management.Tasks.ManageSetupService.StartService(ServiceController serviceController, Boolean ignoreServiceStartTimeout, Boolean failIfServiceNotInstalled, Unlimited`1 maximumWaitTime, String[] serviceParameters)
at Microsoft.Exchange.Management.Tasks.ManageSetupService.StartService(String serviceName, Boolean ignoreServiceStartTimeout, Boolean failIfServiceNotInstalled, Unlimited`1 maximumWaitTime, String[] serviceParameters)
at Microsoft.Exchange.Management.Tasks.StartSetupService.InternalProcessRecord()
at Microsoft.Exchange.Configuration.Tasks.Task.b__c()
at Microsoft.Exchange.Configuration.Tasks.Task.InvokeRetryableFunc(String funcName, Action func, Boolean terminatePipelineIfFailed)”.
Hi, Thanks for the post. I have followed the same procedure posted, everything was going smoothly. But, unfortunately someone switched off my Machine where I have installed Virtual Box and running both AD and Exchange installation. Was in the process of Roles (5/14). When i started the setup again I am getting the below error.
_____
Error:
The following error was generated when “$error.Clear();
$roleList = $RoleRoles.Replace(‘Role’,”).Split(‘,’);
if($roleList -contains ‘LanguagePacks’)
{
& $RoleBinPathServiceControl.ps1 Save
& $RoleBinPathServiceControl.ps1 DisableServices $roleList;
& $RoleBinPathServiceControl.ps1 Stop $roleList;
};
” was run: “System.Management.Automation.MethodInvocationException: Exception calling “Reverse” with “1” argument(s): “Value cannot be null.
Parameter name: array” —> System.ArgumentNullException: Value cannot be null.
Parameter name: array
at System.Array.Reverse(Array array)
at CallSite.Target(Closure , CallSite , Type , Object )
— End of inner exception stack trace —
at System.Management.Automation.ExceptionHandlingOps.ConvertToMethodInvocationException(Exception exception, Type typeToThrow, String methodName, Int32 numArgs, MemberInfo memberInfo)
at CallSite.Target(Closure , CallSite , Type , Object )
at System.Dynamic.UpdateDelegates.UpdateAndExecute2[T0,T1,TRet](CallSite site, T0 arg0, T1 arg1)
at System.Management.Automation.Interpreter.DynamicInstruction`3.Run(InterpretedFrame frame)
at System.Management.Automation.Interpreter.EnterTryCatchFinallyInstruction.Run(InterpretedFrame frame)”.
_____
Could you please help.
Thank You,
Prashanth
someone have any coments about this issues. I have the same error.
Tks
I am receiving an error HTTP 500 the website cannot display page when opening Exchange Admin Center. This is my first install could you assist?
Reset iis and try again
Thanks for the details step, It means a lot to me
Thanks Wei
Hi I am having issue HTTP 500 Internal Server Error when logging into Exchange 2013 do you encounter this before? I try many resolution posted by others and still the same issue encounter.
Go to IE internet Option Security >> trusted site >> then open
I haven’t checked the compatibility with Server 2016. Probably it should work well and the steps remains the same.
Will this work on Windows 2016 Server too?
It’s working well just it don’t need this AS-HTTP-Activation. You will get error when trying to install this one
One of the best ..Thanks for sharing this info.
Thank you Noushad.
hello can you guide me how to make edge server and after make edger server how will external user can connect to my lyn forefornt internal users?