


I’ll demonstrate how to deploy SSMS updates using SCCM (ConfigMgr) if you’re looking to update to the most recent version of SQL Server Management Studio.
When you patch SSMS installations on multiple computers, Configuration Manager is the best option. Using SCCM, you can completely automate SQL Server Management Studio updates across your organization.
We know that Configuration Manager requires SQL Server to create the database which is used to store the critical data. To connect and access the SCCM database, you will require tool called SQL Server Management studio installed on your computer. You must always use the latest version of SSMS to connect to SQL Server.

The option to permit the installation of management tools is available when installing SQL Server 2014. But for SQL Server 2016 and later, you have to install the SQL Server Management Studio on its own. Microsoft decided to separate the main SQL Server installation from the management studio installation. Most likely, the purpose of this is to remotely manage your SQL servers.
When you install SCCM in your setup, you connect to your SQL server using SQL Server Management Studio tool. You can also automate SSMS deployment using Configuration Manager and make it available in Software Center for installation. This post covers the steps to patch or deploy SSMS updates using SCCM.
Introduction to SSMS Updates
SQL Server Management Studio (SSMS) is a unified environment for managing any SQL infrastructure, from SQL Server to Azure SQL Database. SSMS provides tools to configure, monitor, and administer instances of SQL Server and databases.
To ensure the security compliance, you have to ensure the client machines use the latest version of SQL Server Management studio on their computers. Using Configuration Manager, you can download and deploy SSMS updates to multiple computers in your setup. You can always download the latest version of SSMS from Microsoft site.
There are two ways to update SQL Server Management Studio (SSMS) on your computer:
- Deploy the SSMS updates using Configuration Manager or WSUS.
- Download the latest version of SSMS and install it manually.
I’ll talk about the first technique in this article, which is using Configuration Manager to automate the deployment of SSMS updates.
Prerequisites
In order to deploy SSMS updates using SCCM, you must first install and configure the Software Update Point Role. Ensure the SUP is configured correctly to synchronize the SSMS product updates. Patching SSMS can be done through ADR (Automatic Deployment Rule) or you can manually select the latest SSMS updates and deploy them to the device collection.
To test the SSMS software updates deployment and installation, you can create a device collection containing the computers installed with SSMS.
Step 1: Enable SQL Server Management Studio Product updates
To begin with, Configuration Manager does not synchronize SQL Server Management Studio (SSMS) software updates by default. For synchronizations, you must enable the SSMS product in the software update point.
Use the following steps to enable the SQL Server Management Studio product under Software Update Point:
- Launch the Configuration Manager console.
- Go to Administration > Site Configuration > Sites.
- Right-click server installed with SUP role and select Configure Site Components > Software Update Point.

In the Software Update Point component properties window, select the Products tab.

From the list of products under the SQL Server category, select both versions of Microsoft SQL Server Management Studio (versions 17 and 18). Since either of these versions could be installed on a client machine, we chose both here. Click Apply.

Select the Classifications tab and enable the Updates classification. If the Updates classification is already selected, don’t make any changes. Click OK.

After you select the SSMS product, you must sync the software updates manually from the SCCM console. Review the WCM.log and Wsyncmgr.log on the server to ensure that the new changes are correctly applied. From the screenshot below, we see the Microsoft SQL Server Management Studio updates are now synchronized in Configuration Manager.

To confirm if the SSMS Updates are now synced in SCCM, go to Software Library > Software Updates > All Software Updates. In the top ribbon, click Synchronize Software Updates.

On the Run Synchronization box, click Yes.

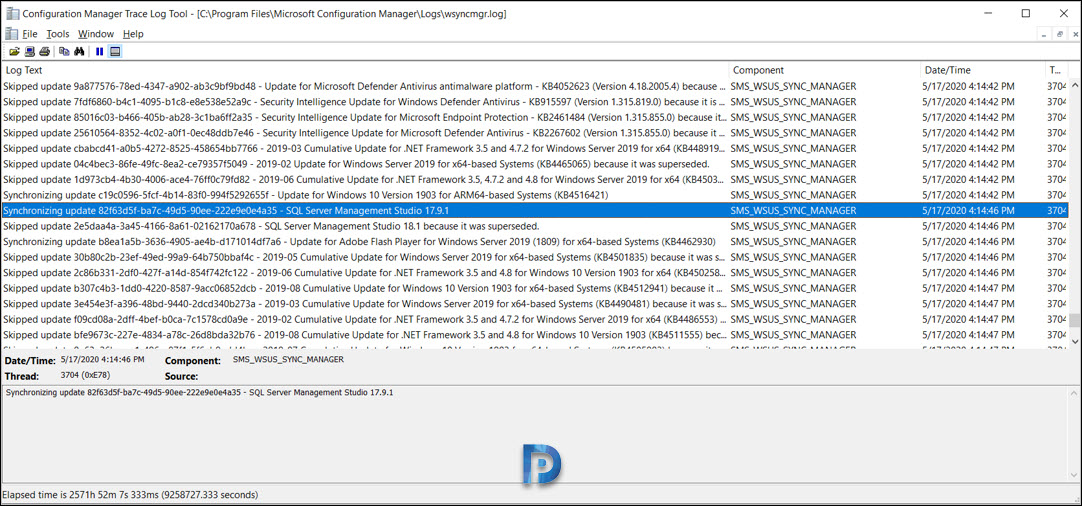
To monitor the Software Updates synchronization of SSMS product, review the wsyncmgr.log file on the server. From the screenshot below, we see the SSMS updates are now being synced.
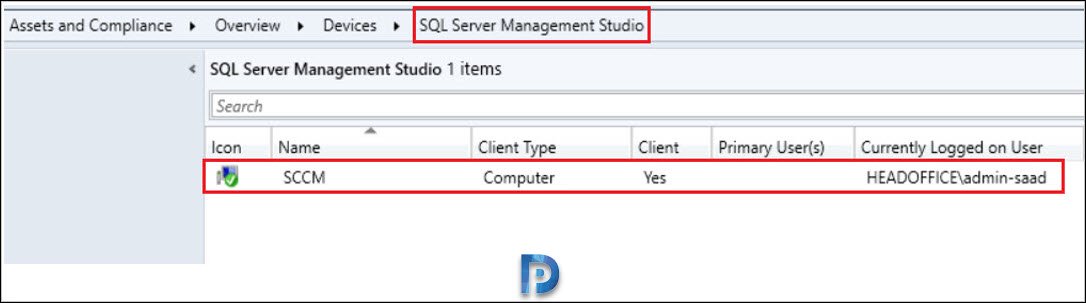
Step 2: Create Device Collection for SQL Server Management Studio
In this step, we will use a WQL query to create a device collection that contains all computers running SQL Server Management Studio software. This allows you to target the SSMS patches to a device collection instead of all computers.
Perform the following steps to create SSMS device collection in SCCM:
- Launch the Configuration Manager console.
- Navigate to Assets and Compliance workspace and select Device Collections.
- On the top ribbon click Create Device Collection.

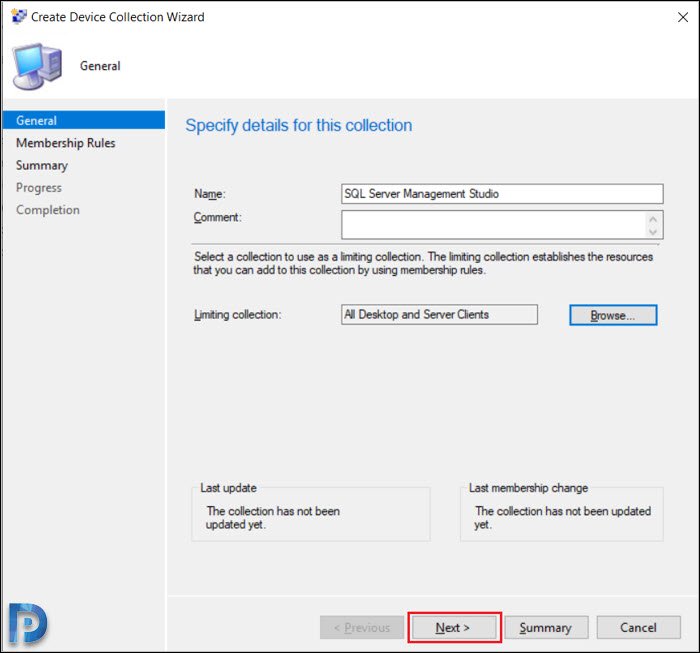
On the General page, specify the collection name as “SQL Server Management Studio“. Click Browse and select Limiting collection. Click Next.
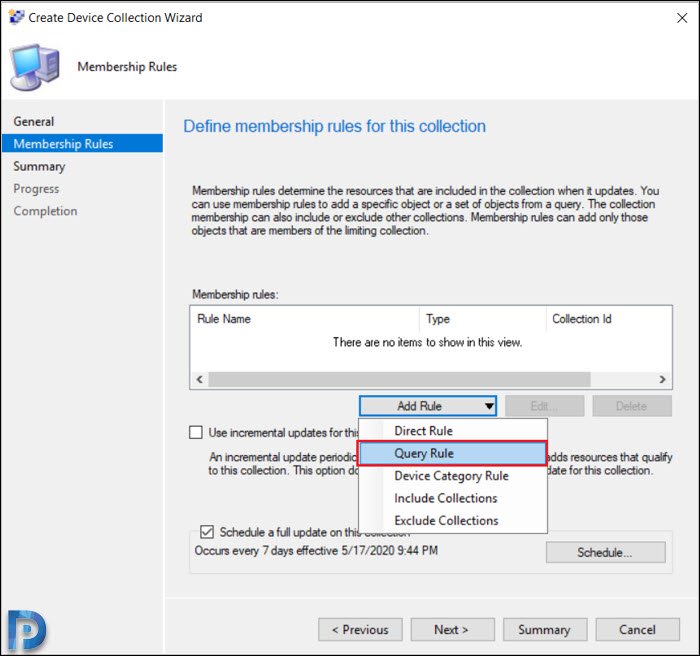
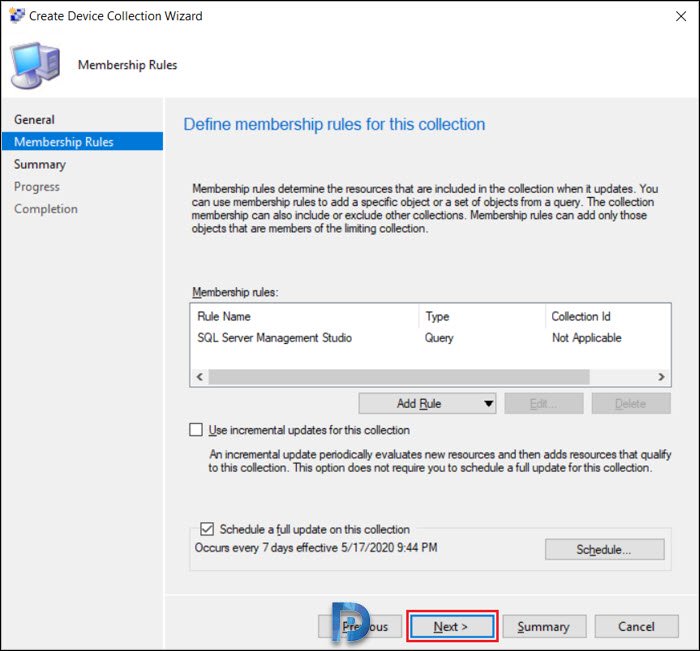
On the Membership Rules page, click Add Rule. Select Query Rule.
Enter name of the query and click Edit Query Statement…
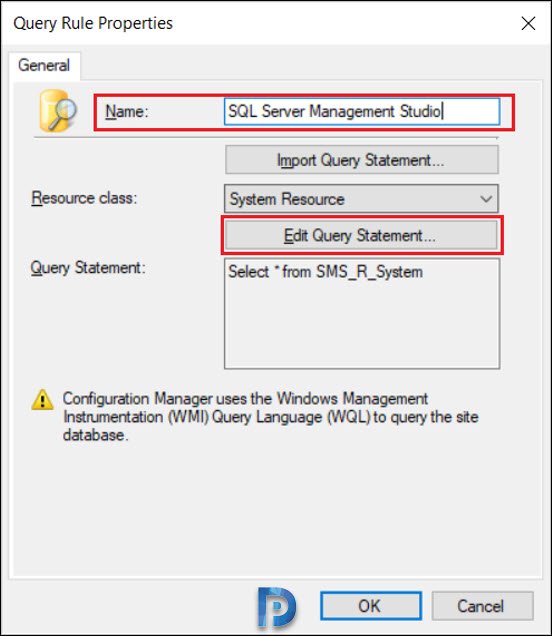
Switch to the General tab and select Show Query Language.
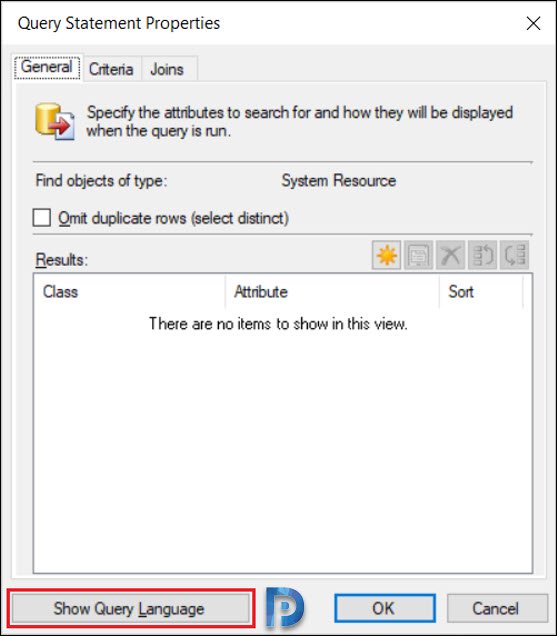
Copy and paste the below SSMS WQL query in the Query statement box. Click OK.
Select * from SMS_R_System inner join SMS_G_System_ADD_REMOVE_PROGRAMS_64 on SMS_G_System_ADD_REMOVE_PROGRAMS_64.ResourceId = SMS_R_System.ResourceId where SMS_G_System_ADD_REMOVE_PROGRAMS_64.DisplayName like "%SQL Server Management Studio%"

On the Query Rule Properties window, click OK.

Once you have added the SSMS WQL query, click Next.
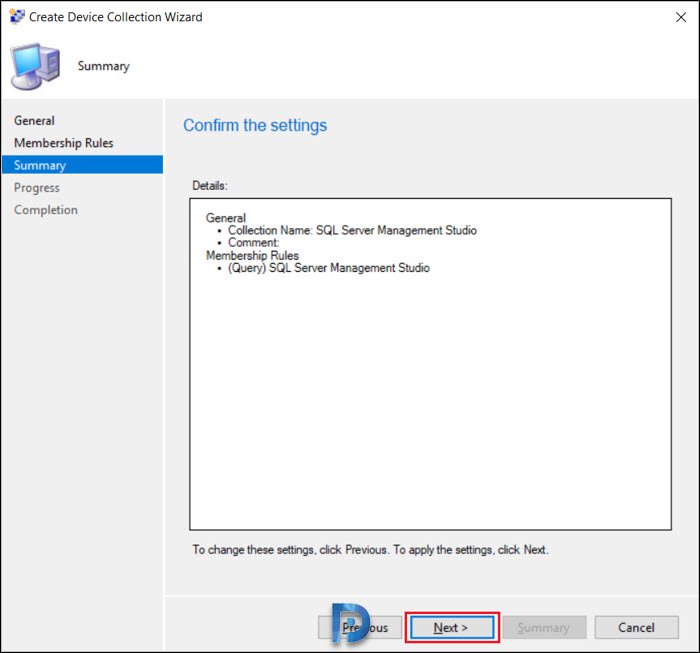
On the Summary page, click Next.
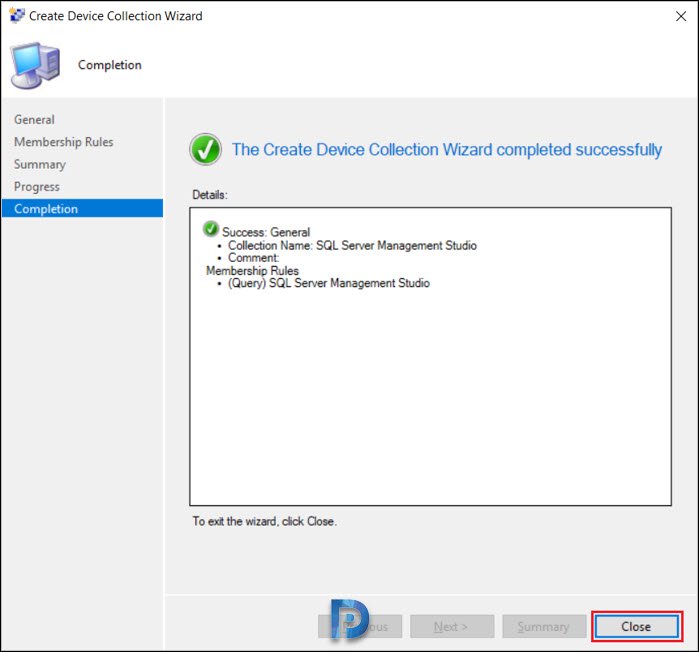
The new SSMS device collection has been created successfully. Close the device collection wizard. You’ll find this new SSMS device collection under list of Device Collections in Configuration Manager console.
After the SSMS device collection is created, the query runs in the background and collects all the computers that are installed with SSMS.
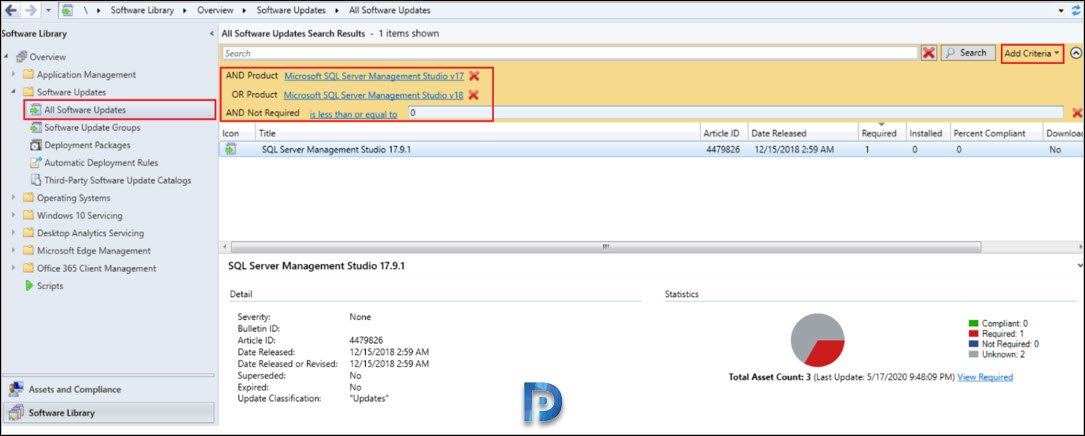
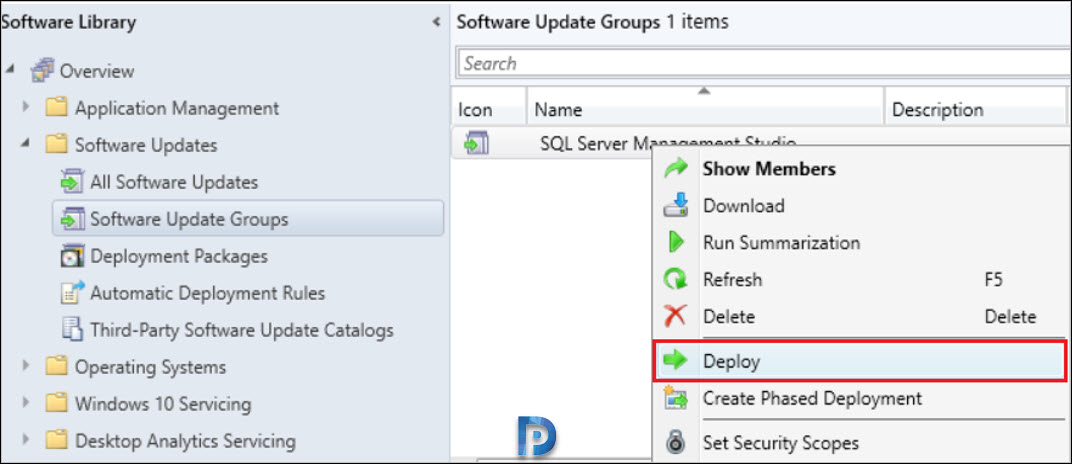
Step 3: Create SSMS Software Updates Group
In this step, we will create software update group in SCCM to include SQL Server Management Studio updates. In the Configuration Manager console, go to Software Library > Software Updates > All Software Updates. Click Add Criteria and add the following.
- Product: Microsoft SQL Server Management Studio v17
- Product: Microsoft SQL Server Management Studio v17
If you have only SSMS version 18 installed on computers, you may skip adding version 17 product to the search criteria. When you add or specify the search criteria, you can find the updates applicable for the SSMS product.
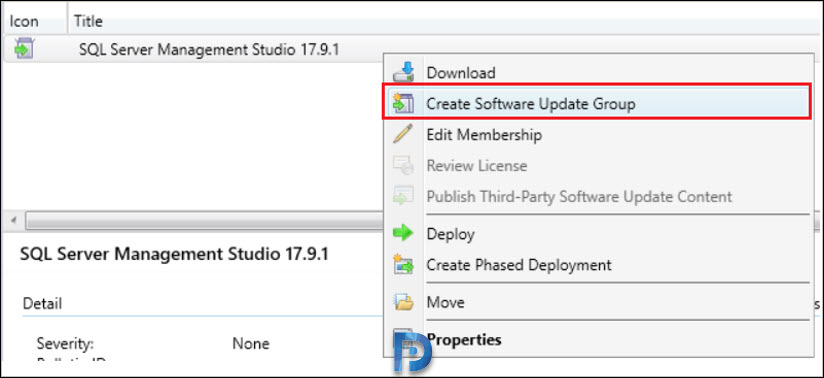
To create a SSMS software update group, select the SSMS updates that you wish to deploy and select Create Software Update Group.
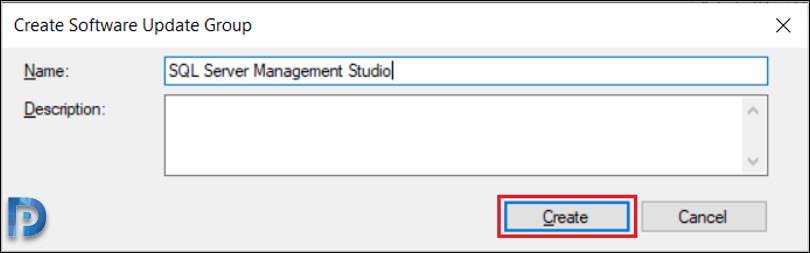
Enter Software Update group name and click Create.
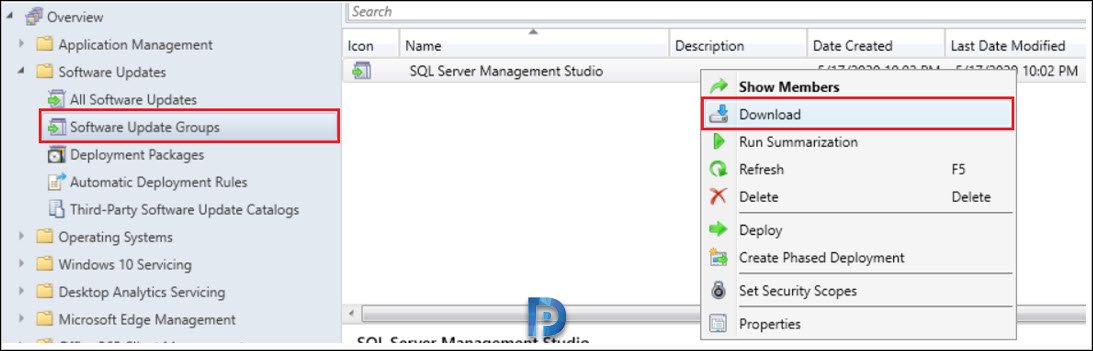
Now, switch to Software Update Groups, right-click the software update group and click Download.
Since this is a new deployment for us, let’s create a new deployment package. Select Create a new deployment package. Enter a name of the Software Update package and specify the package source path. Click Next.

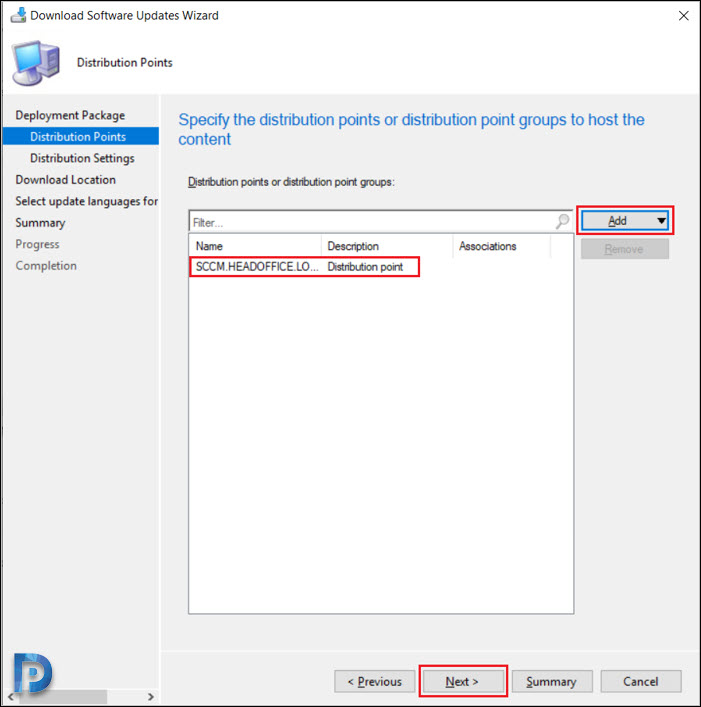
Click Add button and select the distribution points. Click Next.
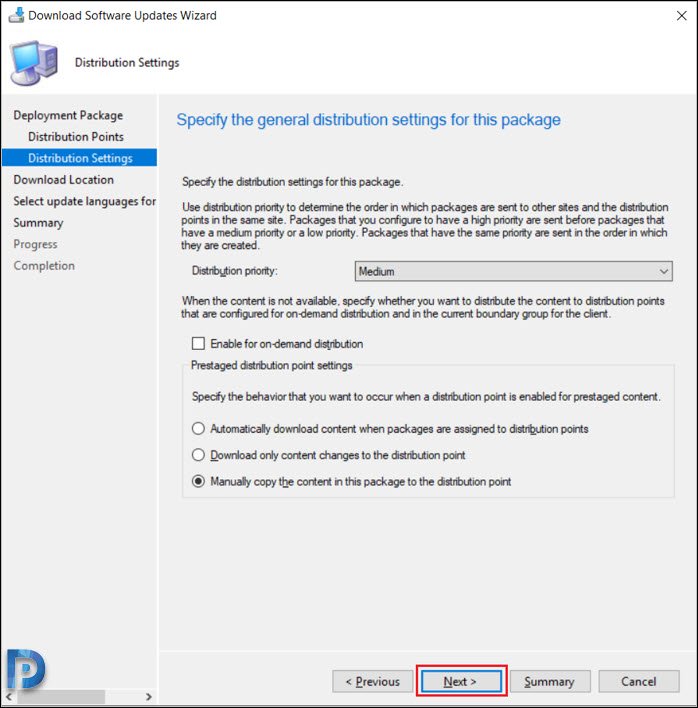
You don’t need to change anything here, so click Next.
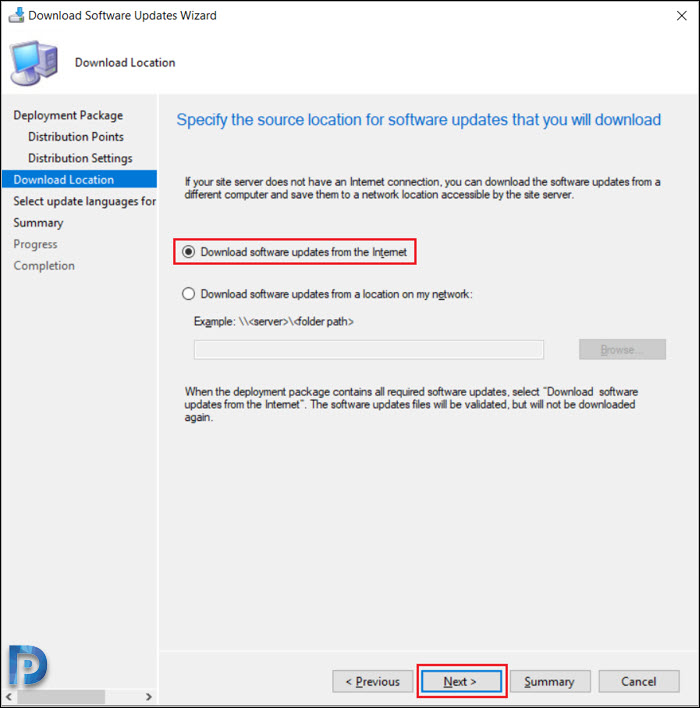
Select Download software updates from the internet and click Next.
If you want to specify the update languages for products, you may do it here. Otherwise click Next.

Review the settings on Summary page and click Next.
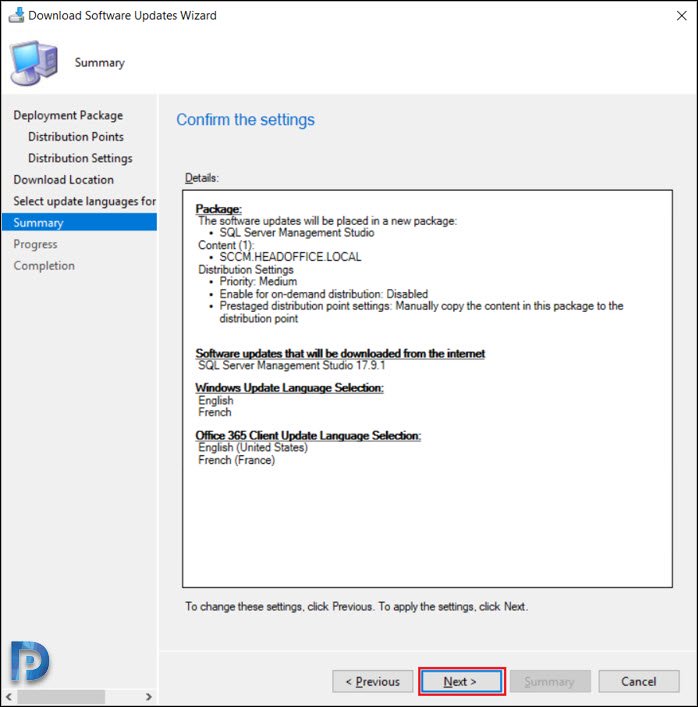
On the Completion page, click Close.

In the next step we will deploy the SQL Server Management studio updates using SCCM.
Step 4: Deploy SSMS updates using SCCM
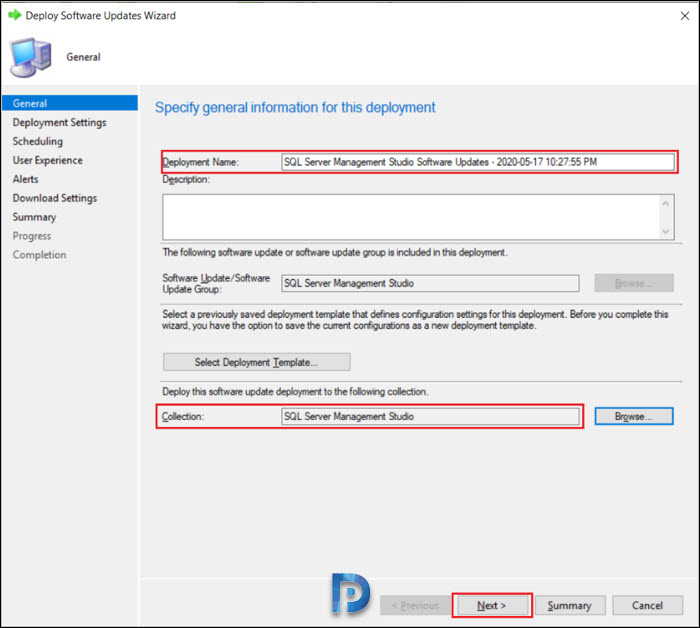
Finally, we are ready to deploy SSMS updates using SCCM. We will deploy the updates to the device collection that we created in Step 2. In the SCCM console, go to Software Update Groups. Right the SSMS software update group and click Deploy.
Specify deployment name and choose a device collection. Click Next.
On the Deployment Settings page, select the type of deployment. It is either Available or Required. For now I will select Available. That’s because I want to see the update appear in software center.
Click Next.

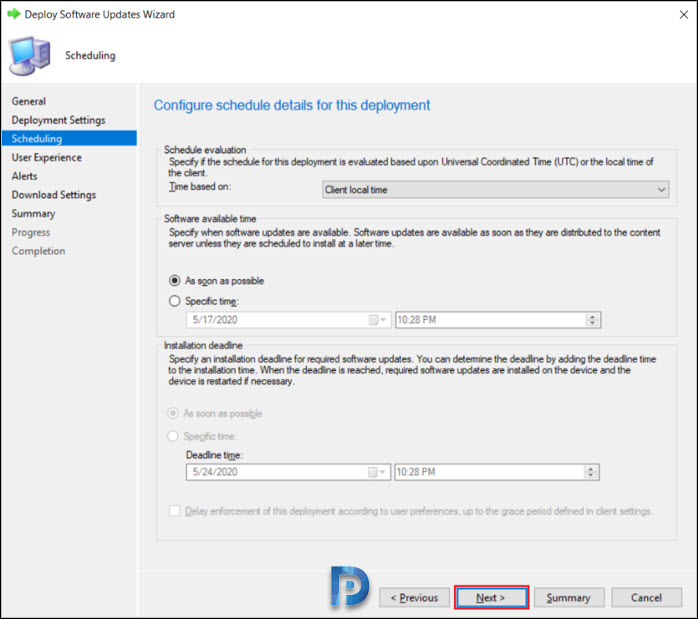
Configure the schedule details for the deployment. Click Next.
On the User Experience page, configure user notifications. Set it to display in Software Center and show all the notifications. Click Next.
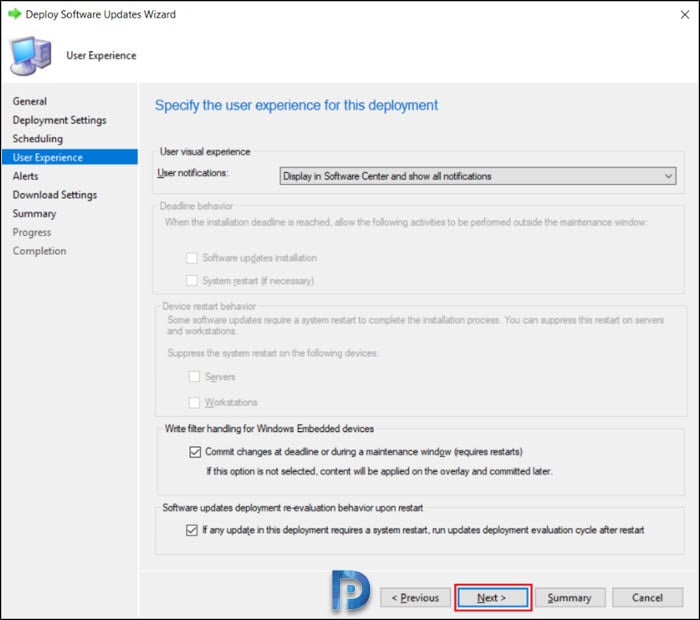
Click Next.
On the Download Settings page, click Next.

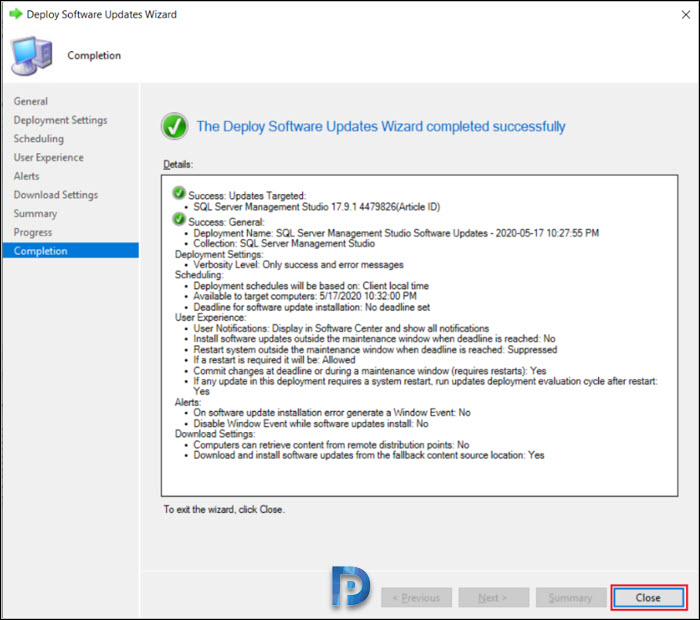
On the Completion page, click Close.
Step 5: Patching SSMS with SCCM
In the above step, we deployed the SSMS updates to a device collection running computers installed with SQL Server Manager Studio. Let’s go ahead install SSMS updates with SCCM. Login to the client computer and launch the Software Center. Select the Updates tab, and you will see the SQL Server Management Studio software updates ready to install. Click Install.
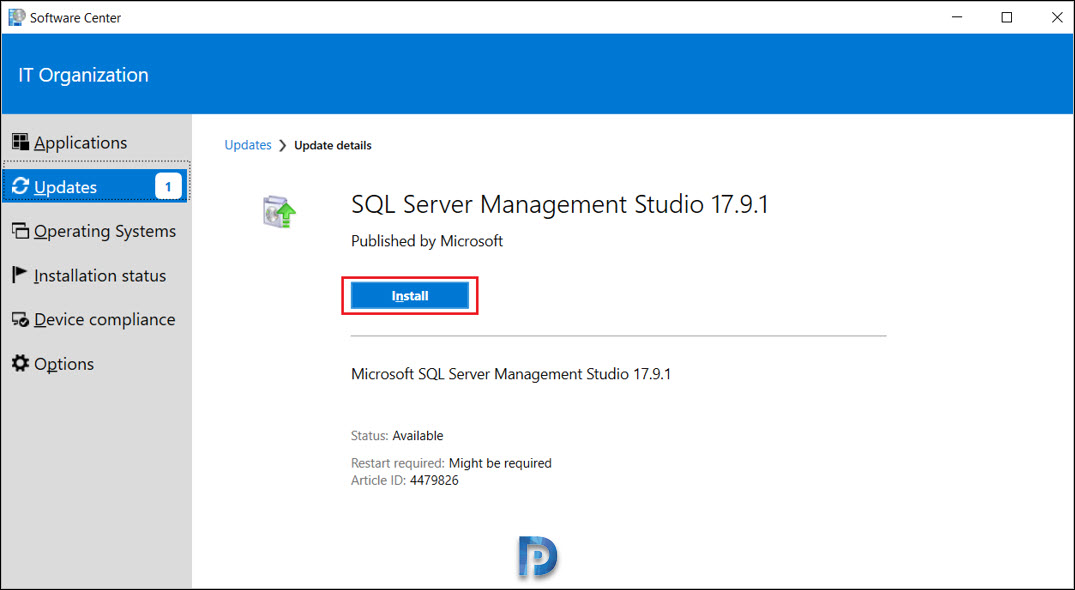
The SSMS updates are downloaded from the distribution point server and installed on the client computer.

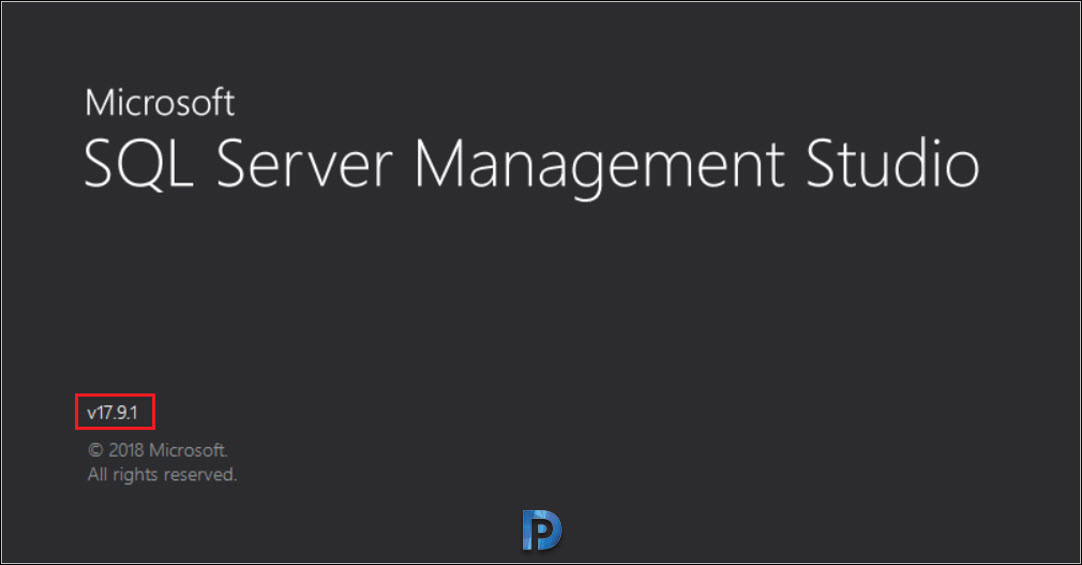
In the background, the SSMS updates are installed. Launch the SQL Server Management Studio, and we see that it is updated to the latest version.

when creating the new deployment package, what is the object in the package source <>? Does this object have to be pre-created and how?