In this post we will see how to install and configure Windows server for Lync Server 2013. I will cover the steps to install Active Directory Domain Services, Certificate Authority. Before you begin, please take a look at Lync Server 2013 features.
Before we configure Windows Server for Lync Server 2013, we must prepare our setup. Since I am setting up this server in lab, I am going to cover the steps from scratch. If you already know how to perform the below steps, you may skip to later part of this post.
Install Windows Server for Lync Server 2013
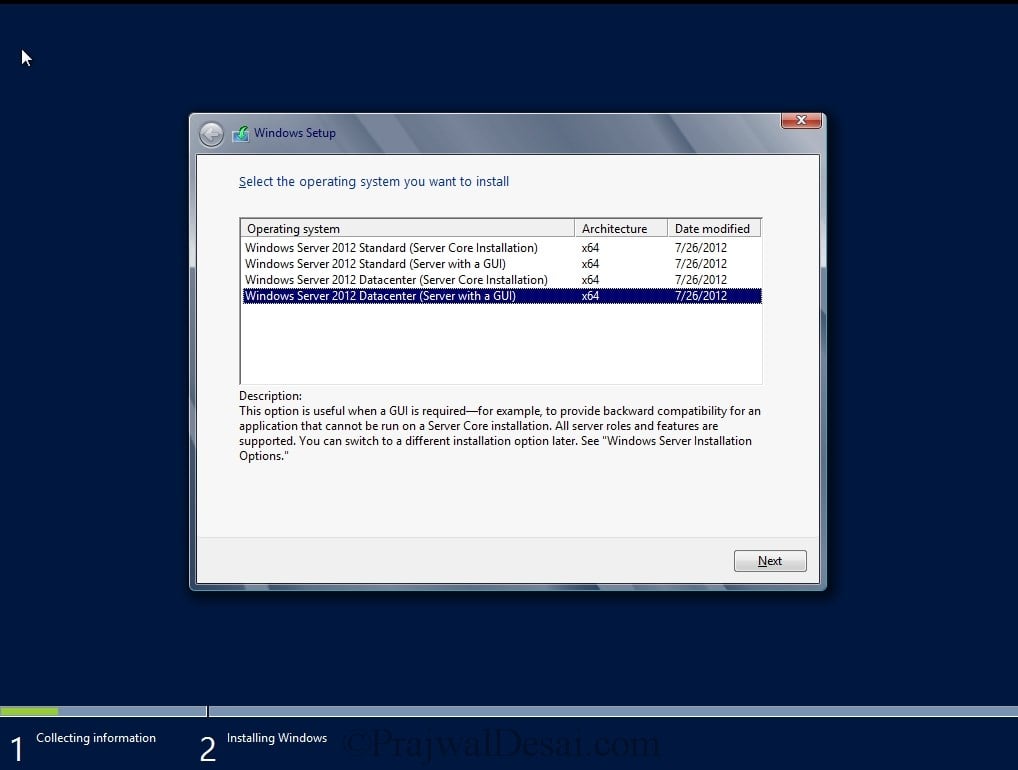
First of all let’s install Windows Server for Lync Server 2013. On the Windows Setup, select Windows Server 2012 Datacenter (Server With a GUI). Click Next.
Choose Custom : Install windows only (advanced).
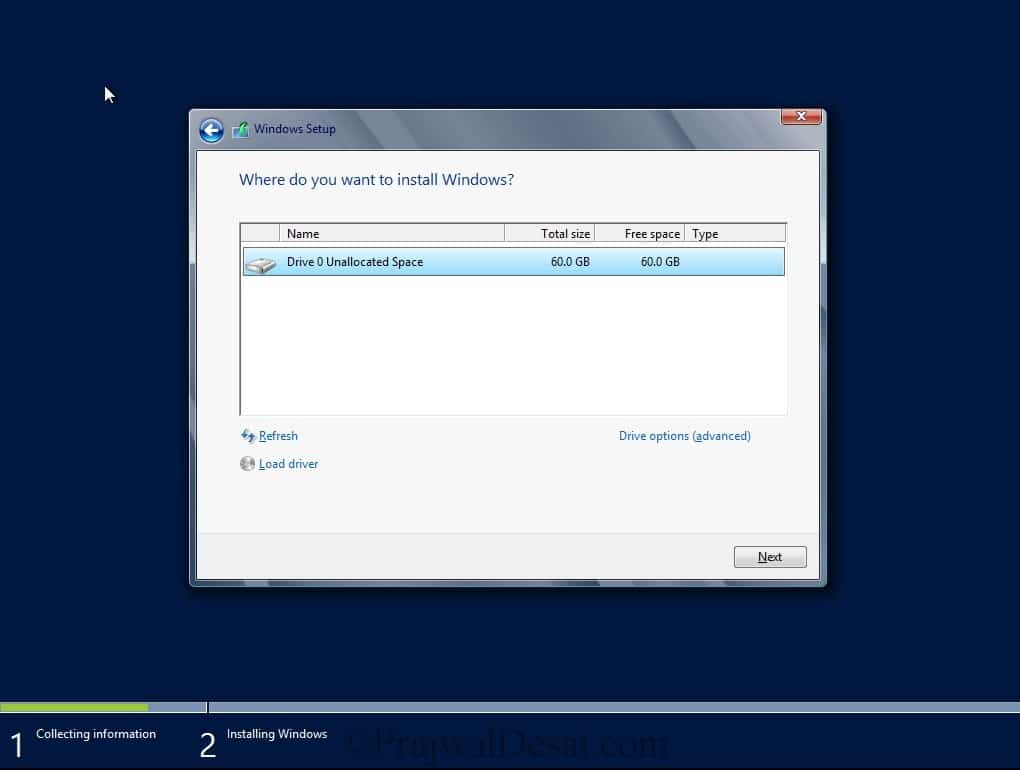
Select the partition and click Next.
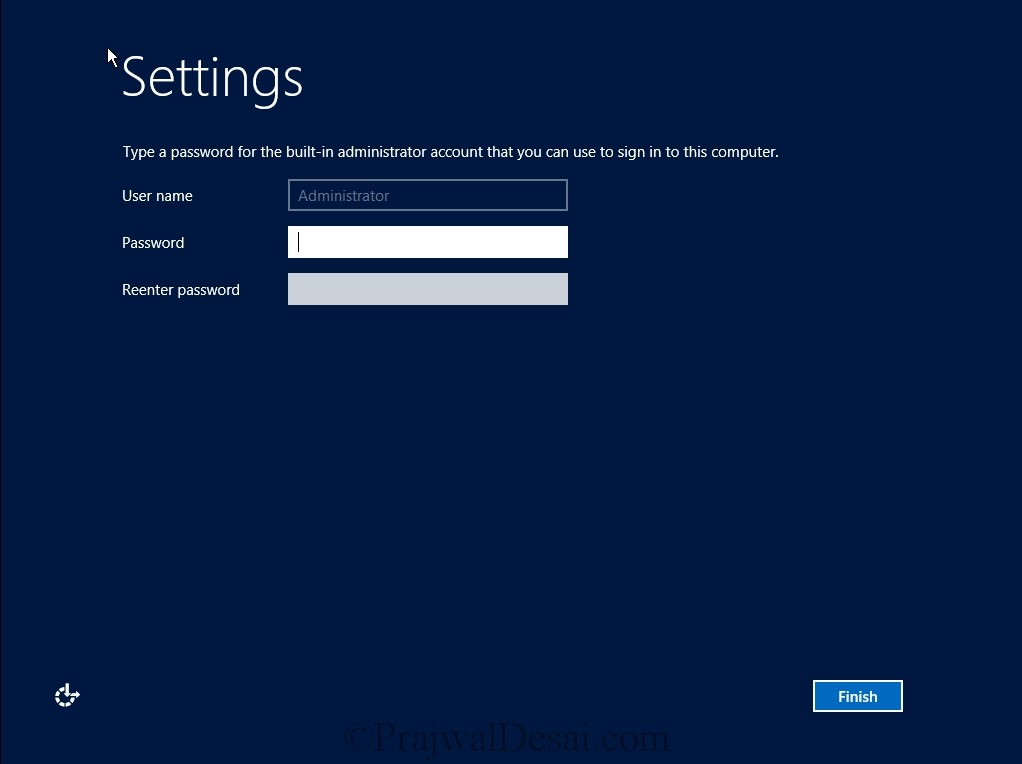
Set an complex administrator password. Sign in with Administrator account.
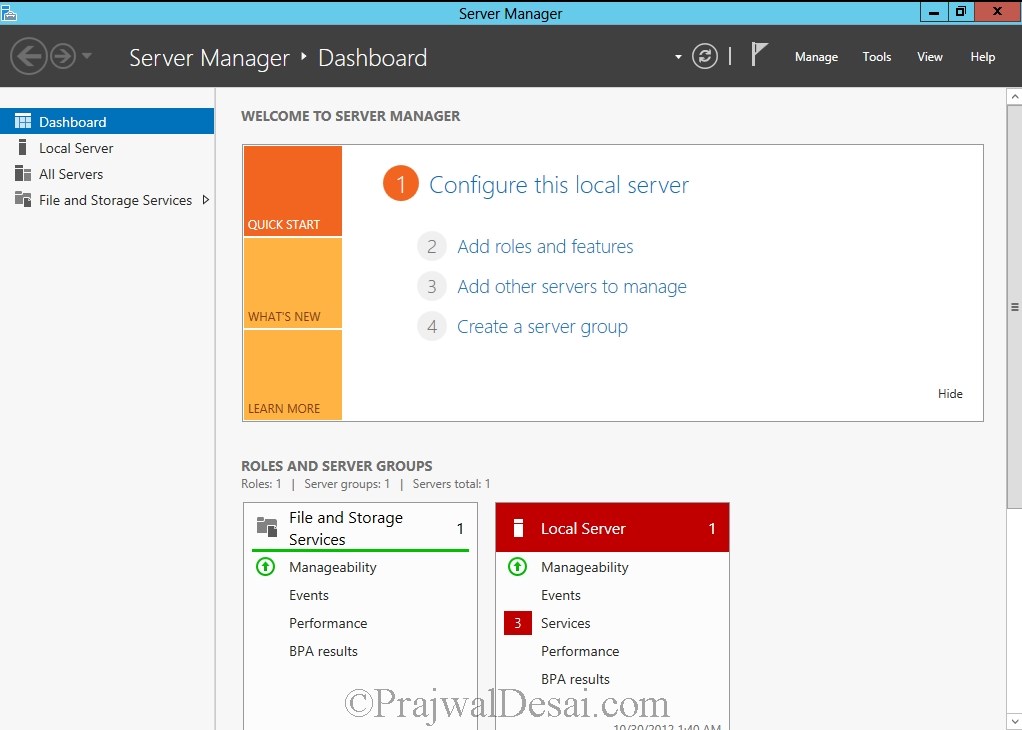
Let’s launch Server Manager and install the Active Directory Domain Services role on the computer. This machine will be our domain controller. This will also run DNS and will be our internal certificate authority.
Installing Active Directory Domain Services
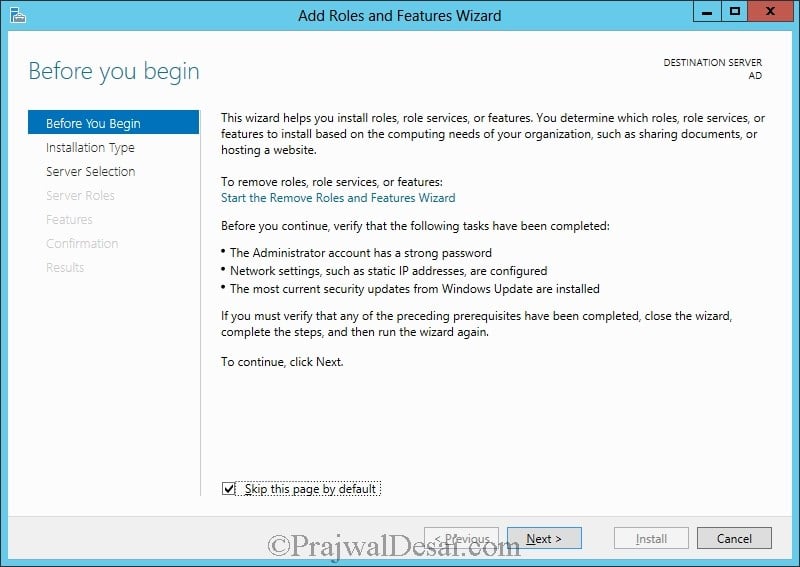
Launch Server Manager, click Add Roles and Features.
Click Next.
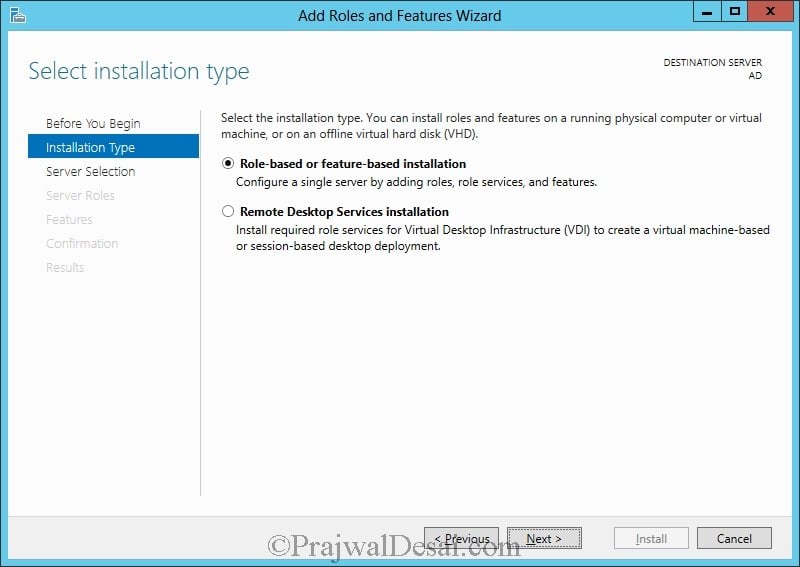
Select Role-based or feature-based installation. Click Next.
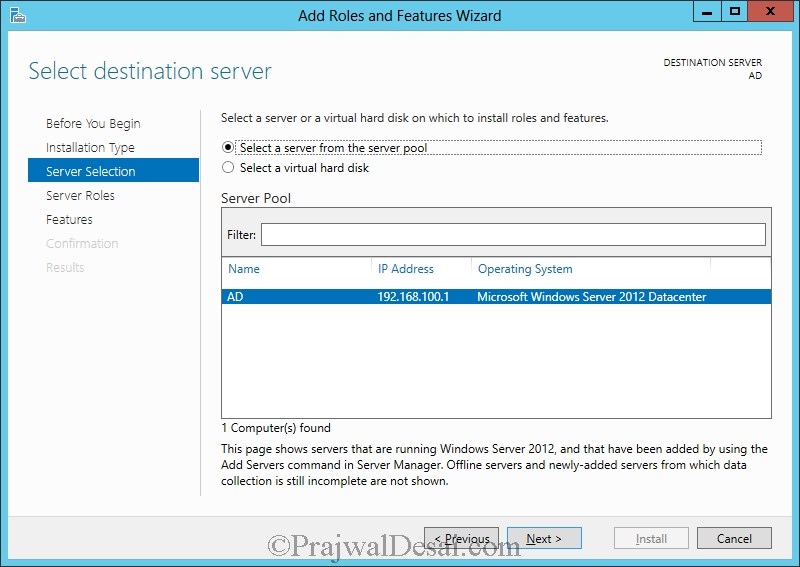
Choose Select a server from the server pool. Click Next.
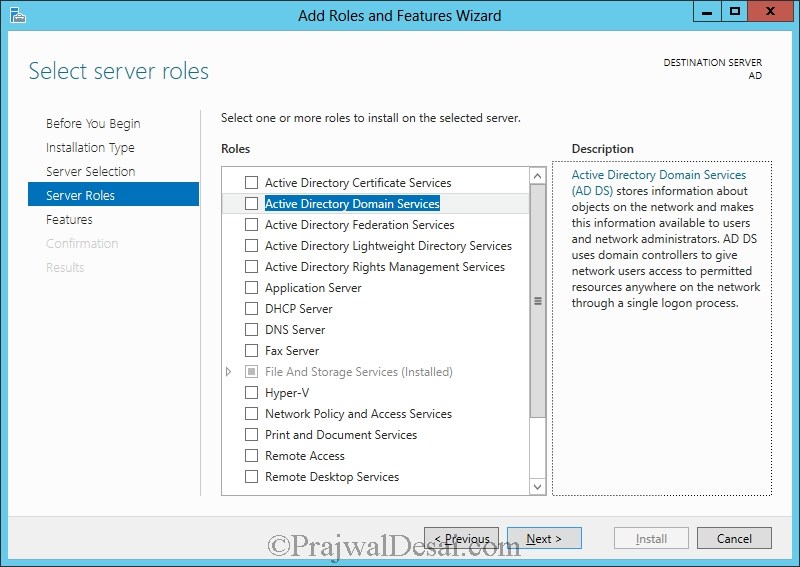
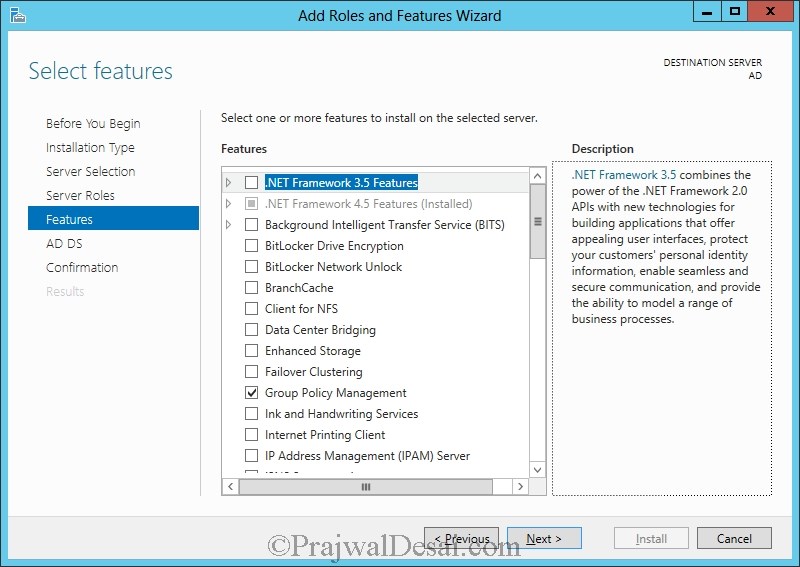
Select Active Directory Domain Services and Click Next.
Don’t select anything here, click Next.
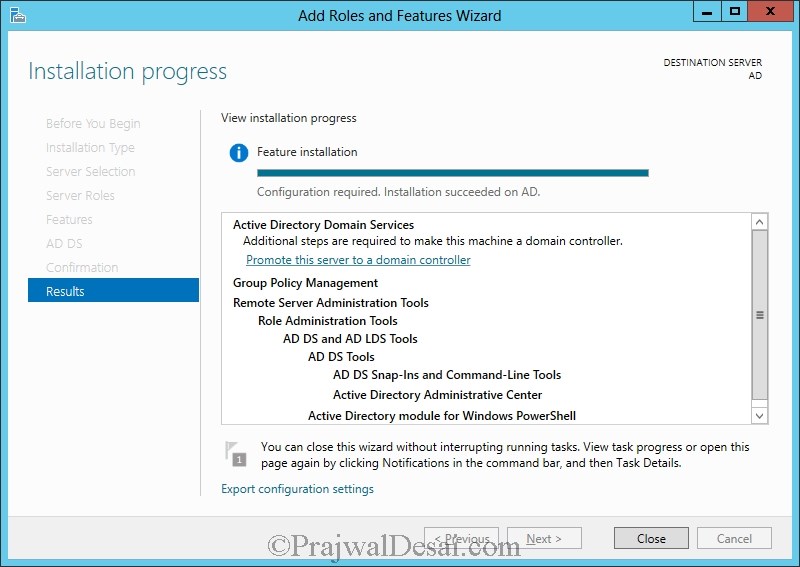
Click Install.
Click Promote this server to a domain controller.
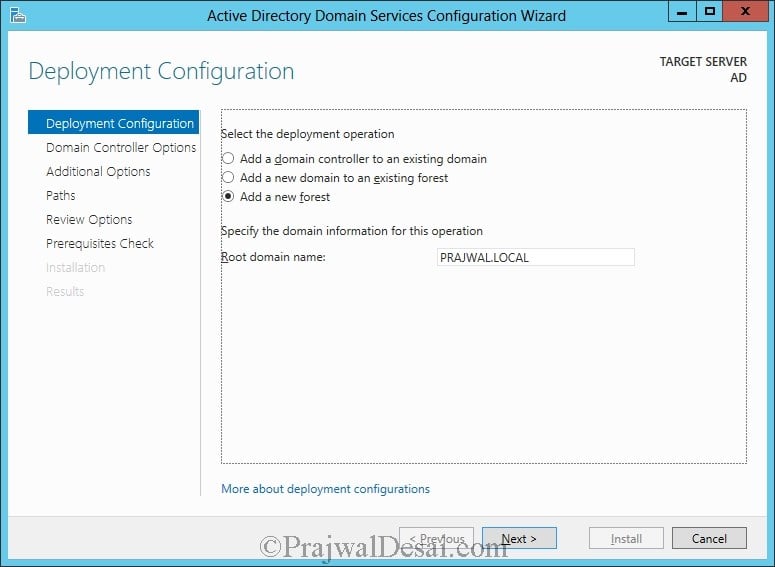
Choose Add a new forest. You must specify a domain name. Click Next.
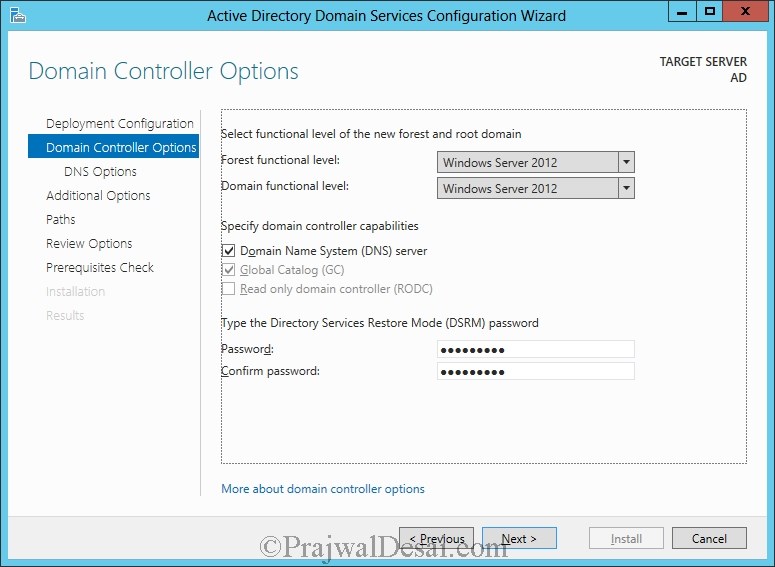
We will keep both Forest Functional level and Domain Functional Level as Windows Server 2012. Provide a DSRM password and click Next.
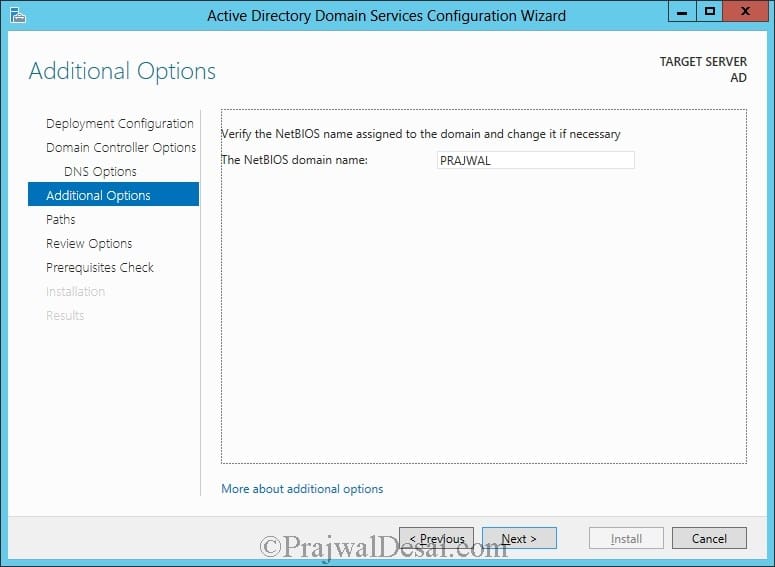
The NetBIOS name for the domain will be PRAJWAL. Click Next.
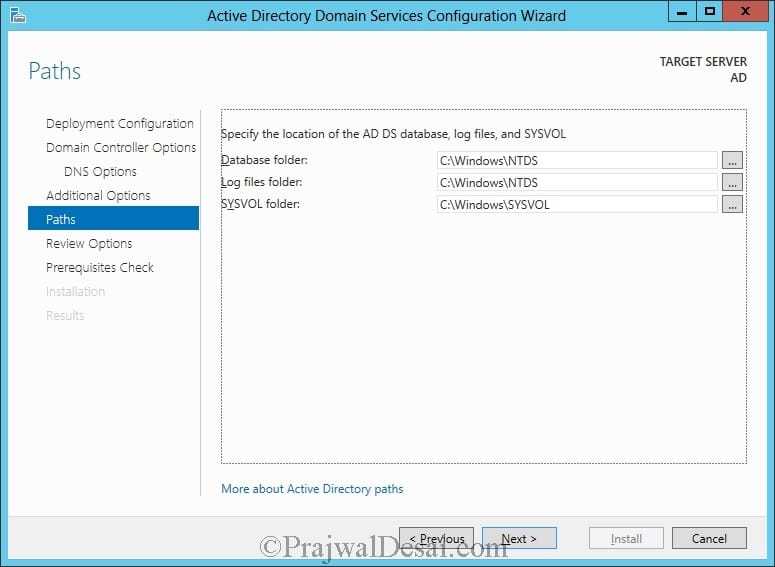
You may specify a different location for log files. I am not going to change anything here. Click Next.
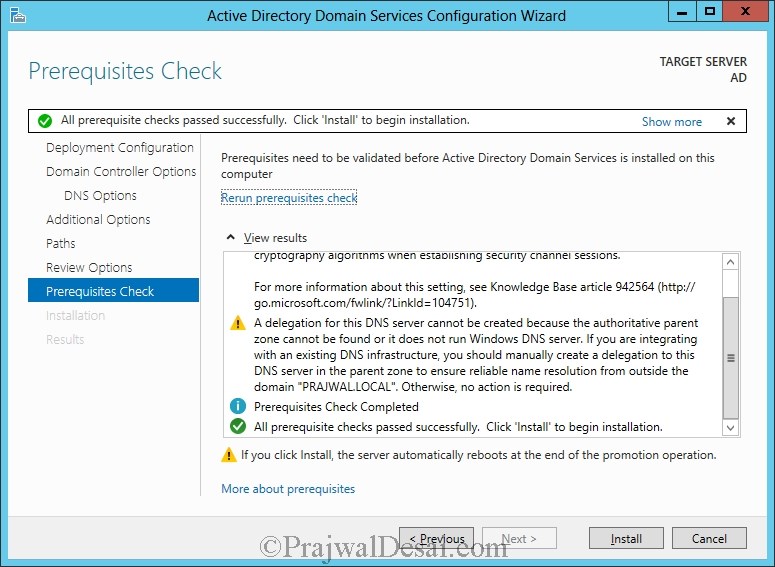
Make sure that you see the notification All prerequisite checks are passed successfully. Click Install.
The Active Directory Domain Services installation begins. The server needs a restart.
Restart the server and login back. The server is now promoted to Domain Controller.
Creating Lync Server Installation Account
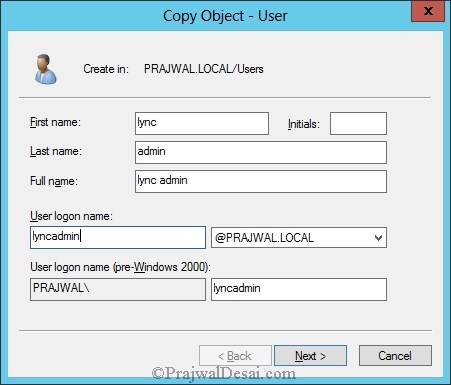
Lets create a user account named Lyncadmin. This account will have enough privileges to install the Lync Server.
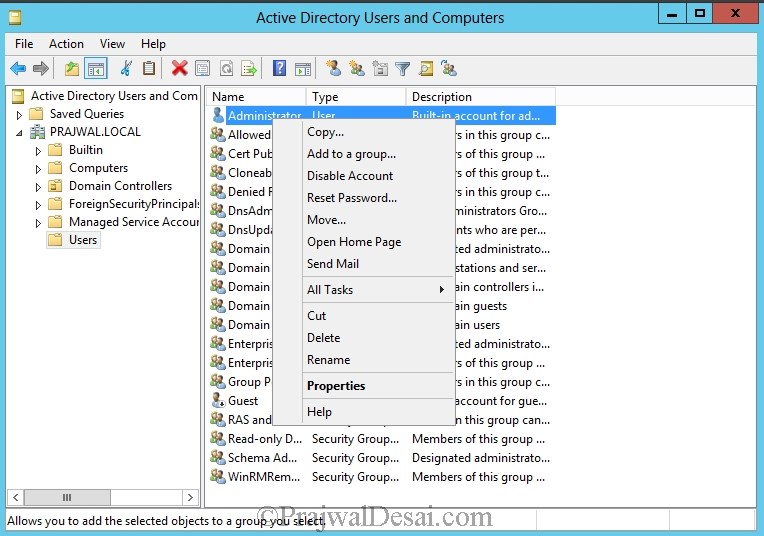
Launch Active Directory Users and Computers, Under users, right click Administrator and click copy.
Specify account details.
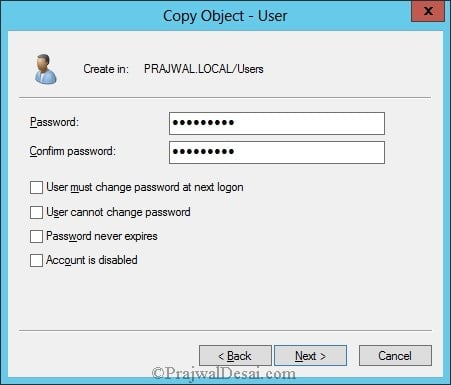
Provide a complex password. Click Next.
Now right click Lyncadmin user account and select Properties. Click Member Of tab and you can see that the lyncadmin account has equal privileges as that of Administrator account.
We will not be using Administrator account to install Lync 2013 server. We will be using Lyncadmin account to install the Lync Server and other components on Member server.
Installing Active Directory Certificate Services
We will now install Active Directory Certificate Services on the domain controller.
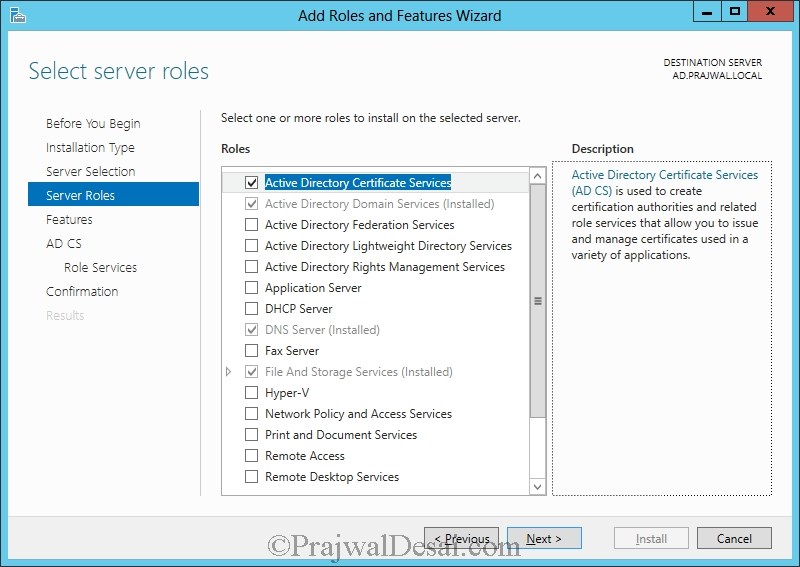
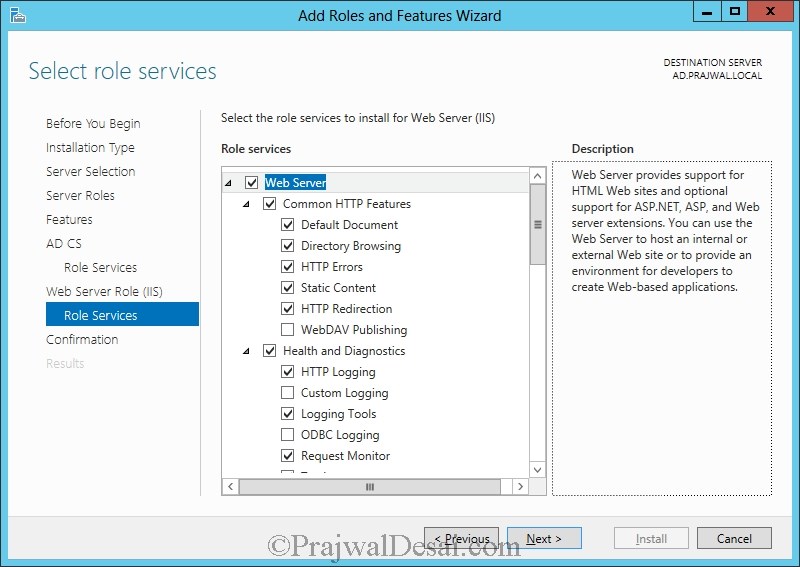
Launch the Server Manager and click Add roles and features. Select Active Directory Certificate Services.
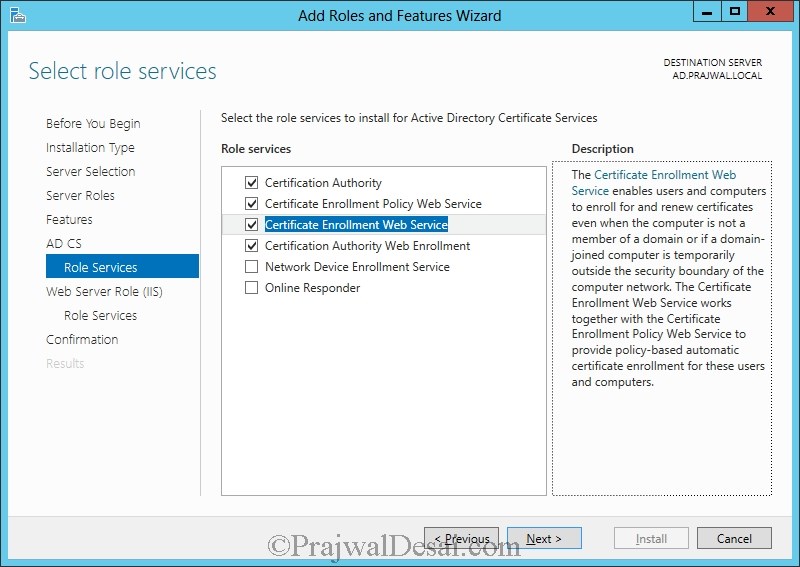
Select Certification Authority, Certificate enrollment Policy Web Service, Certificate Enrollment Web Service, Certificate Authority Web Enrollment. Click Next.
Do not select anything here, leave it to default and click Next.
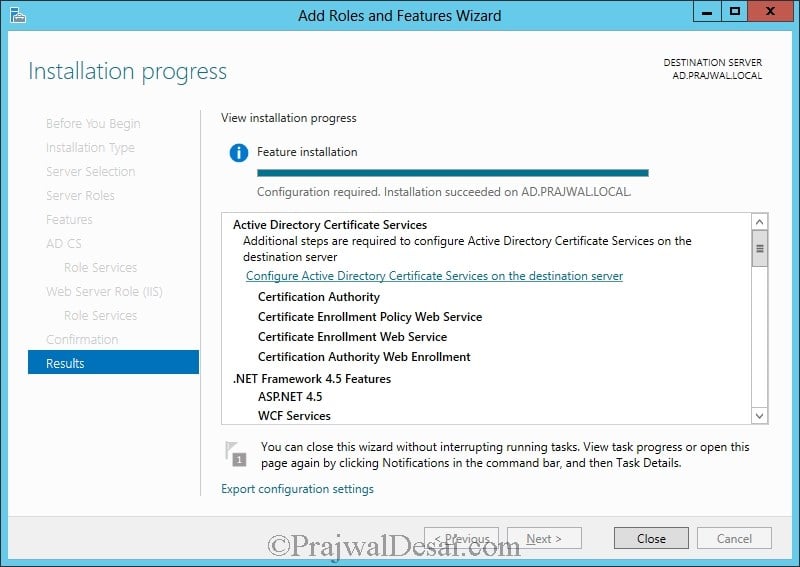
Click Install.
Now click Configure Active Directory Certificate Services on the destination server.
Click Next.
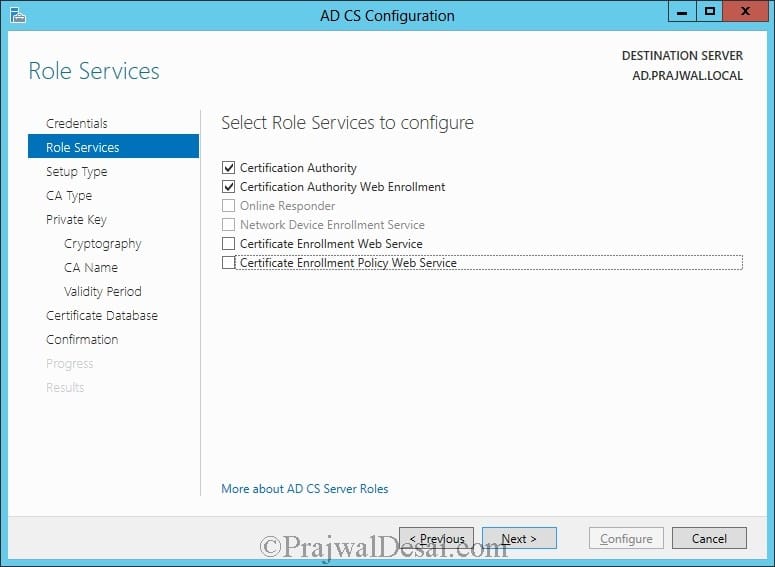
On the Select Role Services to Configure, select Certification Authority and Certificate Authority Web Enrollment. Click Next.
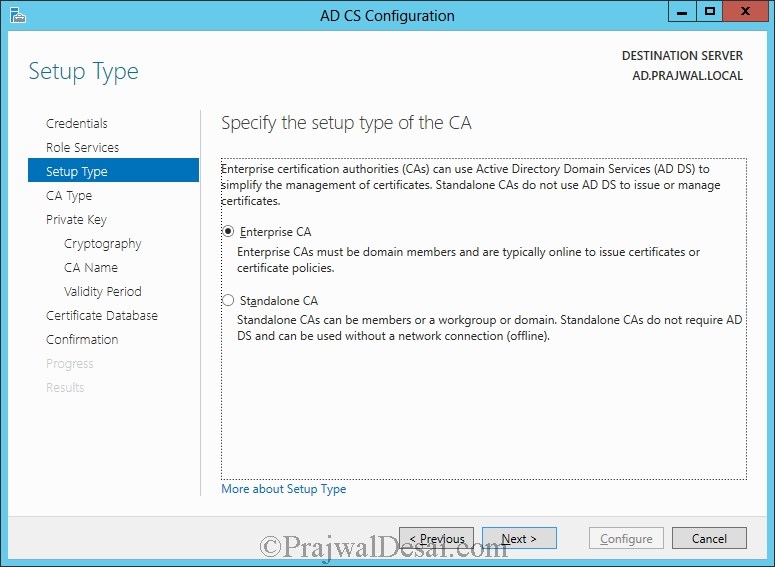
Choose Enterprise CA. Click Next.
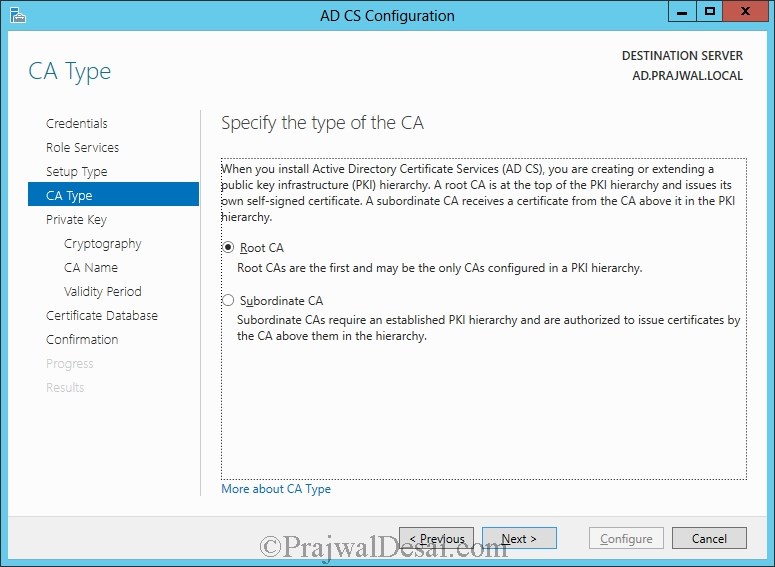
Select Root CA. Click Next.
Select Create a new private key and click Configure.
For Cryptography options, do not select anything and click Next.
Click Next.
Select the certificate validity period. Click Next.
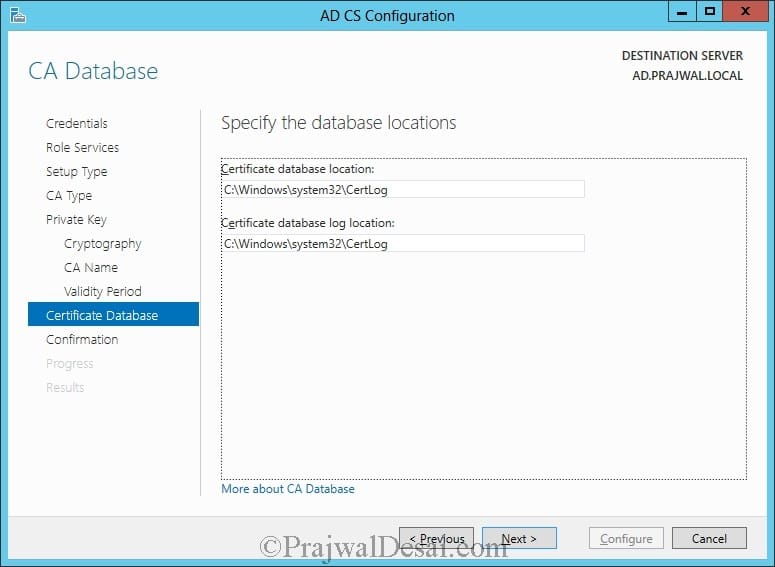
Make a note of certificate database locations. Click Next.
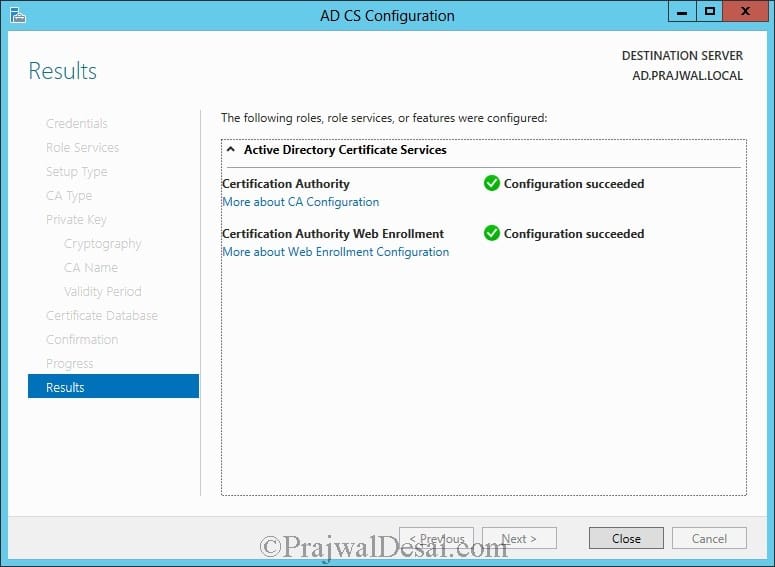
The AD CS configuration is complete.












Hey guy I can’t see Part 2
The part 2 is available, look for it under Lync category
Hi Prajwa
I stuck with certificate wizard step. It indicated that the chain is invalid
Please help me out with detail instruction
Thanks
Hi Prajwal
I really appreciate your post. But I have some concerns, can we create those certificate like the way you show for the real Lync production? if not, please help me how to retrieve those certificate.
And if I deploy an enterprise edition Lync 2013, can I do the same method to creat those certificate as you wrote?
In addition, I am a new on in this Lync field. Could I contact you for experience about Lync?
Thanks a lot Prajwal
LE TRINH
Yes you can generate certs the way i have shown for enterprise edition. I have shown the process that will cover only internal access of lync. For external access of lync there is a different procedure.
Dear Prajwal,
Nice to see such informative write-ups. Would like to suggest to elaborate more with some example & reasoning, so it would be more useful to everyone.
Thanks & regards,
Deepak Talreja
Bangalore
973 937 4113
Thanks Deepak.. I am coming with new posts which has better explanation with examples.. Thanks for the note..