


Office 365 ProPlus Deployment Using SCCM is something that i covered in this post. Using SCCM you can easily create Office 365 ProPlus installer and deploy it to your clients. There are multiple methods to deploy Office 365 ProPlus using Configuration Manager but using using the O365 client installer is the easiest.
In one of my previous post, I covered the steps to deploy office 365 using SCCM. Since then there have been lot of changes and you will see some of them in this post.
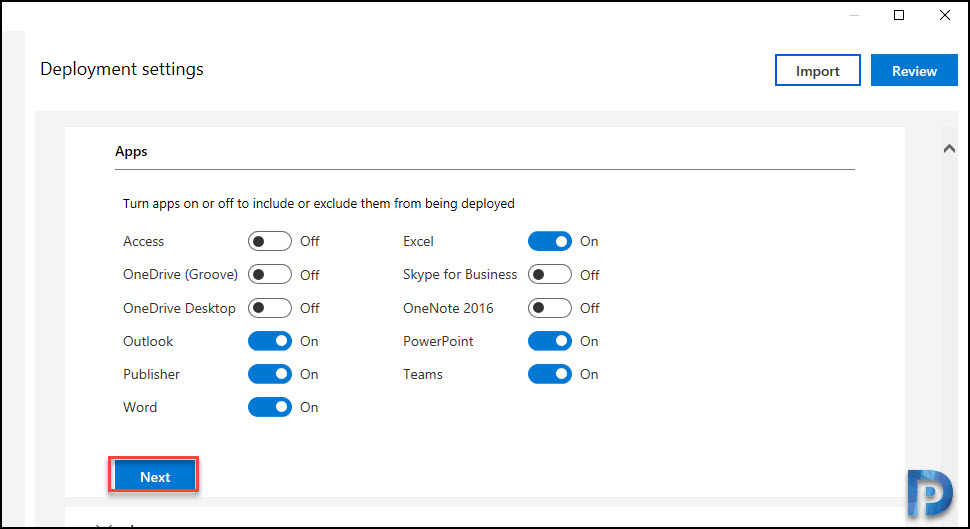
For example, Microsoft Teams was a separate installation from Office 365 ProPlus. But starting with version 1902, Teams is included as part of new installations of Office 365 ProPlus. If you have Teams already installed on the device, no changes are made to that installation of Teams.

Tip – During my test deployment, I enabled the Microsoft Teams under Deployment Settings > Apps along with other apps. However I noticed that Teams wasn’t installed. But the fact is to complete the installation of Teams on new or existing installations of Office 365 ProPlus, you must either restart the device or have the user log off and log back on.
Office 365 ProPlus Deployment Using SCCM
Let’s get started with Office 365 ProPlus Deployment Using SCCM.
Create Office 365 ProPlus Installer using SCCM
To create Office 365 ProPlus Installer using SCCM :-
- Launch the configuration manager console.
- Navigate to Software Library > Overview > Office 365 Client Management.
- Click Office 365 Installer in the console. This will bring up Microsoft Office 365 client installation wizard.
- Using this wizard we will create and deploy Office 365 ProPlus to client computers.

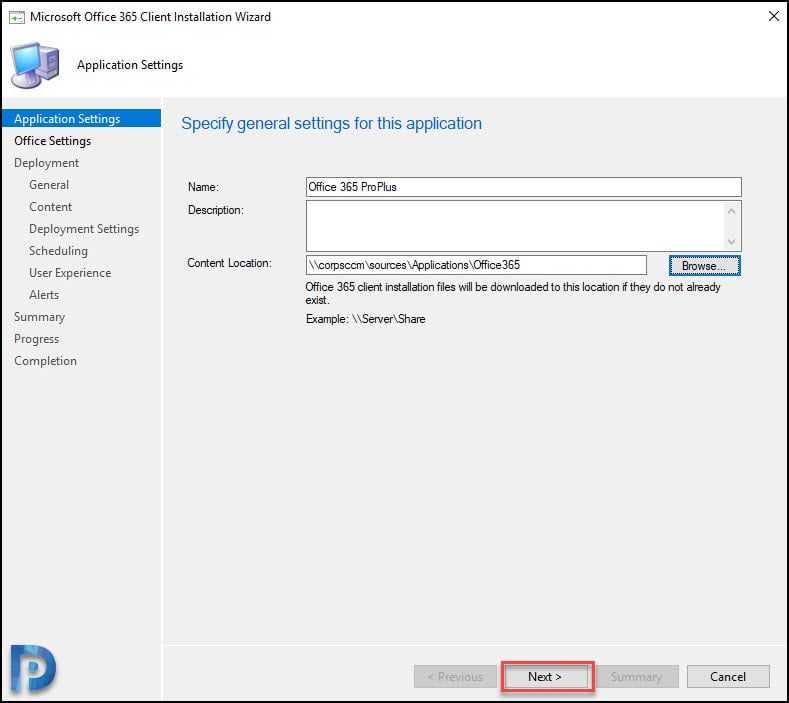
On the Application Settings page, specify the name of the application, description and content location. The content location is the path where the Office 365 installation files are downloaded. Click Next.
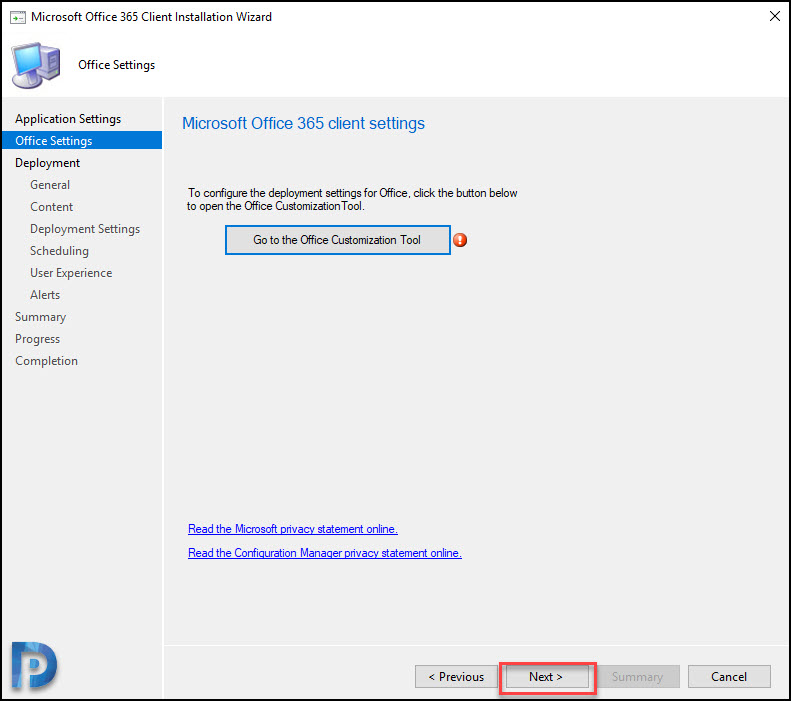
Using the Office Customization Tool
The Office Customization tool will create the configuration file for all the changes that you do. So it is pretty easy to use this and helpful as well. In addition to that you can customize a lot of settings and the settings are deployed along with Office 365.
Click Go to the Office Customization Tool.
Products and Releases
Architecture – Under Products and releases, select the architecture which is 32-bit or 64-bit. I am going to select 64-bit because all my computers in my lab are running Windows 10 64-bit and I like 64-bit apps over 32-bit.
Products – Choose what you want to deploy under this section. My deployment inlcudes :-
- Office Suites – Office 365 ProPlus
- Visio – Visio Online Plan 2
- Project – None
- Additional Products – None

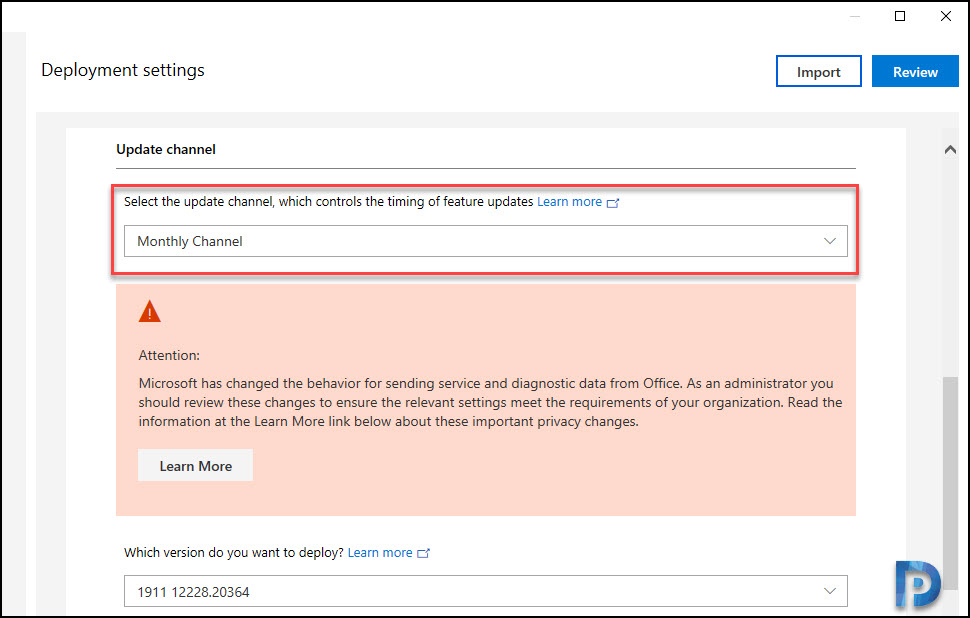
Office 365 ProPlus Update Channel
Under Update Channel, we have got 4 options.
- Monthly Channel
- Monthly Channel (Targeted)
- Semi-Annual Channel
- Semi-Annual Channel (Targeted)
Each of these update channel controls the timings of feature updates. Hence if you are still thinking which Office 365 ProPlus update channel to choose, click here.
Office 365 Apps
In this section you can turn apps on or off to include or exclude them during deployment. I have turned off few apps which I don’t need.
Most of all notice that there is a Teams app which you can turn on and deploy it along with Office 365 ProPlus.
O365 ProPlus Languages
Select your primary language which is English in most cases. You also get the option to select additional languages and proofing tools.
Click Next.

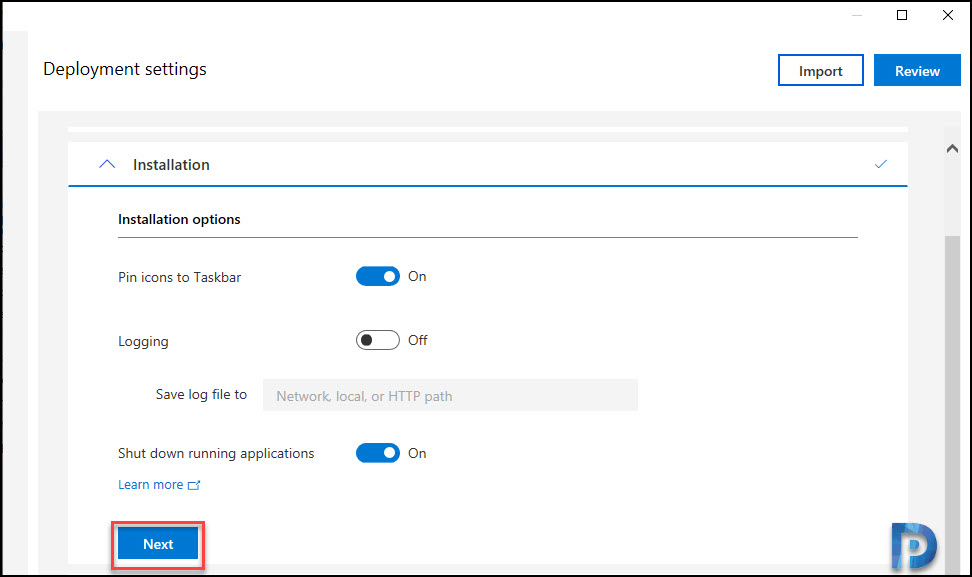
Installation Options
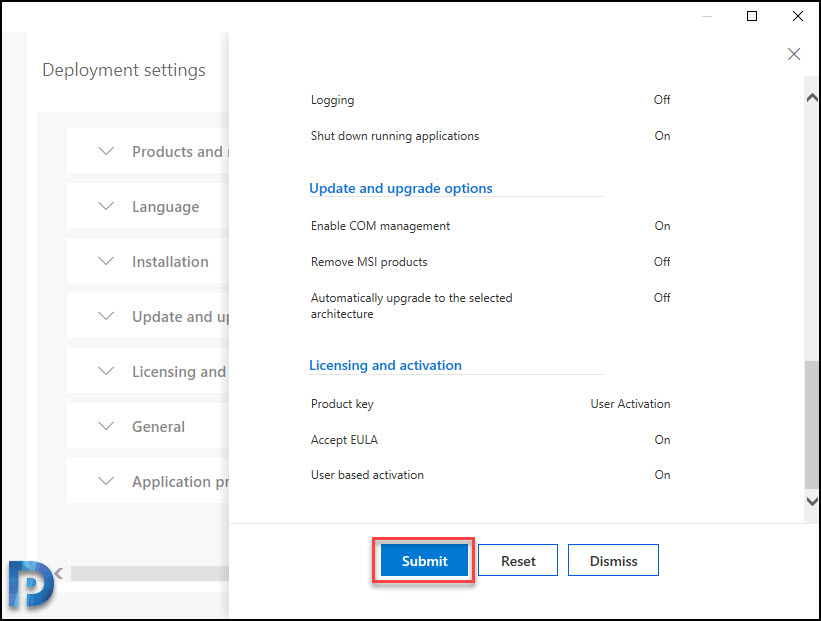
Under installation options, you can pin icons to taskbar, you can enable logging. The new option that I see is Shut Down running applications which was not available previously. Click Next.
Office 365 ProPlus Upgrade Options
You can uninstall any MSI versions of office including Visio and Project. Since my client computers don’t have any old version of office installed, I am not going to enable it. Click Next.

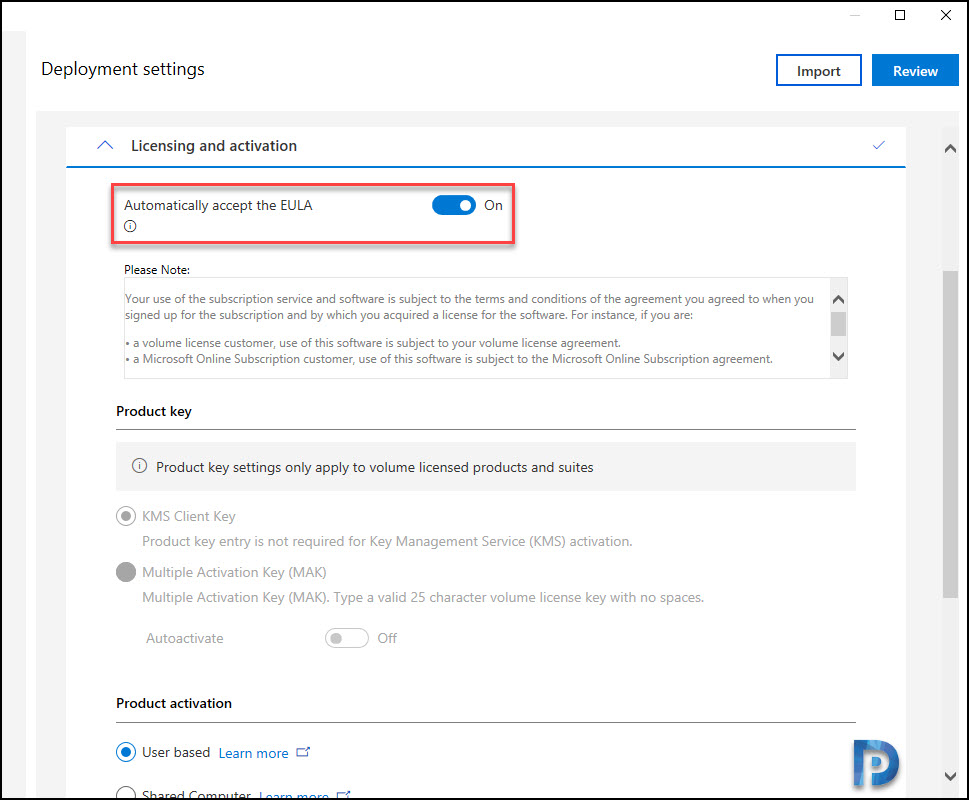
Licensing and Activation
Turn on Automatically accept the EULA. Under Product Key, there are two options. KMS Client Key and Multiple Activation Key (MAK). Both the options are greyed out because the product key settings only apply to volume licensed products and suites.
Therefore under Product Activation, select User Based. To know more about Office 365 licensing and activation, click here.
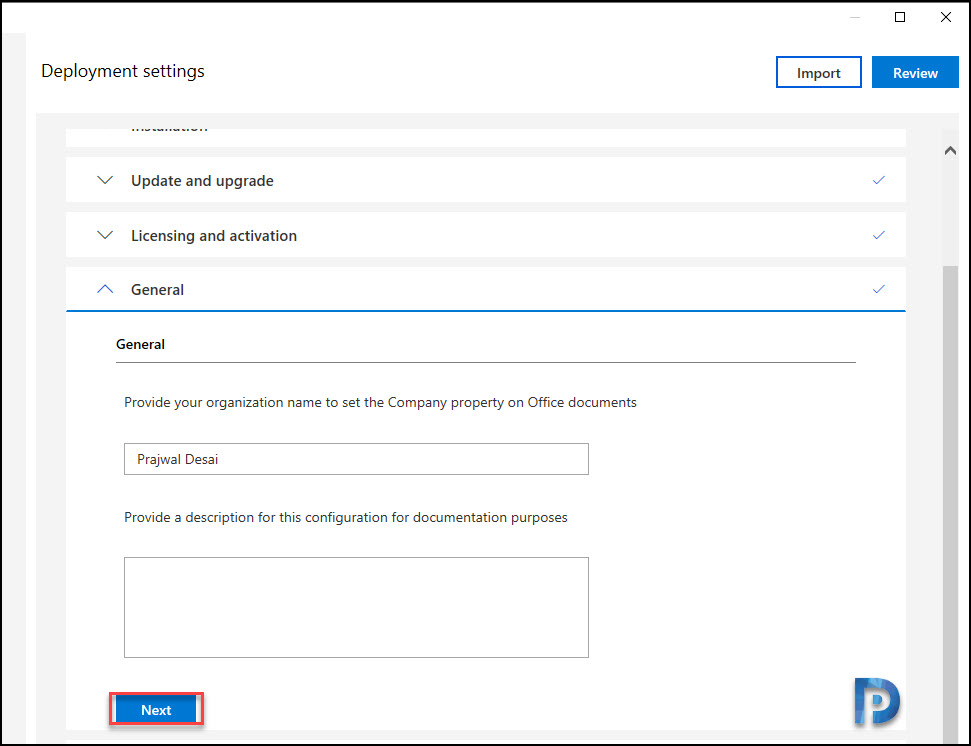
General Information
Here you can provide your organization name and description.
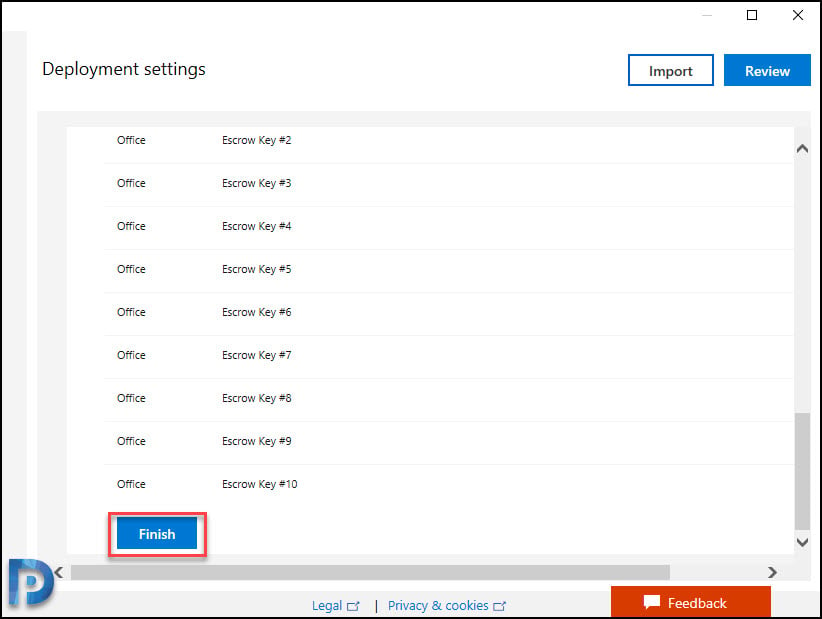
On the Preferences section, click Finish.
Finally click Submit.
Click Next.

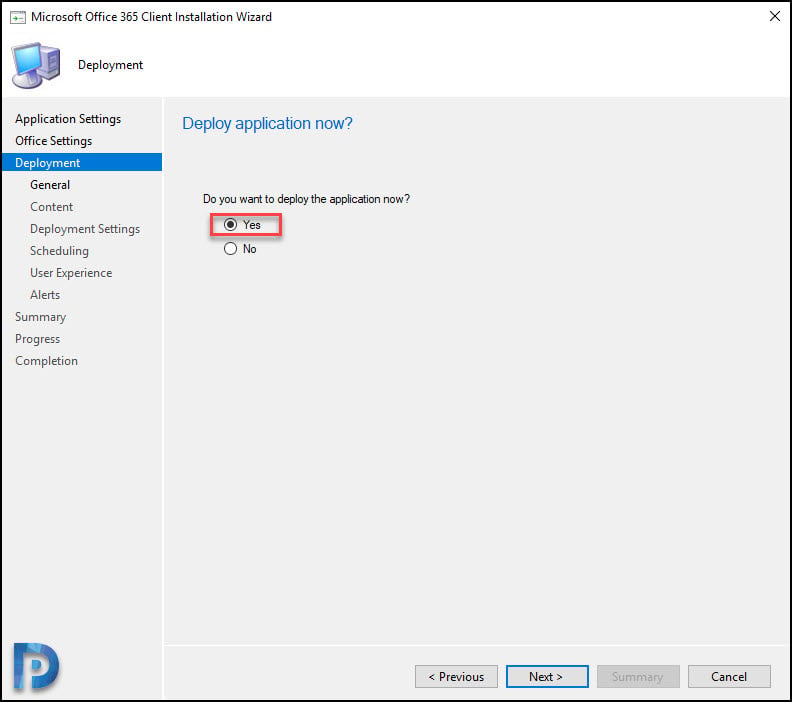
Select Yes if you want to deploy the application as required or No if you want to deploy it as available. Click Next.
On General page, click Browse and select the Device Collection to which you want to deploy Office 365 ProPlus. Click Next.

On the Content page, click Add button and select the distribution points. Click Next.

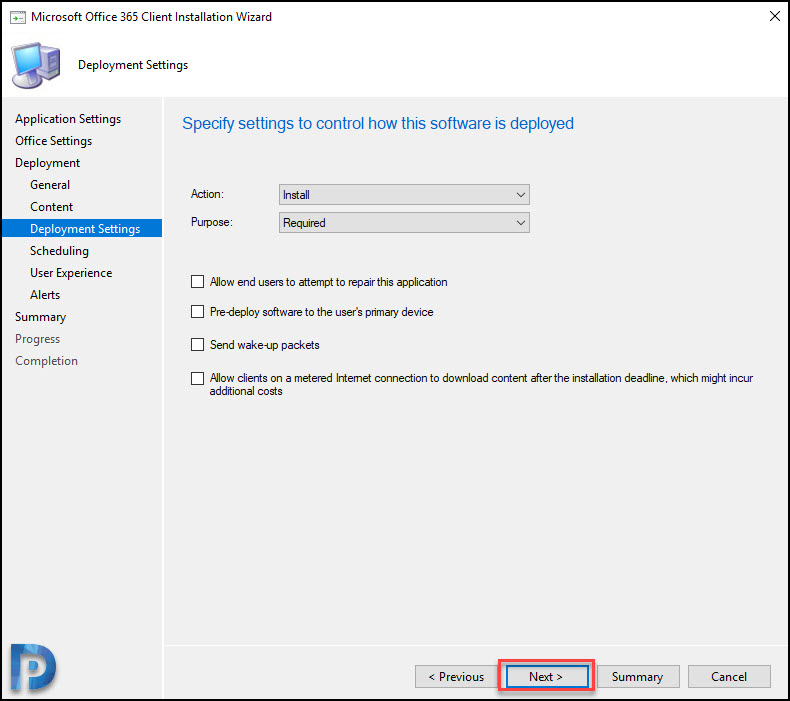
Under Deployment Settings, you may enable other options. click Next.
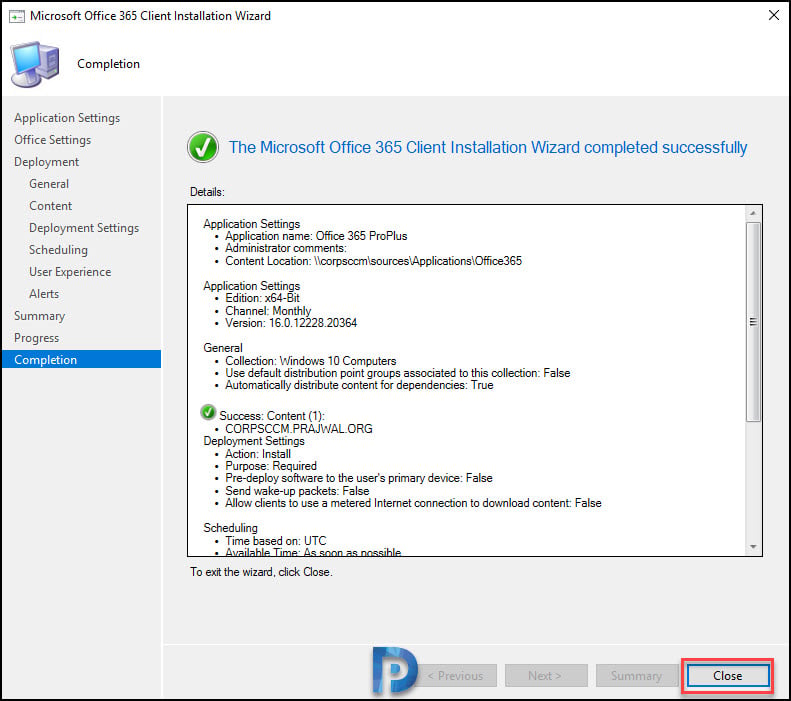
Click Next on the remaining pages. On the Completion page, click Close.
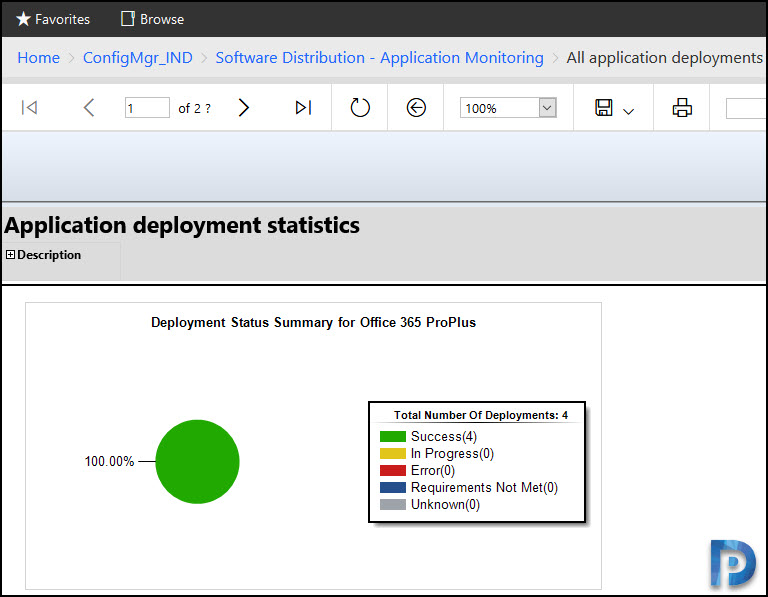
Rather than checking the office 365 installation on individual computers, use the built-in report to check the installation status.

how and where to download the Microsoft project
VLSC or MSDN (Visual Studio Subscriptions)
Hi Prajwal,
Thanks for sharing the post, I was trying to deploy the Office 365 Professional plus via SCCM , which is basically subscription based license, but canot find the Office pro plus in Office deployment template, it shows only Office 365 Enterprise app and Office 365 Business, any idea why we cant see O365 pro plus in the recent templates?
I am getting the same issue, i dont see o365 pro plus either. just like what you have listed. Did you figure it out?
Ok just found out. office 365 pro plus turned into Microsoft 365 apps for enterprise.
Yes that’s correct. Microsoft 365 apps is the new name for Office 365 products.
Hi, is it possible to perform a rollback, in case that I determine that there are some issues with the new version? How do you get all clients back to the previous Office version (prio to installation)?
Hi Prajwal, i followed your documentation and it works to 95%
The deployment of Office 2019 or 365 Apps does not add any Icons to the taskbar.
This is a Limitation from Windows 10 or Office, it only works for Windows 7 / 8.1.
Is there any Workaround available?
Great document. Thanks.
If you choose this method, the config.xml gets an added method tag, which will list CM. If you don’t have WSUS, the Office install will not get updates as it’s expecting SCCM/WSUS to manage them. So, only use this method if you are using WSUS for Office updates.
Great write up. But do have a question. I have been trying this the past few days, but every time it completes the download and installs on the client, I get Office 2016 and not the 365 client. And some of the apps I asked for (Teams and OneNote) are not there. I re did this a few times to be sure I choose everything correctly. Maybe you might know of anything I could be doing wrong? For now I’ll just stick with download directly from our 365 account, but was hoping to get this into SCCM.
Any idea when device based activation through SCCM will be available in the wizard?
I am still deploying via script (opptransition) for this reason.
first time I tried it was the 28th? it was there:
Property Name=”DeviceBasedLicensing” Value=”1″
it is more involved than just hitting the toggle though:
https://docs.microsoft.com/en-us/deployoffice/device-based-licensing?WT.mc_id=email