


So the good news is you can create SCCM Office 2019 deployment now using Office 365 client installation wizard. Few days ago, I published a post on deploying Office 2019 using SCCM. I also covered an overview and deployment info about Office 2019 in this post. Office 2019 uses only click-to-run installation technology. At the time of writing that post, Office 2019 was not available for deployment via client installation wizard. But now you should find Office 2019 under Products section in Office 365 client installation wizard. If you don’t want to use customization tool, you can either download an ISO through VLSC or use the Office Deployment Tool.
In this post we will create SCCM office 2019 deployment. The advantage of deploying Office 2019 using client installation wizard are many. You can customize a lot of settings as per your requirement and at the end the tool creates configuration file. Therefore if you are planning to deploy Office 2019 to an entire organization, this post covers the easy steps to do that. Hopefully i will create a video tutorial on this soon.
Step 1 – Create SCCM Office 2019 Deployment
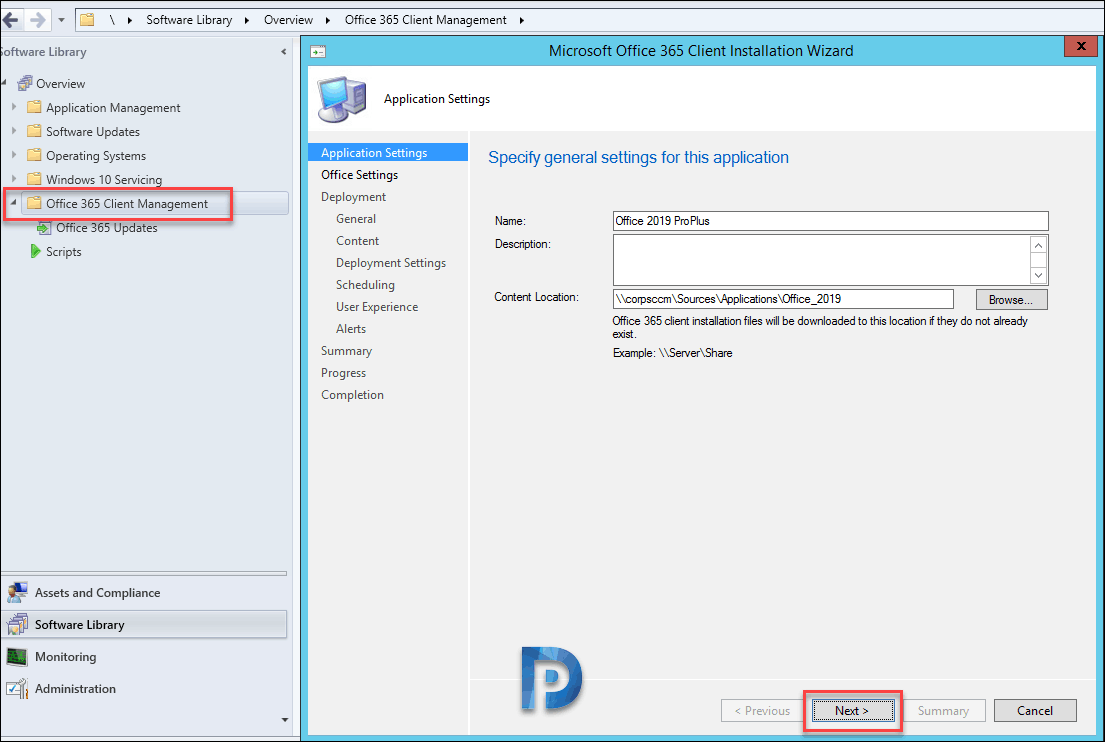
First of all we will create SCCM Office 2019 deployment. Open the SCCM console and go to Software Library > Overview > Office 365 Client Management. Click Office 365 Installer and this will bring up Microsoft Office 365 client installation wizard. Under Application Settings, specify the name of application and content location. Click Next.

Step 2 – Using Office Customization Tool
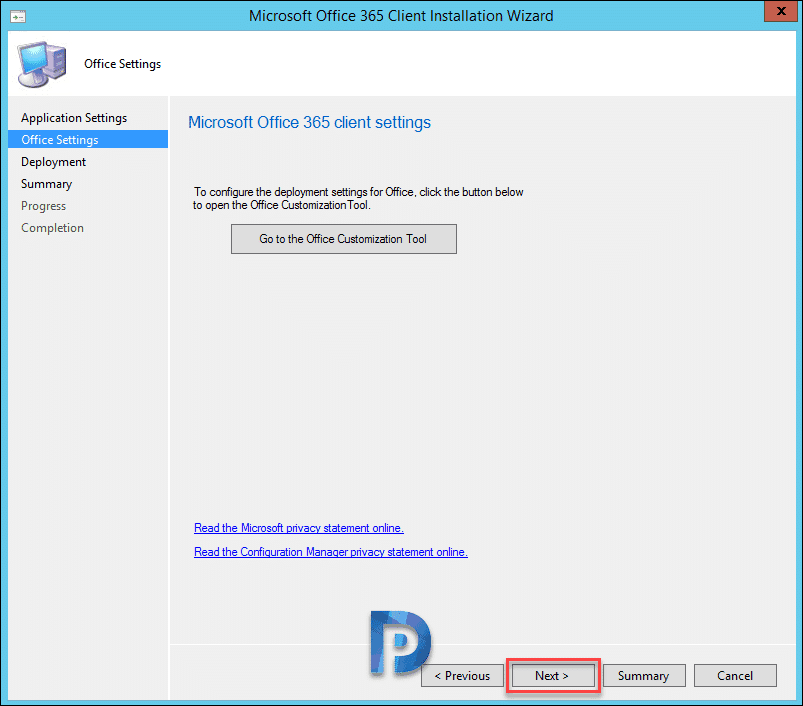
On Office Settings page, click Go to the Office Customization Tool.

There are lot of settings that you can customize here. I will cover some important ones in this post. Under Deployment settings, select the architecture. It can be either 32-bit or 64-bit Office installation. Once you select architecture, select the product which is Office Professional Plus 2019 – Volume License. You can turn apps on or off to include or exclude them from being deployed. Click Add and proceed to next step.
List of Products available :-
Office Suite
- Office 365 ProPlus
- Office 365 Business
- Office Professional Plus 2019 – Volume License
- Office Standard 2019 – Volume License
Visio
- Visio Pro for Office 365
- Visio Standard 2016 – Volume License
- Visio Professional 2016 – Volume License
- Visio Standard 2019 – Volume License
- Visio Professional 2019 – Volume License
Project
- Project Online Desktop Client
- Project Standard 2016 – Volume License
- Project Professional 2016 – Volume License
- Project Standard 2019 – Volume License
- Project Professional 2019 – Volume License
Additional Products
- Language Pack
- Office 365 Access Runtime

Select the update channel “Office 2019 Perpetual Enterprise” and click Next.

You can select the primary language and additional languages. Click Next.

Upgrade Options – The settings allow to uninstall the older version of apps.
- Uninstall any MSI versions of Office, including Visio and project
- Remove Visio
- Remove Project
- Remove SharePoint Designer
- Remove InfoPath
Turn on the options that you require and click Next.

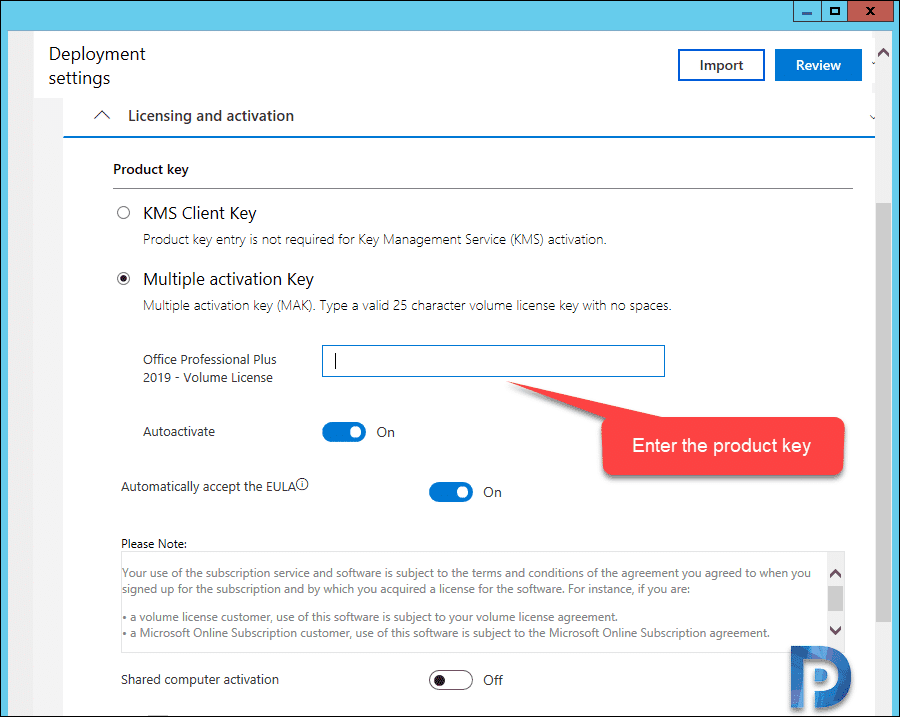
Office 2019 Licensing and Activation – The options here allow you to specify the product key.
- KMS Client Key – Select this option if you have KMS server running in your organization.
- Multiple Activation Key (MAK) – Select this option if you have 25 character volume license key. Enter the key and click Next.
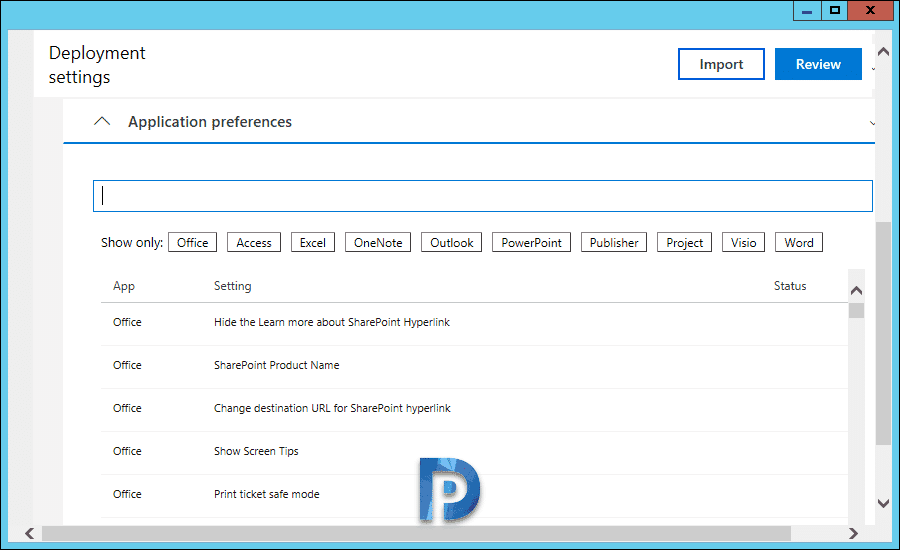
Application Preferences – You will find various settings here that you can configure. You can also customize based on individual office app such as Outlook, Excel, Access etc. The search bar allows you to type and search the settings which is very useful.
If you are done with configuring the settings, click Review button and then Submit.
Click Next.
Step 3 – Deploy Office 2019 Using SCCM
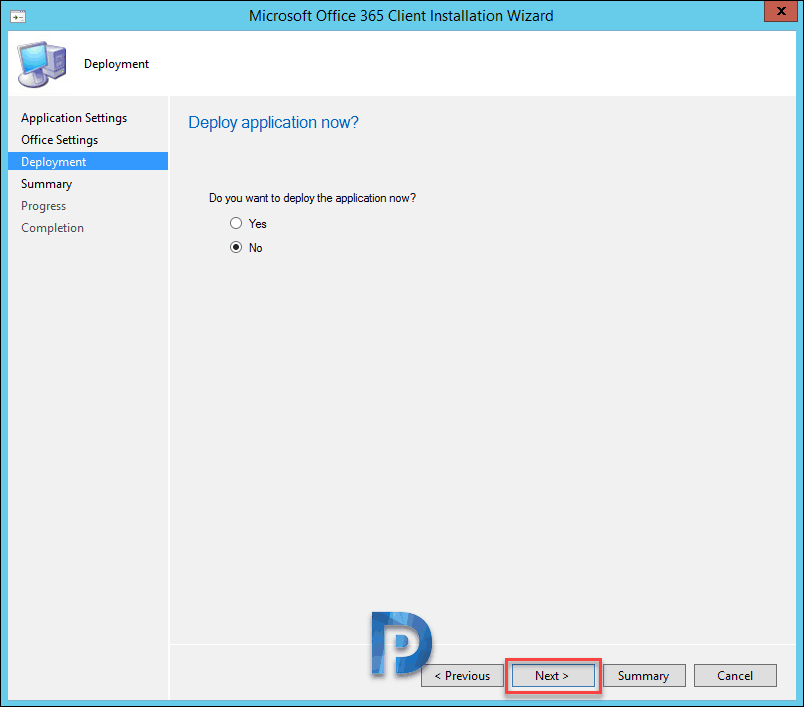
Back to Office 365 client installation wizard. If you want to deploy the application right away, select Yes. For deploying it later or manually, click No. Click Next.
Finally on Completion page, click Close.
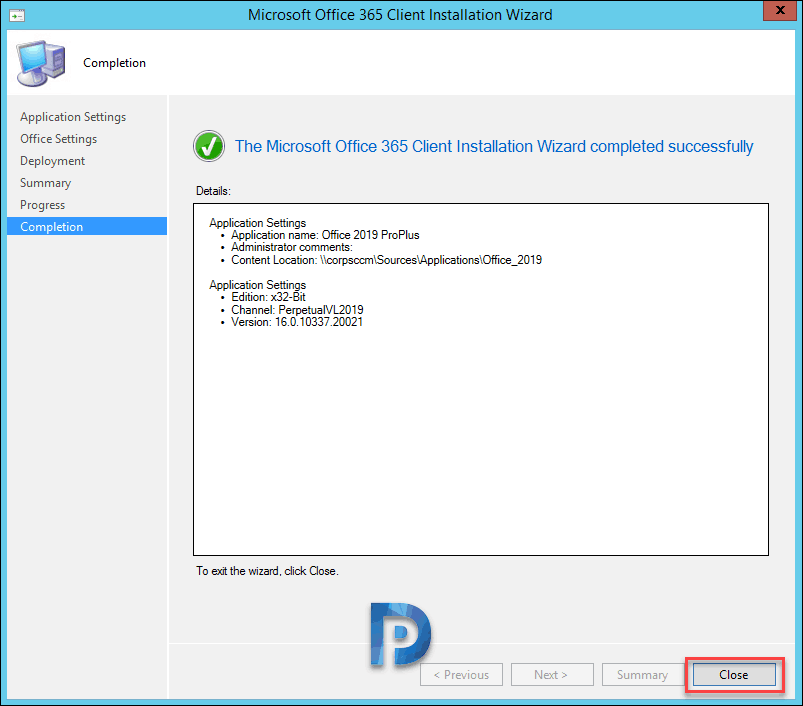
Distribute the Office 2019 application to distribution point(s). Deploy Office 2019 to a device collection. Login to any of the client machine and launch Software Center. Look for Office 2019 application and click Install. The Office 2019 application will be downloaded and installed.


Thank you for the post, tried everything for this error, nothing works
Finally, I asked the security team to remove the DeviceLock app, boom , that was the reason in my case
Hope this help, cause I tried for weeks to find out such a simple solution
Regards
Thanks for a great post. This worked perfectly for me. That is as far as deploying Office 2019. I then tried this procedure to build a deployment of Visio 2019. This did not work so well. There seems to be a problem with the detection rule since the deployment claims the software is already installed.
Hi, thanks for this guide. Was happy to see that you could use the O365 part of the SCCM console, but I’m encountering an error. When I click the button to open the customization tool, I get a white window and a popup with a script error.
I can click Yes to keep running scripts on the page but it never loads the tool. No also doesn’t load it. When I go to the website for the Office Customization Tool, it loads just fine in any browser on the same computer. What could it be?
make sure you add deploy office com to the trusted IE zone
Thanks for this great documentation! Do you have info on how to setup the uninstall xml?
No John, i am yet to update the uninstall.xml file. This will take some time.
Hi Prajwal,
Do you have uninstall.xml file now, Kindly share the procedure to uninstall
Do you really need to uninstall O2019 ?.
First of all thank you very much for your training, they are always beautifully detailed.
I do not have a folder named “Office 365 Client Management” under Software Library.
lol I found it. It goes into Appplications I just didn’t spot it 😀
Where does the deployment go after this process? I can see the source files have comes down but if I want to deploy to a new collection or stop this deployment how do I?
Hi, When using this method and you have office 2013 installed it will most likely uninstall 2013 BUT what if you are using skype for business and the skype for business app is open, how do you deal with that? Do I solve this with PSAppDeploy or is there a way for SCCM to solve this?