


In this post, I will show you how to deploy Cloudflare WARP using SCCM. We’ll get the latest version of the Cloudflare WARP msi installer and use ConfigMgr to deploy Cloudflare WARP.
The Cloudflare WARP client allows individuals and organizations to have a faster, more secure, and more private experience online. The WARP client sits between your device and the Internet, and has several connection modes to better suit different needs.
According to Cloudflare, “The Cloudflare WARP client allows you to protect corporate devices by securely and privately sending traffic from those devices to Cloudflare’s edge, where Cloudflare Gateway can apply advanced web filtering. The WARP client also makes it possible to apply advanced Zero Trust policies that check for a device’s health before it connects to corporate applications.”

The SCCM makes it simple to deploy the Cloudflare WARP client, and silent install commands are also available. For businesses who prefer to install the Cloudflare WARP quietly, the silent installation is useful.
Before you perform the Cloudflare WARP deployment using SCCM, ensure you create a test device collection. This device collection can be used to test the deployments, and then you can expand the deployments to a larger set of computers. You can use the guides below to set up device groups in SCCM based on the operating systems they use.
- Create Windows 10 device collection in SCCM
- Create Windows 11 device collection in Configuration Manager
- Windows Server 2022 device collection
Download Cloudflare WARP MSI Installer
Cloudflare WARP is available for iOS, Android, Chrome OS, Mac, Linux, and Windows. To get the latest version of the WARP installer, visit the Cloudflare WARP download page. The app center lists all the WARP releases, including the changelog for every version. I don’t think Cloudflare offers a 32-bit installer for WARP applications; you get only a 64-bit installer.
Make sure you download the latest stable version of the WARP client installer. Click on the Download button and save the Cloudflare_WARP_Release-x64 installer to a network share folder or the SCCM server’s Sources folder. I have downloaded the WARP 64-bit msi installer and the app icon and saved these two files to the sources folder for deployment.

Create Cloudflare WARP Application in SCCM
Let’s create a new application for Cloudflare WARP client in SCCM.
- Launch the Configuration Manager console.
- Go to Software Library > Overview > Application Management.
- Right-click Applications and select Create Application.

On the General window, select Automatically detect information about this application from installation files. The application type should be Windows Installer (*.msi file) and specify the location of the Cloudflare WARP client msi file. Click Next.

With MSI installers, the Configuration Manager can import information such as product code, install commands, uninstall commands, detection methods etc. In the below screenshot, we see the product information has been populated from WARP client MSI installer and imported into SCCM.
Application name: Cloudflare WARP
Publisher:
Software version:

Deployment type name: Cloudflare WARP - Windows Installer (*.msi file)
Product Code: {E13F3422-0987-4CD9-939F-989256461F34}
Installation behavior: Install for system

Content location: \\corpcm\Sources\Applications\WARP\
Number of files: 2
Content files:
     cloudflare.png
     Cloudflare_WARP_Release.msi

On the General Information tab, enter the basic details about the Cloudflare WARP client application. For example, you can specify the application name, publisher details, software version, etc. The information you enter here will be shown to users when they choose the WARP application in Software Center.
The Cloudflare WARP silent installation command is also populated by the Configuration Manager from the.msi installer. To support additional parameters for.msi installations, you can modify the existing command.

Review the WARP application settings in the Summary window and click Next.

On the Completion tab, click Close button to exit the create application wizard. This completes the CloudFlare warp application creation in SCCM (ConfigMgr). After this step, the WARP application will appear in the Applications node of Configuration Manager console.

Cloudflare WARP MSI Install and Uninstall Commands
If you want to manually install the Cloudflare WARP client using the command line, you can download the .msi installer and install it with the following commands:
The Cloudflare WARP silent install command is as follows:
msiexec /i "Cloudflare_WARP_Release.msi" /q
To uninstall the Cloudflare WARP client silently using the command line, run the below command.
msiexec /x {E13F3422-0987-4CD9-939F-989256461F34} /q
Every MSI installer has a unique product code, and this can be seen under the installer properties. The product is used by Configuration Manager to check if the Cloudflare WARP application is already on the system. If you are curious to know the detection method for Cloudflare’s WARP application, SCCM basically uses the MSI product code: {E13F3422-0987-4CD9-939F-989256461F34} of the installer.
After you have created the Cloudflare WARP application in SCCM, go to the application deployment properties and switch to the Detection Method tab. Here you can see the detection method used for the Cloudflare WARP application. We see the MSI product code being used for the application detection.

Specify Software Center Icon for Cloudflare WARP Application
Configuration Manager lets you specify a logo for Application via the Application Properties and this logo appears along with the application in Software Center. If you are looking to customize software center, use the following guide to customize software center appearance and branding. Assigning an application logo is not mandatory, but it helps users identify the application quickly in Software Center.
To assign an icon for the WARP application, navigate to Software Library\Overview\Application Management\Applications of Configuration Manager console. Right-click on the Cloudflare WARP application and select Properties. On the application properties window, choose the Software Center tab. Click “Browse” and select an icon for Cloudflare WARP and click Apply and OK.

Deploy Cloudflare WARP using SCCM | ConfigMgr
Let’s look at the steps to deploy Cloudflare WARP application using SCCM.
- Launch the Configuration Manager console.
- Navigate to Software Library\Overview\Application Management\Applications.
- Right-click Cloudflare WARP application and select Deploy.

On the General page of Deploy Software Wizard, click Browse and select a device collection to which you want to deploy the Cloudflare WARP application. Click Next.

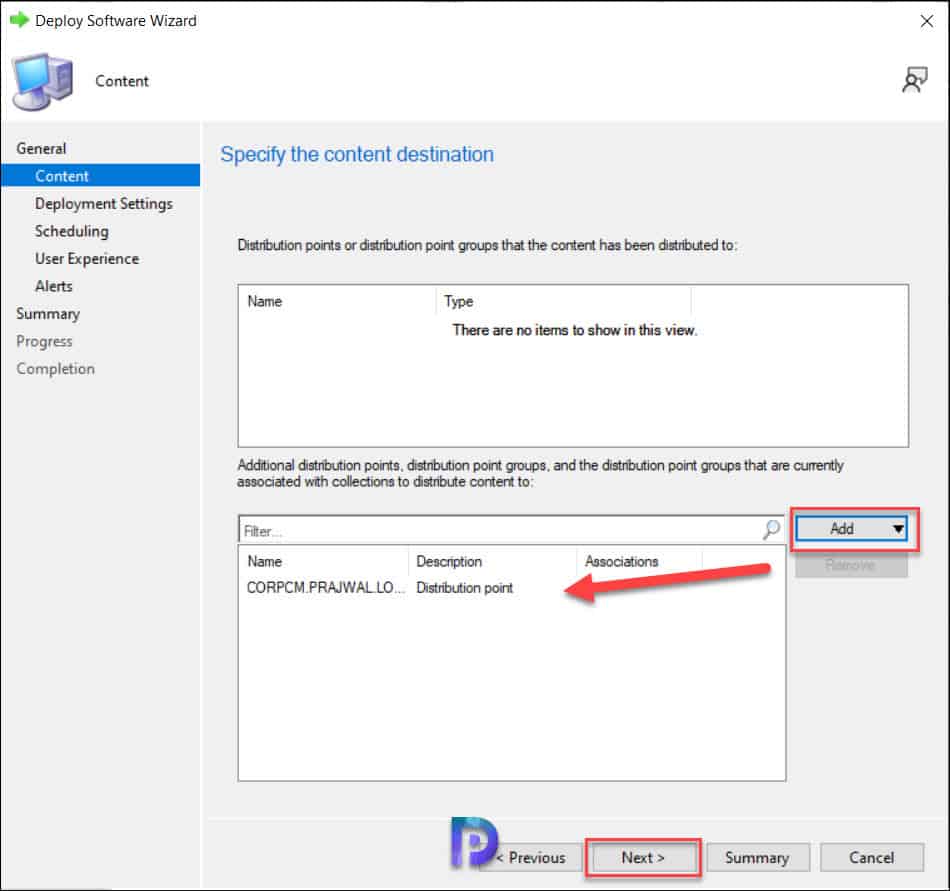
On the Content page, click Add button and specify the distribution points to which you would like to distribute the application content. You may also select distribution point groups when you have numerous distribution points. Click Next to continue.
On the Deployment Settings window, specify the settings to control the deployment. Select the Action as Install and Purpose as Available. Learn the difference between Available and Required deployment in SCCM. Click Next.

On the Scheduling tab, you can specify the schedule for the WARP application deployment. If you want to deploy the application as soon as possible, then don’t configure anything under Scheduling. Click Next.

Specify the user experience settings for the application deployment. For user notifications, select the option “Display in Software Center and show all notifications“. Click Next to continue.

In the Alerts tab, click Next. Review all the Dell SupportAssist deployment settings on Summary tab and click Next. On the Completion window, click Close. This completes the Cloudflare WARP application deployment with ConfigMgr.

Test WARP Application Deployment on Client Computers
The Cloudflare WARP application is ready for deployment. It’s time to validate the application deployment on devices. Log in to a client computer, and launch the Software center. Click on the Applications tab and select Cloudflare WARP application. To install the application, click the Install button.

The Cloudflare WARP application is now downloaded from the local distribution point server for installation. The installation commands specified during the application creation are executed. You can monitor the application installation process by reviewing the AppEnforce.log located on the client computer.
To locate the AppEnforce.log file and other important files, refer to the SCCM Log files which contains all the log files for troubleshooting issues.

“Matched exit code 0 to a Success entry in the exit codes table” confirms that the Cloudflare WARP application has been installed successfully on the computer. The uninstall command that we specified during application packaging should also work fine.
+++ Starting Install enforcement for App DT "Cloudflare WARP - Windows Installer (*.msi file)" ApplicationDeliveryType - ScopeId_67D9092A-81B2-464F-8F38-4D634303C416/DeploymentType_6fab3e7a-a4d7-4fee-8a42-62c08ef6b388, Revision - 1, ContentPath - C:\Windows\ccmcache\8, Execution Context - Any	AppEnforce
    Performing detection of app deployment type Cloudflare WARP - Windows Installer (*.msi file)(ScopeId_67D9092A-81B2-464F-8F38-4D634303C416/DeploymentType_6fab3e7a-a4d7-4fee-8a42-62c08ef6b388, revision 1) for system.
    Prepared working directory: C:\Windows\ccmcache\8
Found executable file msiexec with complete path C:\Windows\system32\msiexec.exe
    Prepared command line: "C:\Windows\system32\msiexec.exe" /i "Cloudflare_WARP_Release.msi" /q /qn	AppEnforce
Valid MSI Package path = C:\Windows\ccmcache\8\Cloudflare_WARP_Release.msi
    Advertising MSI package [C:\Windows\ccmcache\8\Cloudflare_WARP_Release.msi] to the system.
    Executing Command line: "C:\Windows\system32\msiexec.exe" /i "Cloudflare_WARP_Release.msi" /q /qn with user context	AppEnforce
    Working directory C:\Windows\ccmcache\8
    Post install behavior is BasedOnExitCode
    Waiting for process 7968 to finish.  Timeout = 120 minutes.	AppEnforce
    Process 7968 terminated with exitcode: 0	AppEnforce
    Looking for exit code 0 in exit codes table...	AppEnforce
    Matched exit code 0 to a Success entry in exit codes table.	AppEnforce

Hi Prajwal,
For SCCM managed devices that are not on the same routable network as the SCCM servers do you see issues with SCCM accessing logs, pushing SCCM client updates or connecting to the admin share after Warp is enabled? Scenario is windows clients are at the users home, coffee shop or just remote and not on VPN or on-net in the office.