


In this short post I am going to cover the steps to add a Windows update package to a Windows 10 image (install.wim). If you want to slipstream updates into your Windows 10 setup media, this post should help you.
By definition, the process of adding Windows update packages into the Windows setup media is known as Slipstreaming. Instead of deploying a Window 10 image and installing updates via WSUS, you can slipstream or add the latest windows cumulative update to windows image.
If you are using SCCM, you might be familiar with the term offline servicing. Using offline servicing, you inject Software Updates in your WIM file. I will cover about offline servicing in another post. If you are looking to add language packs offline using DISM read this post.

You should always add the latest cumulative update package to your Windows 10 image. And to download the latest cumulative update, go to Microsoft Update Catalog site.
Add Windows Update Package to Windows 10 image
I will split the process of adding update packages to Windows 10 image into steps. This should make it easier to follow.
Step 1 – Download Windows 10 ISO file
You can download the Windows ISO file either from MSDN or VLSC site. In my case I am going to add the latest available cumulative update to my Windows 10 1809 media. You can go with Windows 10 edition of your choice.
After you download the ISO, extract the ISO file to a folder. Or right-click the ISO file and mount it. Copy the contents of Windows 10 media to a folder.

Step 2 – Download Cumulative Update from Microsoft Update catalog
I have seen some sites offering cumulative update downloads. However I would suggest not to download the updates from any of those sites. Download cumulative updates or any updates only from Microsoft Update Catalog site.
Visit the Microsoft update catalog site, in the search box type you Windows 10 version and click Search. From the list of updates, sort the results by Last Updated column.
Look for the cumulative update for your Windows 10 version. Before you download it, click on the update title.
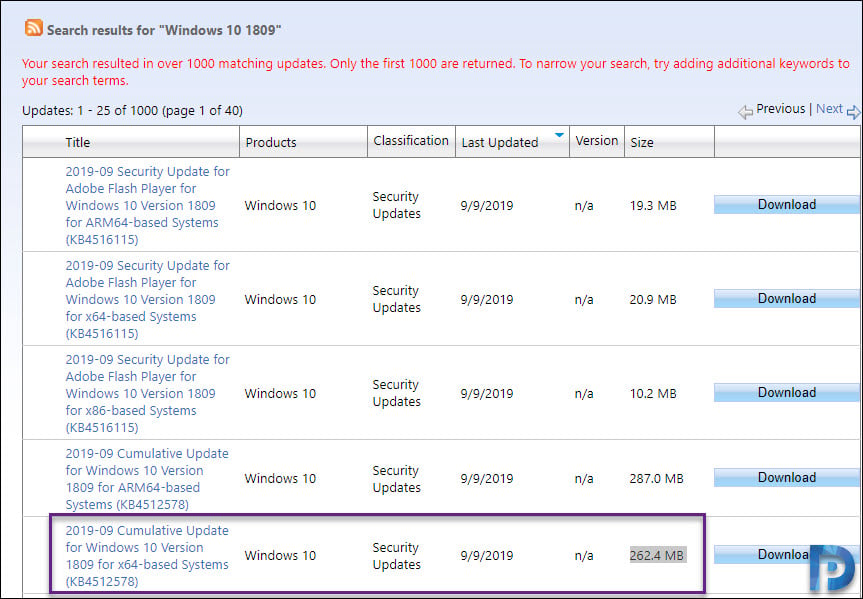
The update details window shows detailed information of this update. Click Package Details tab and notice the updates that this update replaces.
So from the below screenshot one can understand that this cumulative update is the latest one and replaces the previous months updates.

Download the cumulative update for Windows 10. The update always ends with .msu extension. Save the update file to a separate folder.

Step 3 – Determine Image Index Number
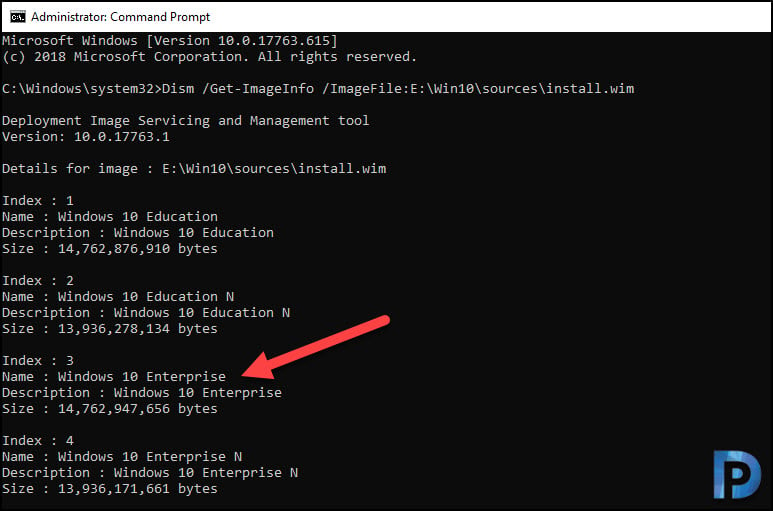
It is important to find the image index before you proceed further. Type the following command to retrieve the name or index number. Using the below command we can find out index number and name of the image as well.
Dism /Get-ImageInfo /ImageFile:path to install.wim file
Since I am going to deploy Windows 10 Enterprise, the index is 3.
Step 4 – Mount the WIM File
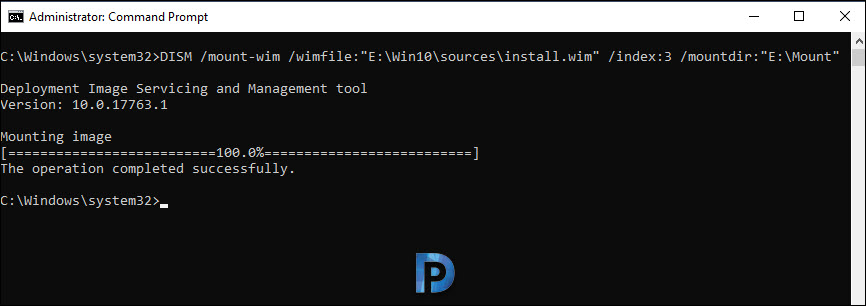
To add the update package to windows 10 media, we must first mount the install.wim file. Create a folder anywhere on your drive and name it as mount.
Run the command to mount the install.wim file.
DISM /mount-wim /wimfile:"path to .wim file" /index:3 /mountdir:"path to mount dir"
Step 5 – Add Windows Update Package to Install.wim
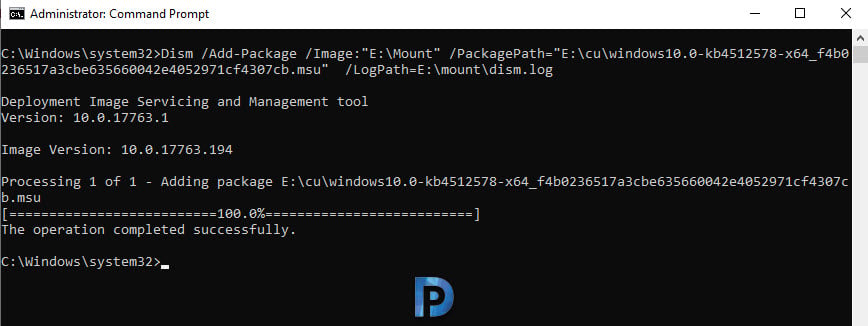
Finally we are at the step where we are going to add or inject the cumulative update into the .wim file.
Dism /Add-Package /Image:"path to mount dir" /PackagePath="path to .msu file" /LogPath=log the output to a file
When you run this command, it takes some time to inject the msu file into the install.wim.
In case you have got multiple cumulative updates in the folder, you can inject them with the help of below command.
Dism /Add-Package /Image:"mount dir" /PackagePath="updates folder\cu1.msu" /PackagePath="updates folder\cu2.msu" /PackagePath="updates folder\cu3.msu" /LogPath=log the output to a file
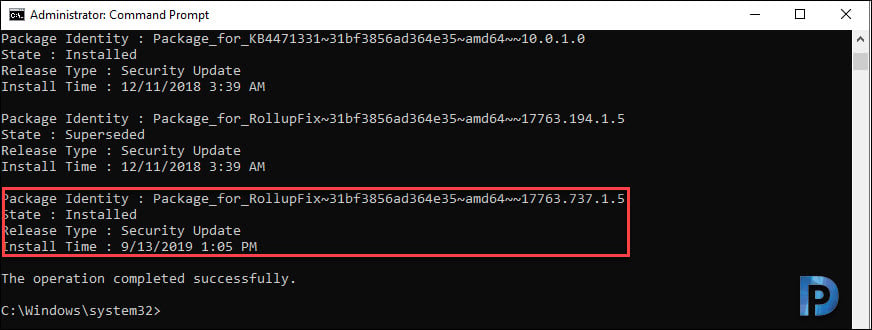
Step 6 – Verify update package
After you successfully add the update package to image file, using the below command you can verify the update package.
Dism /Get-Packages /image:<path_to_image>
Output:-
Package Identity : Package_for_RollupFix~31bf3856ad364e35~amd64~~17763.737.1.5
State : Installed
Release Type : Security Update
Install Time : 9/13/2019 1:05 PM
Step 7 – Dismount the WIM file and Commit Changes
After you add the update package to the image, the last step is to dismount the wim file and commit changes. Unless you commit the changes the process isn’t complete.
To dismount wim file and commit changes run the below command :-
dism.exe /Unmount-wim /mountdir:"E:\Mount" /commit
After you commit the changes, using free tools, you can create an ISO file from the updated setup folder.

HI! Your guide is really useful but I have a question, I need to update a WIM file from 1909 (I think it really is 1903) to 21H2 as per client request. They do not have SCCM or any other tools, and the onsite tech doesn’t know how to create a WIM image via sysprep.
Is it possible to upgrade the one that I have or do we have to mount it, upgrade it and create an image from that? or just plain create a fresh image?
I would really appreciate your input, thanks!
Thanks it helped me update my outdated windows image
I am using Windows 10 Pro which has an “Install.esd” file in the ‘Sources” directory instead of the “Install.wim” file. I managed to determine the Index number using the following command:
“C:\WINDOWS\system32>Dism /Get-ImageInfo /ImageFile:”path to install.esd file”.
Could you provide the command to mount thr “esd” file (STEP4) instead of the WIM file? I will greatly appreciate it.
Thanks very much
Kelly
Great help thanks
i made a little script voor multiple update. Just place them in de update dir.
———
$updatePath = “d:\updates\”
$mountpath = “d:\Mount”
DISM /mount-wim /wimfile:”D:\slipstream\sources\install.wim” /index:1 /mountdir:$mountpath
$Cabs = Get-ChildItem -Path “$updatePath” -Recurse -Include *.msu | Sort LastWriteTime
ForEach ($Cab in $Cabs){
$name=$Cab.FullName
Dism /Add-Package /Image:$mountpath /PackagePath=$name
if ($? -eq $TRUE){
$Cab.Name | Out-File -FilePath $updatePath\Updates-Sucessful.log -Append
} else {
$Cab.Name | Out-File -FilePath $updatePath\Updates-Failed.log -Append
}
}
Pause
#check logs
Dism /Get-Packages /image:$mountpath
Pause
dism.exe /Unmount-wim /mountdir:$mountpath /commit
—-
Does this work with feature updates (such as going from 1809 to 1909)?
Use this post – https://www.prajwaldesai.com/sccm-update-windows-10-1809-to-windows-10-1909/
Why would you have multiple CU for the same OS?
x64 and x86 packages are separate. So are Windows and .NET CU packages
I am having issues with adding the package. After entering the command, nothing happens.
I have a working bare metal task sequence I was using to install 1709 x64 in our environment. I copied my master task sequence and changed the OSD to the Win10 1809 x64 using the newest ISO from the Volume Licensing Center. When trying to simply use the image wim in the ISO, the image states it worked. SMSTS shows exit code 0 and success, but when loading the machine, its stuck in a reboot loop stating it needs to install an update but not naming the update on the screen. Instead, it will simply get stuck. I tried to F8 into safe mode, but it states it will not load the safe mode until it finished installing Win 10. I can get to the troubleshooting and the command prompt, but I’m not even sure what log to look at as I can’t use Event Viewer in this particular instance. I tried using DISM and injecting the latest Cumulative update I could find into the Win 10 ISO and it did the same thing still. Then I tried to do a build and Capture to try pulling the new Image from there and got a WMI error that will not allow me to edit the task sequence, even after rebuilding it 4 times.
Potential side issues that could be related, but I don’t know anymore:
We have had an issue with some files seeming to disappear(like drivers all the sudden not being distributed and our office files disappearing from our Source share) so its possible something is missing, but I’ve redownloaded and rebuilt the ISO repeatedly. We also had an issue with our primary appearing to expired updates in WSUS and it was not allowing our Upgrade servicing to work until we unexpired these updates.
I’m at a loss and pulling my hair out. Any and all advice on where to check or what to look into is welcome.
Do you find this to be a better way than using the console’s built-in Offline Servicing? I ask because for a long time I used DISM until we updated to CM1902. I now use Offline Servicing and remove superseded updates. Seems to work perfectly for me.
I added SSU and October CU in Win10 1903 via Offline servicing, post which Windows 10 search bar stopped working
What about the servicing stack update which is a requirement for the cumulative update?
John,
I have been using Offline Servicing for a few months now and the console seems to handle the SSU’s for me. Not sure what is actually happening and why this same process doesn’t happen with regular patching though.