


In this tutorial, I am going to show you how to enable remote desktop on SCCM CMG virtual machine. You can use RDP to access a CMG VM after you’ve configured it and enabled remote desktop.
To enable the remote desktop on a Cloud Management Gateway server hosted in Azure, you must first set up a cloud management gateway correctly. Use the CMG step-by-step guide to set up the Cloud Management Gateway for your organization.
Starting with SCCM version 1806, a CMG can act as a cloud distribution point to serve content to clients. This is really a good functionality because it reduces the required certificates and cost of Azure VMs.

One of the primary reasons for enabling the RDP on CMG is to access the IIS log files from the virtual machine that runs the cloud service. This also helps when you intend to troubleshoot the Cloud Management Gateway (CMG) issues.
How to Enable Remote Desktop on SCCM CMG
Perform the following steps to enable remote desktop on SCCM CMG:
- Log in to the Azure Portal.
- Navigate to Cloud Services (classic) and select your Cloud Management Gateway service.
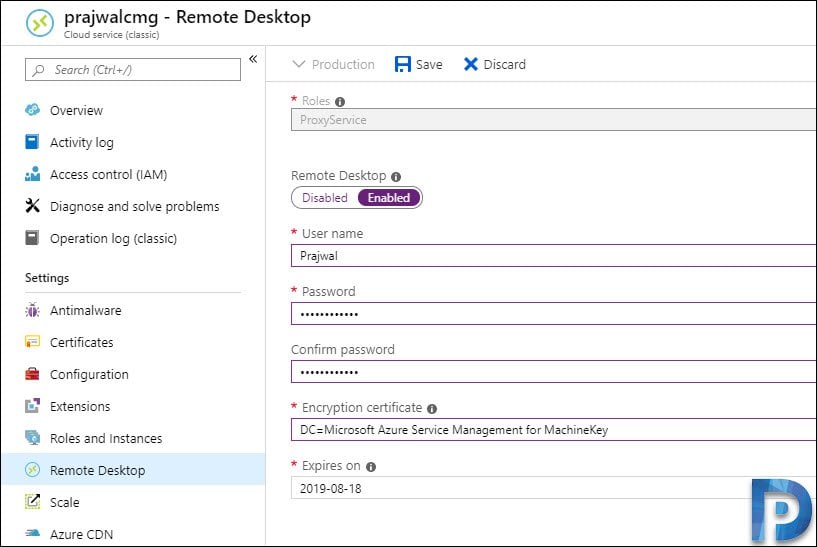
- Under Settings, select Remote Desktop and toggle the slider to Enabled.

After you click Enabled, create a username and password to access the CMG. Choose an encryption certificate and click “Save.”
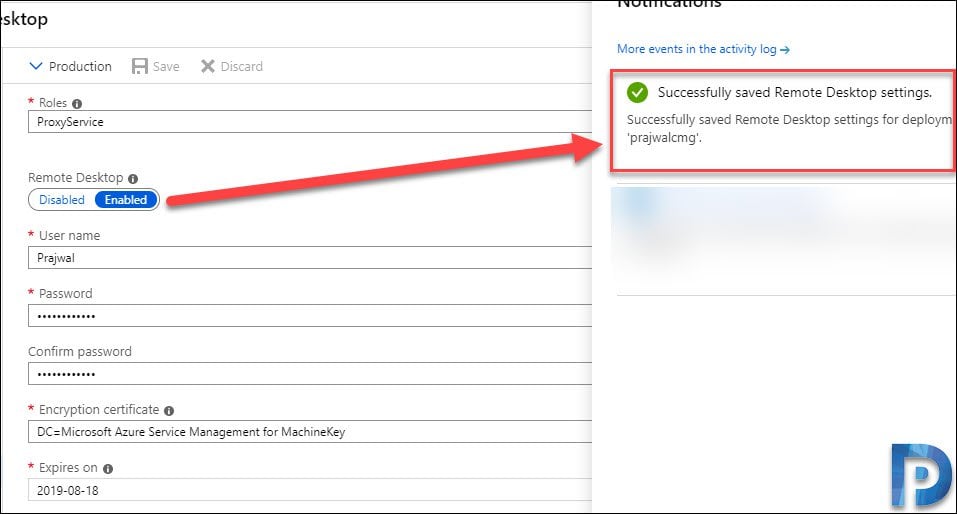
Look for the notification that says, Successfully saved Remote Desktop settings.
Connect to CMG via RDP
In this section, I will show you how to RDP CMG, i.e., connect to CMG via RDP. After the Remote Desktop Services have been activated on CMG, you can connect to the virtual machine. Click on Roles and Instances and click on ProxyService (ProxyService_IN_0).

When you click ProxyService (ProxyService_IN_0). On the right pane you got three options.
- Connect: Downloads ProxyService_IN_0.rdp file. Using this RDP file, you can connect to this virtual machine.
- Reboot: Restarts the virtual machine.
- Reimage: I haven’t used this option yet. It seems like the whole role instance is re-imaged, and the local data will be lost.
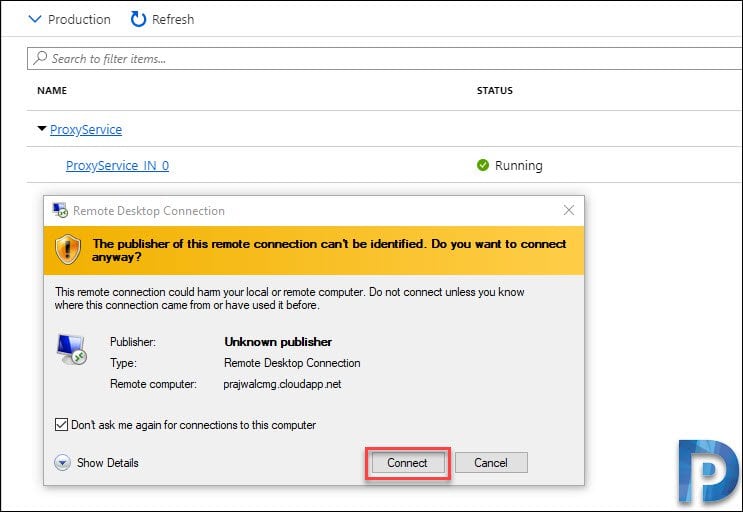
Now click Connect to download the Remote Desktop file named ProxyService_IN_0.rdp.

Double-click the RDP file, then select Connect from the RDP box. You may also save the RDP file on your computer so that you can access the CMG VM whenever required.
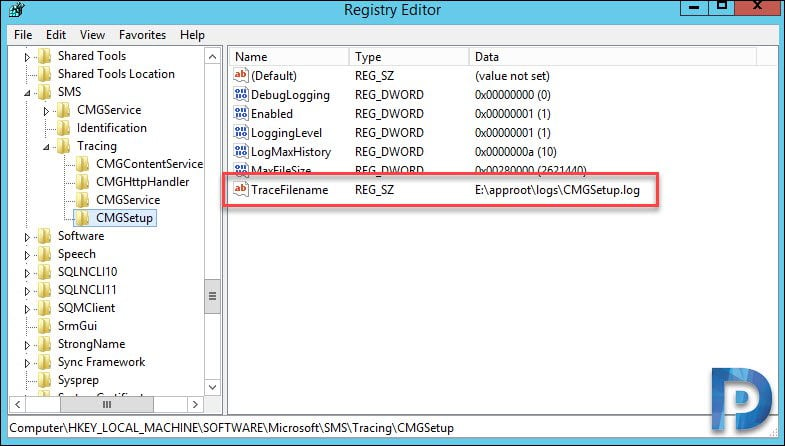
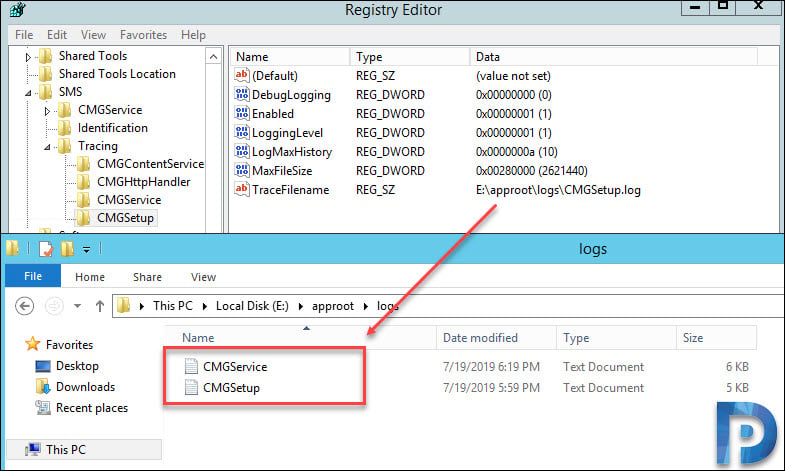
After you log in to this CMG virtual machine, open the registry editor using the regedit command. In the registry edition, navigate to HKLM\SOFTWARE\Microsoft\SMS\Tracing\CMGSetup. The registry key “TraceFilename” reveals the location or path of CMG log files, which in this case is E:\approot\logs\CMGSetup.log.
If you browse to E:\approot\logs folder, you should find the CMGService.log and CMGSetup.log files. These two log files are essential for troubleshooting the CMG issues.
- CMGService.log: Records details about the cloud management gateway (CMG) service core component in Azure.
- CMGSetup.log: Records details about the second phase of the cloud management gateway deployment (local deployment in Azure).

Hi,
Like some other people. We ar very interested to get un updated procedure for those they are using the modern Azure Scale Set because the Classic method is no more possible. Many things have changed since 3 years in Microsoft Azure.
How do I enable rdp on the CMG if it is using VMSS which doesn’t use the Cloud Services (classic)?
I am able to connect and all but i get a pop up everytime indicating a certificate error and it might be unsafe to proceed.
It can’t validate the remote computers certificate. Do you think this is something we should take seriously and do something about? I have picked an encryption certificate on the Azure Portal