


In this post, I will show you how to deploy Pulseway agent using SCCM or ConfigMgr. The most recent version of the Pulseway agent for Windows will be downloaded, packaged in SCCM, and distributed to Windows computers.
If you’re not familiar with the Pulseway tool, it is a remote monitoring and management software designed to assist MSPs and IT teams in lowering downtime and raising the bar on efficiency through automation. Read the following guide to get in-depth information about Pulseway endpoint management.
Like Configuration Manager requires agent to be deployed to Windows computers, Pulseway also requires the agents to be installed on the remote Windows devices. These agents when installed on remote devices will communicate with the Pulseway server and exchange information. To package the Pulseway agent into SCCM, you need the agent installer which you’ll have to download it from Pulseway website.

Download Pulseway Agent for Windows
There are 2 methods to download the Pulseway agent for Windows, and they are as follows:
- Download Pulseway agent directly from Pulseway downloads section. Visit the Pulseway website and go to Downloads. Click the Agents tab and download the matching agent for your OS. Both 64-bit and 32-bit agent installers are available.
- You can also download the agent by opening the Pulseway portal > onboarding > downloads section.
Download the Pulseway for Windows installer according to the architecture of your operating system. As I only have 64-bit machines in my lab, I will be deploying the 64-bit Pulseway agent. There are downloads available for Linux, Mac, and Raspberry Pi, among other operating systems. Save the installer for the Pulseway agent for Windows to an SCCM server or shared folder.
The good thing about the Pulseway agent: the installer is an .msi file. This should make SCCM admins happy because Configuration Manager can read the install, uninstall and product code details from the MSI installer and ease the application deployment.

Create Pulseway Application in SCCM
In this step, we will create a new application for Pulseway in SCCM. Launch the ConfigMgr console and go to Software Library > Application Management > Applications. Right-click Applications and select Create Application.

Select the application type as Windows Installer (*.msi file) and specify the location of the Pulseway agent. Click Next.

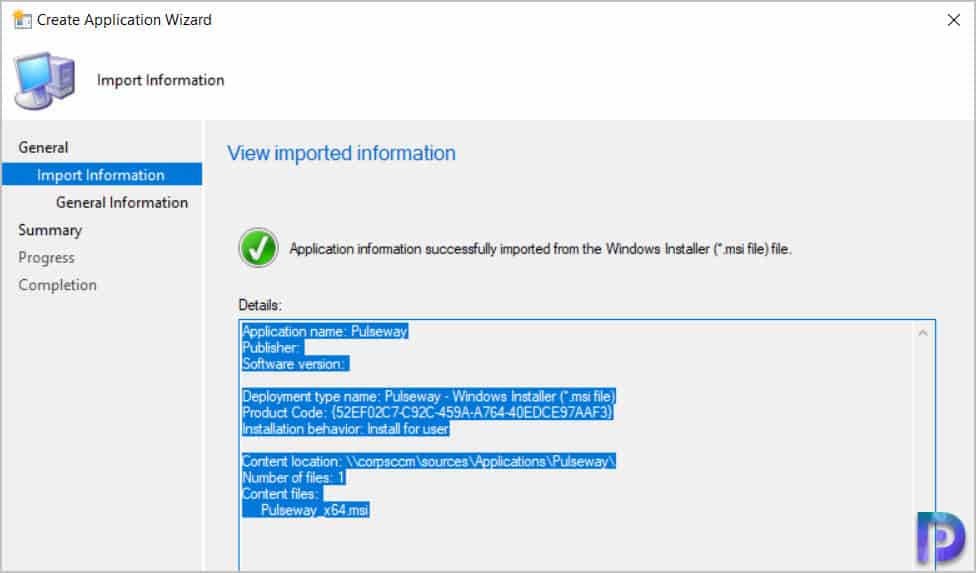
The application information is now imported from the Pulseway agent installer .msi file. Click Next.
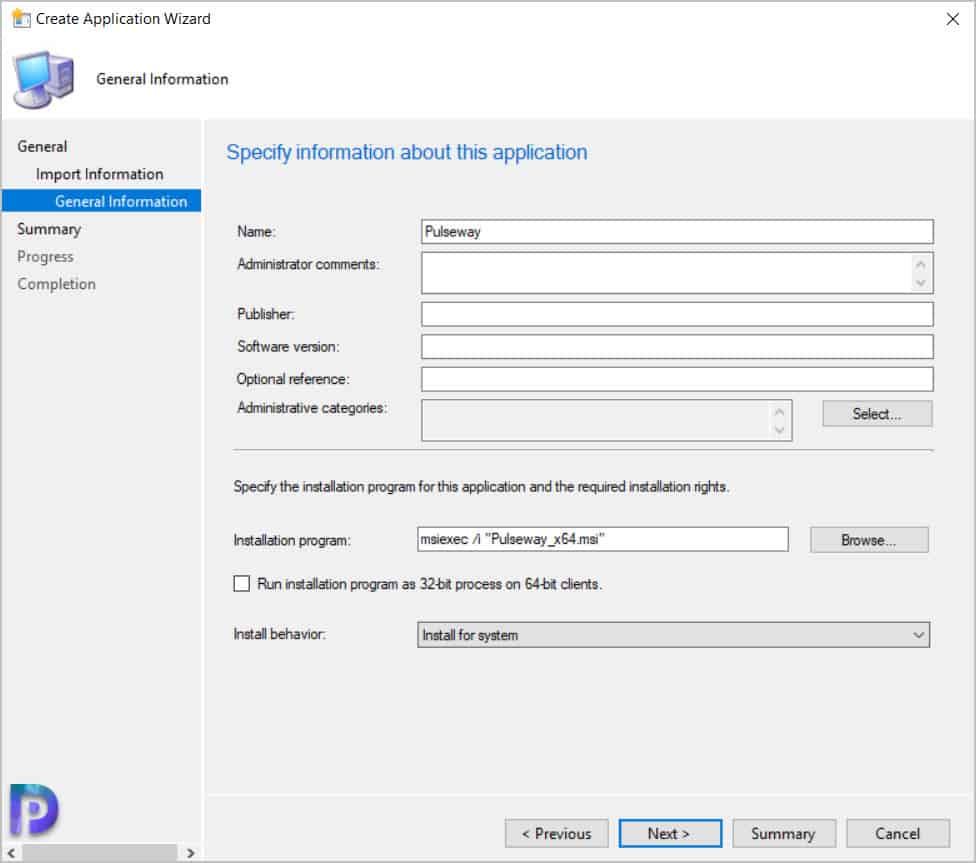
Specify additional information about Pulseway agent on General Information window. Click Next.
On the Completion window, click Close. We have successfully created the Pulseway application in Configuration Manager. In the next step, we’ll deploy the application to all our Windows computers.

Deploy Pulseway Agent using SCCM
Let’s look at the steps to deploy the Pulseway agent using SCCM. In the Configuration Manager console, right-click the Pulseway application and select “Deploy.” On the General window, click Browse and select the SCCM device collection to which you want to deploy the Pulseway agent. Click Next.

You must distribute the application’s content to all the distribution points. So click on the Add button and select the distribution points to distribute the Pulseway application content. Click Next.

Select the actions “Install” and “Available” on the Deployment Settings window. With these settings, we make sure that the app shows up in the software center so that it can be installed. The user must install the application manually. In case you want the agent to be installed automatically, select the purpose as “Required.” Click Next.

Specify the user experience for the installation of the Pulseway agent on your devices. Click Next.

On the Alerts and Summary window, click Next, and on the Completion window, click Close. We have successfully deployed the Pulseway agent for our Windows devices using SCCM.

Test Pulseway Installation on Windows Computers
On the client computer, launch the software center. Select Applications, and from the list of apps, select the Pulseway application. Click Install to begin the Pulseway agent installation. We see that the client now downloads the Pulseway agent content from the distribution point, and the installation begins.
During the application installation, you can review the SCCM Client Logs to determine any errors or warnings. In my testing, the Pulseway agent installed without any issues and I have tested it on more than 5 computers. Post the agent installation, you should see the Pulseway manager icon on the desktop. The agent requires a sign-in before you perform any further tasks.

