In this post I will show you how to create SCCM Application phased deployments. With every SCCM update, we get to see lot of features getting added. Most of the features make it from technical preview version to current branch version.
One such feature that I am talking about is phased deployments. The phased deployment feature was first introduced in version 1802 as a pre-release feature. However beginning with version 1806, it’s no longer a pre-release feature.
So what do you mean by phased deployments ?. As per Microsoft – Phased deployments automate a coordinated, sequenced rollout of software across multiple collections. In big organizations, the admins are bit worried when there is mass deployment on an application. You never know what could go wrong during deployment.
The idea behind phased deployments is to deploy software to a pilot collection first. Then automatically continue the rollout based on success criteria.
In Configuration Manager, you can create phased deployments for the following objects:
- Task sequence
- Application (starting in version 1806)
- Software update (starting in version 1810)
How to Create SCCM Application Phased Deployments
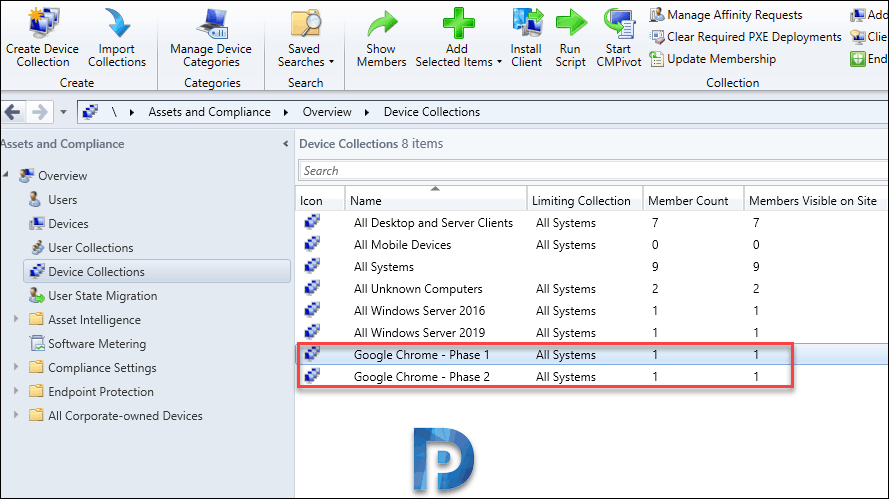
To create SCCM application phased deployments, I am going to chose an application to deploy it in phases. Before that I have got two devices collections created. Each of these collection has got just 1 computer to perform initial testing.
You may add more computers to the collection. The application that I will be deploying is google chrome. Before creating a phased deployment, distribute the associated content to a distribution point. So my two test collections are Google Chrome – Phase 1 and Google Chrome – Phase 2.
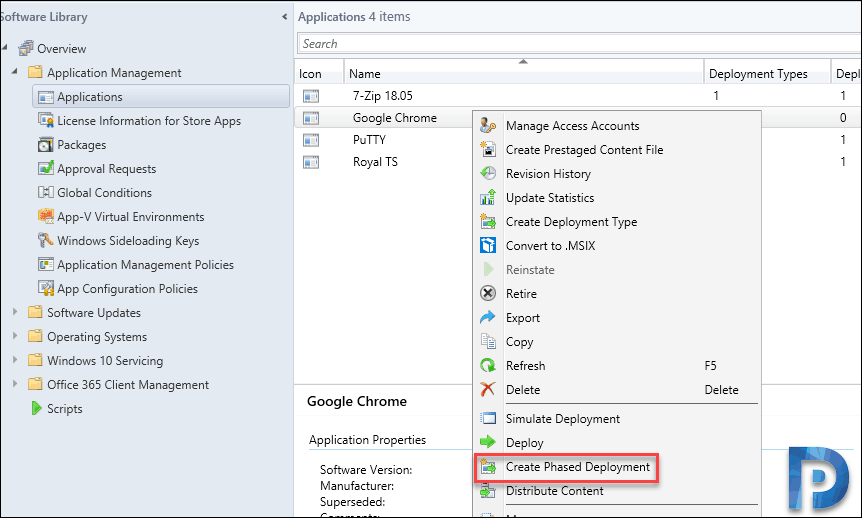
Go to Software Library > Application Management > Applications. Right click desired application and click Create Phased Deployment.
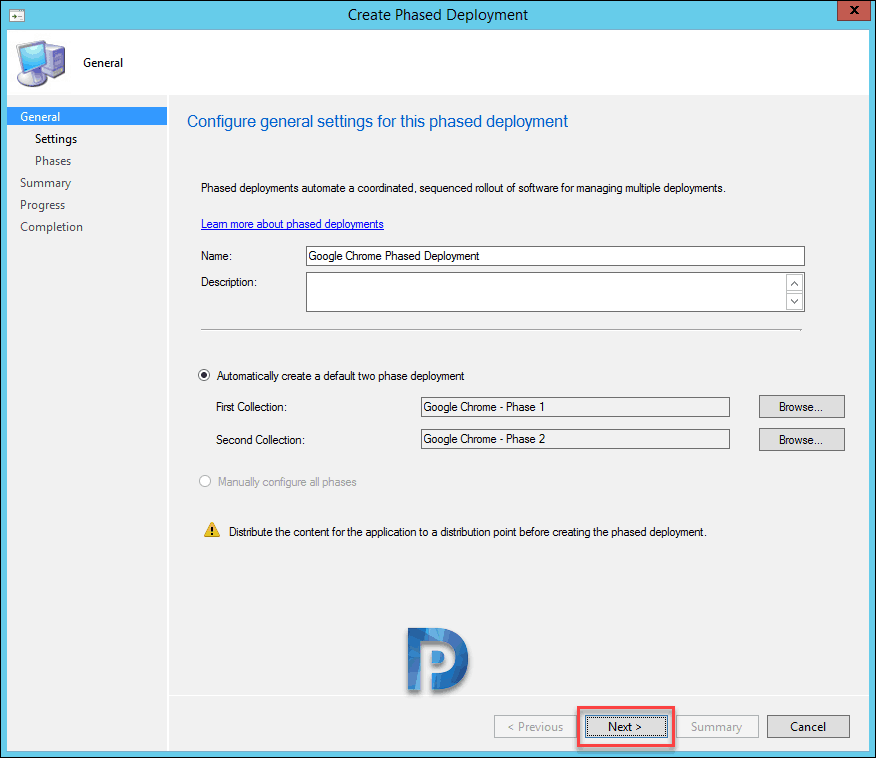
On General page, specify name of the deployment. Choose the first collection and second collection by clicking Browse button.
Notice that Manually configure all phases option is greyed out. You can’t currently manually create phases for an application. The wizard automatically creates two phases for application deployments.
Phased Deployment Settings
This needs a bit more explanation before you choose them.
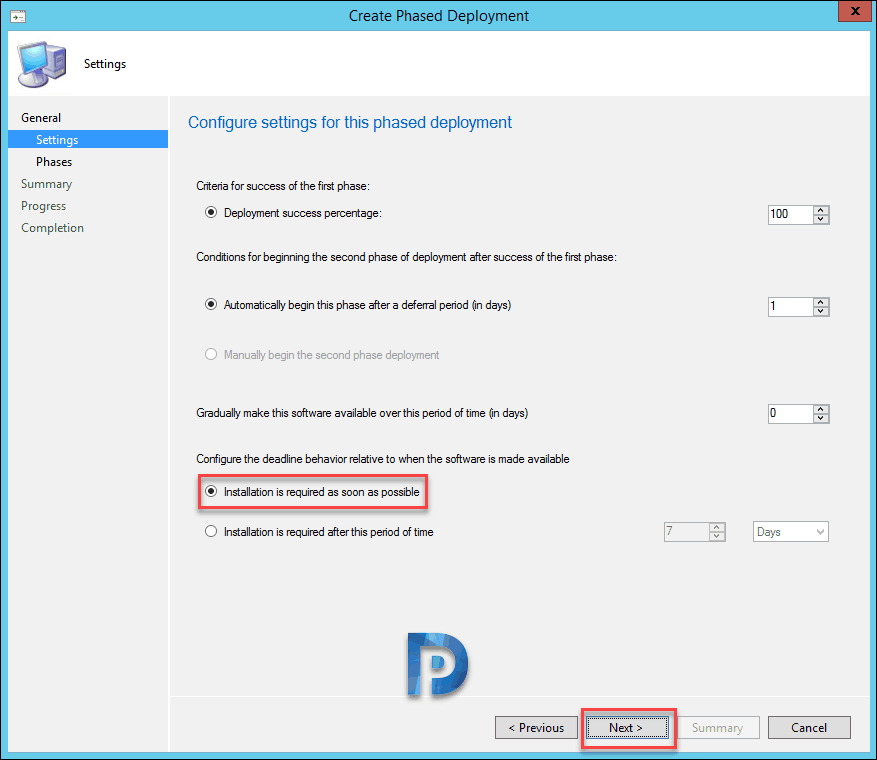
- Deployment Success percentage – In short this setting specifies the percent of devices that need to successfully complete the deployment. This applies only to the first phase.
- If the deployment is 100% successful (in my case i have set the criteria as 100%), the deployment continues to the second phase, and creates a deployment of the software to the next collection.
- Automatically begin this phase after a deferral period (in days) – Specify the number of days to wait before moving to the second phase after the success of the first.
- Manually begin the second phase of deployment – With this option, you can manually start the second phase. This option isn’t available for phased deployments of applications.
- Configuration Deadline – You can either choose to deploy the application as required asap. Or set to deploy the application after a certain period of time.
Once you configure the settings, click Next.
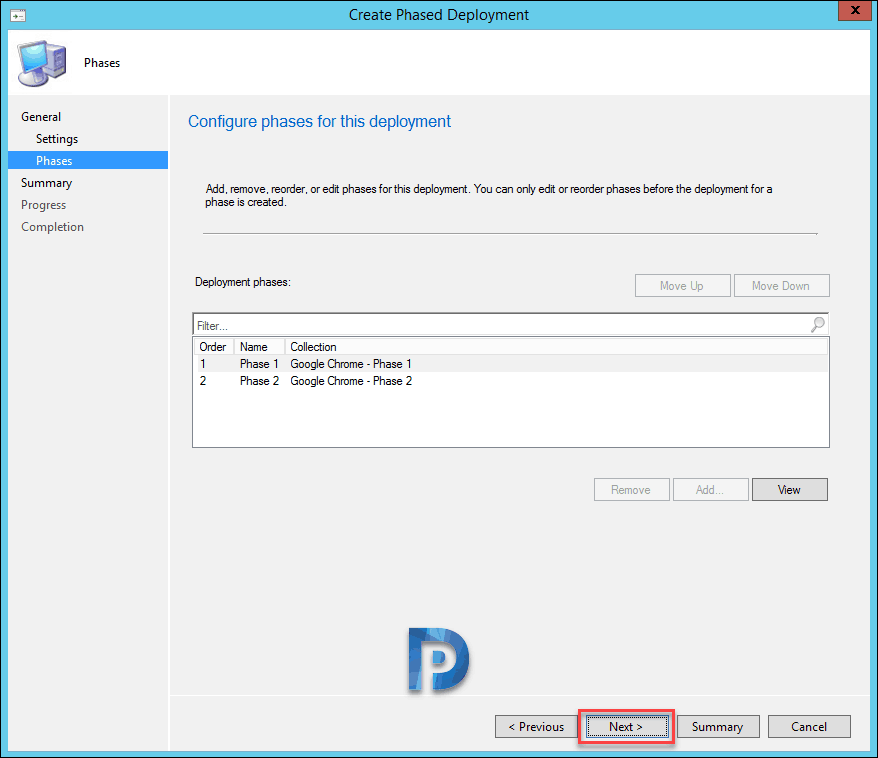
You see the phases that you configured. Click Next.
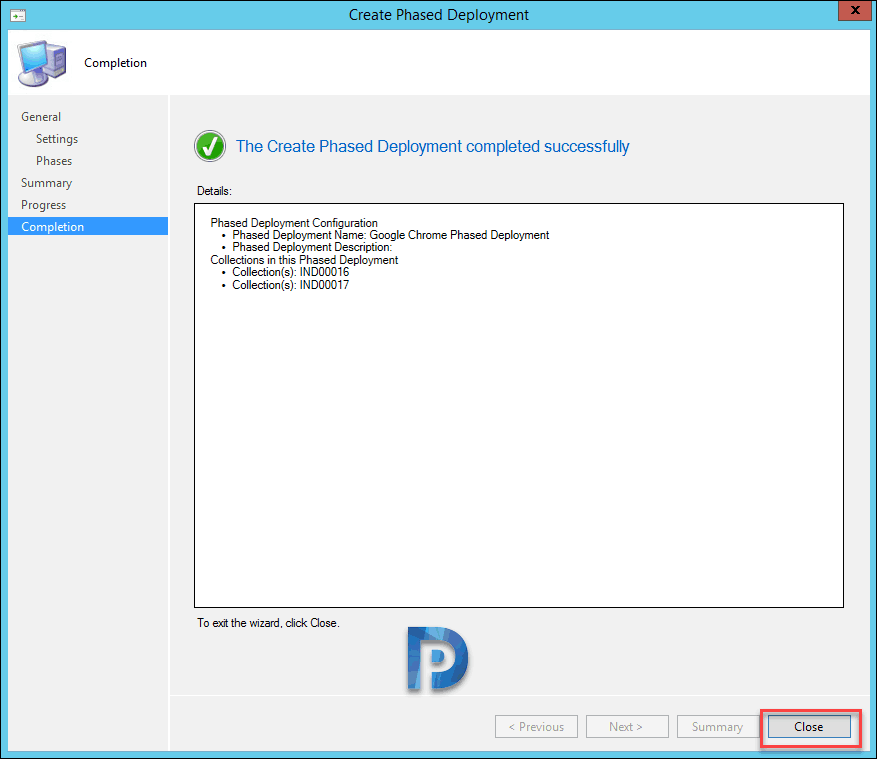
Click Close on the completion page.
Phased Deployment Application Properties
Once you create SCCM application phased deployments, you can go back and check some what all is configured.
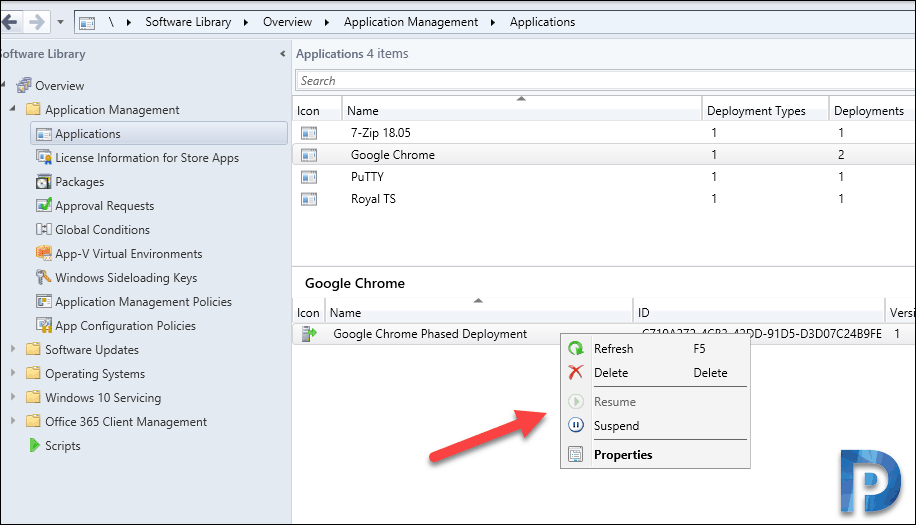
Navigate to Software Library, Overview, Application Management, Application. Select the application and in the bottom pane, select either Phase 1 or Phase 2.
Right click any of the Phase and you see an option called Suspend. You can simply suspend the phased deployment using this option. Once you do that you get an option to resume the phased deployment.
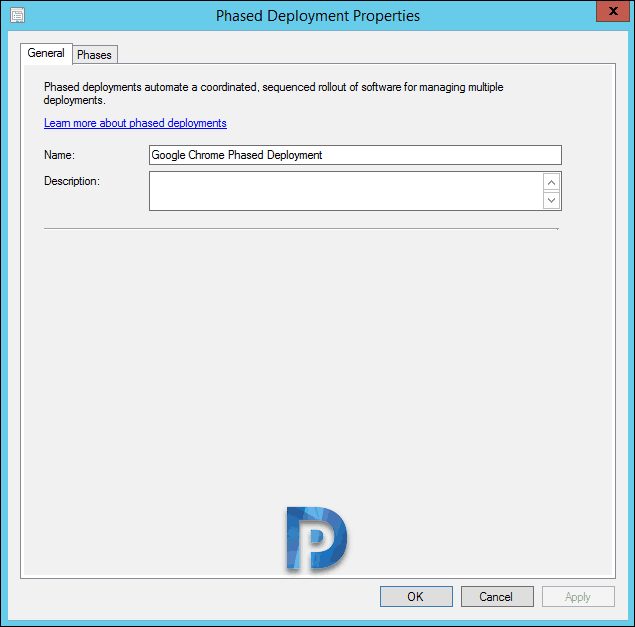
Clicking the Properties shows the Phased Deployment Properties. On the General tab you can still provide some description about the deployment in case you missed it earlier.
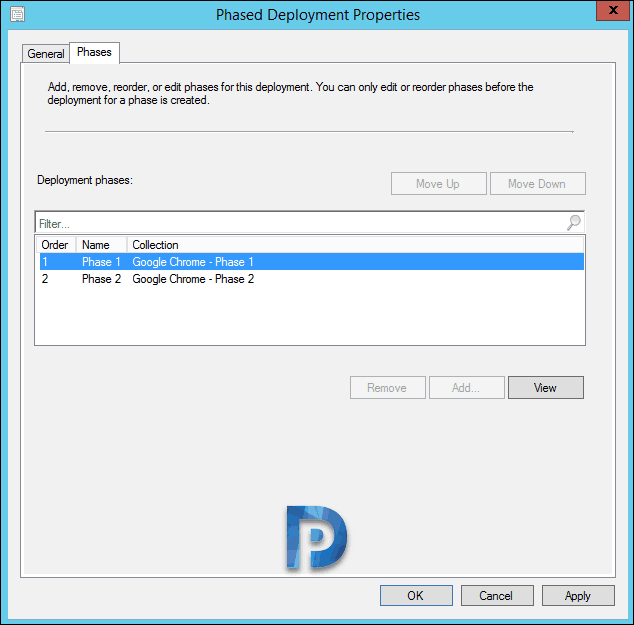
On Phases tab, you see the deployment phases. At this point you cannot move them up and down as the Phase 1 deployment has already begun. You can click View to see the Phase Settings.
Phase Settings window shows you the overview of settings that you configured.
Phased Deployment Monitoring
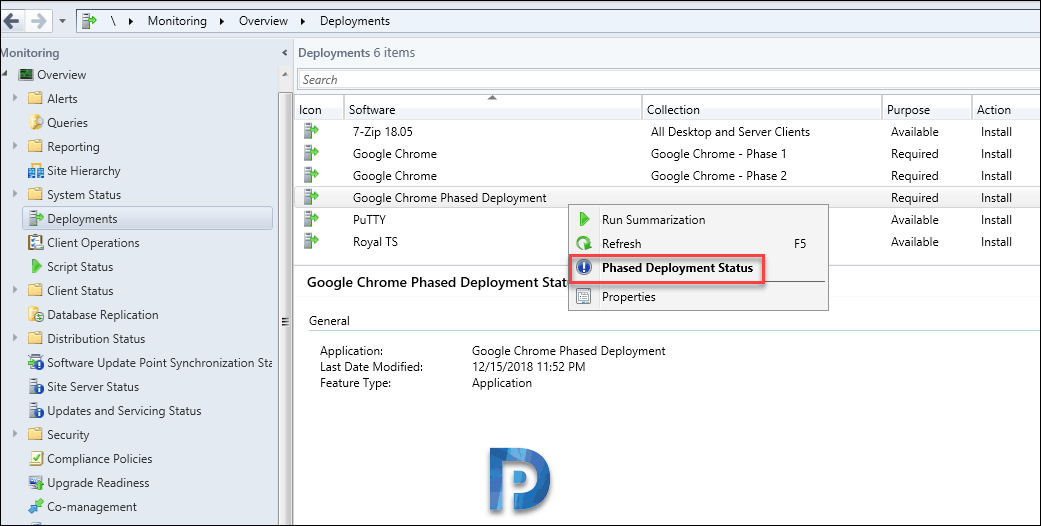
Now that you deployed the application in phases, it is important to know how successful the deployment has been. Click on Monitoring > Overview > Deployments.
Right click the application phased deployment (in my case it’s Google Chrome) and click Phased Deployment Status.
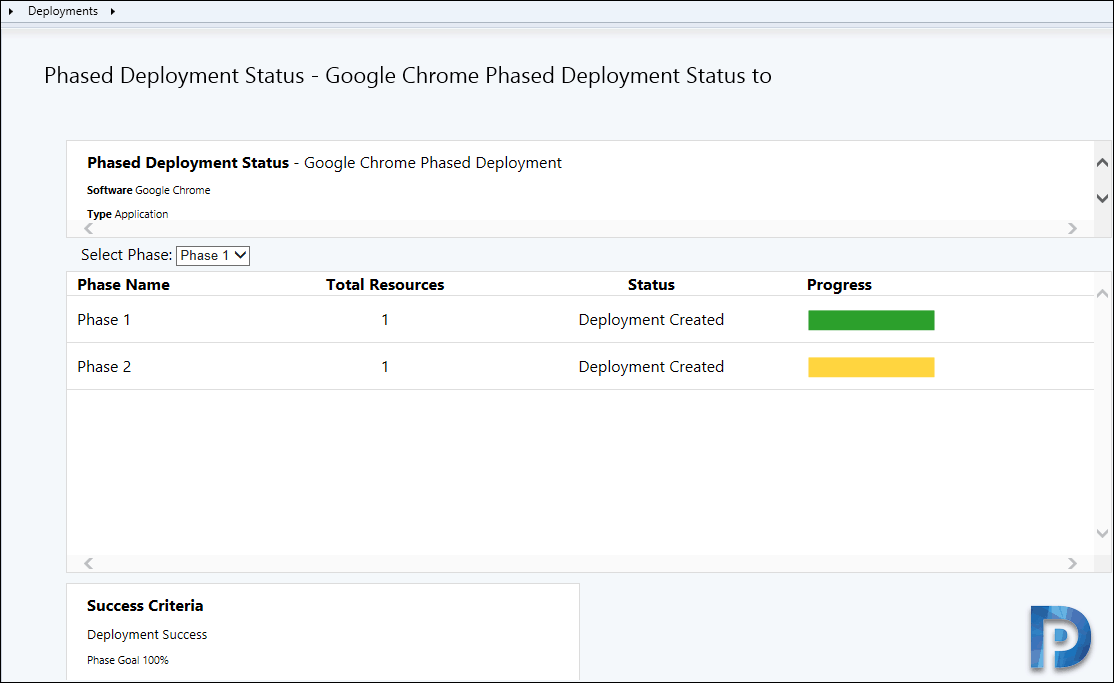
The Phased Deployment Status windows shows the phases, total resources, status and progress. Notice that my Phase 1 application deployment is complete. As per the configuration that we did, the deployment has now moved to second phase.





Hi,
If my application has 2 types of Deployments, i.e. one is for Initial Install and second is for Upgrade – how to create a Phased Deployment for second Deployment type (Upgrade)? I did not find option to do it in SCCM! And – what Deployment type is selected by SCCM, if there are 2 of them?
Why is the user experience grayed out not allowing you to allow it to install out side of a MW but honor it for reboots. This seems like it makes it useless for application deployments.
Hey Prajwal,
Great content. It helped me a lot!
Can we do more than 2 phases now or Microsoft hasn’t launched that capability yet? I can only see 2 automatic phases in the wizard.
Hi Prajwal!
When creating a phased deployment of Software Updates, I specify “User Notification” in User visual experience to “Display in Software Center, and only show notifications for computer restarts”, for each phase. But, when the phases begin to work, these parameters return to default – “Display in Software Center and show all notification”. The same goes for “Detail level” in Deployment Settings.
Please tell me how to fix it. Many thanks!
Is there any information on changing the user notification whilst using the phased deployment? It seems that it defaults the “Display in Software Center and show all notifications” and prevents this from being changed.
Hi Prajwal,
Thanks for this blogs. It is very helpful.
I have not tested Phased deployment method for Software updates. I wanted to know the below Scenario
Say i have created phased deployment at 8 PM Phase1 i have given 80 % and Phase2 deadline delay for 2 days. When the actual deployment will start (phase1 and phase2), if Phase1 reaches only 75% and deadline reaches day 2 will phase 2 deployment starts ?
Thanks in advance.
Excellent post man. What a clear explanation.
Hello Prajwal
Your blogs helps us a lot to keep our knowledge regularly updated on SCCM with its all new features practical implementation. I am looking forward for a blog to Convert MSI application to MSIX ,which is the new feature introduced in SCCM 1810.
Well described.