


This post is a step by step SCCM 1806 upgrade guide. SCCM 1806 is released and yes you can upgrade to SCCM 1806. You can read more about this announcement here. The SCCM 1806 upgrade guide contains the steps to upgrade your configuration manager current branch to SCCM 1806. This is probably the 9th release of current branch and I admire the hard-work done by MS product team.
There have been lot of features introduced with every release of configuration manager current branch. SCCM 1806 update also comes with some great features and fixes. You can read the official announcement here. To know what’s new in version 1806 of Configuration Manager current branch, check this post.
SCCM 1806 – Installation Info
As always you know that updates and hotfixes are always available right in the console. SCCM 1806 update is available as an in-console update. To install SCCM 1806 update, you must be running one of these versions of SCCM 1706, 1710, or 1802.

Note – Most of all if you’re running a multi-tier hierarchy such as CAS and primary sites, start at the top-level site in the hierarchy. First begin with CAS upgrade, and then you can begin the upgrade of each child site.
SCCM 1806 New Features
As mentioned earlier SCCM 1806 comes with new features. While it’s not only new features but it also includes enhancements or fixes reported in previous releases of current branch versions. I will list down some of the best SCCM 1806 features and we will then proceed with installation steps.
- Site server high availability feature
- Uninstall application on approval revocation
- New Custom tab for webpage in Software Center
- CMPivot
- Deploy PXE-enabled distribution point without Windows Deployment Services
- CMTrace is now installed along with client agent
- Configuration Manager Toolkit is now included
- View Currently logged-on user
- Feedback can be submitted from console
- Network congestion control for distribution points
- Partial download support in client peer cache
- Feature to configure remote content library for the site server
- Improvements to phased deployments
- Improved WSUS maintenance
- Deploy software updates without content
- New software updates compliance report
- Deploy third-party software updates
- Improvements to co-management
- New product life-cycle dashboard
SCCM 1806 Fast Ring vs Slow Ring
If you want to install SCCM 1806 update quickly, you can opt for fast ring method which uses a PowerShell script. You can download this script from Microsoft. However the PowerShell script is available for limited time because after 2 weeks (I assume), the update becomes available to everyone. So initially if you don’t find the update in the console, you might have to run the PowerShell script once. If you wish to wait for a period of 2 weeks, the update shows up in the console without the need for running any PowerShell script.
SCCM 1806 SQL and OS Supported Versions
Before you install SCCM 1806, ensure that you are running the supported version of SQL and operating system. For SCCM 1806 supported operating system refer to this post. And for SCCM 1806 SQL server support, refer to this guide
SCCM 1806 Upgrade Guide
The SCCM 1806 upgrade guide contains the steps to upgrade your configuration manager current branch to SCCM 1806. Let me tell you that I am installing SCCM 1806 update on my primary site server. The site server is running Windows Server 2016 standard OS and SQL server is SQL 2017 Enterprise.
Step 1 – SCCM 1806 Prerequisite Check
Open the SCCM console and go to Administration > Updates and Servicing. If you don’t find the update 1806, click Check for updates button. Once the update is available, download the update. Once you see the update is downloaded, right click update and click Run prerequisite check.

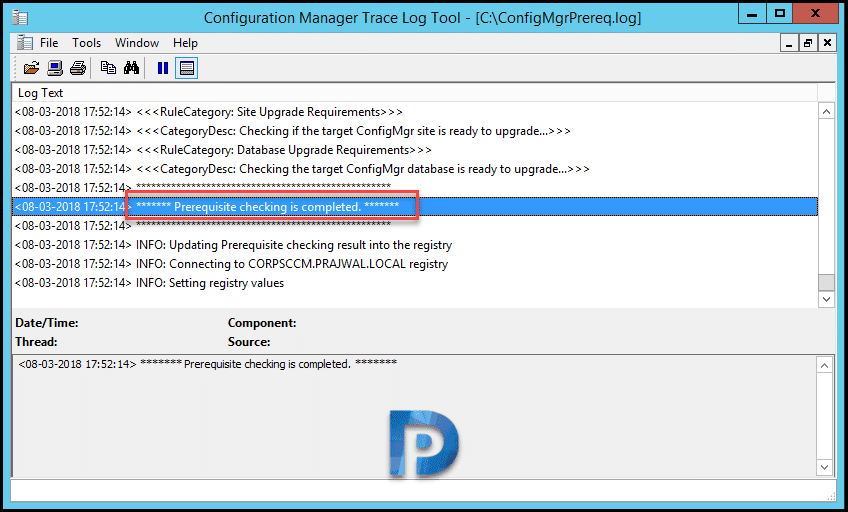
In the background prerequisite checks are done. Open the ConfigMgrPrereq.log file located on C: drive of site server. Look for the line at the end which reads Prerequisite checking is completed. That confirms the prerequisite check is passed/complete.
Step 2 – SCCM 1806 – Installing Update
Refresh the console now and you will see the status of update as prerequisite check passed. You can now proceed with installing the SCCM 1806 update. Right click SCCM 1806 update and click Install Update Pack. On the General page, click Next.
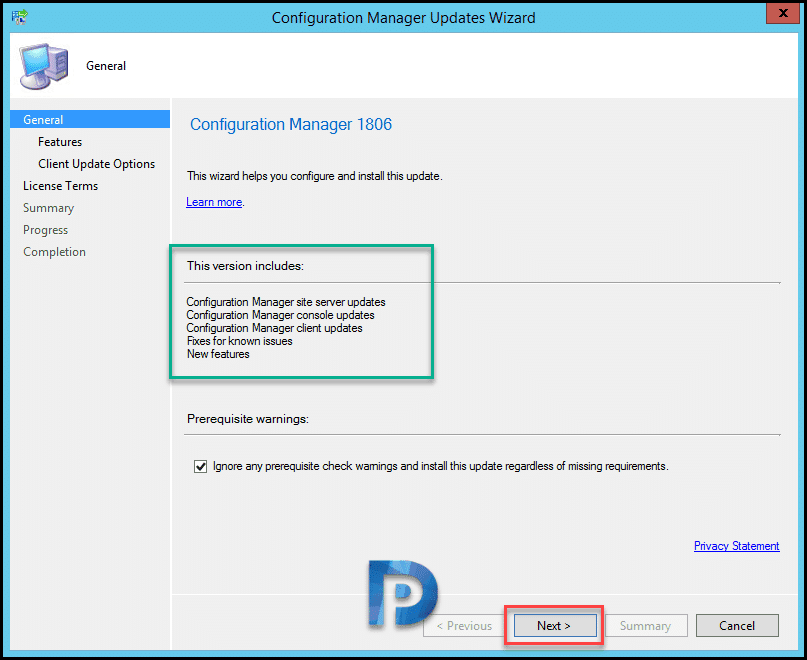
Choose the features that you want to enable. If you want to enable them later, click Next.

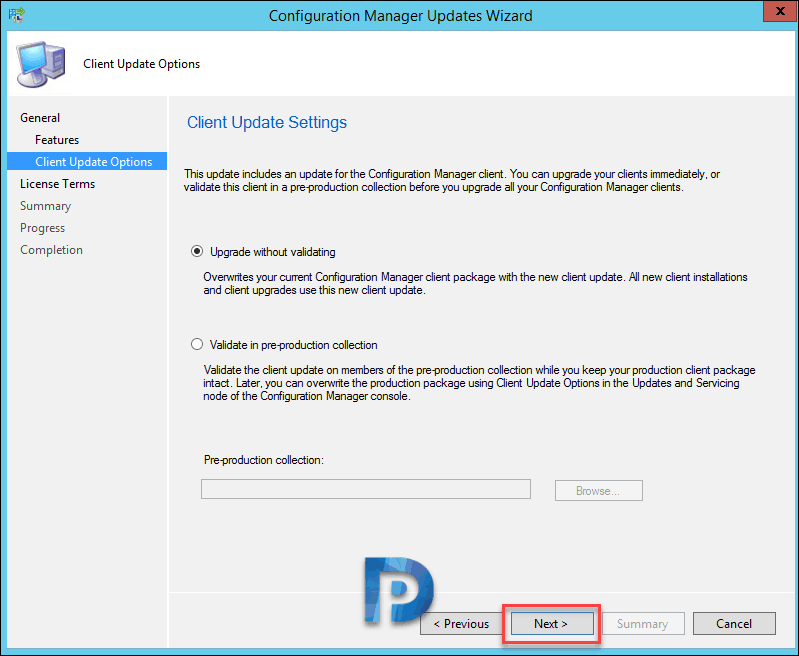
If you wish to validate client update on members of pre-prod collection, click Validate in pre-production collection. Else go with upgrade without validating and click Next.
License Terms – Click I accept these license terms and privacy statement. Click Next.

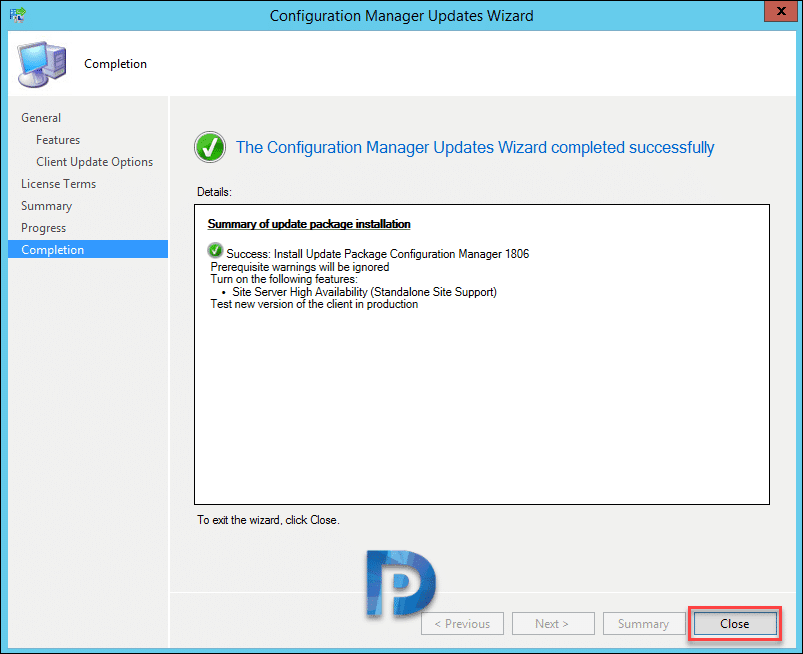
Click Next on Summary and Progress page. On Completion page click Close.
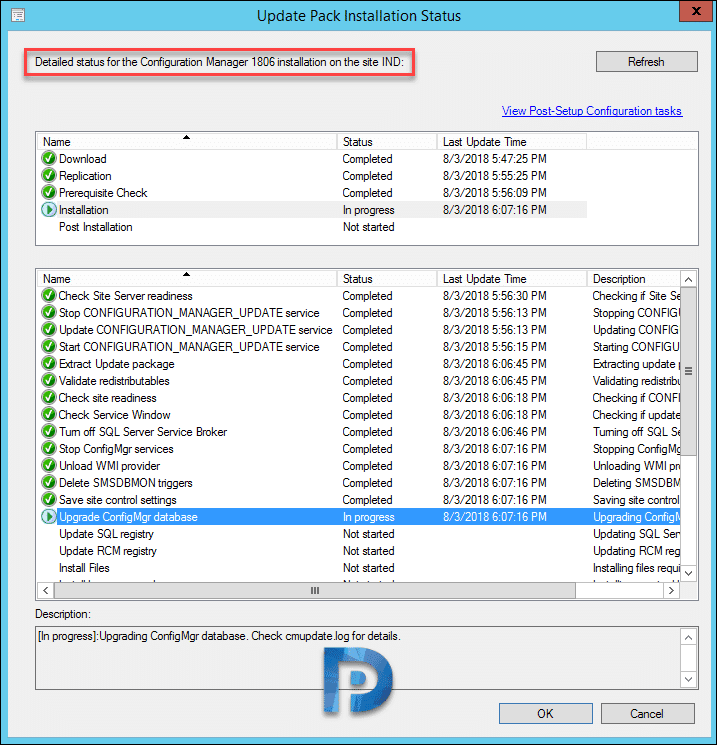
Step 3 – Monitor Installation Progress
Once you install the update pack, go to monitoring node. Click on Overview > Updates and Servicing Status. Select the update and click Show Status. You can now see the detailed status for Configuration Manager 1806 installation.
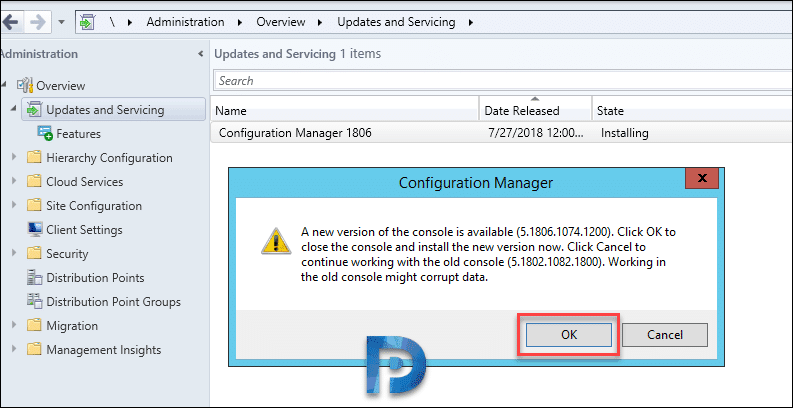
Step 4 – Console Upgrade
Once the update is installed, either refresh or close and re-open the console. You will see the console upgrade box. Click OK to begin the console upgrade. The old version of console 5.1802.1082.1800 will be upgraded to version 5.1806.1074.1200. The two helpful logs for monitoring console upgrade would be ConfigMgrAdminUISetup.log and ConfigMgrAdminUISetupVerbose.log. Both of these are present on C: drive of site server.
Step 5 – Verify Update Installation
The console will re-launch. Check About Configuration Manager details.
- Version 1806
- Console Version: 5.1806.1074.1200
- Site Version: 5.0.8692.1000
 In addition viewing the site properties shows the version and build number.
- Version – 5.00.8692.1000
- Build Number – 8692

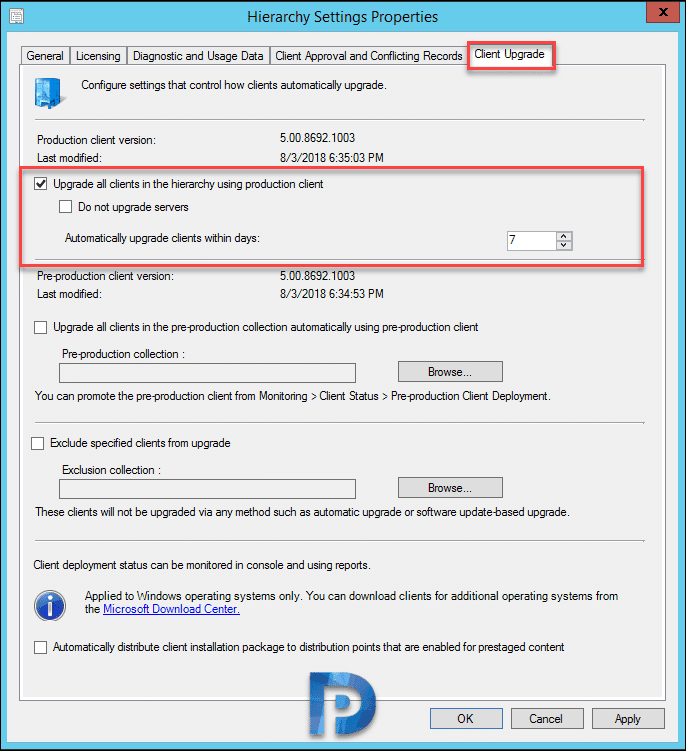
Step 6 – Upgrading SCCM 1806 Client Agents
Once you perform SCCM 1806 upgrade, the client agents in the hierarchy should also be upgraded. You can upgrade client agents using client upgrade feature. So go to Administration > Site Configuration > Sites. Click the Hierarchy Settings on top ribbon. Select Client Upgrade tab. Ensure Upgrade all clients in hierarchy using production client box is checked. You also also choose to not upgrade servers. The client agents are upgraded to latest version withing 7 days. You can choose your settings here as per your requirements.
The upgraded client agent should display it’s version as 5.00.8692.1003.

Looking at upgrading from 1802 right the way through to 1910. We are looking at 1802 to 1806 then 1806 to 1910. My only query is that if certain clients don’t get updated to the latest version during the interim period of going from 1802 to 1806 will these clients be able to automatically get updated from the older client version straight to the 1910 version?
If I upgrade my SCCM Site Server from 1710 to (1806 or 1810), will I lose remote control functionality to my clients that are still running the 1710 client prior to updating to the new (18**) client?
Prajwal,
Thank you for writing the guide. In previous upgrade guides, I read it was a good idea to install the newer ADK first. Is that not needed for 1806?
Thanks
Yes John, that’s right. You can always use the latest version of ADK.
After the upgrade all my clients are showing up with a Question mark.
I have searched for this problem but everything is older then this version that I am finding. What could have happened.
Thanks!
Are the client agent upgraded to latest version ?. Check the client version in the console.
Hi, I have the same problem as Volker above. All is fine but the report is not there, any solution to that?
Hi Prajwal,
Thank you for the article. We have multiple primary sites what’s the best way to upgrade SCCM in staging manner ?
Regards
Bhavik
Nice Article! Thank you!
In your upgrade guides you have not mentioned the step for “Test DB upgrade”. So is this step not recommended or necessary?
You are right. I think i will publish a separate post on how to perform test DB upgrade and use it as reference for upgrade guides.
Hi Prajwal,
When I try to do the update, it fails on the “Prerequisite Check”. See more details below. Would appreciate any advice on this.
Failed Prerequsite Check
Unsupported site server operating system version for setup
Errors in ConfigMgrPrereq.log
ERROR:Can not get sql instance regkey.
ERROR:Failed to get Sql edition, Sql Server:mysqlserver.com, instance:sccm.
Currently running..
Configuration Manager 1802 with Hotfix (KB43442419)
Windows Server 2016 for both SCCM and the SQL Server
SQL Server 2017
Legend Prajwal
Thank you
Hi! For some reason the upgrade has not installed the new ‘compliance 9’ report, the rest seems to work fine though. Is there a way to get the RDL files for the missing report somewhere, or to trigger the install again? Regards, V.Klaffehn
This has been fixed in 1810.
I have 1810 but the Compliance report still doesn’t show, also the lifecycle reports are not there. All else is working fine and I have the dashboard showing well too.
you are great man!! appreciate your works
Thank you so much