

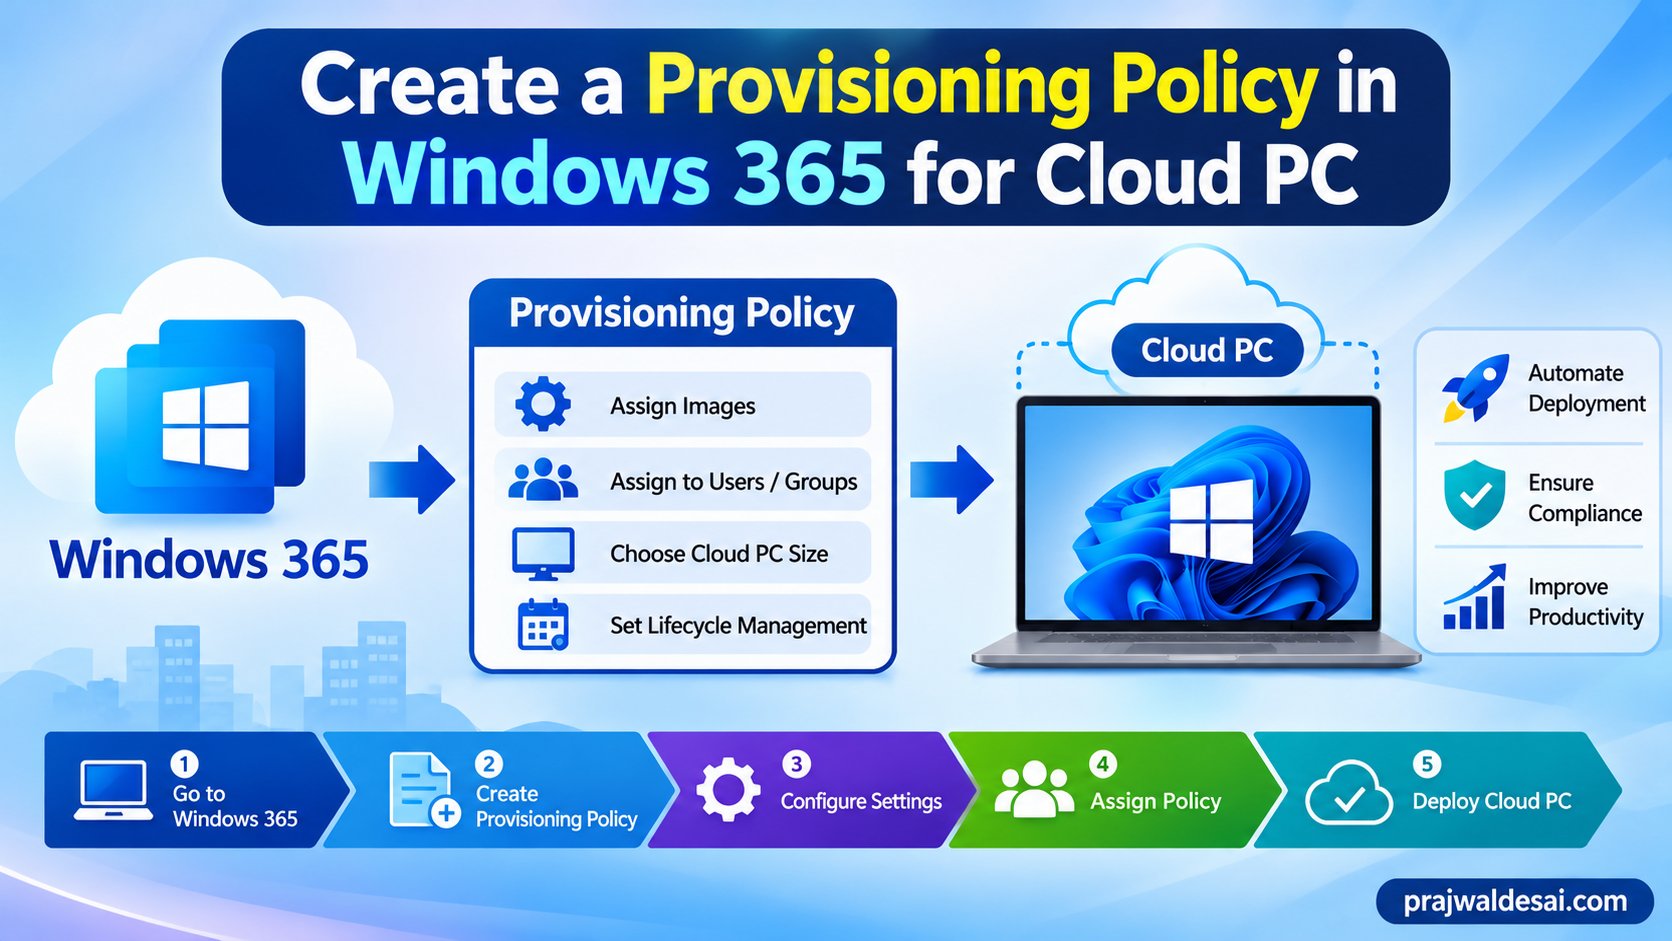
In this guide, you’ll learn how to create a Windows 365 provisioning policy for Cloud PCs in Microsoft Intune, select networking and image options, assign users, and check deployment progress.
When you plan to deploy a Windows 365 Cloud PC, it all starts with defining how it should be configured and who should receive it. A Cloud PC provisioning policy brings these decisions together, helping IT administrators deliver consistent cloud desktops without setting up each device manually.
After assigning provisioning policies to user security or Microsoft 365 Groups, Windows 365 checks licensing and configures Cloud PCs. The end users can then access the assigned Cloud PC either via the web browser or via the Windows desktop app. For more information, see how to connect and access the Windows 365 Cloud PC.
Note: Remember that a Cloud PC provisioning policy is not a replacement for ongoing device management. Use Intune policies and application assignments to manage security settings, compliance, software, and updates after deployment.
What is Windows 365 Cloud PC Provisioning Policy?
A provisioning policy contains the rules Windows 365 uses to create and configure Cloud PCs. These include settings such as:
- The desktop experience users receive.
- The identity join type and network configuration.
- The Windows image used for deployment.
- Additional configuration options such as Windows Settings, Cloud PC naming, Patching Cloud PCs, etc.
- The Entra ID groups whose users should receive Cloud PCs.
After an Enterprise policy is created and assigned, Windows 365 checks whether users have an appropriate Cloud PC license and provisions their devices accordingly.
Important: The group membership alone does not provision an Enterprise Cloud PC. The user must also have the appropriate Windows 365 license assigned. Windows 365 uses only one provisioning policy for each Cloud PC license assigned to a user. If more than one policy applies, Windows 365 uses the first assigned policy to provision that Cloud PC. That’s why you must avoid overlapping assignments where possible. Clear group targeting makes deployment behavior easier to troubleshoot.
Prerequisites
Following are the prerequisites for creating a Windows 365 provisioning policy in Microsoft Intune.
- Administrative access: An account with permission to create and manage Windows 365 provisioning policies in Intune.
- Licensing: Appropriate Windows 365 Enterprise licenses assigned to the users you intend to provision.
- A target group: A Microsoft Entra user security group or Microsoft 365 group containing the intended users.
- An identity and networking plan: A decision about Microsoft Entra join or Microsoft Entra hybrid join and the network option your deployment requires.
- An image choice: A suitable gallery image or a supported custom image prepared for Windows 365.
If you plan to use an Azure network connection, ensure it is configured and passes the relevant health checks before deployment.
How does Windows 365 use Provisioning Policy?
Once the Cloud PC provisioning policy is assigned to users/user groups, the Windows 365 service does the following checks:
- Checks for appropriate licensing for each user: Windows 365 determines if the user is assigned with an active Cloud PC license. This means if a user doesn’t have a Cloud PC license assigned, then Windows 365 will not provision their Cloud PC. Read how to assign Windows 365 License to Cloud PC User.
- Configures the Cloud PCs accordingly: Based on rules that you specify, the Cloud PCs are configured. If you create multiple provisioning policies, the Windows 365 service always uses the first assigned policy to provision the Cloud PC.
Steps to Create a Windows 365 Provisioning Policy
I will now go through the steps for creating a provisioning policy for Cloud PC deployment. I’ve broken down the entire procedure into steps so it’s easier to follow.
Step 1: Create a security group for Cloud PC users
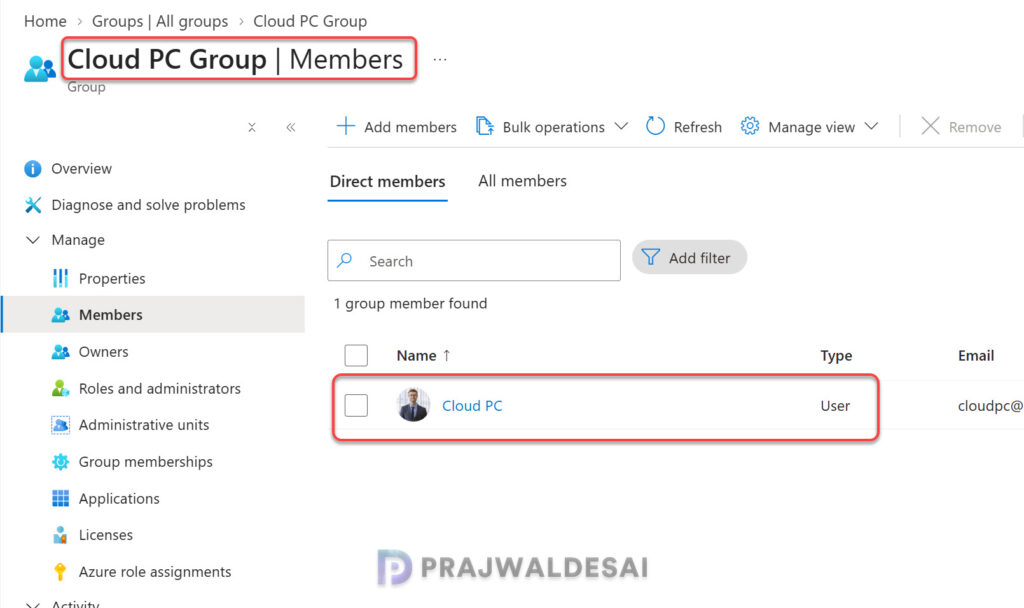
Before creating a provisioning policy, I recommend creating a dedicated Microsoft Entra user security group or Microsoft 365 group containing the intended Cloud PC users. For example, I have created a new user group named Cloud PC Group and have added users who have been assigned the Cloud PC license. The provisioning policy that I am going to create will be assigned to this Microsoft 365 group containing the users.
Step 2: Create a Cloud PC Provisioning Policy
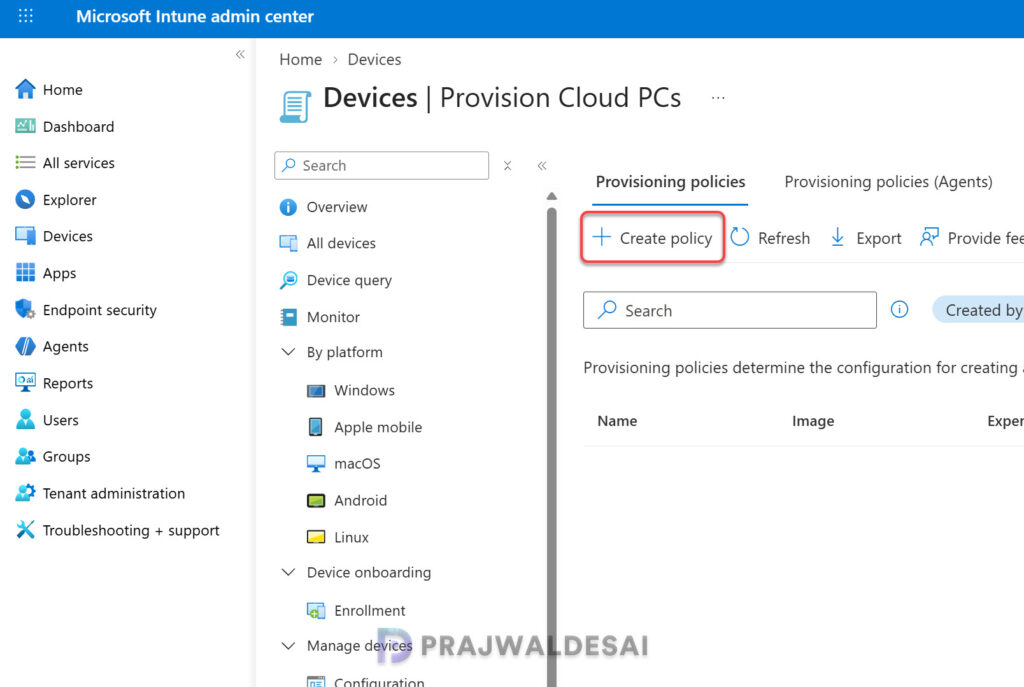
To create a Windows 365 Cloud PC provisioning policy, sign in to the Microsoft Intune Admin Center and go to Devices > Provision Cloud PCs > Provisioning policies > Create policy.
Step 3: General Configuration and Licensing
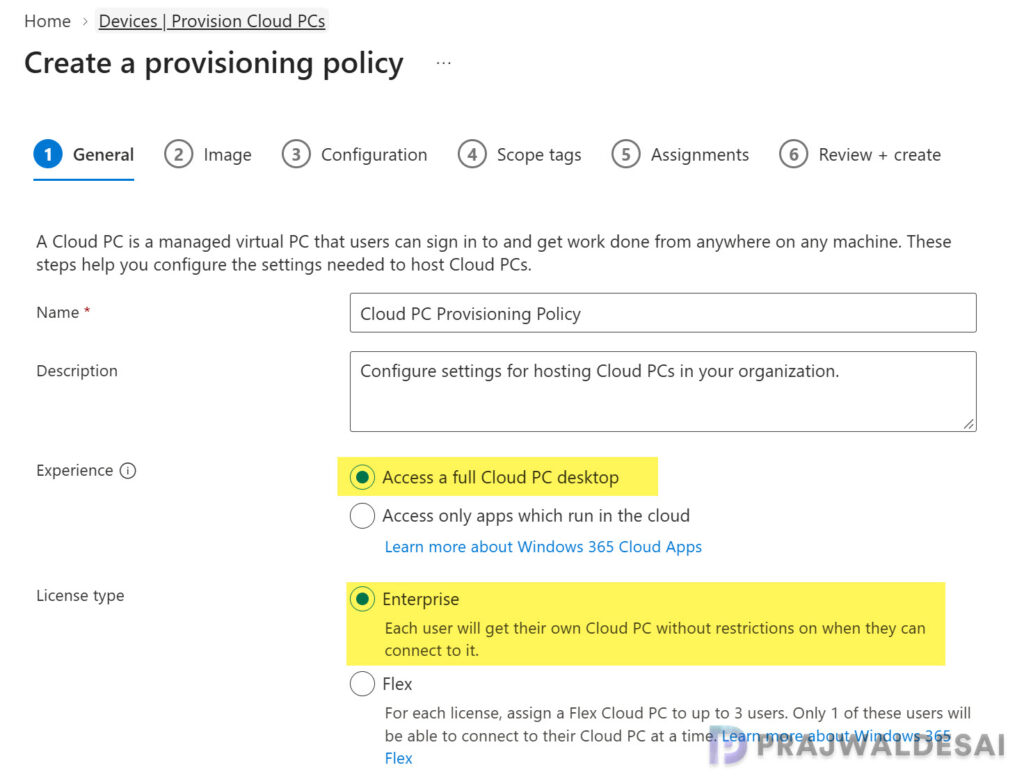
On the General tab of the new policy, specify the name and description for Windows 365 Cloud PC provisioning policy. A useful naming convention can identify the department, join type, and deployment location.
Note: As per Microsoft, the provisioning policy name cannot contain the following characters: < > & | ” ^. Ensure you don’t include them in the name while creating a policy.
Experience type: There are two options provided here.
- Access a full Cloud PC desktop: Users connect to a full Windows desktop experience. This option is available for all Windows 365 license types.
- Access only apps which run on a Cloud PC: Users connect to Cloud Apps. This option is only available for Windows 365 Flex in Shared mode.
For a standard cloud desktop deployment, select the experience that allows users to access a full Cloud PC desktop.
For License type, select Enterprise to provision Cloud PCs for Windows 365 Enterprise. The other option you see is Windows 365 Flex, which provisions Cloud PCs for Windows 365 Flex. You must have Windows 365 Flex licenses to create a provisioning policy for Windows 365 Flex Cloud PCs.
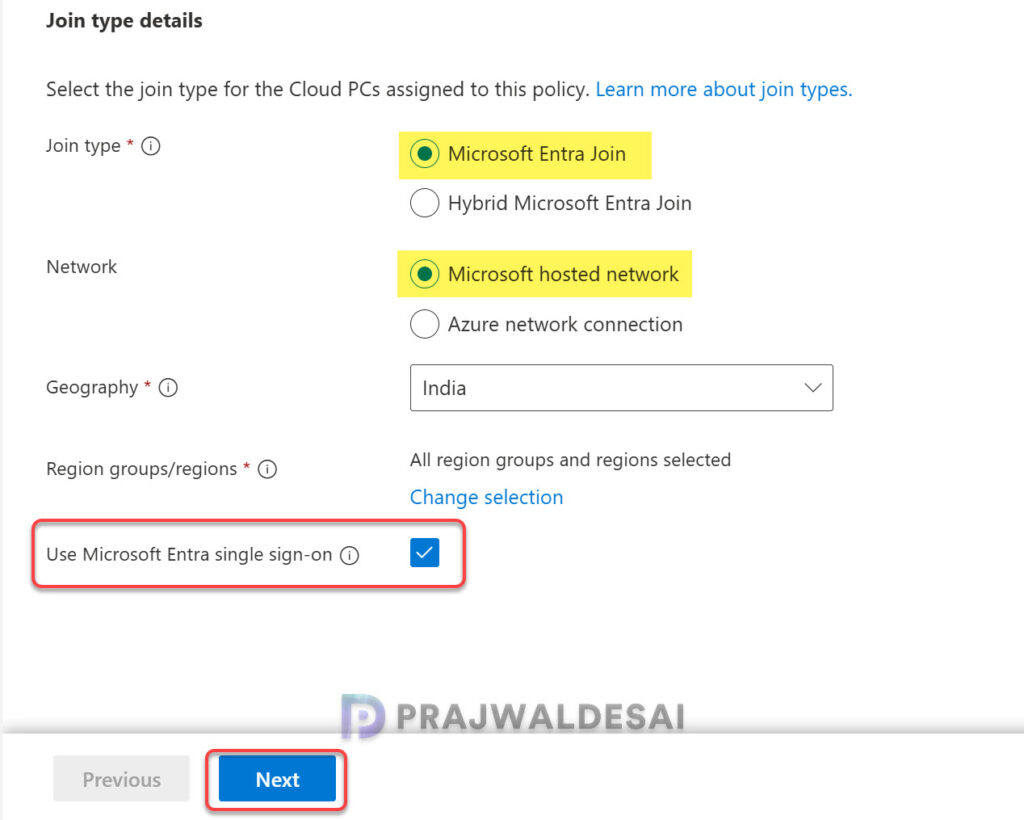
Step 4: Configure Join Type and Networking Details
In this step, you choose the join type and network settings appropriate for your organization. You must choose networking based on application access, identity requirements, and user location.
When it comes to choosing the join type, there are two options:
- Microsoft Entra Join: Microsoft Entra Join is suitable for cloud-native deployments in which Cloud PCs join Microsoft Entra ID directly.
- Hybrid Microsoft Entra Join: Microsoft Entra hybrid join supports environments that require integration with an on-premises Active Directory domain. This option requires an appropriately configured Azure network connection and connectivity to the necessary domain infrastructure.
Depending on the available options and your requirements, you can use a Microsoft-hosted network or an Azure network connection. With Microsoft-hosted networking, select the available location settings that best suit your users and organizational requirements.
Lastly, configure additional options, such as Microsoft single sign-on, if they are available and appropriate for your environment. Click Next.
Step 5: Select a Windows Image
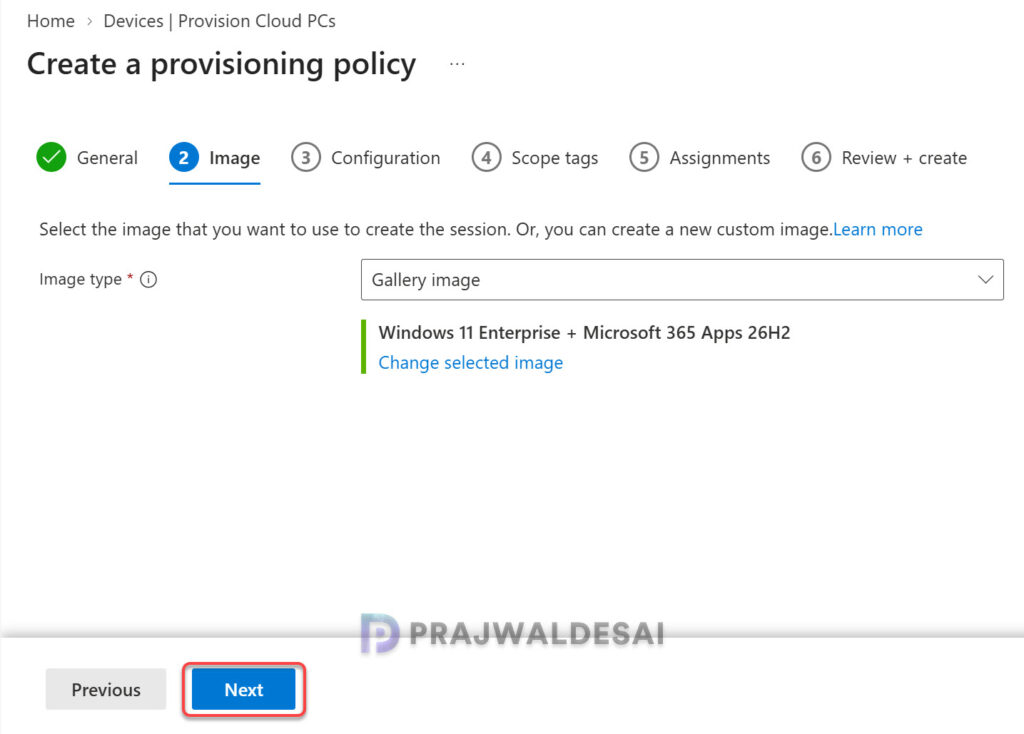
On the Image page, select the operating system image Windows 365 will use to create Cloud PCs. There are two main approaches:
| Image option | When to use it |
|---|---|
| Gallery image | You want a Microsoft-provided image and a straightforward starting point. |
| Custom image | You need a supported image containing organization-specific applications or configuration. |
For many deployments, a gallery image combined with Intune application deployment and configuration policies is a practical starting point. If you choose a custom image, confirm that it meets Windows 365 requirements and has been tested before assigning the policy broadly.
Step 6: Select Additional Configurations
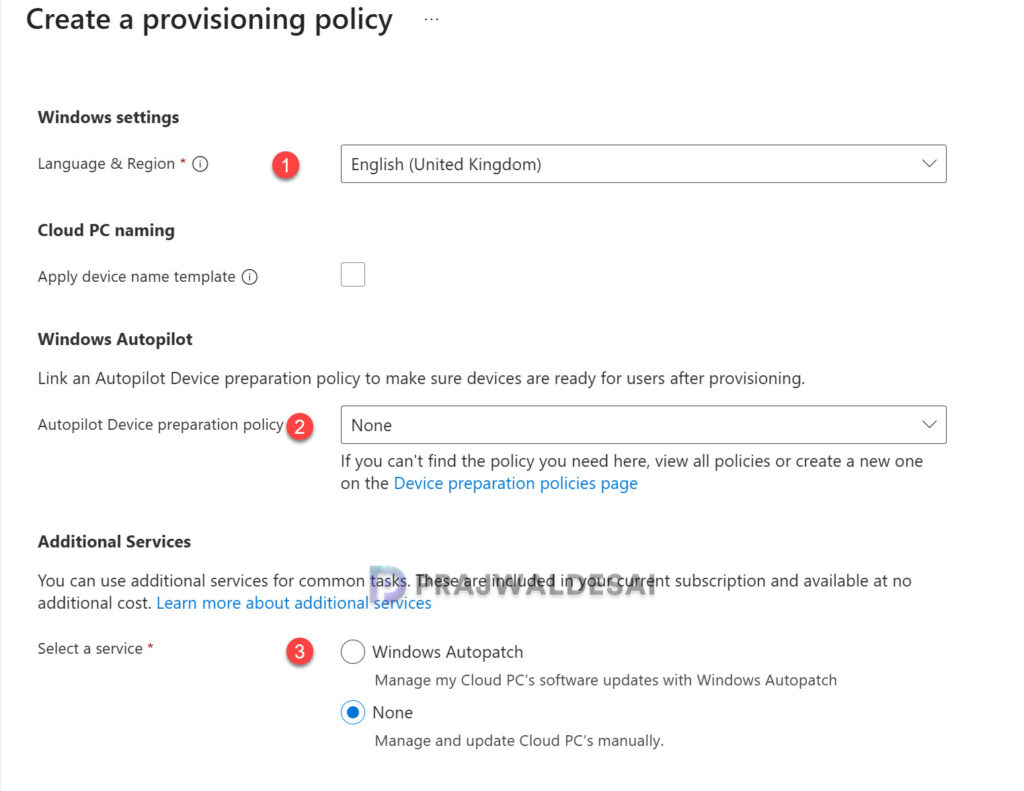
On the Configuration page, review the settings available for your selected deployment. These include language and region settings and other Cloud PC configuration options. The exact choices can vary by experience, license type, and service updates.
- Language & Region: Set the language and region appropriate for your users.
- Cloud PC device naming template: Select Apply device name template to create a Cloud PC naming template to use when naming all Cloud PCs that are provisioned with this policy. This naming template updates the NETBIOS name and doesn’t affect the display name of the Cloud PC.
- Autopilot Device Preparation Policy: You may select a preparation policy in Microsoft Intune that configures and prepares Windows 11 devices during the Out-of-Box Experience (OOBE).
- Additional Services: Additional services include Windows Autopatch using which you can manage Cloud PC’s software updates. For more information, see how to set up Windows Autopatch in Intune.
Click Next to continue.
Step 7: Configure Scope Tags and Policy Assignments
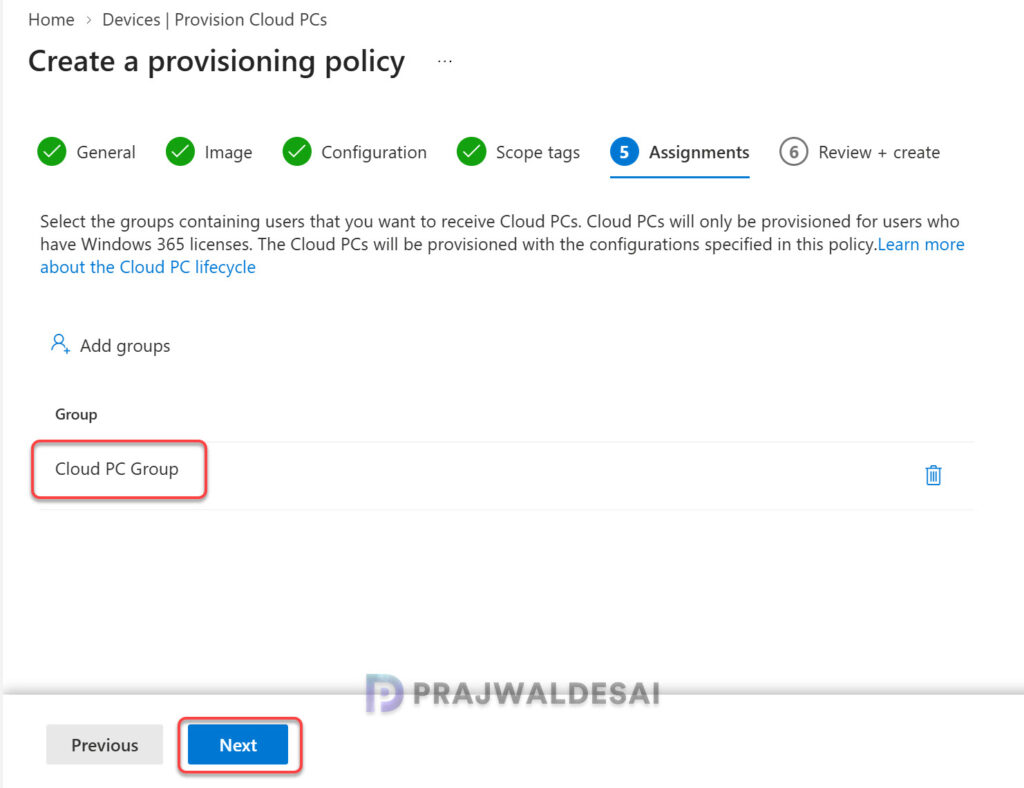
You can create scope tags for your provisioning policy. This is optional, and you may skip to the next step. On the Assignments page, select the Microsoft Entra user security groups or Microsoft 365 groups that should receive the policy. Start with a small pilot group before expanding the policy to the wider organization. Click Next.
Step 8: Review and Create the Policy
Verify the Provisioning Policy settings on the Review+Create page and click Create. After the provisioning policy is created and assigned, Windows 365 automatically starts to provision Cloud PCs. Microsoft Entra hybrid join may take up to 60 minutes for policy creation, depending on the last Entra Connect sync.
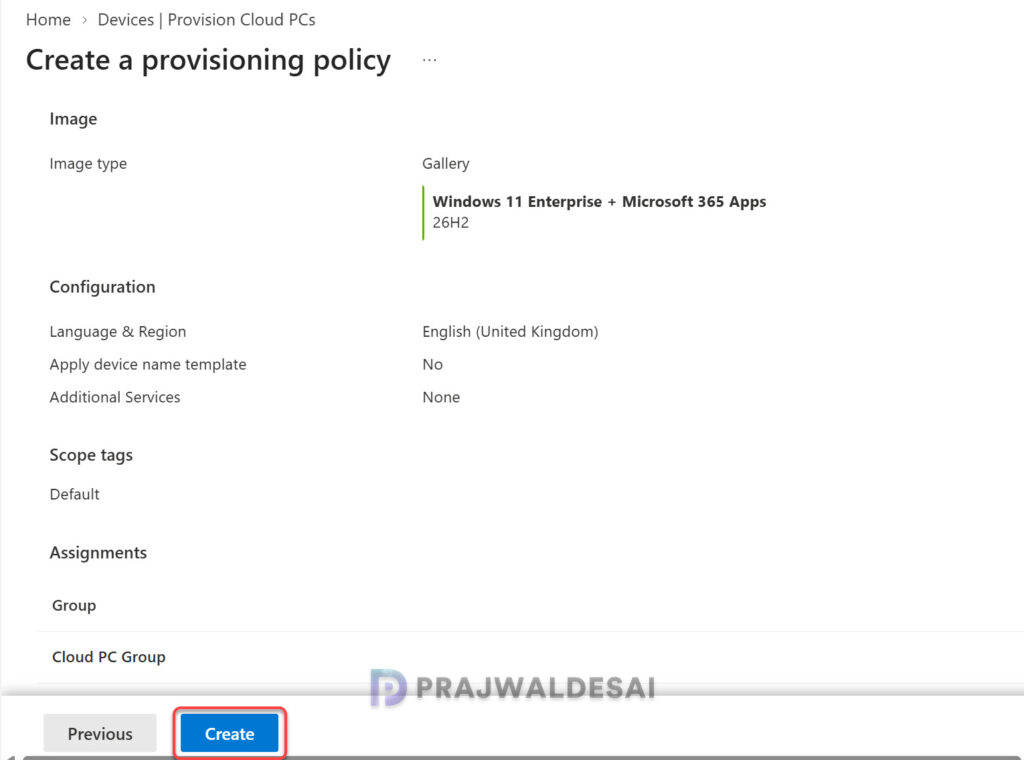
In the top-right corner of the screen, you will see a notification “Successfully added new policy” which confirms the Provisioning Policy has been created in Windows 365.
Step 9: Verify Cloud PC Provisioning
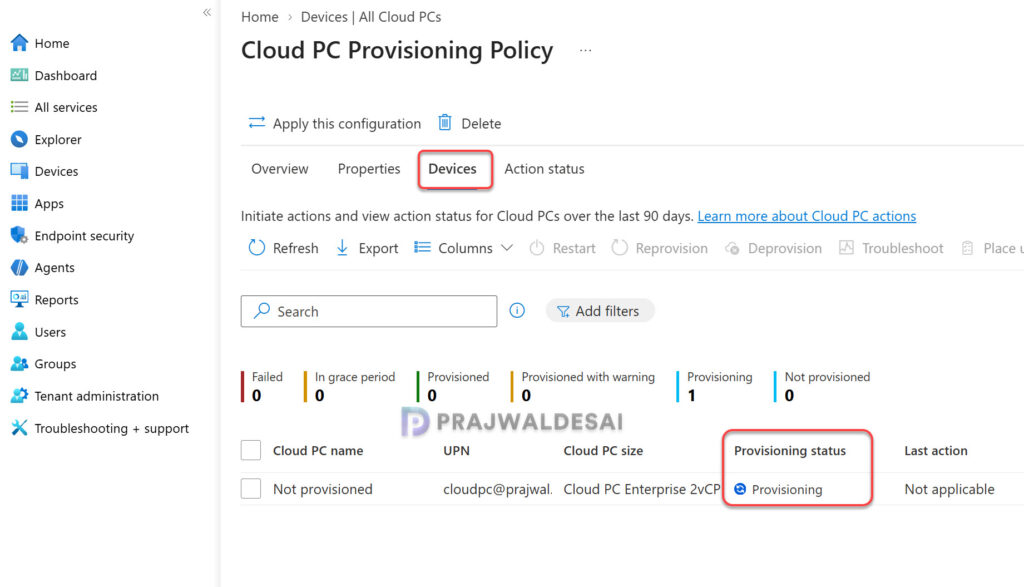
In this final step, I will show you how to monitor the provisioning status of the policy for the Windows devices. In the Intune admin center, go to Devices > All Cloud PCs. Switch to the Devices tab, and check the Provisioning Status column. In the below image, we see the provisioning status is shown as ‘Provisioning‘ which means the Cloud PC is being provisioned for the user.
After a few minutes, refresh the page, and we see the provisioning status is shown as ‘Provisioned‘ which means the Cloud PC is successfully provisioned for the user. The user can sign in to the assigned Cloud PC and use it for work.
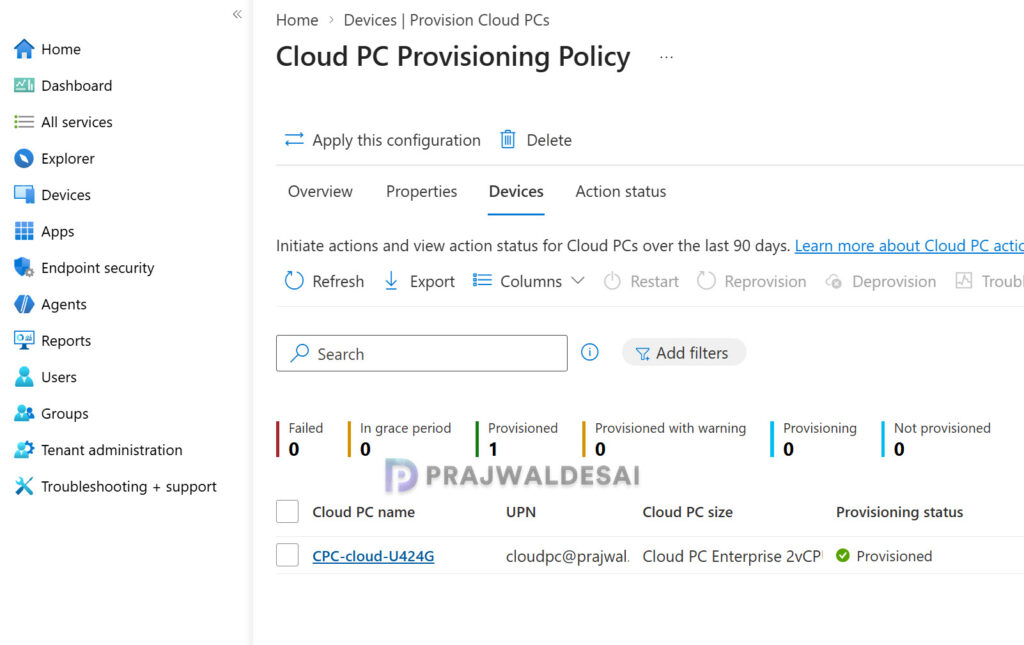
Once provisioning completes, test sign-in, application access, and connectivity with a pilot user before expanding deployment. To find the list of all the provisioning policies created in Windows 365, go to Devices > Windows 365 > Provisioning Policies.
Conclusion
Creating a provisioning policy is a foundational step in a successful Windows 365 Enterprise deployment. By selecting the right identity model, network, image, and user assignments, you can provide consistent cloud desktops while keeping administration manageable. For organizations, I recommend starting with a pilot group, confirming successful provisioning, and then expanding your deployment with confidence. That’s all for this guide; keep checking the Windows 365 category for such more useful guides.
