In this post, I will show you how to automatically enroll Windows 365 Business Cloud PCs in Intune. You can accomplish this through Windows365.microsoft.com or the Microsoft 365 admin center ensuring all the existing and new Cloud PCs are enrolled in Intune.
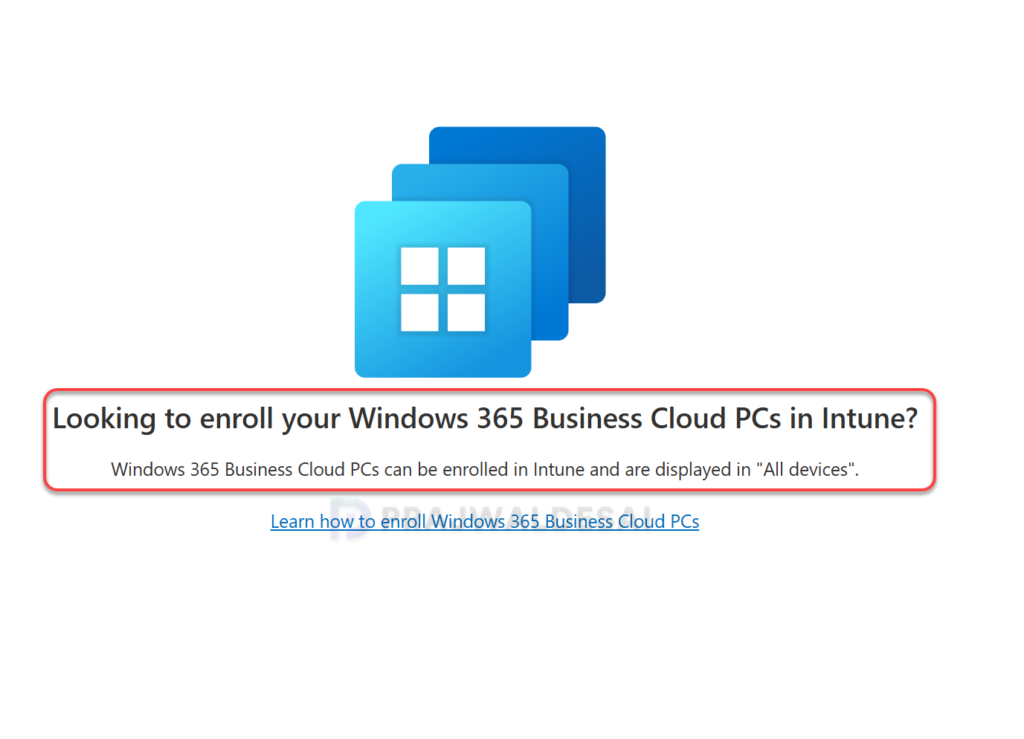
A customer recently purchased a Windows 365 Business license and assigned it to a user. However, when trying to manage the Cloud PC through Microsoft Intune, they encountered the message “Looking to enroll Windows 365 Business Cloud PCs in Intune.”
This message appears because, by default, the organization’s default settings don’t allow new business cloud PCs to be enrolled in Intune. To resolve this issue, you must change organizational default settings to allow enrollment of new Cloud PCs in Intune.

Note that Windows 365 Enterprise-specific features, like custom images and provisioning policies, aren’t available to Windows 365 Business customers, even if Cloud PCs are enrolled in Intune.
Prerequisites
- You must have the Windows 365 Administrator role.
- An Intune license subscription. Ensure the user assigned to the Cloud PC has the correct license for MDM.
Automatically Enroll Windows 365 Business Cloud PCs in Intune
I will now demonstrate various methods that allow Business Cloud PC administrators to enable a toggle for automatically enrolling new Cloud PCs into Microsoft Intune. When you change organizational default settings, the settings will apply to existing and new Cloud PCs.
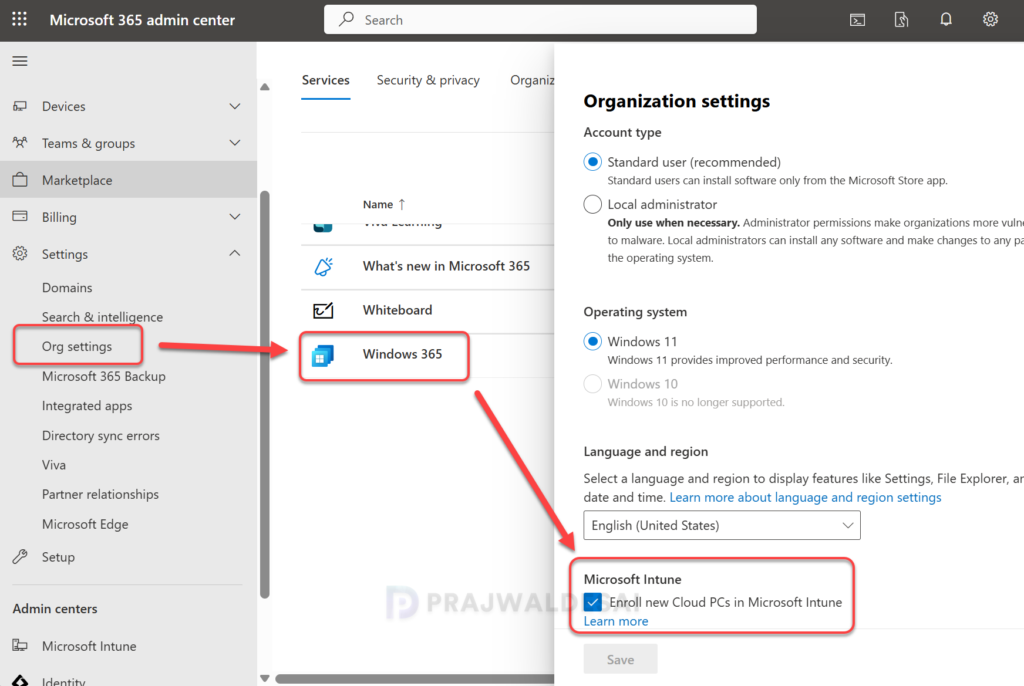
Method 1. Microsoft 365 Admin Center
You can change your organization’s default settings for Cloud PCs in the Microsoft 365 admin center. Sign in to the Microsoft 365 admin center. Navigate to Settings > Org Settings > Services > Windows 365. In the Organization Settings pane, scroll down and enable the option “Enroll new Cloud PCs in Microsoft Intune” and click Save.
Method 2. Windows365.Microsoft.com
Microsoft lets you change organizational default settings for Cloud PCs via the web browser. Open the browser and visit windows365.microsoft.com and sign in with an account that has the Windows 365 Administrator role. Select Admin > Update organization settings.
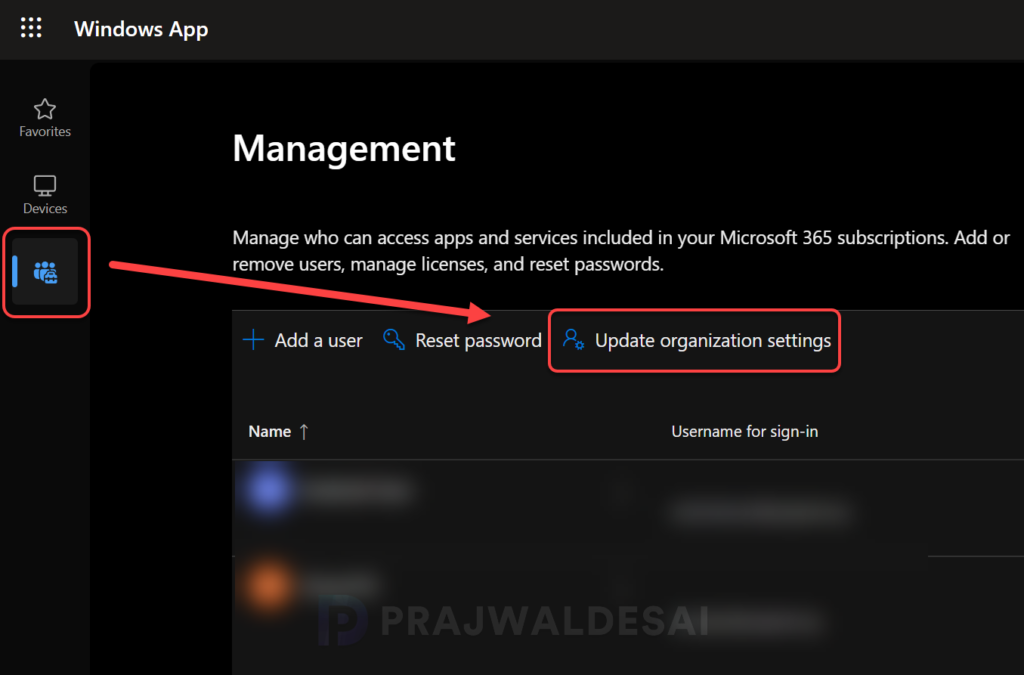
In the Organization settings pane, switch to the Setup tab. Under Microsoft Intune, check the box for the setting ‘Enroll new Cloud PCs in Microsoft Intune‘ and click Save. Your business cloud PCs will now be shown in the Microsoft Intune admin center > All Devices.

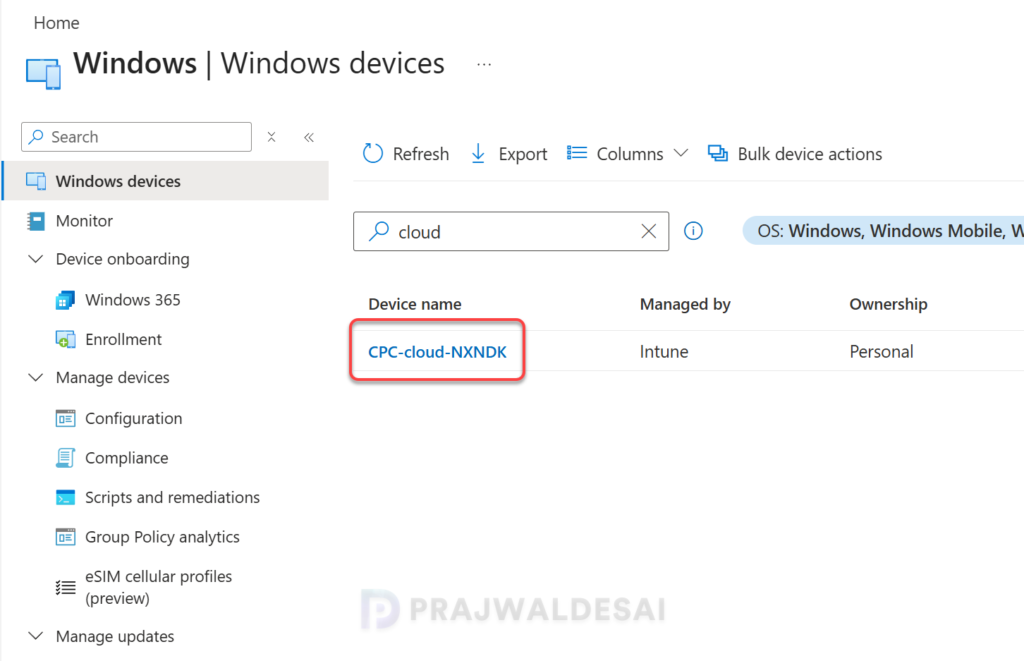
Verify Enrollment of Cloud PCs in Intune
To confirm Windows 365 Business Cloud PCs enrollment in Intune, sign in to the Intune admin center. Go to Devices > All Devices. Here you should see all the enrolled Business Cloud PCs in Intune. You can now connect to your Cloud PC and start using it.