


In this post, I will show you how to allow or block camera using Intune. The settings catalog in Intune includes “Allow Camera” and “Block Camera” policies, enabling you to manage camera access across multiple device platforms such as Windows, Android, and iOS/iPadOS.
Today, most modern business laptops come equipped with a built-in webcam. To access this built-in webcam, Windows 11 offers a dedicated Camera app. This app allows users to capture photos and videos using a webcam or other connected camera device.
In some organizations, the cameras are disabled on enterprise laptops to enhance security and privacy. IT administrators can remotely disable cameras through group policies, Intune policies, or other security tools to prevent unauthorized access or misuse. This helps mitigate risks associated with potential hacking attempts or accidental exposure of sensitive information.

Note: Blocking the camera with Intune policy may impact apps that rely on camera functionality (e.g., video conferencing apps such as Teams, Zoom, etc.). Ensure business approval is obtained before restricting camera access on managed devices.
Allow or Block Camera Using Intune
In Microsoft Intune, the “Allow Camera” and “Block Camera” policy settings are available via the settings catalog for various device platforms, including Windows, Android, and iOS/iPadOS. I will walk you through the process of creating policies for each platform individually, allowing you to choose the steps that best suit your requirements.
Windows Devices
To enable or disable the built-in camera on Windows 11 devices, you can create the Intune policy with the following steps. First, sign in to the Microsoft Intune admin center. Navigate to Devices > Windows > Configuration > Create > New Policy.
Choose Windows 10 and later as Platform and Settings Catalog as Profile Type. On the Basics tab, specify the name of the profile as “Allow or Block Camera for Windows Devices.” You may add a brief description about the profile. Click Next to continue.

In the Settings Picker, search for “Allow Camera.” From the results, select the category named Camera. Now select the setting “Allow Camera” and close the settings picker.

For Windows devices, the Allow Camera policy offers two settings to choose from:
- Allowed: If you enable this policy setting, camera devices will be enabled.
- Not Allowed: If you select this setting, camera devices will be disabled.
Select “Allowed” or “Not Allowed” from the drop-down menu, depending on whether you want to permit or restrict camera usage on the device.
In the example below, I selected “Not allowed” to test the camera blocking functionality. Then, click “Next.”

In the scope tags section, you specify scope tags. Specifying scope tags is optional, and you may skip this step. Click Next.
In the Assignments tab, select the Entra ID security user groups to which you want to assign the policy. When deploying this policy for the first time, start by applying it to a few test groups. If the testing proves successful, gradually extend the policy to additional users or devices. Select Next.
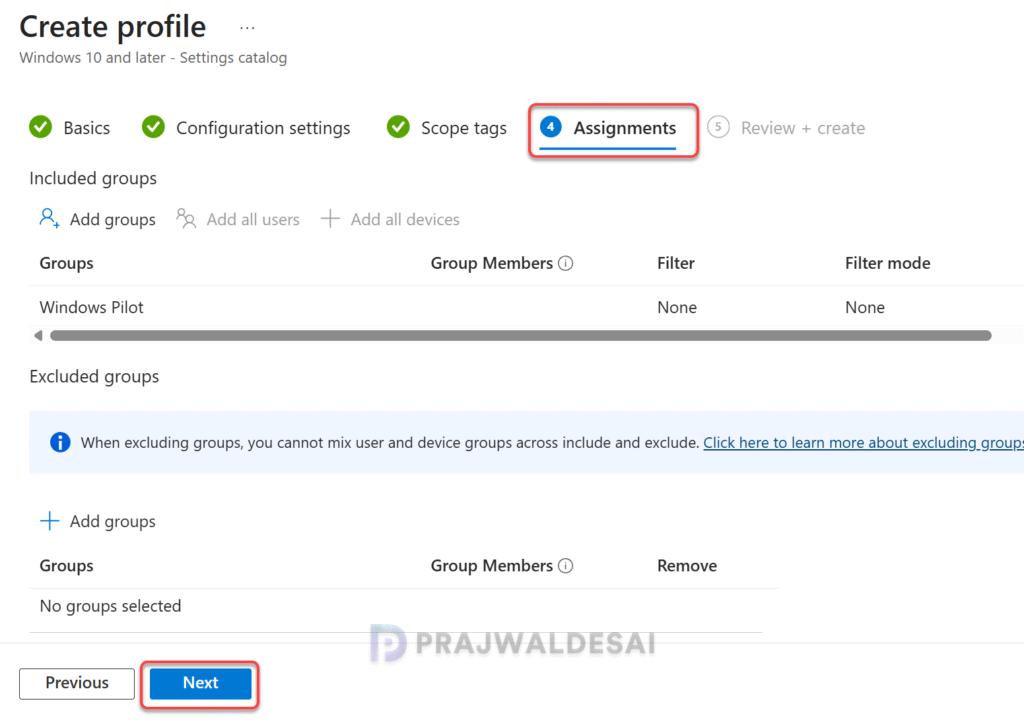
Review the policy settings and click the Create button. A new policy is created, and you can find it under the list of Configuration Profiles.

After applying the policy, Windows 11 devices must check in with Intune to receive the updated policies. To expedite this process, you can manually initiate a sync for the Intune policies.
Log in to a Windows 11 device targeted by the above policy. Click the Start menu and launch the Camera app. You will see the message “We need your permission. To use this app, open Privacy Settings and change the settings to allow this app to use your camera and microphone.”

Clicking the Privacy Settings button takes you to Privacy & Security > Camera. Here the Windows 11 camera access permissions are greyed out. It states that some of these settings are managed by your organization. This is due to an Intune policy blocking camera access, which restricts Windows users from modifying the camera access settings.

Android Devices (Enterprise/Work Profile)
On Android devices, you can control camera access through two methods: Android Enterprise settings and Android (AOSP). Using Android Enterprise, the settings catalog allows you to manage camera access, while Android AOSP provides a device restrictions template and settings catalog to enable or disable camera usage. Choose the method that best meets your needs.
In the Intune admin center, go to Devices > Android > Manage Devices > Configuration and create a new policy. Select the platform as Android Enterprise and Profile Type as Settings Catalog. Click Create.

Enter the profile name and description. Click Next.

In the Settings Picker, search for “Camera.” From the results, select the category named ‘Device Restriction Personal Profile.’ Now select the setting “Block Camera” and close the settings picker.

If you set the Block Camera setting to ‘True‘, it prevents access to the camera on the Android device. If it is set to ‘False‘, Intune doesn’t change or update this setting. By default, the OS might allow access to the camera. Intune only manages access to the device’s camera. It doesn’t have access to pictures or videos.
In the below example, I have set the Block camera to True for Android devices. Click Next.

Navigate to the Assignments tab, add the Android devices group you wish to target with this policy, and click Next.

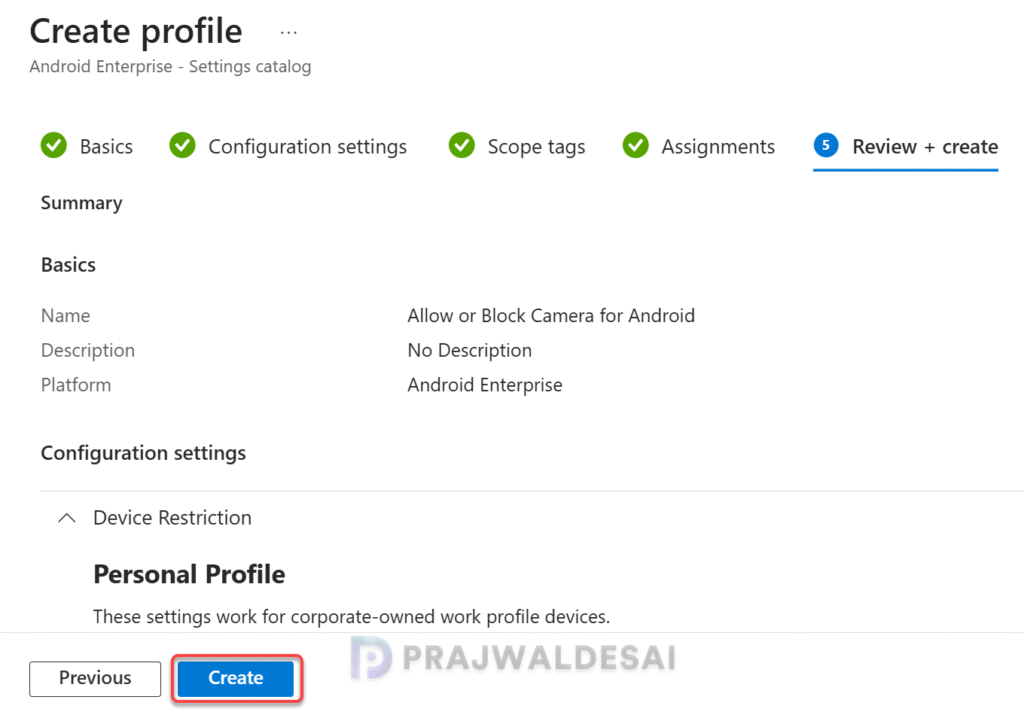
Review the camera settings that you’ve configured for Android devices and click Create.
After deploying the above policy, it’s time to test if the Android devices have successfully received the camera access settings from Intune. In case the remote Android device is powered off or has been in a disconnected state for a while, it won’t get the latest policy updates and requirements. In these cases, you can consider manually syncing Android devices with Intune.
End User Experience: During my testing, the block camera policy settings were successfully applied to Android Enterprise devices, and what I noticed was that the camera access was completely blocked for users. Apps that rely on the camera will fail to launch because it is restricted now. This is a perfect example of how you can enforce policy settings on remote Android devices enrolled in Intune.
iOS/iPadOS Devices
Camera access for iOS/iPadOS devices can be efficiently managed with an Intune policy. To configure camera usage, you can utilize either the Settings Catalog or the Device Restrictions template within Intune. I recommend using the settings catalog for applying policy settings to Apple devices, as it is easy to configure the settings.
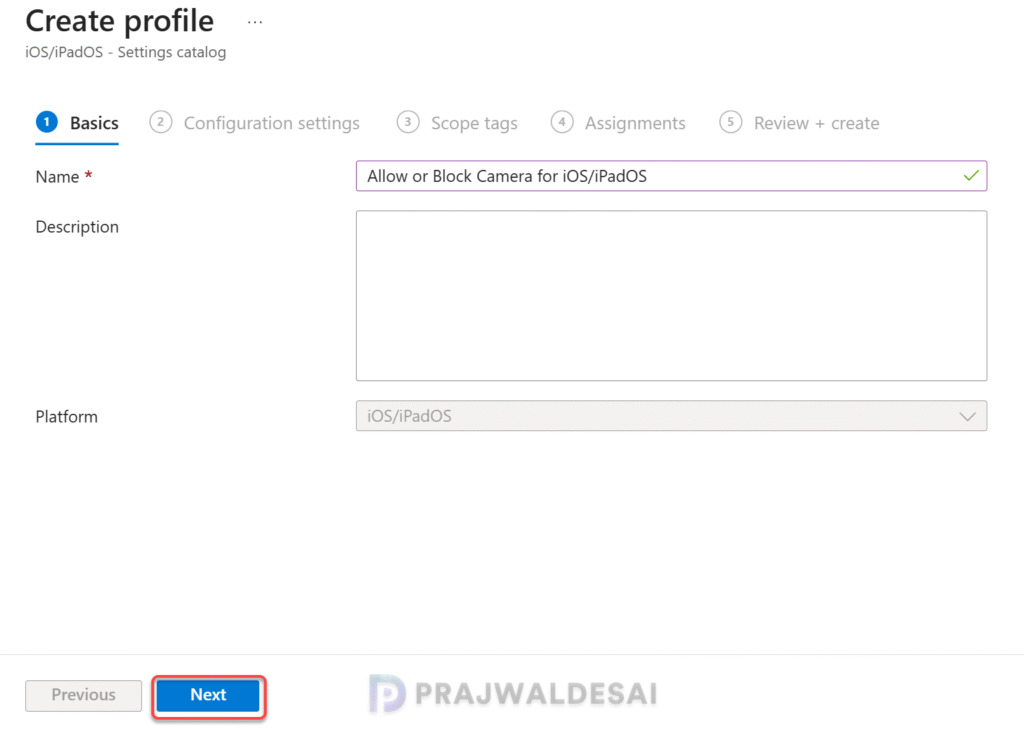
To get started, in the Intune admin center, go to Devices > iOS/iPadOS > Configuration > Create a new policy. Select the profile type as Settings Catalog and select Create. On the Basics tab, enter the profile name and description. Click Next.
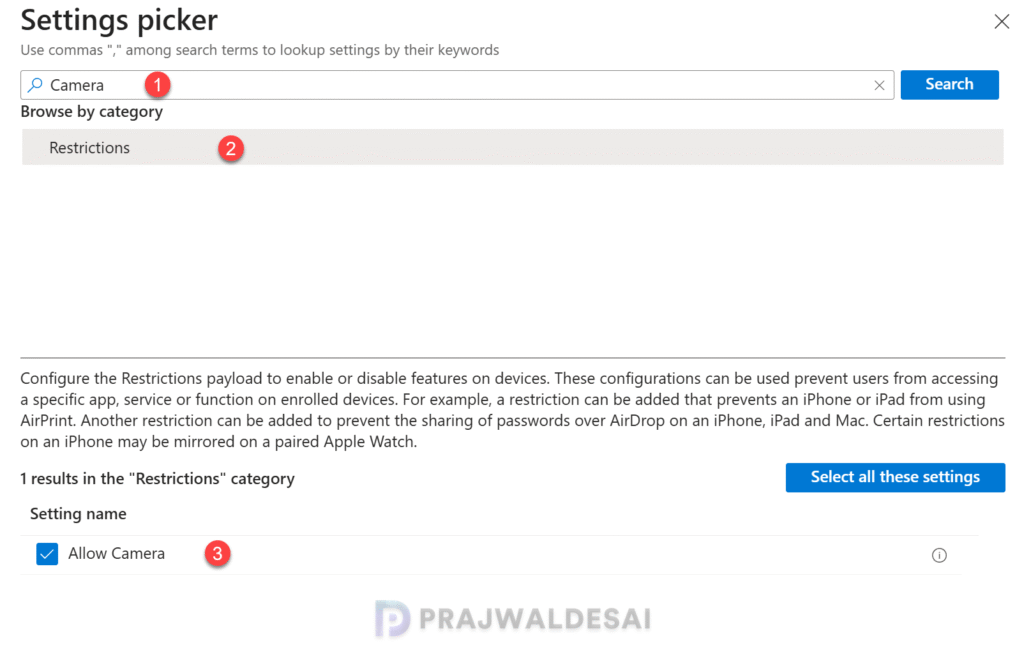
In the Setting Picker window, enter “Camera” into the search box and press Search. Select the Restrictions category in the results, then select the “Allow Camera” setting. Click Next to proceed.
If you set the Allow Camera to True, the camera access is enabled on the iOS/iPadOS devices. If you set the Allow Camera to False, the camera access is restricted on the iOS/iPadOS devices.
Configure this setting based on your requirements and click Next.

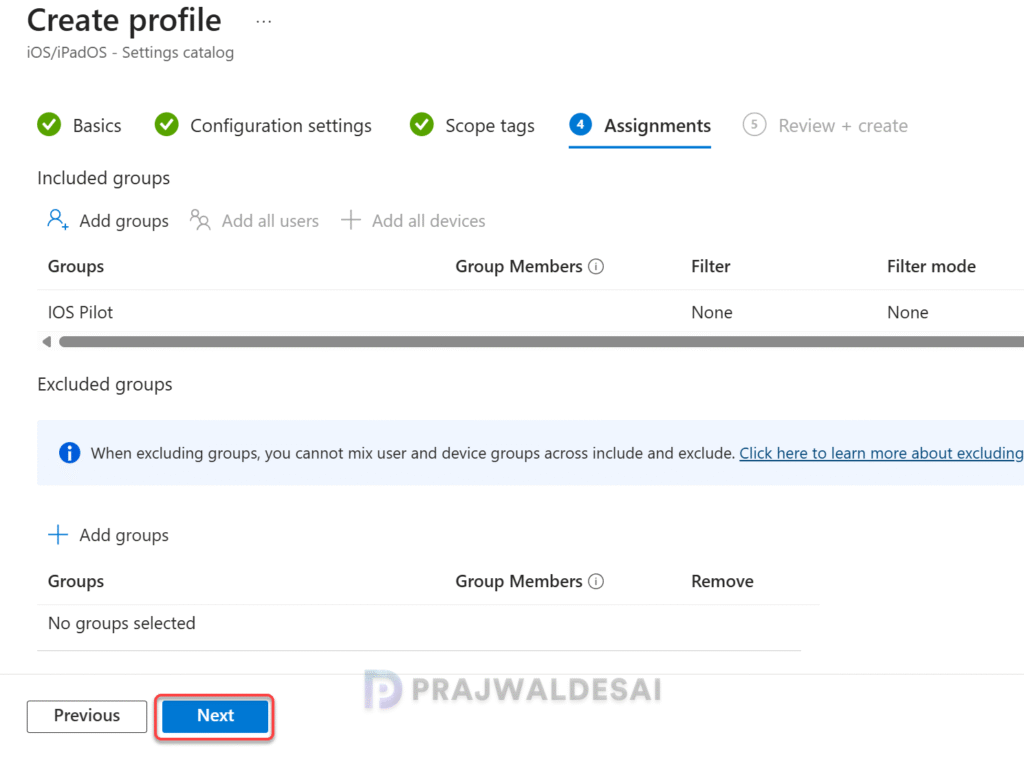
Navigate to the Assignments tab and include the iOS/iPadOS device groups to apply this policy. Click Next.
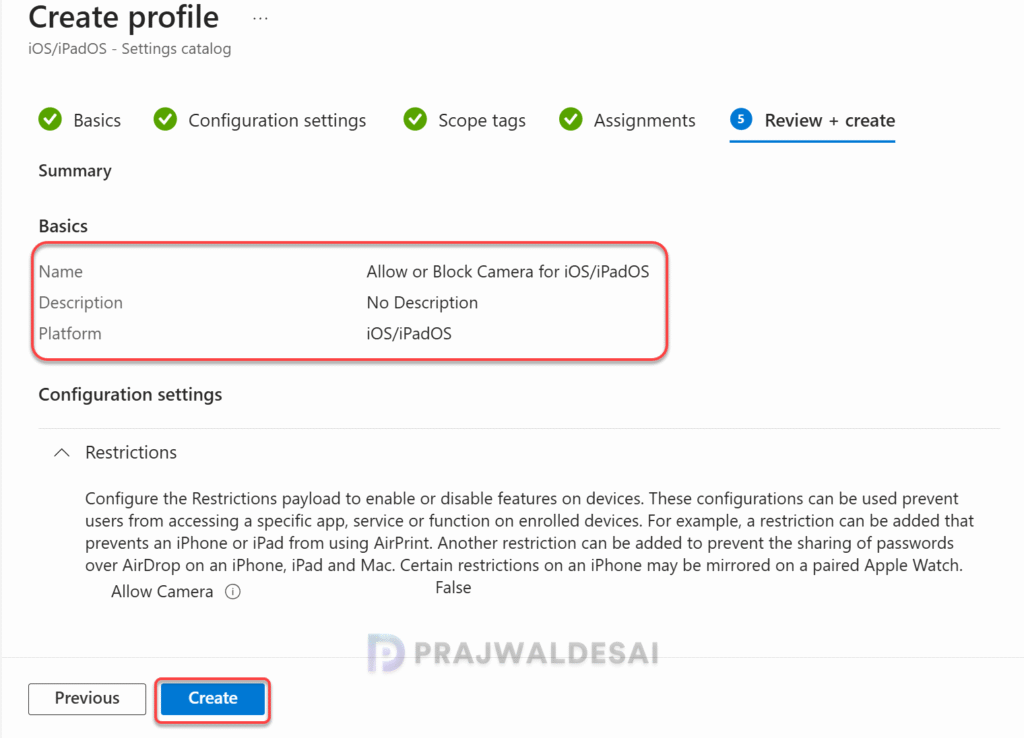
Review the camera settings that you’ve configured for iOS/iPadOS devices and click Create.
Wait for iOS/iPadOS devices to check in with Intune and retrieve updated policies. If testing policy deployment, manually sync your iOS/iPadOS devices with Intune to expedite the process.
End User Experience: So here is what I found during my testing. Blocking camera access on iOS/iPadOS devices through Intune permanently disables the Camera app on the devices. The Camera app will no longer appear even when you search for the app on the device. This confirms that the above Intune policy was successful in disabling camera access on iOS/iPadOS devices.
Monitoring Camera Access Policy in Intune
In this section, I will show you how to monitor the camera access policies assigned to various device types, including Windows, Android, and iOS/iPadOS, in the Intune admin center.
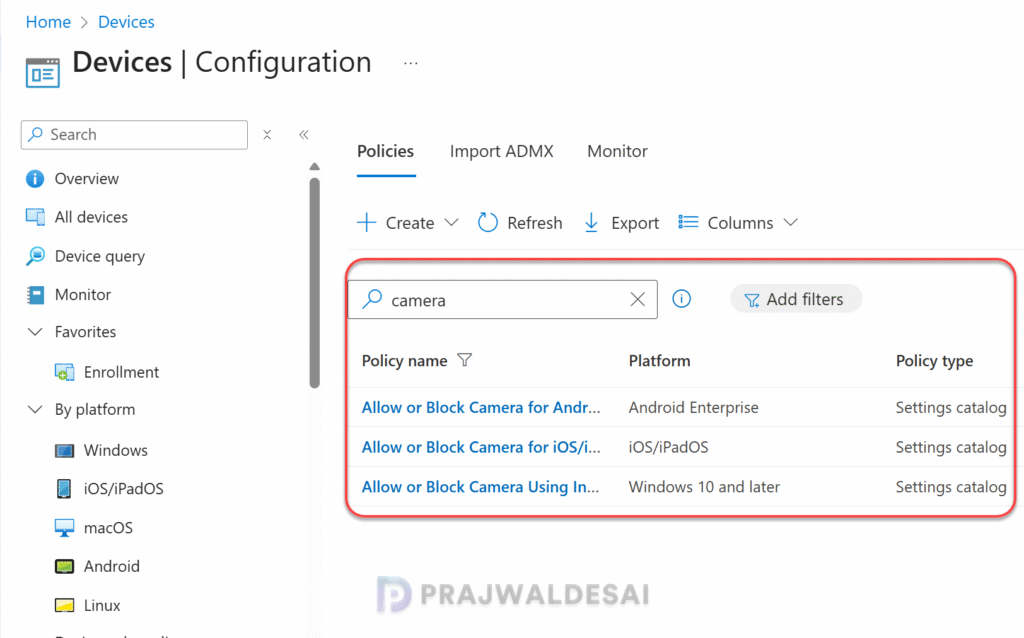
Sign in to the Intune admin center, go to Devices > Manage Devices > Configuration. In the search box, type the policy name, for example, “Allow or Block Camera” and this should list the relevant profiles. Select the policy (based on the device platform) to monitor the assignments.
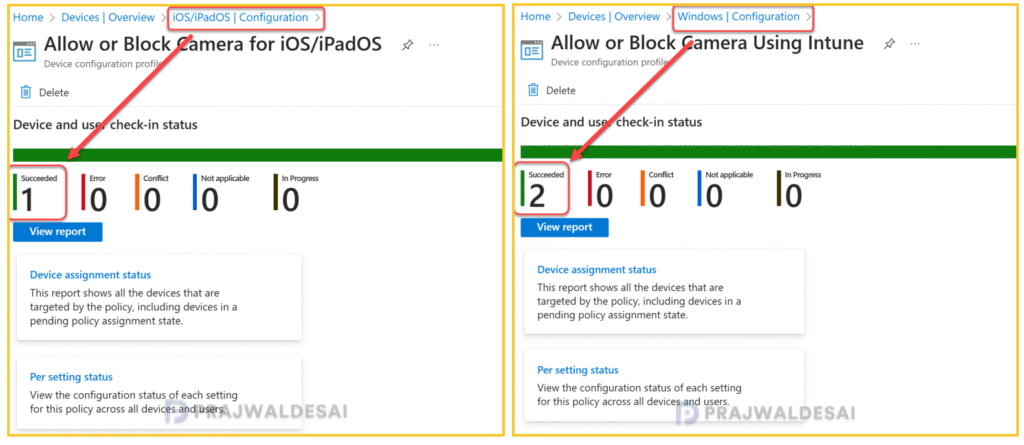
On the Policy overview page, check the device and user check-in status. Here you will find the number of devices or users on which the policy has been applied successfully. The view report button lets you see the names of devices or users for which the policy deployments have been successful.
Troubleshooting
Applying camera access policies via Intune can sometimes lead to assignment failures for end users or devices. Troubleshooting these issues varies depending on the device type and the associated logs. Experienced Intune engineers likely know where to begin, but for those new to the process, it can be challenging. To simplify this, I will outline troubleshooting methods for each device type.
- Windows Devices: To troubleshoot policy assignment failures, review the essential Intune IME logs. In addition, review Event ID 814 in Event Viewer. Use the following path: Applications and Services Logs > Microsoft > Windows > Devicemanagement-Enterprise-Diagnostics-Provider > Admin.
- Android Devices: Open the Microsoft Intune app on the Android device. Navigate to Settings. Under Diagnostic Logs, select “Save Logs.” Choose an output directory to save the logs. Begin your troubleshooting by reviewing these logs.
- iOS/iPad OS Devices: See how to retrieve iOS app logs from the device.

what about disabling the camera button only (which some devices have), it it possible at all?
we have devices in kiosk mode which have apps using the camera – they have to be able to do so. we want disabling only the button, so users are not able to take photos when not in the apps.