


This step-by-step guide shows how to enable SSO for Chrome using Intune. We will enable automatic user sign-in for accounts backed by a Microsoft® cloud identity provider which lets users automatically sign in with their Entra ID credentials to websites that support Single Sign-On (SSO).
Single Sign-On (SSO) for Chrome is a feature that allows users to authenticate once and then access multiple websites, applications, or services without needing to log in again. Essentially, it streamlines the user authentication process across web-based resources by leveraging the credentials already authenticated on the user’s device or network.
If you’re curious to know how the Single Sign-On (SSO) for Chrome SSO works with Entra ID and Intune, here is some explanation. With CloudAPAuthEnabled, a user signs into their device with a work account. The Primary Refresh Token (PRT) allows them to access Microsoft 365, Azure, and other cloud apps without requiring the user to reenter their credentials.

Applications such as Office, Microsoft Edge, and Teams leverage the PRT through a broker to seamlessly authenticate users, streamlining the user experience, minimizing repeated sign-ins, and boosting overall productivity. This is very similar to what I covered in Platform SSO configuration for macOS.
Key Benefits of SSO for Chrome
Organizations looking to set up SSO for the Chrome browser using Intune can benefit from several key advantages.
- Improved User Experience: You users only need to log in once, reducing the hassle of entering credentials repeatedly. This applies to websites that require authentication with Entra ID.
- Enhanced Security: Authentication is often tied to secure identity providers like Azure AD or Google Workspace. This in turn reduces the risk of password reuse and phishing attacks.
- Increased Productivity: Chrome SSO feature saves time for users, especially in enterprise environments where multiple apps and services are accessed daily.
- Simplified Management: Administrators can enforce policies centrally (e.g., via Intune or Group Policy) to ensure secure and seamless access to resources.
Prerequisites
- Your devices must be Entra ID Joined, Hybrid-Joined, or Entra ID Registered.
- The Windows devices must be enrolled in Intune. See the Windows enrollment guide.
- The Google and Chrome ADMX files must be imported into Intune. Don’t worry, this prerequisite is covered in this guide.
- The latest version of Chrome browser must be installed on the target devices. See how to deploy Chrome using Intune.
- Administrative access to Microsoft Intune and the Azure portal.
Step 1: Download and Import Chrome ADMX Templates
To configure the Chrome browser using Intune, you must first import the ADMX templates into Intune. If the templates are already imported, you can proceed to the next step. For those who haven’t imported the Chrome ADMX templates yet, here’s how to get started.
Open the browser and navigate to the Chrome Enterprise website to download the ADMX templates for the Chrome browser. Here make the following selections and click on Accept and download link to download these policy template files.
- Policy templates: Click the drop-down and select Chrome ADM/ADMX templates.
- Update management templates: Click the drop-down and select Google Updater ADMX template update.
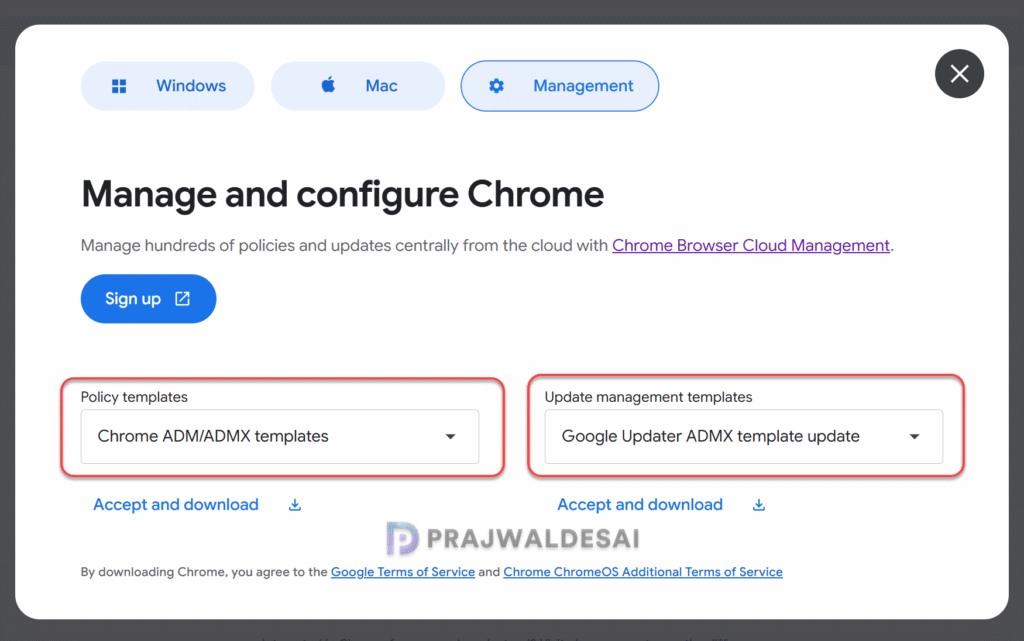
The browser now downloads two files: policy_templates.zip and googleupdateadmx.zip. Extract these zip files to a folder to see all the .admx and .adml files for Chrome.
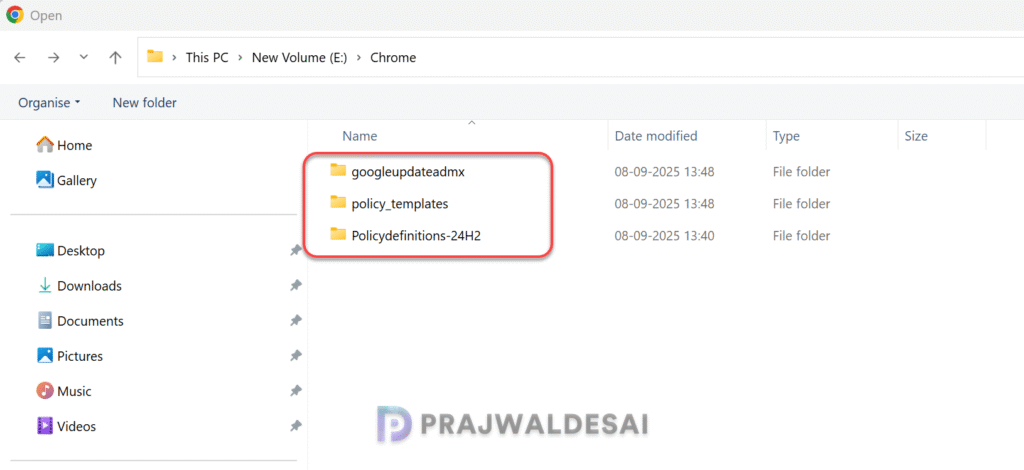
I have placed the Google Update ADMX, Policy Templates and Policy Definition files for Windows 11, 24H2 into a single folder. This makes it easy when you’re uploading them to Intune.
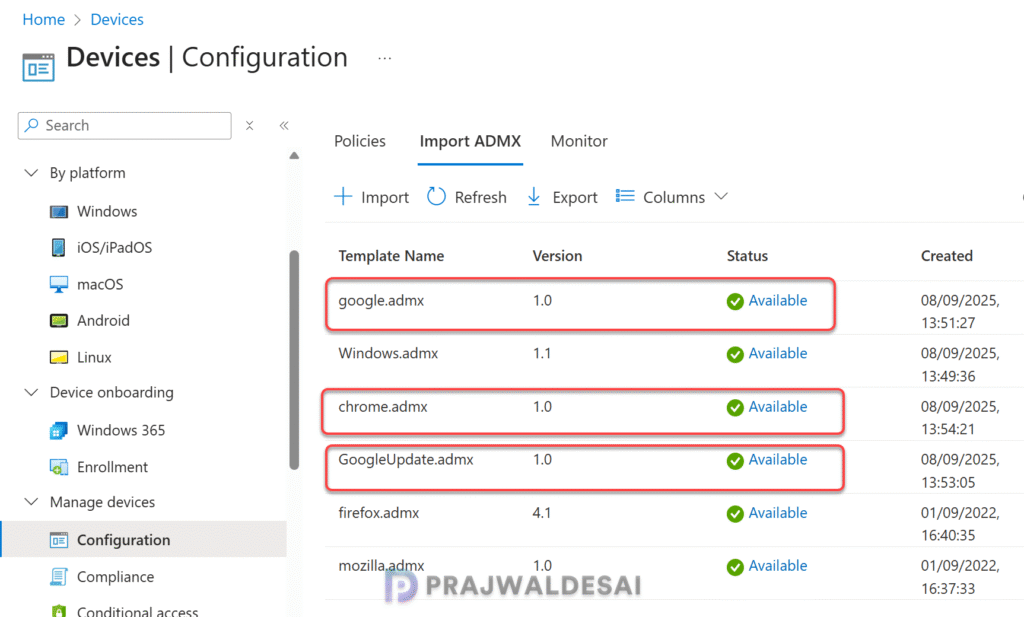
To import the Chrome ADMX templates into Intune, sign in to Intune admin center. Go to Devices > Manage Devices > Configuration. Select the Import ADMX tab and click on + Import button to upload the Google.admx, Chrome.admx, and GoogleUpdate.admx files one by one. Ensure you upload the corresponding .adml file for each .admx file.
Note: In case you encounter the weird “NamespaceMissing:Microsoft.Policies.Windows” error while importing the ADMX templates, ensure you import Windows.admx first and then the other ones.
Step 2: Enable SSO for Chrome using Intune policy
To enable Single Sign-On (SSO) for Google Chrome using Microsoft Intune, you must enable automatic user sign-in for accounts backed by a Microsoft cloud identity provider for Chrome users.
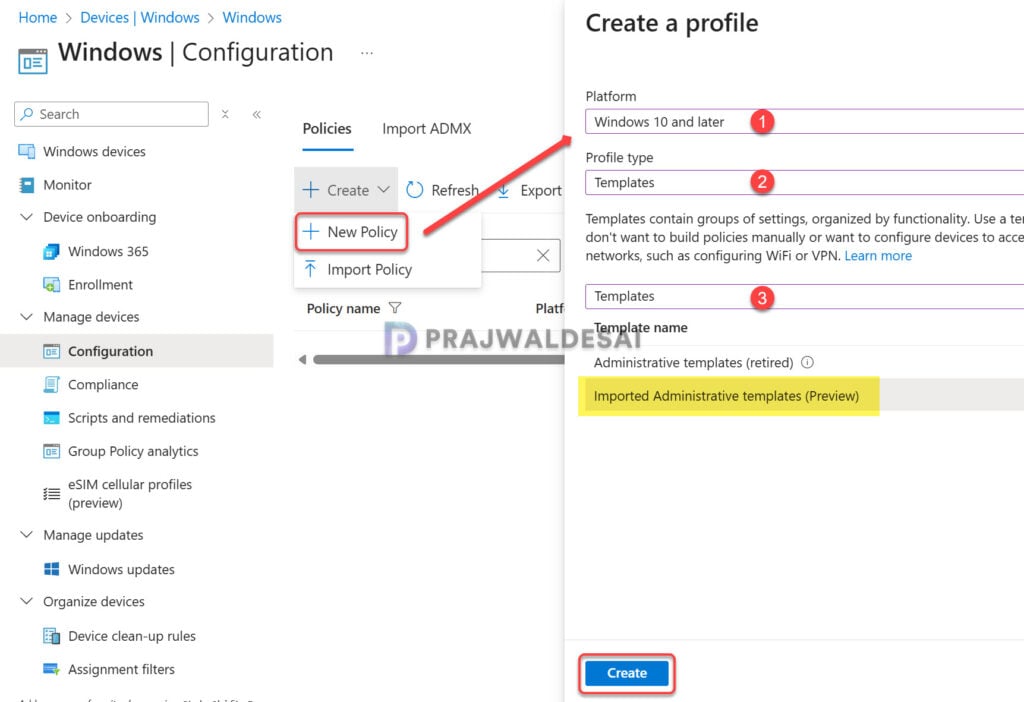
Sign in to the Intune admin center. Go to Devices > Manage devices > Configuration > Create > New policy. Choose Windows 10 and later for the platform and Profile Type as Templates. From the list of Templates, select Imported Administrative templates. Click Create.
Enter the policy name and add a brief description about the policy.
- Name: Enable SSO for Chrome with Entra ID using Intune
- Description: Enter an optional description about the policy.
Click Next.

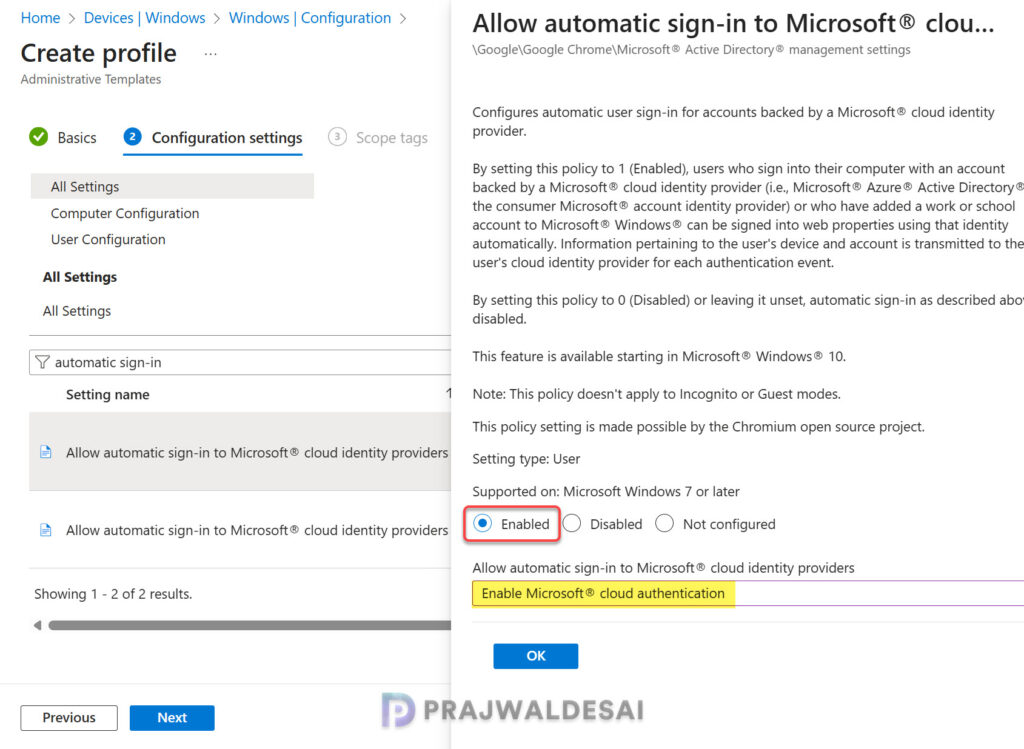
In the Settings picker window, type ‘Allow Automatic Sign‘ in the search box and click Search. From the search results, select the following setting: Allow automatic sign-in to Microsoft® cloud identity providers. Enable this setting and click the drop-down and select “Enable Microsoft® cloud authentication“. Click OK and Close the Settings Picker.
Here is a brief description about the Enable Microsoft® cloud authentication policy:
- Enabled: When this policy is Enabled or set to value 1, the users who sign into their computer with an account backed by a Microsoft® cloud identity provider (i.e., Microsoft® Azure® Active Directory® or the consumer Microsoft® account identity provider) or who have added a work or school account to Microsoft® Windows® can be signed into web properties using that identity automatically.
- Disabled: By setting this policy to 0 (Disabled) or leaving it unset, automatic sign-in as described above is disabled.
On the Scope tags page, you may select any desired scope tags to apply. This is optional and you can skip to the next page. Learn how to create new scope tags in Intune. Click Next.

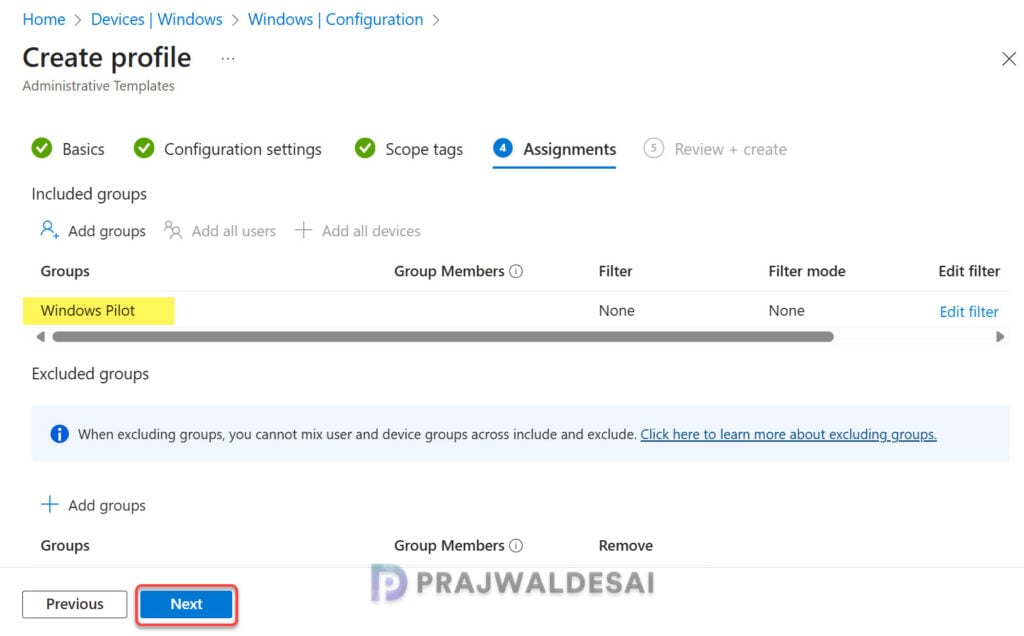
For Assignments, select the Entra ID user groups to target this policy. To continue, select Next.
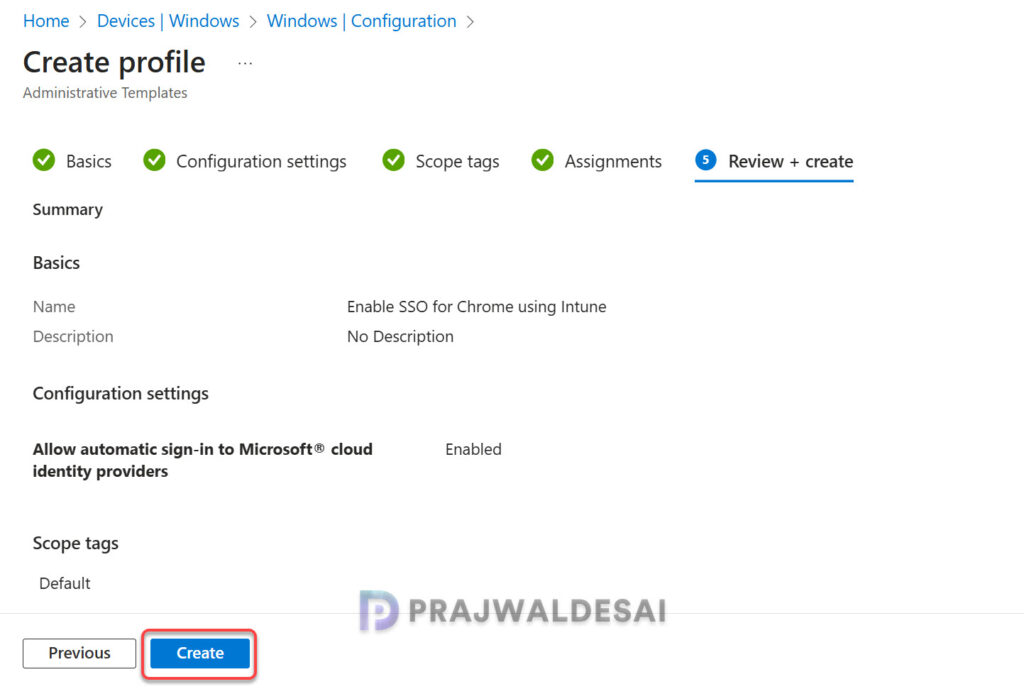
Review the Chrome SSO policy settings on Review + create page and then click Save. The policy is now deployed to members of the assigned groups. This new policy is now displayed in Configuration > Policies tab in Intune admin center.
Step 3: Sync Intune policies
To apply the Intune SSO policy settings for Chrome browser on targeted devices, you can manually sync Intune policies using various methods. The sync action prompts devices to instantly connect with Intune and apply the most up-to-date policies. This is typically performed to test an app or policy deployment and verify its functionality.
Step 4: Monitor Chrome SSO Intune Policy
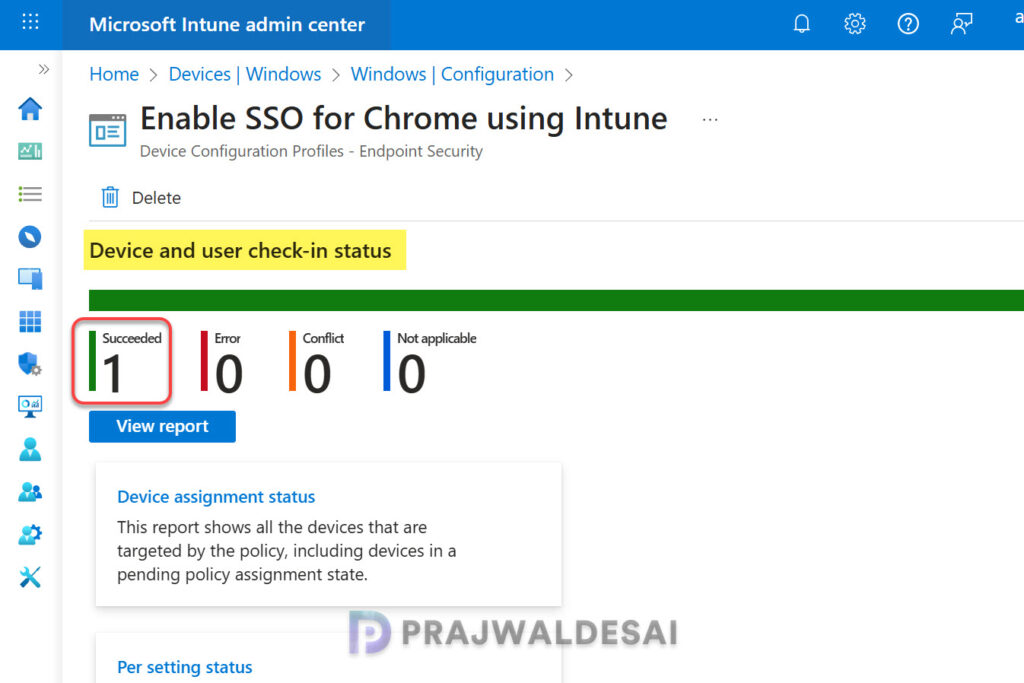
To monitor the Chrome SSO policy assignments in Intune, go to Devices > Windows > Configuration. Select the ‘Enable Chrome SSO‘ policy. On the Policy overview page, check the device and user check-in status. You can see the number of devices or users on which the policy has been applied successfully.
In some cases, the policy settings may fail to apply to certain users. To resolve these issues, you will need to troubleshoot the issue by reviewing Intune logs on Windows computers. These are essential IME logs that are useful for troubleshooting app and policy assignments failures on remote computers.
Step 5: End User Experience
After completing the Chrome SSO policy deployment, you can confirm its functionality and successful configuration through various methods. I am listing three different methods with which you can confirm the SSO is working correctly on Chrome.
Method 1: Sign in to a device with your work account that is targeted with the SSO policy and launch the Chrome browser. Browse to a website for ex. https://portal.office.com. You will notice that the browser doesn’t prompt you to enter the username and password (Entra ID credentials) to access the portal. This confirms that SSO for Chrome is working as intended.
Method 2: Administrators can verify if the Chrome SSO policy settings are applied via Event Viewer. Launch the Event Viewer and navigate to Applications and Services Logs > Microsoft > Windows > Devicemanagement-Enterprise-Diagnostics-Provider > Admin. Here look for Event ID 814 to confirm if the SSO is enabled for Chrome.
The below screenshot shows the Event ID 814, where the CloudAPAuthEnabled policy setting is enabled via Microsoft Intune.
MDM PolicyManager: Set policy string, Policy: (CloudAPAuthEnabled), Area: (chrome2ebd4837-14a8-4bbc-faa52b971a75~Policy~googlechrome~ActiveDirectoryManagement), EnrollmentID requesting merge: (53BCD465-4DE6-4293-8A28), Current User: (S-1-12-1-1154075189-3672277412-345537846), String: (<enabled/><data id="CloudAPAuthEnabled" value="1" />), Enrollment Type: (0x0), Scope: (0x1).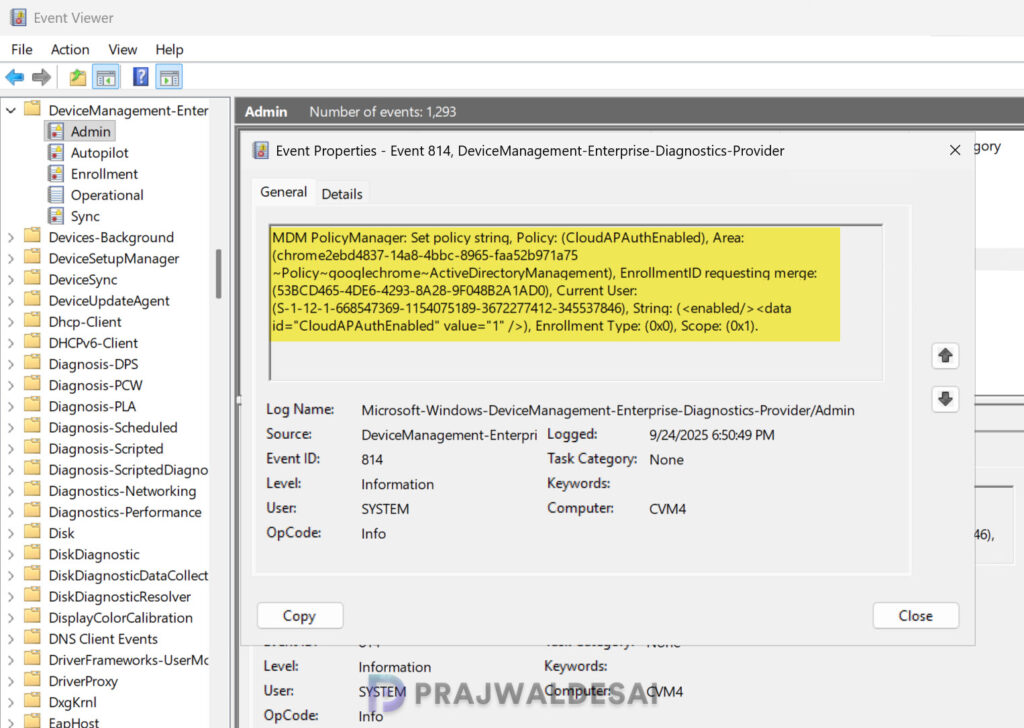
Method 3: Open the Chrome browser, type Chrome://policy in the address bar and press enter. This will display all the policies applied to the browser. Look for the policy named CloudAPAuthEnabled and if the policy value is set to 1, it confirms that you have enabled automatic user sign-in for accounts backed by a Microsoft® cloud identity provider for Chrome.


What is the advantage of importing the admx templates for Chrome over just using the Chrome policies for device configuration for Microsoft SSO that are built into Intune?
If the policies are newly introduced to Chrome and are not available in Intune, importing the ADMX templates becomes essential.