


This post covers the steps to install SQL cumulative update on SCCM SQL server. When I powered on my SCCM lab, I noticed the SQL server wasn’t installed with latest cumulative update. Checking for the latest SQL cumulative update, I found that a new cumulative update was available for SQL server.
While the process of installing CU for SQL server is simple, I want to share the steps to do that via this post. I always recommend installing the latest SQL cumulative updates.
My lab has SCCM and SQL running on same VM. I always install SCCM and SQL on one VM because it provides the best performance. And moreover I like to keep my lab setup simple. So I will install SQL cumulative update on SCCM server.

Determine the SQL Server Version
There are several methods to find the SQL server version and the easiest one is by running a SQL query. Launch the SQL Server management studio and run the query Select @@Version and execute it. That will give you information about the SQL Server version, service pack and cumulative update. I have also published a separate post on finding the SQL server version using different methods.
In my case I was running SQL Server 2014 SP3 with an old cumulative update. The latest CU available for SQL 2014 SP3 was KB4500181.
You might be running a different version of SQL server however you can download the latest CU version available for your SQL Server.
Install SQL Cumulative Update on SCCM Server
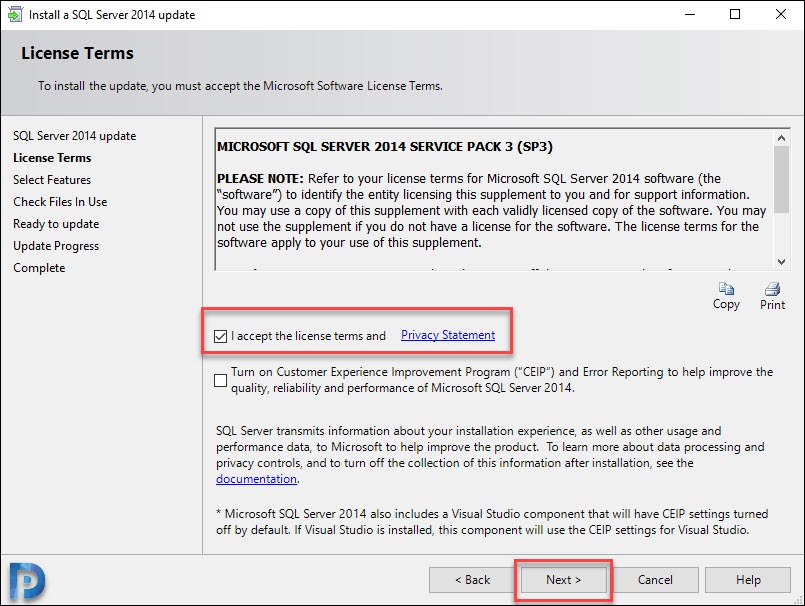
Let’s install SQL cumulative update on SCCM server. First of all copy the KB4500181 update on to your SQL server. Right click the SQL cumulative update and click Install. Check the box I accept the license terms and click Next.
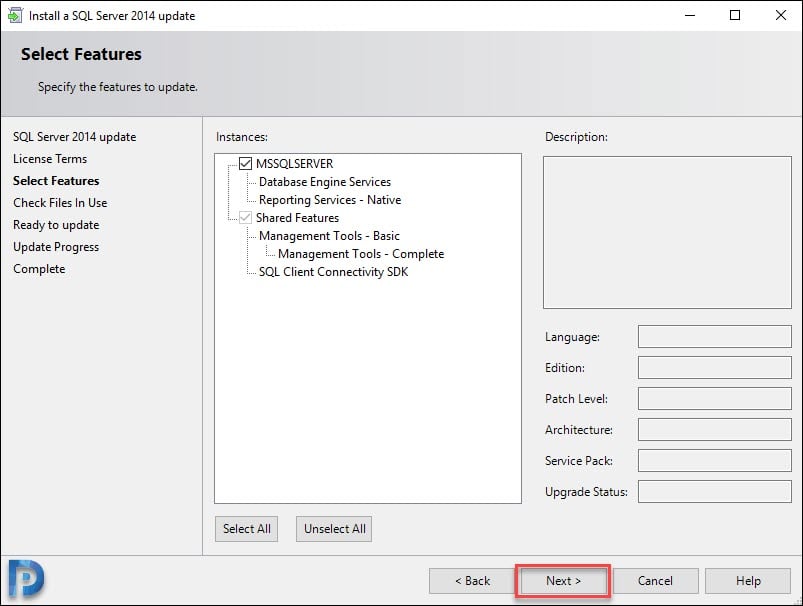
On the Select Features page, click Next.
In order for setup to complete, it checks if any applications and services are in use. In my case I got list of 3 processes that I had to deal with.
- Ssms.exe – This is a SQL management studio service and yes it was open while I was installing this update. Close the SQL Server management studio.
- WmiPrvSE.exe – I have covered about WmiPrvSE.exe in this post.
- Microsoft.Identity.Health.AadSync.MonitoringAgent.Startup.exe – If you find this process listed, you have to manually stop this process. Go to Services console and look for Azure AD Connect Health Sync Monitoring Service. Right click the service and stop it.
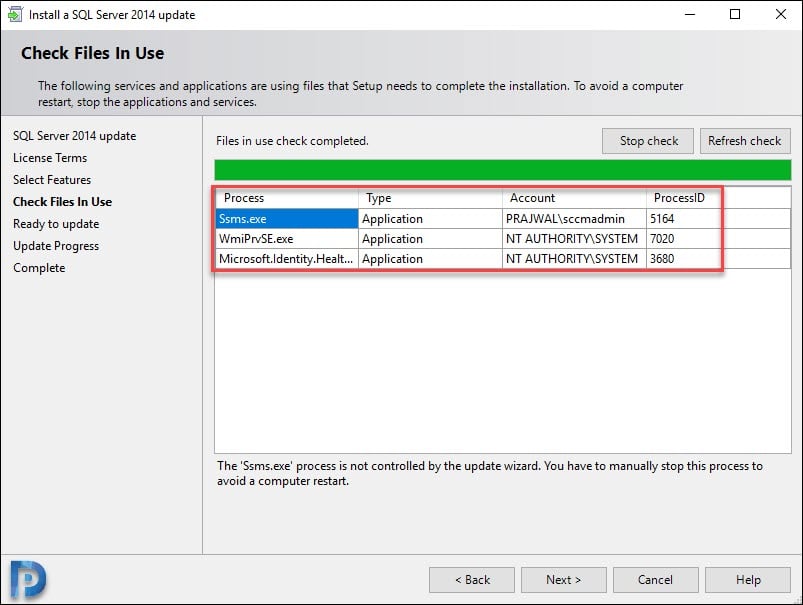
Click Refresh check and I don’t see any thing listed under Files in use. Click Next.

On the Ready to update page, click Next.

Wait for the update installation to complete. The KB4500181 installation is complete but it requires a system restart.

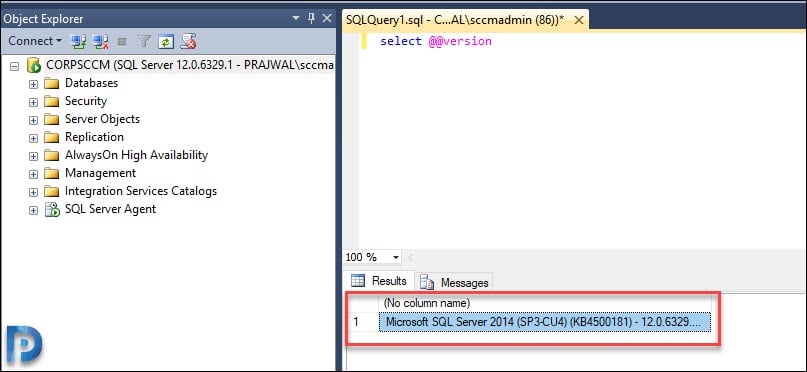
After restarting the server, login and open SQL server management studio. Right click the server and click New Query. Type the command select @@version and click Execute.
From the output you can determine the SQL server version, service pack, the cumulative update (KB4500181) that you just installed.

Hi Prajwal,
We are in process of patching SQL db using SCCM. Can you please share any document which I can refer as a first timer for DB patching. Also, I learnt that SCCM will update SQL as a whole and not per instance.
Requesting your assistance on this.
Hello!
Should we stop the SCCM (SMS_EXECUTIVE?) before installing the CU?
Thanks,
Zoltan
Hi,
I have a server with version SQL Server 2014 SP2 12.0.5000.0 , which is too old. Now i want to update it with the recent cumulative update which is 12.0.5687.1 . Please suggest me is it safe to update cumulative updates on server. the gap between update is of 3years. Will it take much time? Do i need to upgrade to SP3? Or is there any SQL patching also present to patch the SQL server or OS patching is enough?
-Supriya