


In this post we will see how to Install Exchange 2010 Management Tools on Windows 7. Prior to installing the Exchange 2010 management tools on widows 7, we must first install the prerequisites. Lets do it step by step.
First we will install Remote Server Administration Tools for Windows 7. The Remote Server Administration Tools enables IT administrators to manage roles and features that are installed on computers that are running Windows Server 2008 R2, Windows Server 2008, or Windows Server 2003, from a remote computer that is running Windows 7 or Windows 7 with SP1. The RSAT tools are available for both Windows 7 and Windows 7 service pack 1.
Installing Remote Server Administration Tools on Windows 7
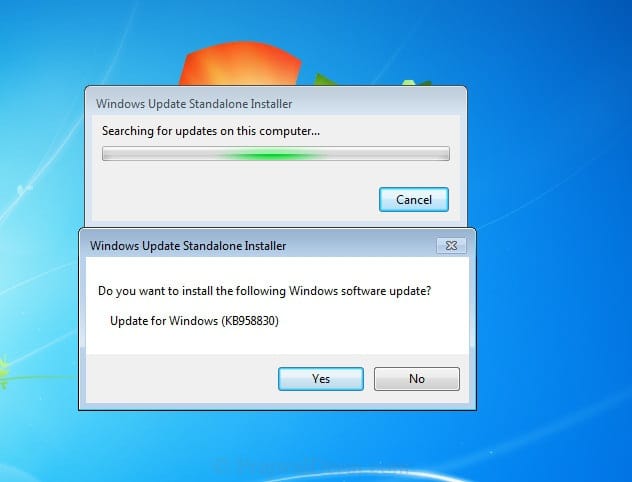
Once you have downloaded the RSAT, double-click the package to unpack it, and then start the Remote Server Administration Tools for Windows 7 with SP1 Setup Wizard. Click Yes to install the update for windows.

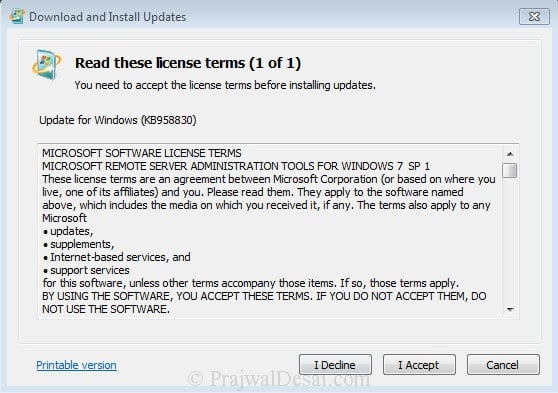
Read the license terms and click I Accept.
Wait for few minutes to complete the installation of RSAT and click Close when you see Installation Complete.

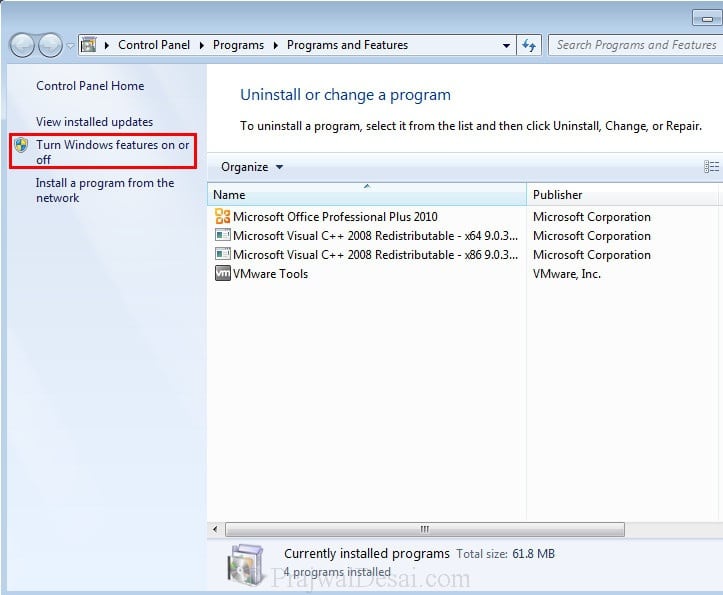
Now that we have installed RSAT, we have to enable few features for installing exchange 2010 management tools. Click on Start > Control Panel > Programs. Click on Turn Windows features on or off.
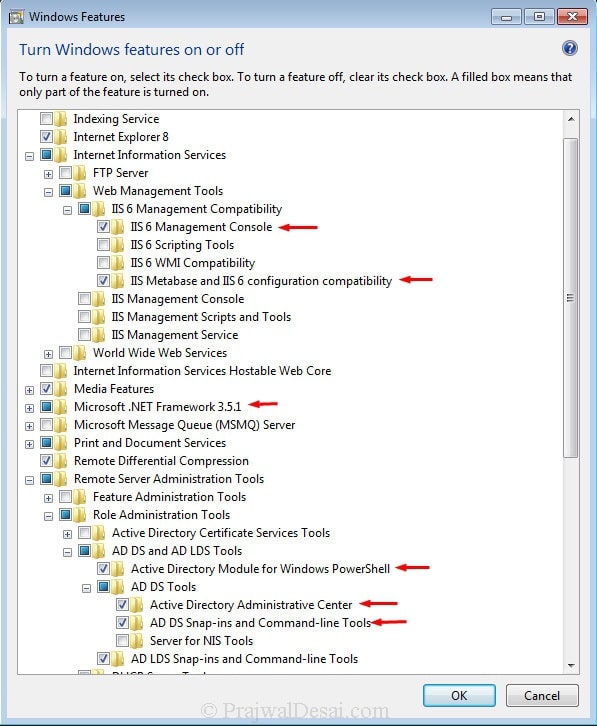
Check or enable the options shown in the screenshot below. Click on OK once done.
Install Exchange 2010 Management Tools On Windows 7
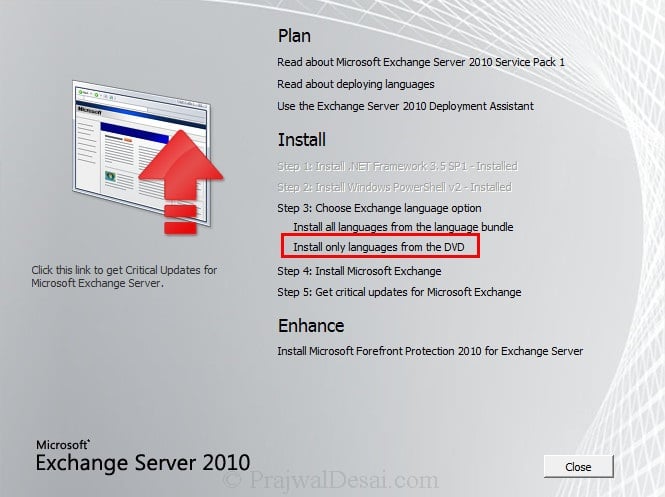
Run the Exchange 2010 SP1 setup, on the installation screen click on Choose Exchange language option and Click on Install only languages from the DVD.
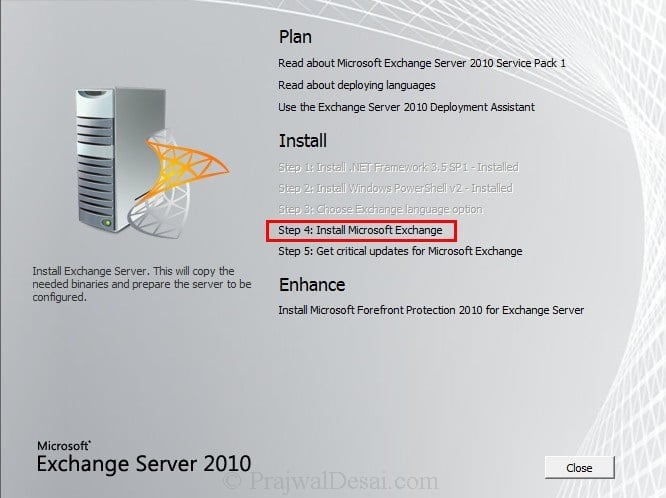
In the next step, Click on Install Microsoft Exchange.
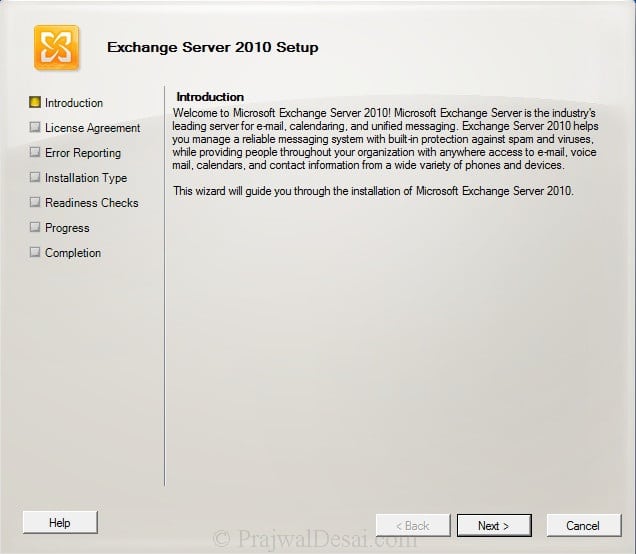
On the Introduction page, click on Next.
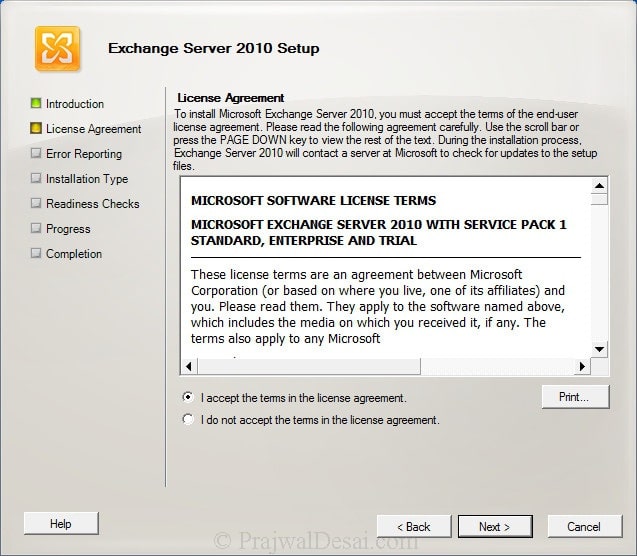
Click I accept the terms in the license agreement. Click on Next.
 .
.
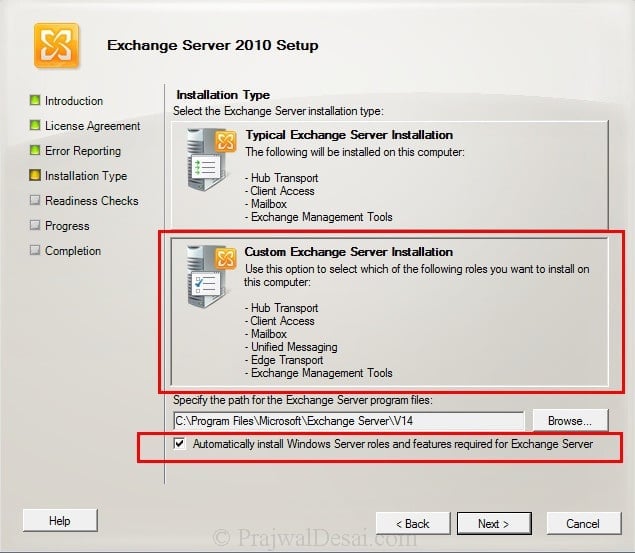
Select Installation type as Custom Exchange Server Installation and check the box for Automatically install windows server roles and features required for Exchange Server.
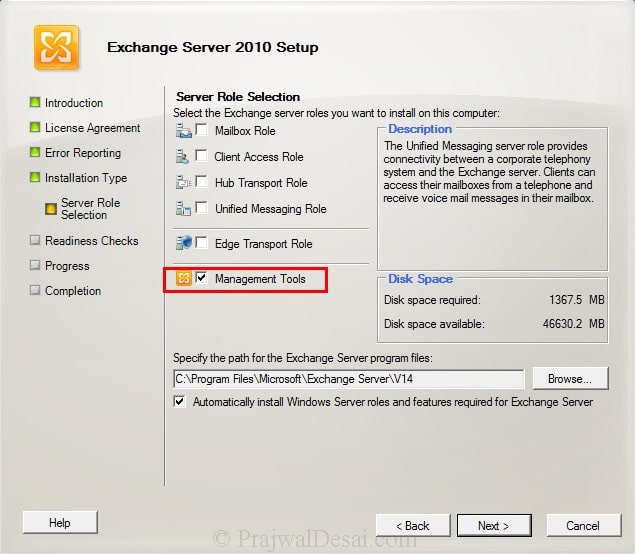
On the Server Role Selection Page, Click the box Management Tools and click Next.
Wait for the Readiness check to complete. Click on Install.

Wait for few minutes to complete the installation of server roles. Once you see the status as completed, click Finish.

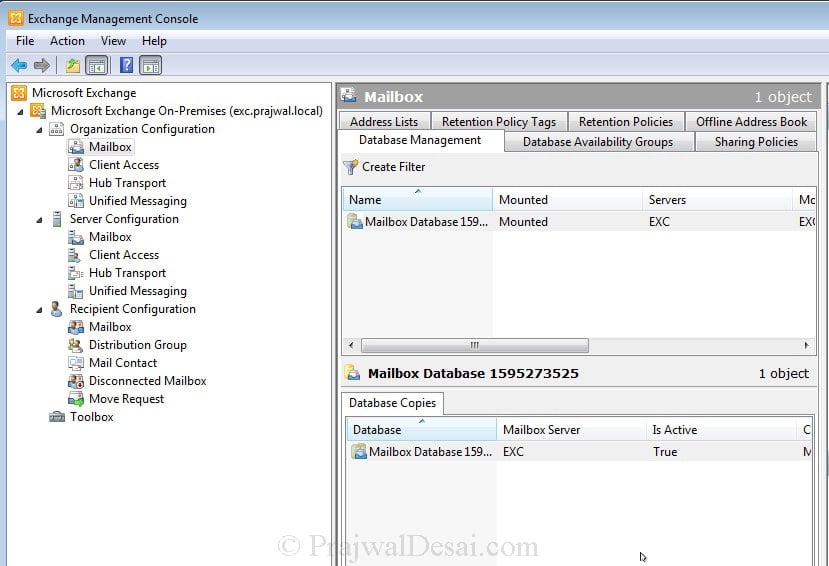
The exchange management console is launched and you are now ready to access your exchange 2010 server from windows 7 machine.

Query the user must have permissions in the domain and the Exchange tool to install and manage the exchange from your computer.
Congratulate the post …
Great post, however when loading the exchange management console I receive an Initialization Failed. The Operation couldn’t be completed because a change occured in the remote forest.
Any ideas?
Post the error screenshot in the comment. Also try restarting server once during the maintenance. A reboot should fix the issue.
I’ll give the reboot of a server a go, I will let you know if that makes any difference.
Worked out what the issue is, I had the wrong version installed on the client desktop.
btw – viewed other posts of yours, they are detailed extremely well, book marked your website!
Thank you Andrew, you comment will surely help other people..
Thank you for sharing your knowledge. I really like your posts. I have a question for you. After following through your instruction I was trying to connect to our Exchange 2010 version 14.3.123.4 ( I assumed SP3). It failed with this error message. “Unable to connect to version 14.3.123.4 server using version 14.1.438.0 due to potential compatibility problems. To resolve this issue remove this sub-node from the console tree and re-add it specifying a server with a matching version.” Is my RSAT version is not matching the Exchange server version? Where can I get RSAT version that compatible with the server version?
Your help is greatly appreciated.
Yes my guess is your RSAT version is not compatible connecting to exchange server. May I know from on which windows OS have you installed exchange management tools.
I installed on Windows 7 64 bit computer. I installed Exchange management tools from Exchange server 2010 SP1. So how do I update the tool to the same version on the server?
You need not do anything on server, looks like you installed or updated the exchange server
Excellent post man, thanx allot. Been searching for this for ages, you made my life allot easier.