


In this post I will show you how to backup and restore Snagit database. We will backup the Snagit database first and then restore the database manually.
Snagit is a popular screen capture and screen recorder tool by Techsmith. Snagit lets you quickly capture your screen, add additional context, and easily share with coworkers. I personally use this tool and I recommend this tool to anyone who wants to capture the images, edit them and share it online. More details can be found on the Snagit tool homepage.
The steps to backup and restore Snagit Database are very simple however you need to know the procedure to do that. But first let’s understand what the Snagit database is and what does backup and restore database in Snagit do.

The Datastore is where Snagit stores its unsaved captures. While using the Snagit capture tool you capture several images but you don’t save all of them. One good thing about the Snagit tool is it saves the recent captures and every time you launch the tool you get to see these captures. You don’t need to save these captures because they are held in the cache by tool. By default a maximum of 15 files are stored by Snagit tool.
If this Datastore folder is moved from its original location without being exported from the Snagit Editor using this process, then the captures will not automatically open back up in the Snagit Library. However, it is possible to restore these captures so that they show in your Library.
Steps to Backup Snagit Database
The steps to backup database in Snagit are as follows.
- First launch the Snagit editor on your computer.
- On the Menu bar, click Edit >Editor Preferences.
- Select Library tab and click Create Backup. Save the backup as backup.snagarchive.
- The Snagit Database saves in the C:\Users\Administrator\AppData\Local\TechSmith\SnagIt\DataStore\ location.

Apart from the default location, you may choose another location to save the Snagit database. The Snagit tool remembers this location and when you restore database, this new location is automatically selected. So select a location on your hard drive and save the backup. The default name is backup.snagarchive however you may change the name but don’t change the extension.
This completes the steps to backup Snagit database.

Steps to Restore Database in Snagit
The steps to restore database backup in Snagit are as follows.
- First launch the Snagit Editor tool on your computer.
- On the Menu bar, click Edit >Editor Preferences.
- Select Library tab and click Restore Backup.
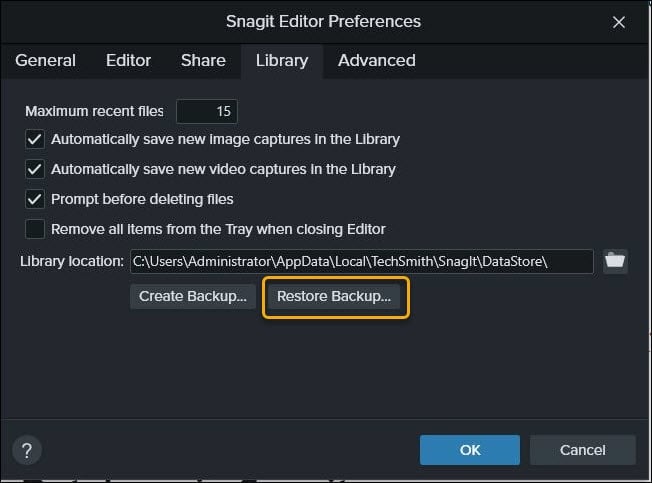
The Snagit Database is backed up by default in the C:\Users\Administrator\AppData\Local\TechSmith\SnagIt\DataStore\ location. However if you have saved the database in a custom location browse to it and select the backup.snagarchive file.

Before you restore the database it prompts with a message. You current library will be overwritten with the captures in the backup file and Snagit will restart. Click Restore and Replace.
The database is now restored and the Snagit tool closes and launches itself. Now you can find your old captures that were lost.

This completes the steps to restore Snagit database. I hope this post helps.

Hi Prajwal,
I am trying to backup the appdata\roaming folder, is it possible via intune?