


This article details the steps to enable controlled folder access using Group Policy.
With the latest versions of Windows 10, Microsoft has really worked hard on improving Windows defender. The AV features that most of the customers were looking for are now available in Windows Defender. While most of the antivirus softwares have already got advanced features, Windows defender too gets new features with every update.
We all know that Microsoft introduced host intrusion prevention functionalities in Windows 10. The idea behind this is to prevent the user data from unsafe apps. One of the important feature of Windows Defender Exploit Guard is Controlled folder access.

This feature protects important data from malicious apps and threats. Once any ransomware enters a computer, it encrypts the files and demands ransom to unlock it. Since this is a common behavior of ransomware, securing the files and folders is first preventive step.
Ways to Enable Controlled Folder Access
Controlled folder access can be enabled by using one of the following ways:
- Group Policy
- Windows Defender app
- PowerShell
- MDM CSP’s
What happens after you enable Controlled Folder Access?
With controlled folder access enabled for Windows computers, the apps are monitored for any suspicious activities. All the apps installed are scanned in depth by Windows Defender antivirus.
In addition the Windows defender will then determine whether the app is safe or malicious. If it finds the app to be malicious, the app will be blocked from making changes to the files located inside protected folders. Also a notification will be shown to the user about the app being blocked by windows defender.
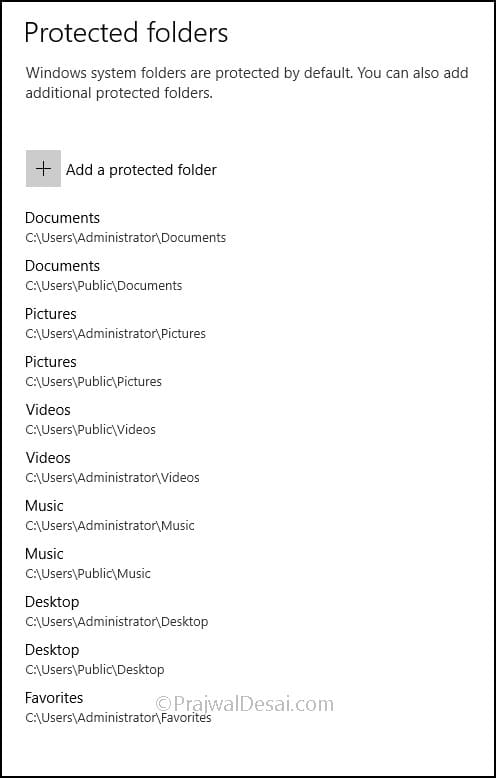
By default Windows system folders are protected with controlled folder access feature. The below screenshot shows the default system folders that are protected. By clicking Add a protected folder, a user can add additional folders to the list.
Prerequisites
Before you enable controlled folder access, please read the following prerequisites.
- Before you enable controlled folder access, ensure Windows Defender AV real-time protection is enabled.
- The controlled folder access feature will not be available if a third-party antivirus is installed on the system.
How to Enable Controlled Folder Access Using Group Policy
In this section, we will create a new GPO to enable controlled folder access on our Windows computers.
Launch the group policy management console. Under Computer configuration click Administrative templates > Windows components. Expand Windows Defender Antivirus > Windows Defender Exploit Guard > Controlled folder access.
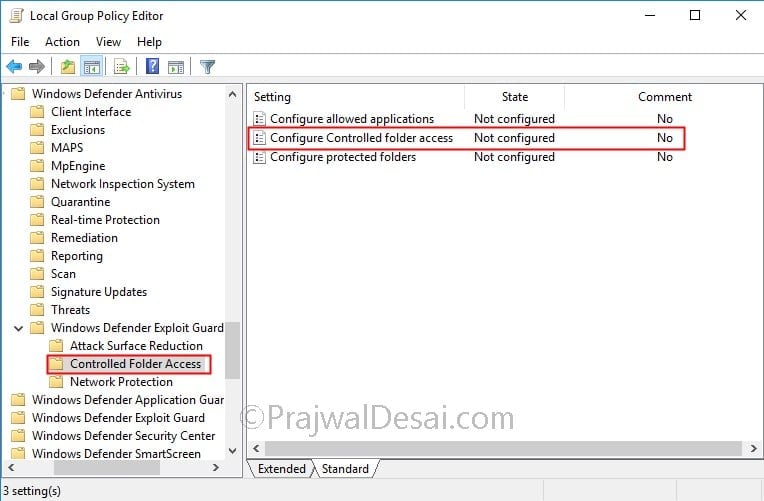
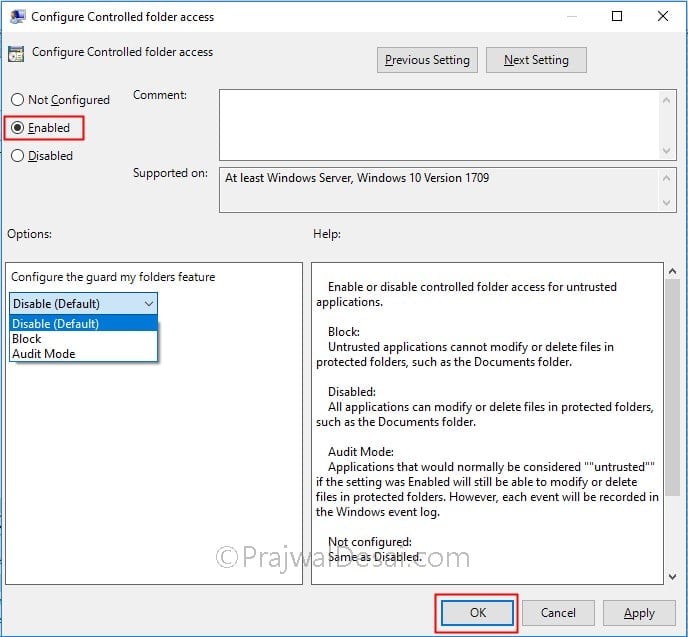
Double-click the policy Configure Controlled folder access. To enable the policy, click Enabled. You get 3 options to configure the guard my folders feature.
- Disable – This is the default option. Not a secure option though as any app can modify / delete files in protected folders.
- Block – This is a strict mode where untrusted apps cannot make any changes to files insides protected folders. Enable this with caution as it may affect organization’s productivity.
- Audit Mode – In the audit mode untrusted apps are allowed to make changes (modify/delete) to files inside protected folders. However each of the activity is logged in the windows event log.
Select Audit mode and click Apply and OK.
Once you have configured controlled folder access, there are 2 more policy settings. Configure Allowed applications and Configure Protected folders.
Configure Allowed Applications
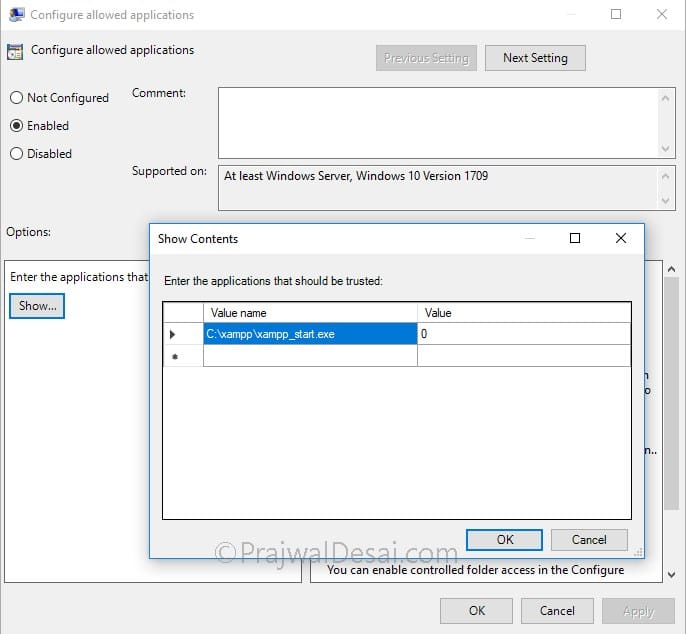
By enabling configure allowed applications policy setting, the applications added to the list will be marked as trusted by controlled folder access.
To enable the policy setting, click Enabled and to add the list of apps click Show button. A window pops up where you can enter the app path in value name field. Enter 0 as value for all the applications that you add to the list.
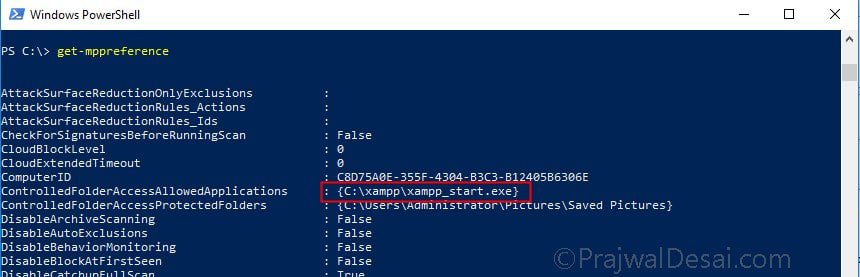
Launch the PowerShell and type the command “get-mppreference“. In the output, take a look at allowed apps next to ControlledFolderAcessAllowedApplications.
Configure Protected Folders
The policy setting allows admins to configure protected folders. Untrusted applications cannot modify/delete folders added to list of protected folders. Double click the policy setting “Configure Protected Folders”. Click Enabled and to add the folders click Show. In the new window, add the folder path under value name and set the value to 0. Click Apply and OK.

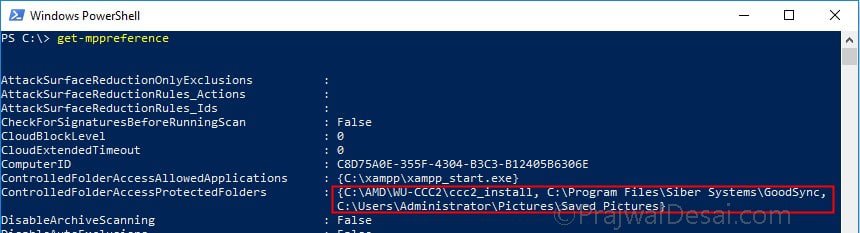
Launch PowerShell and type the command get-mppreference. Look for value ControlledFolderAccessProtectedFolders to see folders that you just added.

Richard’s Comment. I think he may be able to ad the Windows 10 .admx policy files to his //<domain name/SYSVOL/Policies/Policy Definitions and then he will see the Windows 10 Policies event though he is using Server 2012 R2 – Which is not long for being End of Support.
When I attempt to use GP to implement this in a domain environment this path – “Windows components > Windows Defender Antivirus > Windows Defender Exploit Guard > Controlled folder access” – does not exist. I’m running Server 2012r2 Standard with a GUI and 90% of my PCs are running Windows 10 version 1709. I only see Windows Components > Windows Defender (without the ‘Antivirus’ part on the end), that’s it. I do, however, see this path when browsing to the local policy on a Windows 10 PC. I’ve enabled real-time protection in GP but no luck. Any other ideas? Is this something I can control with a GPO in a server 2012r2 environment with a domain function level of 2012r2.
Oh and we don’t use a 3rd-party AV solution, we use Windows Defender.
Well defined the topic “How to Enable Controlled Folder Access Using Group Policy”. Like it…
*I am happy I came across…
Hii, Prajwal Desai. My name is Jeremiah and I am from Nigeria. I’m an IT/computer engineer and I am committed to growing every day in IT knowledge. I am I came across your site. You are doing a great work. I would like to learn more from you. Are there any materials or video you can share with me … I hope to hear from you.
Thank you