Configuring Firewall Settings For Configuration Manager 2012 R2 In this post we will look at the steps for configuring firewall settings for configuration manager 2012 R2. System Center 2012 R2 Configuration Manager is a distributed client/server system. The distributed nature of Configuration Manager means that connections can be established between site servers, site systems, and clients. Some connections use ports that are not configurable, and some support custom ports you specify. You must verify that the required ports are available if you use any port filtering technology such as firewalls, routers, proxy servers, and IPsec. To know more about ports used by configuration manager 2012 R2 click here.
Note – In order to successfully use client push to install the Configuration Manager 2012 R2 client, you must add the following as exceptions to the Windows Firewall. If there is a firewall between the site system servers and the client computer, confirm whether the firewall permits traffic for the ports that are required for the client installation. 1) File and Printer Sharing 2) Windows Management Instrumentation (WMI).
Configuring Firewall Settings For Configuration Manager 2012 R2
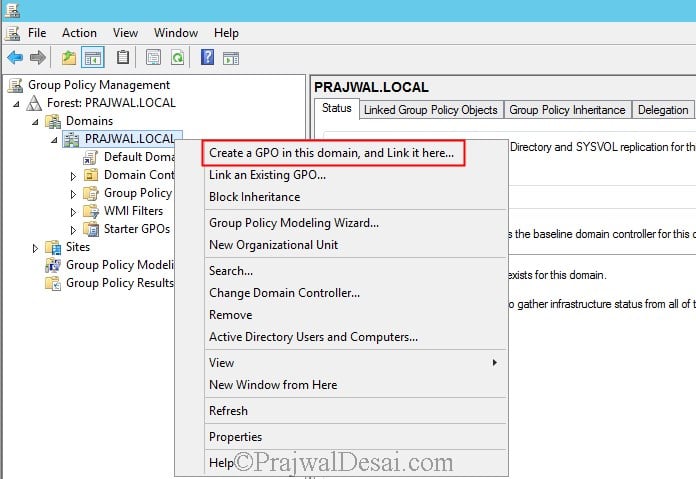
We will create an inbound and outbound rule, add File and Printer sharing service as exception to firewall and an Inbound rule to allow WMI. We will perform this activity on the Domain Controller. Click on Server Manager, click on Tools, open Group policy management console. Right Click on the domain and Create a GPO.
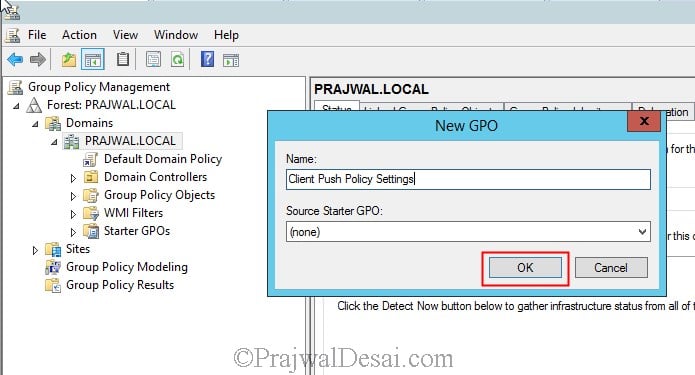
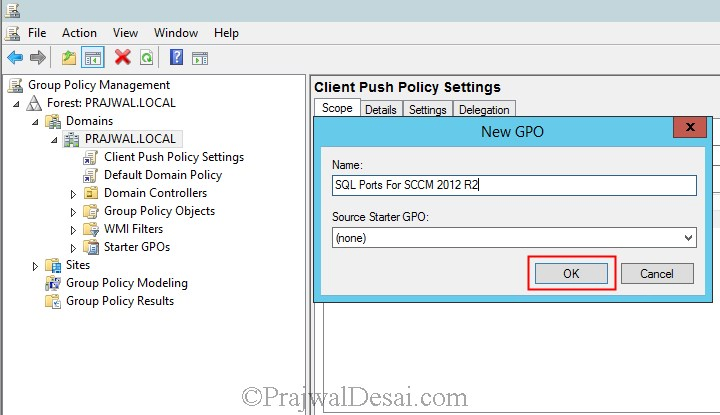
Provide a name to the GPO and click on OK.
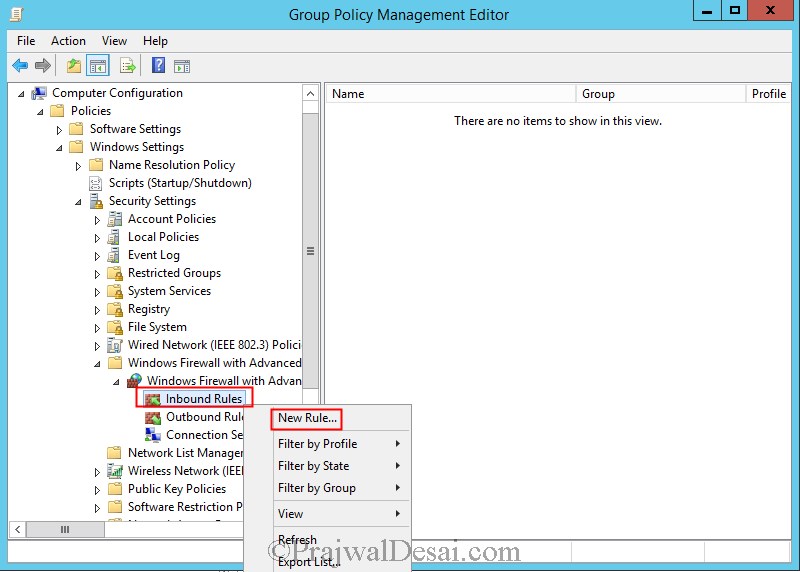
Right click on the policy that you created and click on Edit. Expand computer configuration, Windows settings, Security settings, Windows Firewall with advanced security. Right click on Inbound rules and click on New Rule…
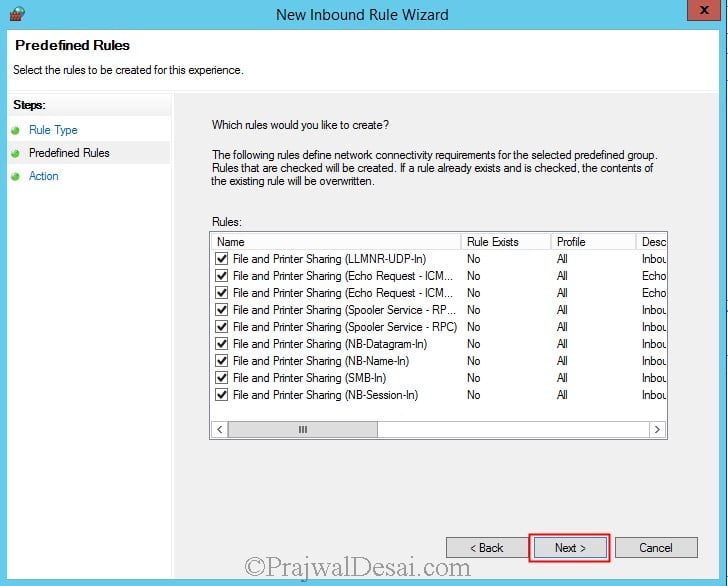
Click on Predefined and select File and Printer Sharing. Click on Next.
Don’t change anything here, click on Next.
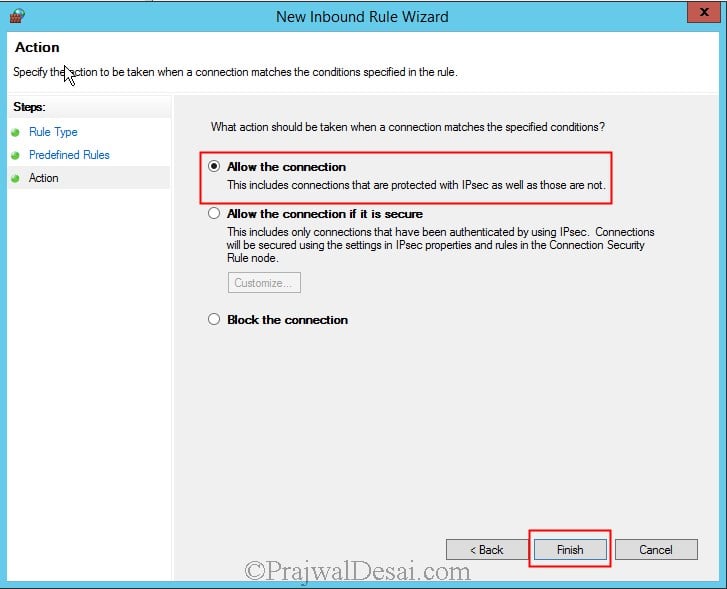
Click on Allow the connection. Click Finish.
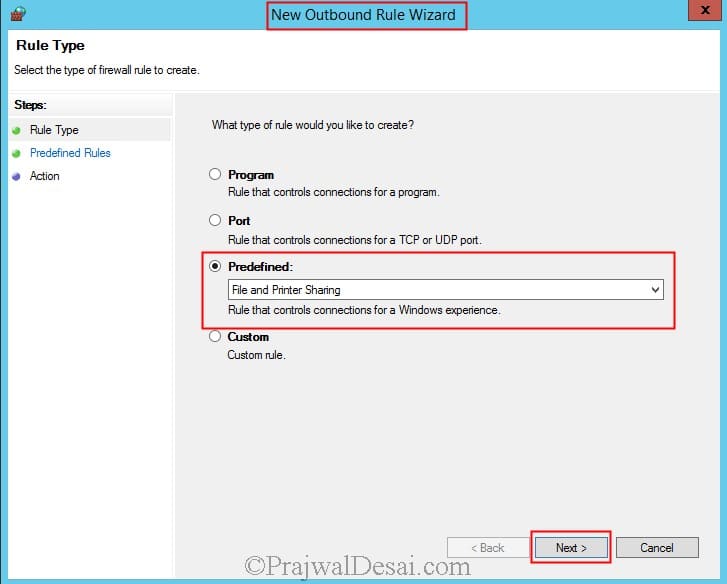
Now we will create an outbound rule to allow File and Printer sharing. Right click on the Outbound Rule and click on New Rule. Choose Predefined and select File and Printer Sharing. Click on Next.
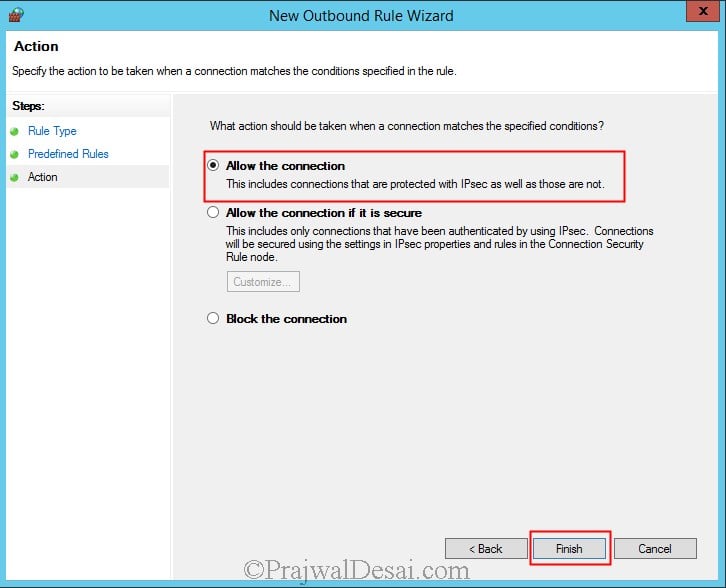
Click on Allow the connection. Click Finish.
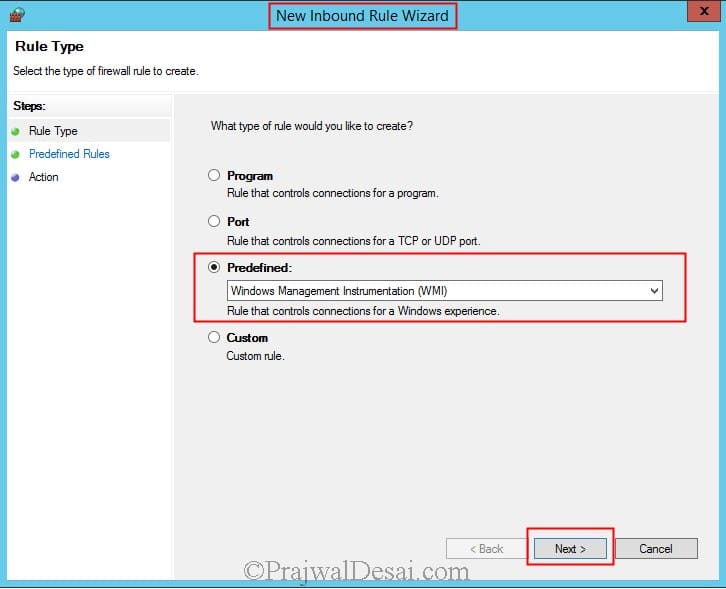
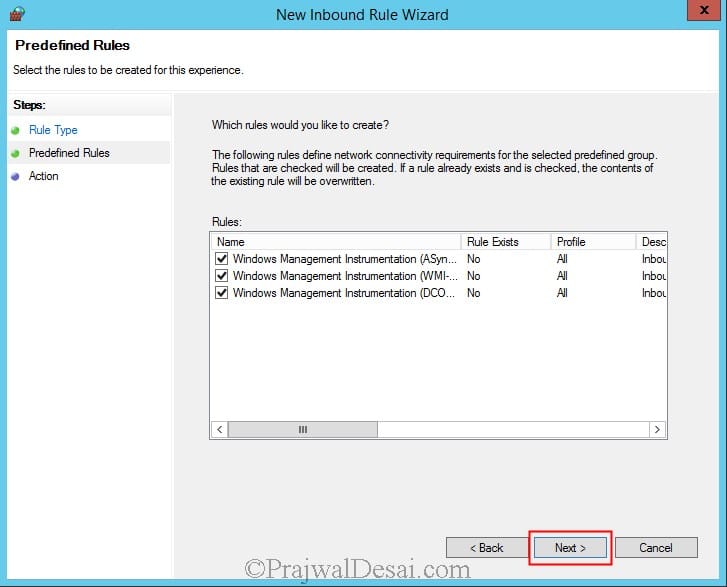
Now we will create an Inbound Rule to allow the WMI service on our Firewall. So right click on Inbound Rule and click on New Rule. Click on Predefined and select Windows Management Instrumentation (WMI). Click on Next.
Click Next.
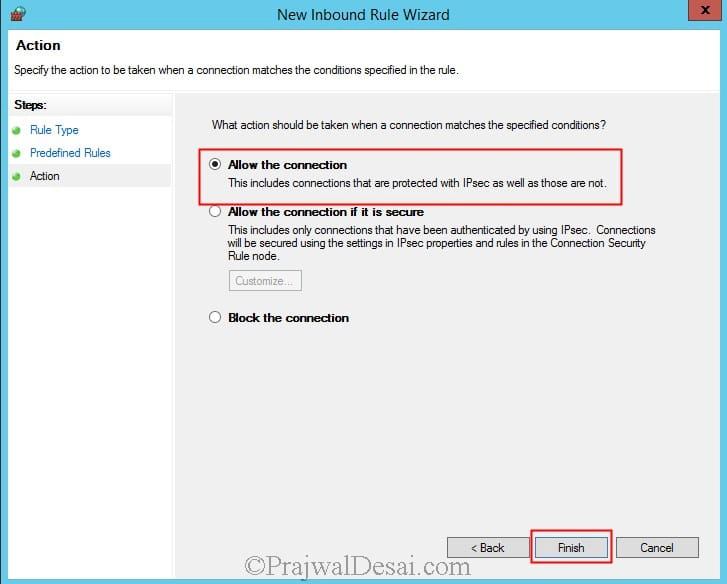
Choose Allow the connection and click Finish.
Opening Ports for SQL Replication
We will now see the steps to open the ports for SQL Replication. Please note that Configuration Manager does not support dynamic ports. Because SQL Server named instances by default use dynamic ports for connections to the database engine, when you use a named instance, you must manually configure the static port that you want to use for intrasite communication. This point has been discussed while installing SQL server for configuration manager 2012 R2.
Why should the ports 1433 and 4022 opened on Firewall ??
Port 1433 – SQL Server listens for incoming connections on a particular port. The default port for SQL Server is 1433. It applies to routine connections to the default installation of the Database Engine, or a named instance that is the only instance running on the computer.
Port 4022 – This is SQL Service Broker, though there is no default port for SQL Server Service Broker, but this is the port that we allow inbound on our firewall.
Site System roles that communicate directly with the SQL Server database
Application Catalog web service point
Certificate registration point role
Enrollment point role
Management point
Site server
Reporting services point
SMS Provider
SQL Server to SQL Server
By default, Microsoft Windows enables the Windows Firewall, which closes port 1433 to prevent Internet computers from connecting to a default instance of SQL Server on your computer. Connections to the default instance using TCP/IP are not possible unless you reopen port 1433. We will now create a group policy to open TCP ports 1433 and 4022.
Open the Group Policy Management console. Create a new policy and provide a name for the policy. Right Click the policy and edit it.
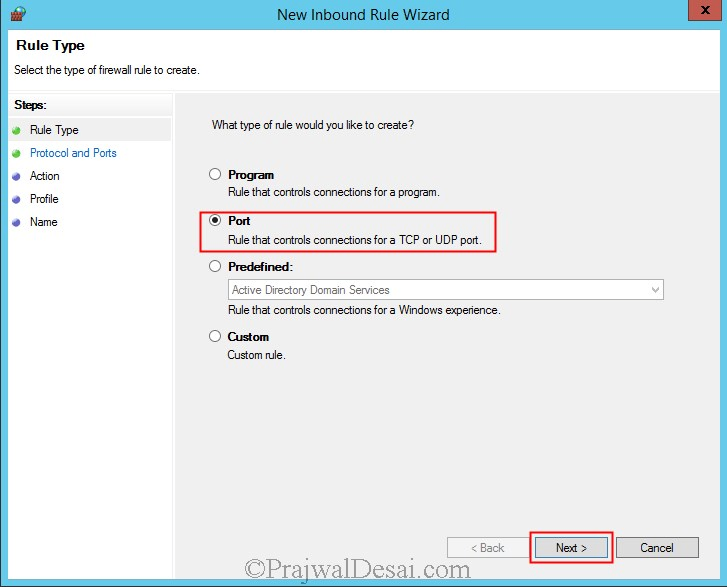
In the Windows GP management console, expand computer configuration, Windows settings, Security settings, Windows firewall with advanced security. Right click on Inbound Rule and create an Inbound Rule and select Port. Click on Next.
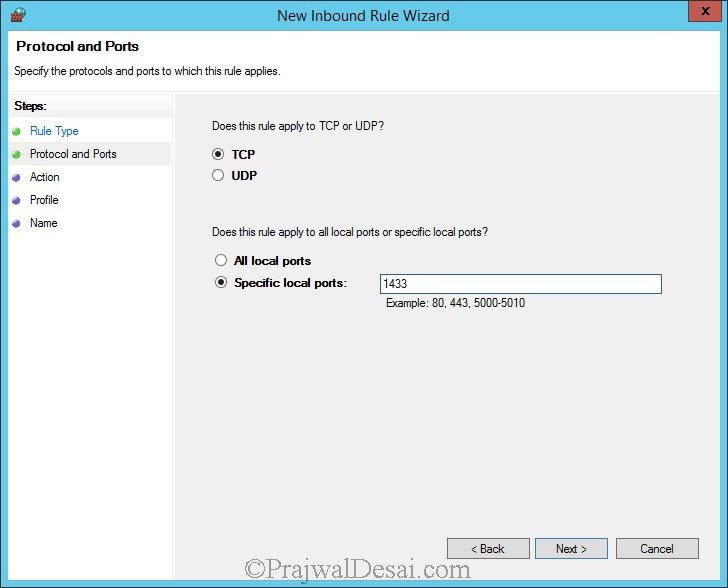
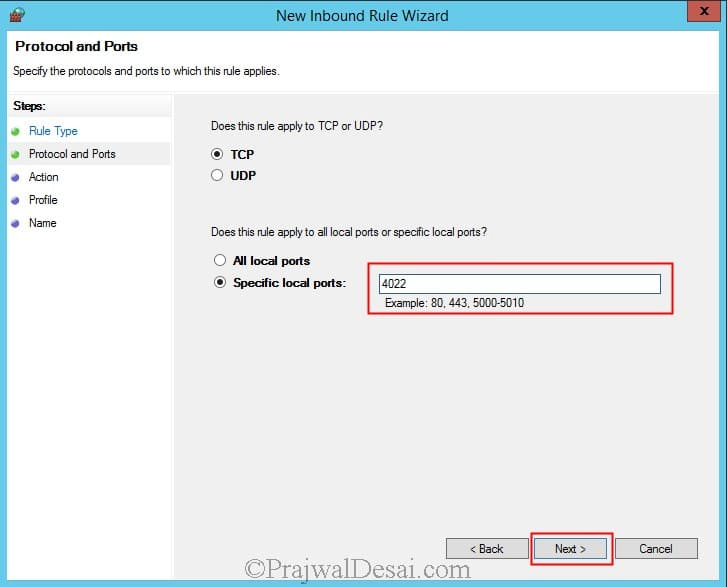
Select TCP, and specify port 1433 in specific local ports. Click Next.
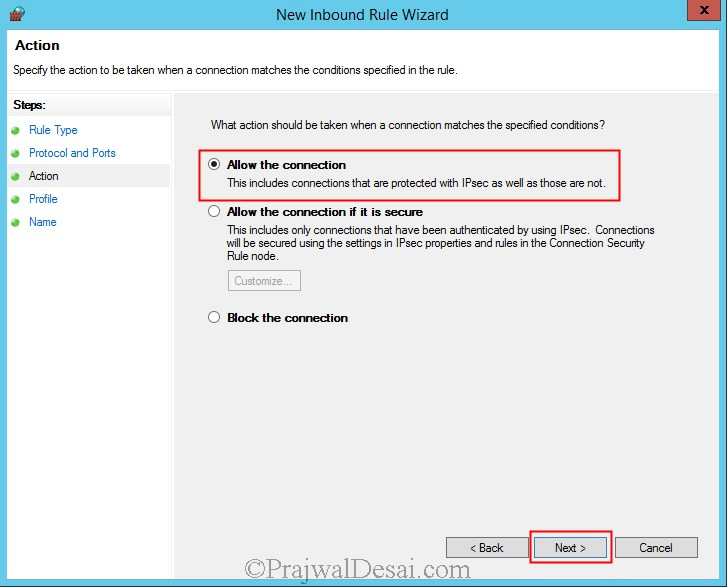
Click on Allow connection and click on Next.
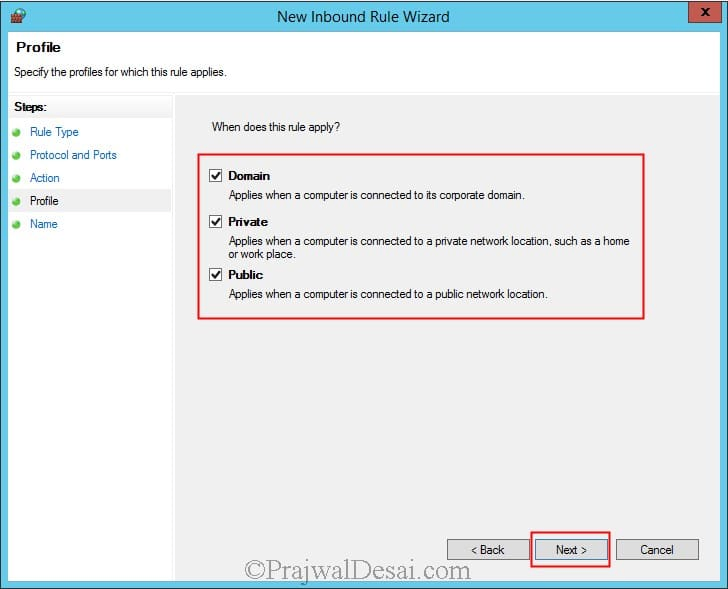
The firewall rule will be applied for all the 3 profiles. Click on Next.
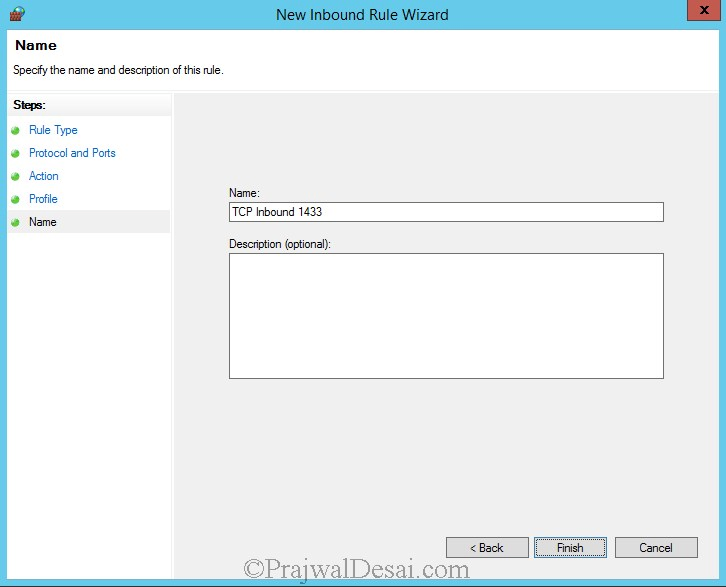
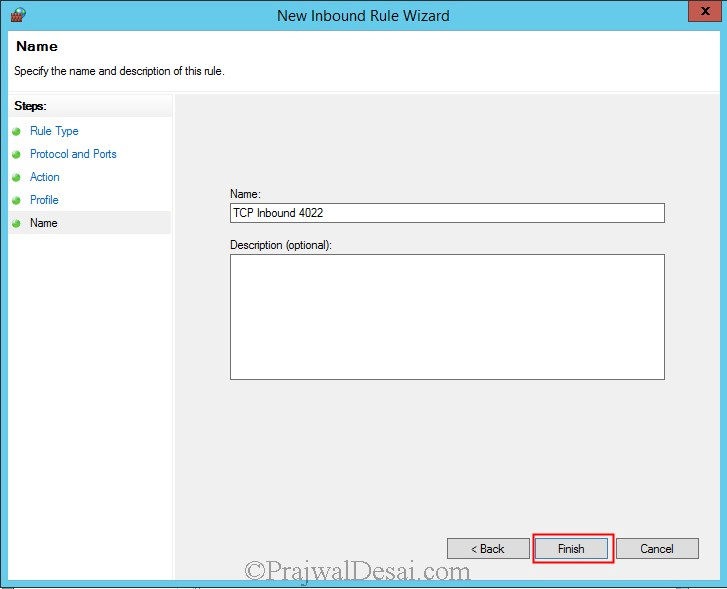
Name the rule as TCP Inbound 1433. Click on Finish.
Similarly create an Inbound Rule to allow port 4022. choose TCP and specify the port number as 4022. Click on Next.
Click on Allow the connection. Click on Next. Select Domain, Private and Public and click on Next. Provide the name as TCP Inbound 4022 to identify the rule. Click on Finish.
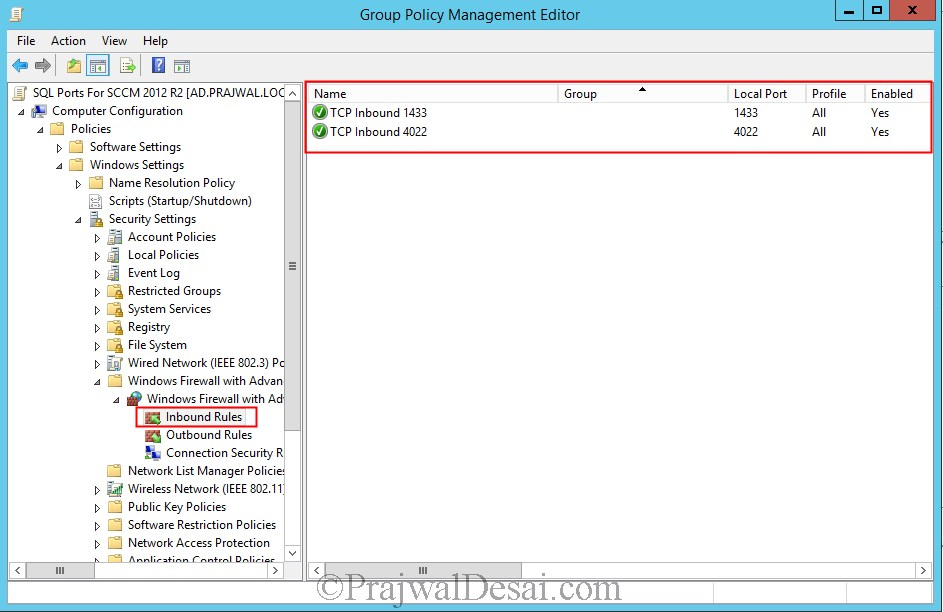
We have allowed TCP inbound ports 1433 and 4022 on our firewall.
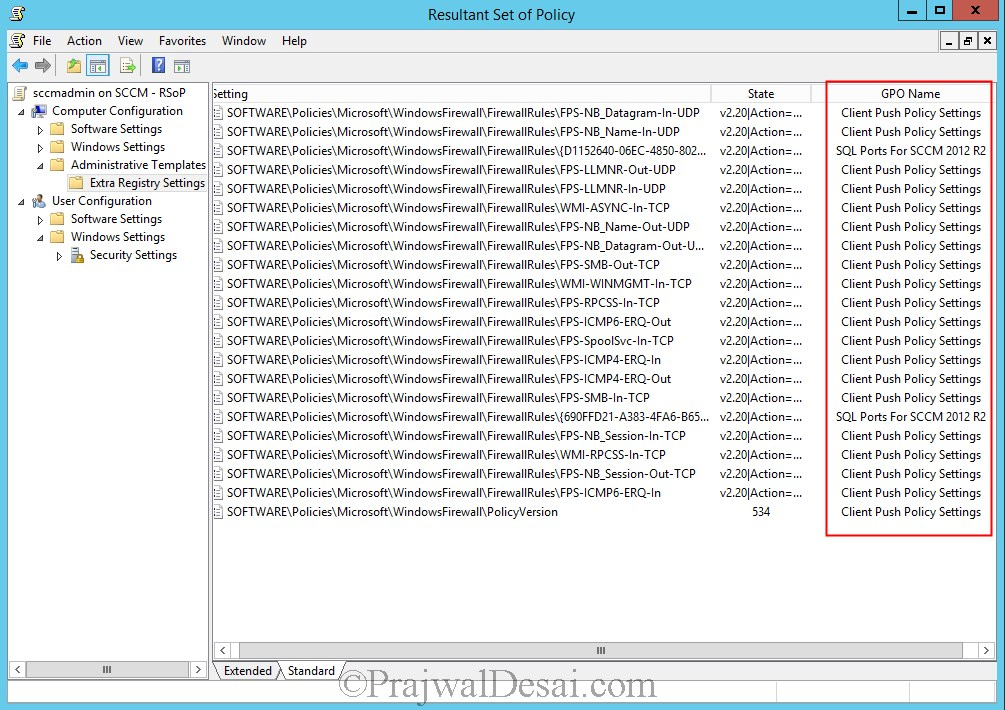
Run the gpupdate /force command on the domain controller and on any of the client machine, launch the command prompt and type the command gpupdate /force and hit enter. In the same command prompt, type the command rsop.msc. This will show the resultant set of policies, group policies that are applied to this client. Expand Administrative Templates and click on Extra Registry Settings. On the right side pane you will find that the policies that we created are applied on the machine.




Would simply turning off the Windows Defender firewall on the SQL, SCCM and workstations accomplish the same results?
Yes that will work but would you do that in an organization ?. If you want to do that in your lab setup, you can..
A sincere thank you to you, Prajwal, for taking the time to build an excellent resource for us that really need this!!
You’re a ‘diamond geezer’.
SQL Server Broker service is not enabling and for that reason unable to discover object in SCOM (Pool mapping error)
we only add and allow those ports tcp 1433 and 4022 if our SQL Config Mgr is on diff servers isnt it?
Getting below mentioned error message while installing client from SCCM Server
Hi Prajwal,
Is there a reason why you have added all the TCP ports in one rule?
Sorry it should have read why wouldn’t you add all the tcp ports in one rule?
Thanks a lot Prajwal! I was chasing my tail with this, my customer uses Symantec Endpoint Protection for their clients firewall/network protection and I have already allow ports in SEP. For some reason they also have Windows Firewall running, and your article helped point to the right direction.
Can we disable the rules once the client pushes are successful? Will it impact other SCCM to client operations/connectivity e.g software deployment/ updates deployment? I am concerned of the implications if File and Print sharing is allowed permanently, with ransomeware prevalent these days…
Thanks
You cannot close those ports post the client installation. They need to be open which allows the client agents to contact site server.
Very well explained Prajwal..keep it up..
Thank you Rohit
HI Prajwal, I am unable to create new GPO under Group Policy Management console. It is greyed out. I have already researched a lot on this but could not find a solution. The user account is an administrator on Local machine and Domain controller. I have also checked that the account has Full Control permission to access SYSVOL folder but still no luck. Could you please suggest a fix?
“The user account is an administrator on Local machine and Domain controller.” – Right click user account properties > Members and tell me what do you see there.
The account is a member of Domain Users and Controllers. This is what it looks like:
https://uploads.disquscdn.com/images/e77df61fd0a69be2799a98b2ad265dc48d91387784a70e0d4edf6d07b93bcbbf.jpg
This is a permission related issue. Check this – https://technet.microsoft.com/en-us/library/gg416505.aspx?f=255&MSPPError=-2147217396
The TechNet link does not open. It says – Unable to Service Request. Any other suggestions please?
Thanks for the update Prajwal. That TechNet doc mentioned that only Domain Administrators have the access to link GPOs. So I added my account to Domain Admins group and it worked.
I appreciate your help a lot! 🙂
The TechNet link does not open. It says – Unable to Service Request. Any other suggestions please?
Try this – https://technet.microsoft.com/en-us/library/gg416505.aspx
Thanks for the update Prajwal. That TechNet doc mentioned that only Domain Administrators have the access to link GPOs under Group Policy Management console. So I added my account to the Domain Admins group and it worked. I appreciate your help a lot! 🙂
That’s great. Glad that it helped.
Did you try running the SQL replication link analyzer -https://www.prajwaldesai.com/replication-link-analyzer-in-configuration-manager-2012/
Thank you for getting back to me.
Yes but evertime is says unable to lunch replication link analyzer.
Something seems to be really wrong.
Yes and I really need your advise please, i’m willing to do anything to fix it.
Could you post the contents of ReplicationLinkAnalysis.log file ?
Hi Prajwal,
Thank you so much for your time and effort, please find attached requested pictures.
Could you try restarting the Primary site server once ?. Let me know if Replication link analyzer works fine after that.
Thank you Prajwal
I did but it didn’t work
Hi Prajwal,
I have an issue and I cannot fix it and I need your help please?
I have a lab at home and I installed primary site and after that I installed the CAS there is no replication between them and everytime I open CAS Read only mode appears.
Pete
Thank you
Yes you can do that.
That’s my question as well. Also, for environments where firewalls are disabled for local machines, you can just set the appropriate exceptions for those ports ( If not already in place from other applications utilizing these ports)
can i simply disable firewall in server and client instead of doing all this ? will tht be enuff ?
You can disable the firewall in server but practically in the organization where the SCCM is to be deployed you cannot do that. If you are using the lab setup then you can disable the firewall.
Do you have Vb script to see the particular port opened , I need to work this via baseline?
Bonjour j’aimerais désactiver le protocole SSLv3 pour activé le TLS pendant le déploiement de mon système d’exploitation comment je vais procédé avec systeme center configuration manager je suis encore en phase de création de mon image