In this blog post I will show you how to configure the Power Management options in Intune for Windows 10 devices. We will use OMA-URI settings to configure different features in Intune.
In Microsoft Intune, you can manage your Windows 10 devices very well. You can add or create custom settings for your Windows 10 devices using “custom profiles”. The custom profiles are a feature in Intune. You use custom profiles to add device settings and features that aren’t built in to Intune.
Windows 10 custom profiles use Open Mobile Alliance Uniform Resource Identifier (OMA-URI) settings to configure different features. These settings are typically used by mobile device manufacturers to control features on the device.
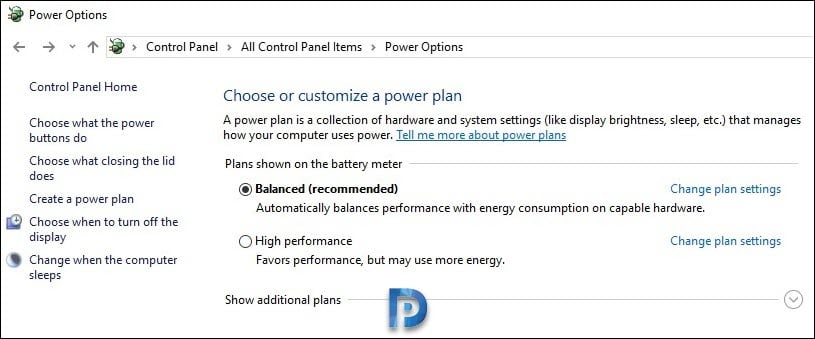 Configure Power Management Options in Intune
Within the Intune portal we will create a new profile with the following information. To create a new profile in Intune.
- First of all login to Intune portal.
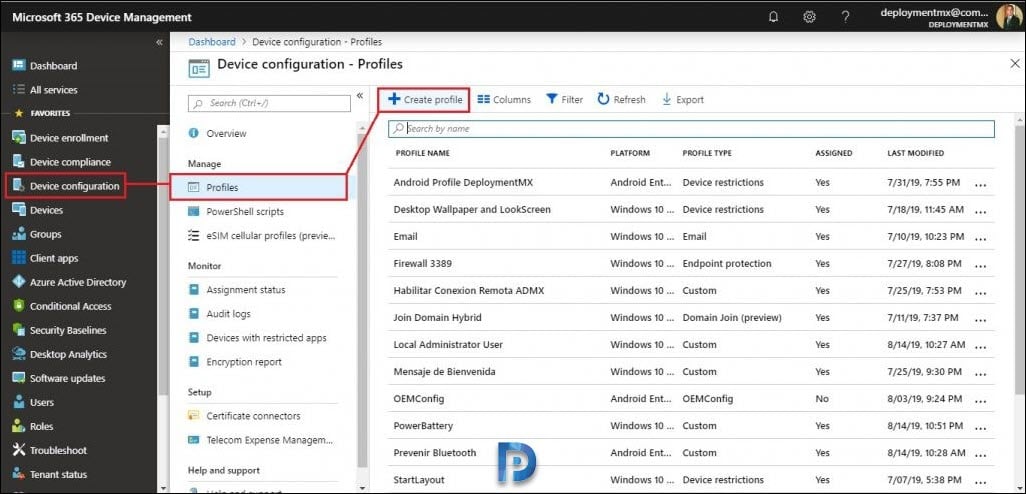
- Select Device configuration > Profiles.
- Now click on Create Profile.
Normally when you create a new custom profile, you specify the following information.
- Name: Specify a name that identifies the profile.
- Platform: Windows 10 or later.
- Profile Type: Choose Custom.
- In Custom OMA-URI Settings, click Add.
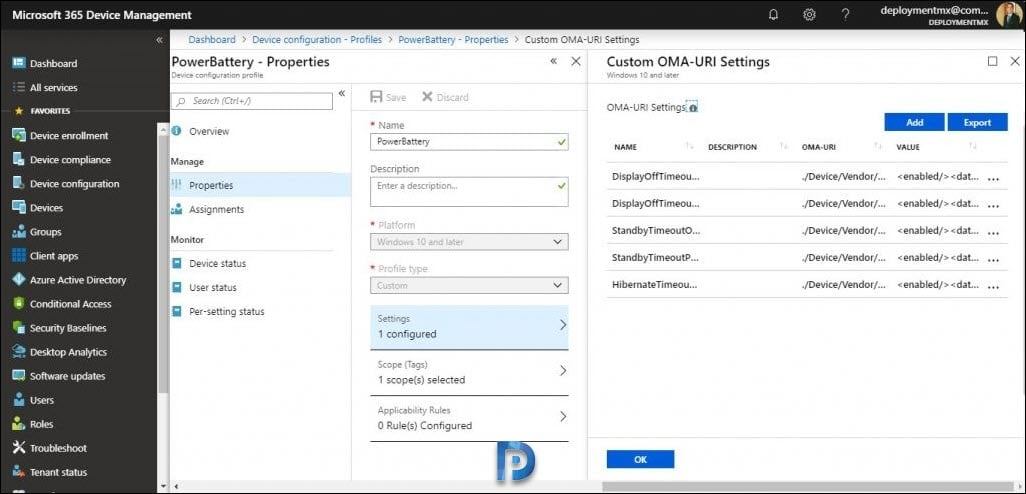 You can click Export button to export the OMA-URI Settings.
Name: DisplayOffTimeoutOnBattery
OMA-URI: ./Device/Vendor/MSFT/Policy/Config/Power/DisplayOffTimeoutOnBattery
Data Type: String
Value: <enabled/><data id=”EnterVideoDCPowerDownTimeOut” value=”600″/>
—————————————————————————-
Name: DisplayOffTimeoutPluggedIn
OMA-URI: ./Device/Vendor/MSFT/Policy/Config/Power/DisplayOffTimeoutPluggedIn
Data Type: String
Value: <enabled/><data id=”EnterVideoACPowerDownTimeOut” value=”1800″/>
—————————————————————————-
Name: StandbyTimeoutOnBattery
OMA-URI: ./Device/Vendor/MSFT/Policy/Config/Power/StandbyTimeoutOnBattery
Data Type: String
Value: <enabled/><data id=”EnterDCStandbyTimeOut” value=”900″/>
—————————————————————————-
Name: StandbyTimeoutPluggedIn
OMA-URI: ./Device/Vendor/MSFT/Policy/Config/Power/StandbyTimeoutPluggedIn
Data Type: String
Value: <enabled/><data id=”EnterACStandbyTimeOut” value=”0″/>
—————————————————————————-
Name: HibernateTimeoutPluggedIn
OMA-URI: ./Device/Vendor/MSFT/Policy/Config/Power/HibernateTimeoutPluggedIn
Data Type: String
Value: <enabled/><data id=”EnterACHibernateTimeOut” value=”0″/>
From the list of custom OMA-URI Settings, select HibernateTimeoutPluggedIn. Take a note of value field. The value numbers are the time in seconds, where “0” is never. Change the value from 0 to the desired one. Click OK.
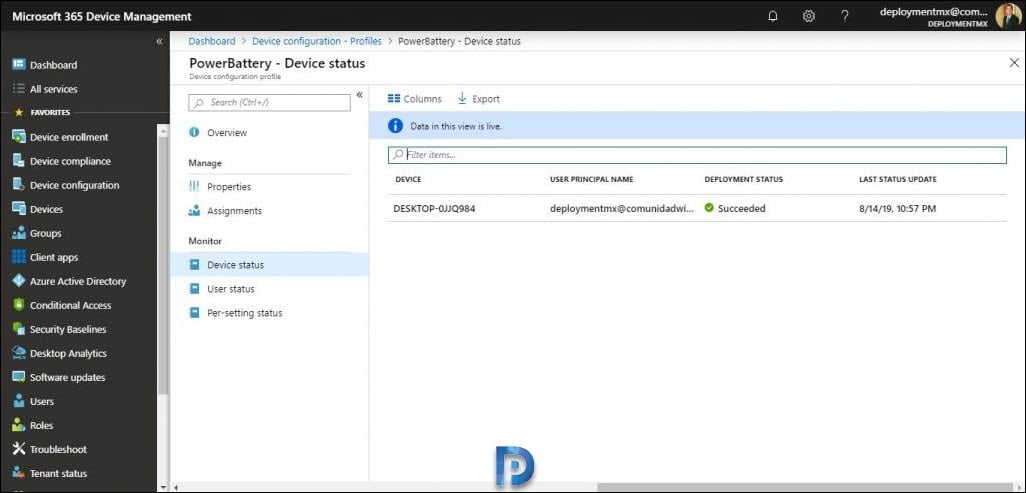
After you complete the above steps, your profile is listed under Device configuration – Profiles list.
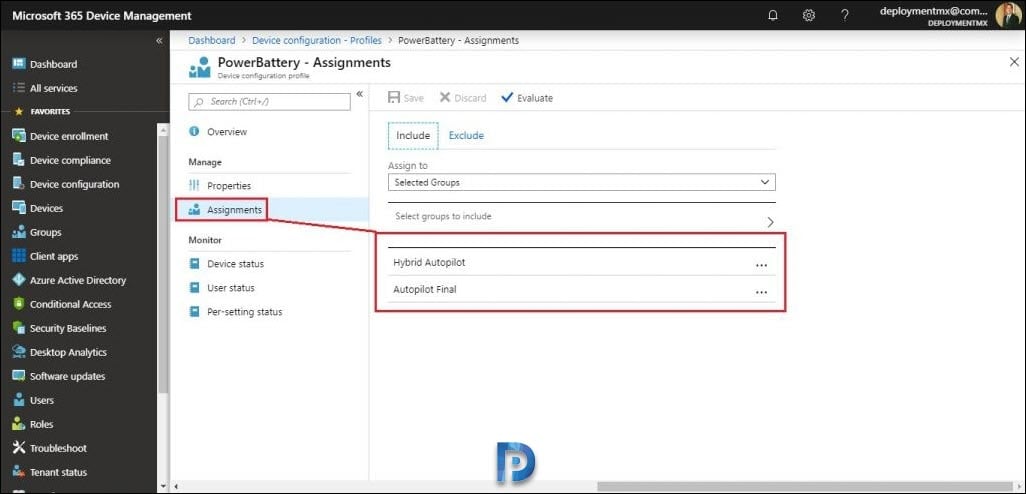
Click Assignments and assign this profile to a desired group or groups.
Finally after a few minutes the agent connects to the client.
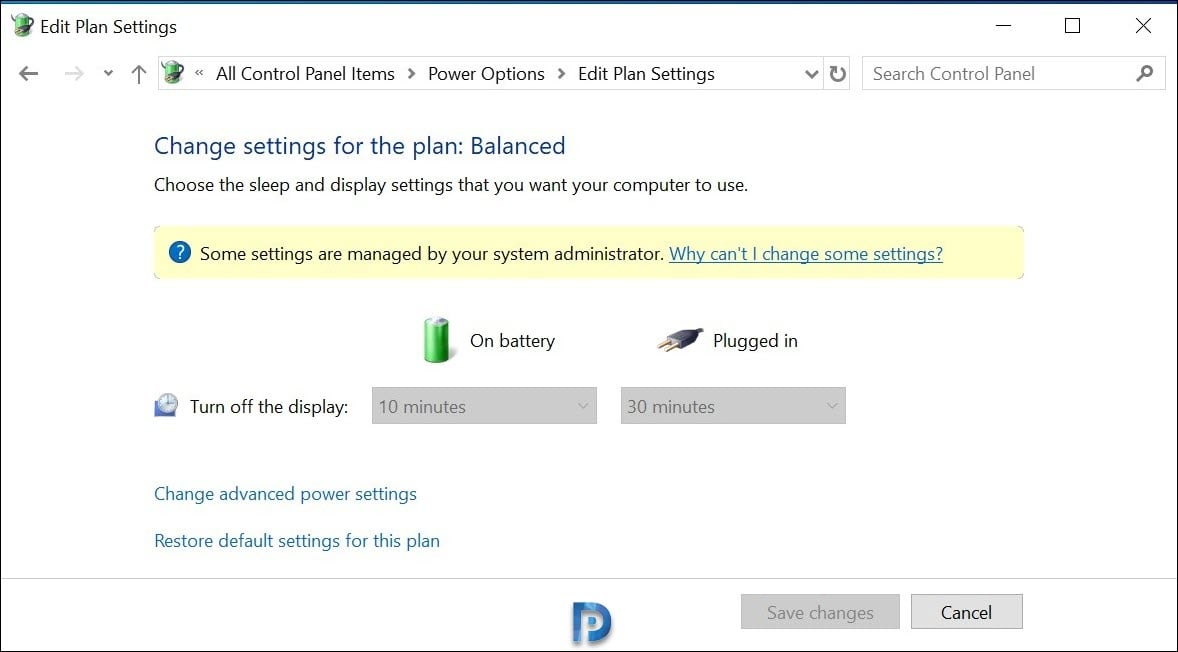
If you login to the client machine, go to control panel > power options. Try editing the plan settings. You will see the message “some settings are managed by your system administrator“.





Nevermind, fixed it. Remembered seeing a similar problem in the past so I said to myself : “What the heck” and replaced the ” by ”
Must be a keyboard or language thing… works properly now!
Thank you… I had already tried copying it in and out of notepad… but that had not worked… then scrolled down and saw this. Perfect! cheers
As simple as this seems to be, it’s not working for me (standard remediation failed error). Is it because there are no other plan than Dell on my laptop? Will try a few more things…
Did you ever resolve this? I’m seeing the same problem.
my intune dosent accept any string value
{ “error”: { “code”: “ModelValidationFailure”, “message”: “The property ‘isReadOnly’ does not exist on type ‘microsoft.management.services.api.omaSettingString’. Make sure to only use property names that are defined by the type.”, “innerError”: { “message”: “The property ‘isReadOnly’ does not exist on type ‘microsoft.management.services.api.omaSettingString’. Make sure to only use property names that are defined by the type.”, “request-id”: “1c5de9a4-f0ef-4762-9200-7ab27747e777”, “date”: “2020-06-04T19:28:42” } }}
Where can you find a list of all configurable OMA-URI Settings?
You can find them here:
https://docs.microsoft.com/en-us/windows/client-management/mdm/policy-configuration-service-provider
Are there any reasons to use OMA-URI instead of Administrative templates?
Refer to the security baseline policy available on the Intune portal under “Intune” –> device security” and apply it to a user group. OMA-URI is the thing of the past to a large extent and is too timeconsuming to build and apply.
When are power management settings, sleep etc exclusively for security. I’m not convinced that your suggestion applies here.
OMA-URI aren’t really a thing of the past when there are literally no settings for certain scenarios.
Information like this shouldn’t be simply cast asunder when it falls outside a narrow scope of understanding. IMO there is a lot of info about OMA-URI applied policies. A lot of that information is hard for most people to decipher.
.
I had a look at Device Security / Windows 10 Security Baselines / MDM Security Baseline for May 2019 – Profiles, I went ahead and created a profile. I couldn’t locate any policies that matched up with OnBattery / PluggedIn for traditional Power Settings. What I did find was the following 4:
->Require password on wake while plugged in
->Standby states when sleeping while on battery
->Standby states when sleeping while plugged in
->Require password on wake while on battery
All have the following options:
Not Configured / Enabled / Disabled
So I would say OMA-URI is the way to go for old granular Power Settings. It’s almost like we’re stuck waiting until they move the Power Settings into modern Settings rather then Control Panel…
I also noticed that MSFT is planning on pulling out the GUI options for “Fast first sign-in” under Device Configuration / Shared multi-user device. It’s quite possible whenever this happens you’ll have to use the OMA-URI to set it again. UNLESS, they plan on removing Fast first sign-in in future builds of Windows 10 20H1 or later releases… Who knows, maybe the regular Shared PC Mode might be slightly revamped to already include the Fast first sign-in mode to some extent…it is buggy in my experience… One item I’ve noticed was sound didn’t work until 2nd login on a Dell Latitude 3190…
Sadly each one gave me 0x87d1fde8
I had the same error.
Take note of the quote marks. I changed from ” to ” all in 1 line, then it worked perfectly 😀
(Can’t be seen in this editor. Copy/paste to notepad and re-type the “)
E.g.
<enabled/><data id=”EnterACHibernateTimeOut” value=”0″/>
Great find – I have been looking at this for ages, wondering why it didn’t work.
Name:
StandbyTimeoutOnBattery
OMA-URI:
./Device/Vendor/MSFT/Policy/Config/Power/StandbyTimeoutOnBattery
Value:
I tried your solution but this also did not work:
I have this now:
Name:
StandbyTimeoutOnBattery
OMA-URI: ./Device/Vendor/MSFT/Policy/Config/Power/StandbyTimeoutOnBattery
Value: