In this article, you’ll learn how to configure Account Lockout Policy in Active Directory. We will explore the options available for Active Directory account lockout policy and learn how to configure them.
An Active Directory account lockout policy is a security policy that allows administrators to determine when and for how long a user account should be locked out.
Within an organization, some employees may attempt to log in to other user’s account by trying different passwords. The intention is to gain access to other user’s account and information. The account lockout policy is a good way to prevent unauthorized access to the computer in Active Directory environment.
To summarize, the unauthorized access to a computer can be avoided with the help of the active directory account lockout policy. An intruder won’t be able to enter the system by guessing the password and thanks to the lock out feature. In this article, we will show you how to configure and manage account lockout policies in the Active Directory domain.
Before you read further, here are some useful posts on Active Directory:
- Reset DSRM Administrator Password using Ntdsutil
- Find User’s Last Logon Time using 4 Easy Methods
- How to Unlock User Accounts with PowerShell
- Allow Domain User To Add Computer to Domain
- Creating Fine Grained Password Policies
- How to Enable Active Directory Recycle Bin
How To Configure Account Lockout Policy in Active Directory
We will now look at the steps to configure account lockout policy in Active Directory. To access the account lockout policy settings, perform the following steps. Log in to the Windows Server installed with Group Policy Management tools. Launch the Server Manager and click Tools > Group Policy Management.
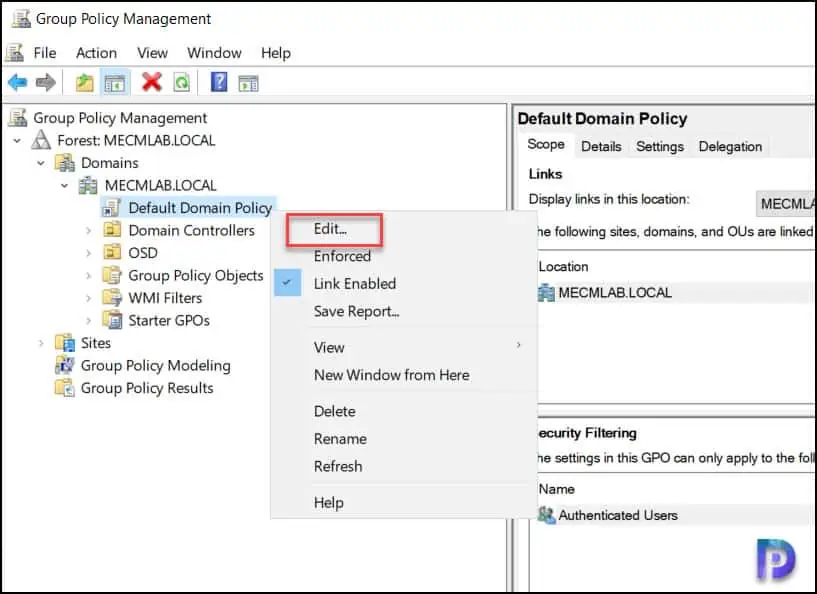
In the Group Policy Management console, expand your domain and right-click Default Domain policy and select Edit. If you wish to use a custom policy for configuring account lockout, you can create a new GPO and link it to your domain.
In the Group Policy Editor, go to Computer Configuration > Windows Settings > Security Settings > Account Policies.
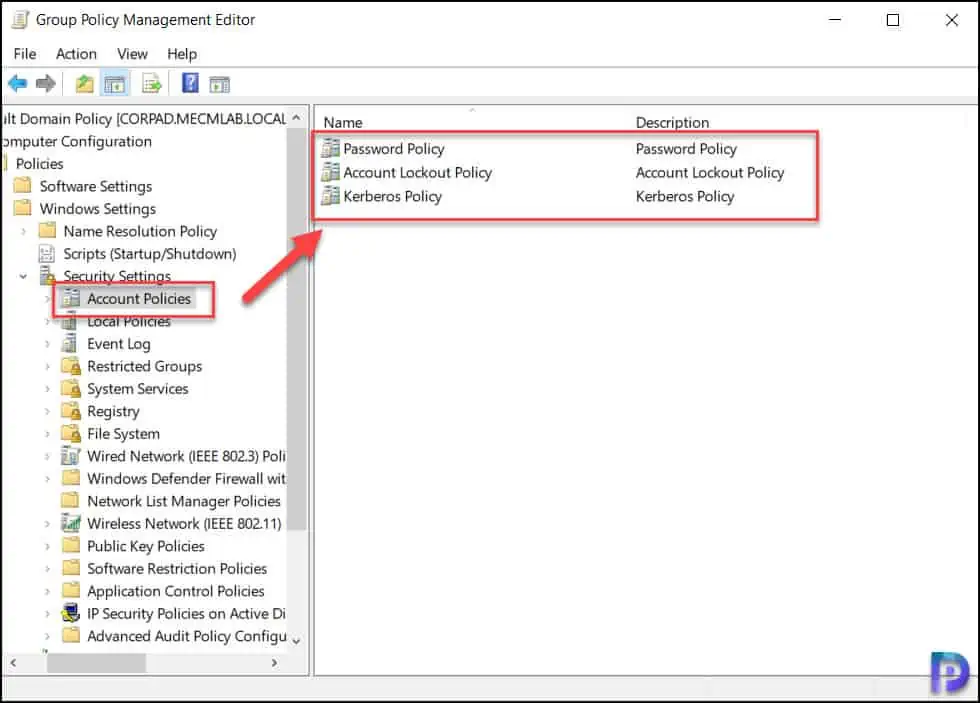
Select Account Lockout Policy and you will find three account lockout policy options available in Active Directory.
- Account Lockout Duration
- Account Lockout threshold
- Reset Account Lockout Counter After
In the next section, we will look at each of the account lockout setting in detail.
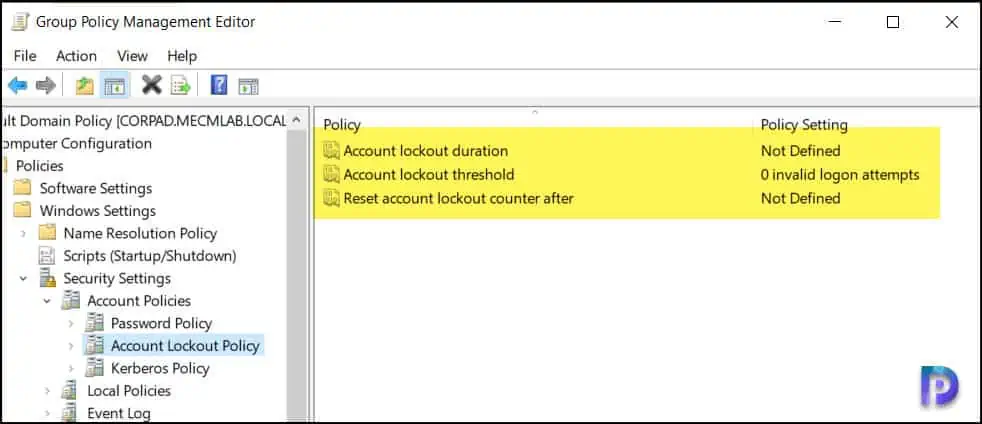
Configure Account Lockout Duration
The Account lockout duration security setting determines the total number of minutes a locked-out account remains locked out before automatically becoming unlocked. The lockout duration range is from 0 minutes through 99,999 minutes.
If you set the account lockout duration to 0, the account will be locked out until an administrator explicitly unlocks it. If an account lockout threshold is defined, the account lockout duration must be greater than or equal to the reset time.
The default value for this policy setting in 30 minutes, and we will keep this value as it is.
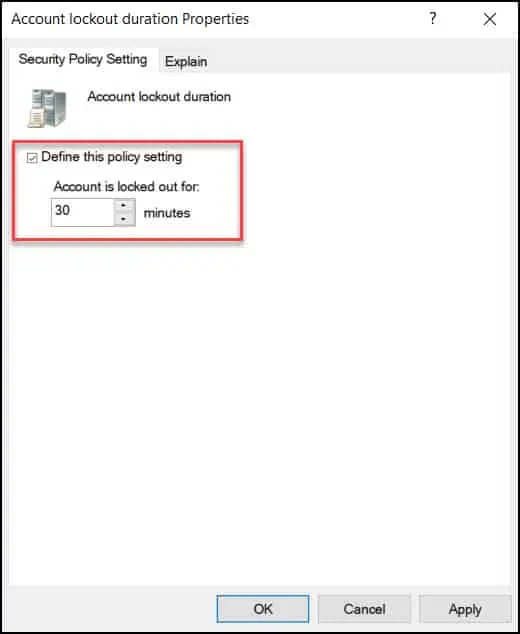
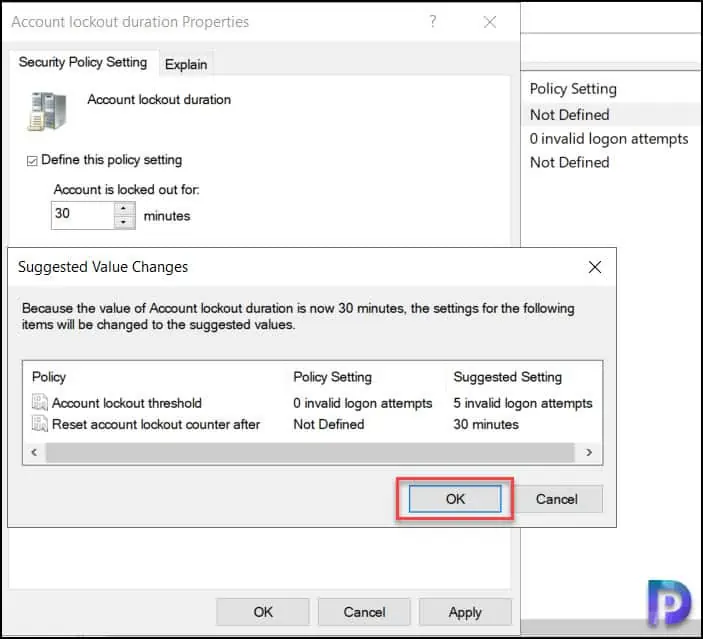
When you set the lockout duration of account to 30 minutes, the settings will change for other two policies. The account lockout threshold and reset account lockout counter after will have new values set automatically.
Configure Account Lockout threshold
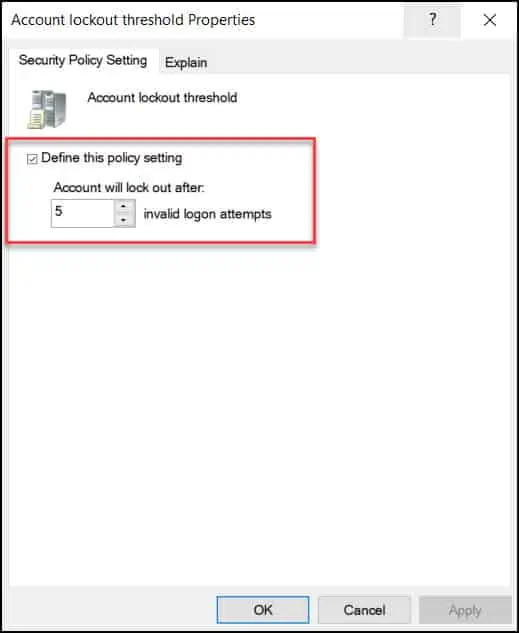
The Account lockout threshold security setting determines the number of failed logon attempts that causes a user account to be locked out. A locked-out account cannot be used until it is reset by an administrator or until the lockout duration for the account has expired.
You can set Account Lockout threshold value between 0 and 999 failed logon attempts. If you set the value to 0, the account will never be locked out. Failed password attempts against workstations or member servers that have been locked using either CTRL+ALT+DELETE or password-protected screen savers count as failed logon attempts.
Enable Define this policy setting and configure the value for invalid logon attempts. In the below example, Account Lockout threshold is set to 5 invalid logon attempts.
Configure Reset Account Lockout Counter After
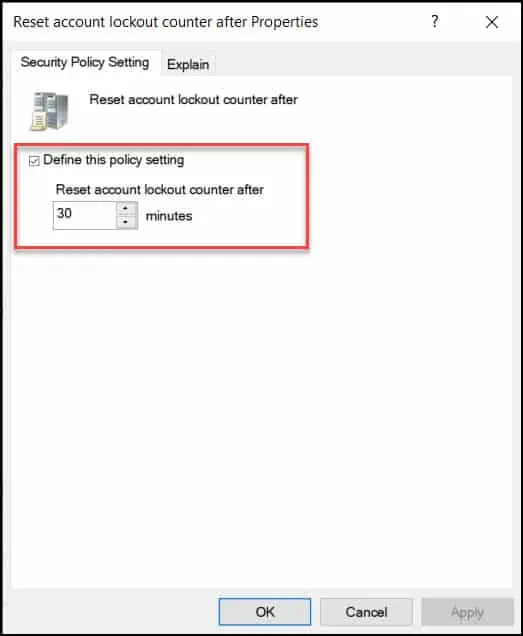
The reset account lockout counter after security setting determines the number of minutes that must elapse after a failed logon attempt before the failed logon attempt counter is reset to 0 bad logon attempts.
The available range is 1 minute to 99,999 minutes. If an account lockout threshold is defined, this reset time must be less than or equal to the Account lockout duration.
Click Define this policy setting and configure the value for reset account lockout counter after. In the below example, the value is set to 30 minutes.
After you configure account lockout policy in Active Directory, close the group policy management console. You must wait for the policy settings to apply for the client computers. The default Group Policy refresh interval is 90 minutes however here is the guide to modify Group Policy refresh interval for Windows computers.
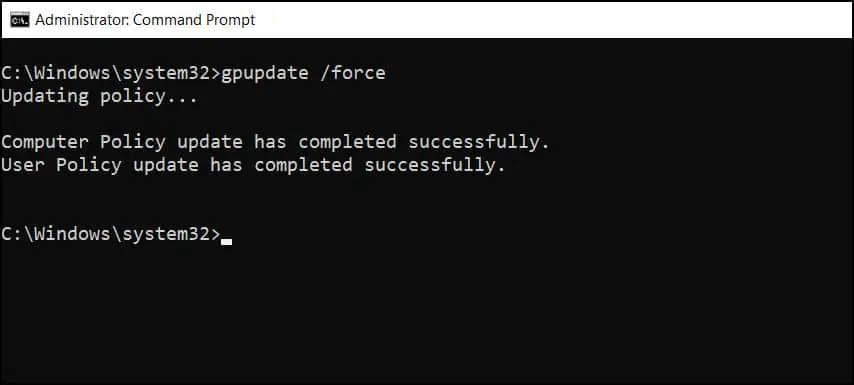
On the client computers, if you want to update the group policy settings at the earliest, launch the command prompt as administrator and run the command gpupdate /force.
View Account Lockout Policy Settings using PowerShell
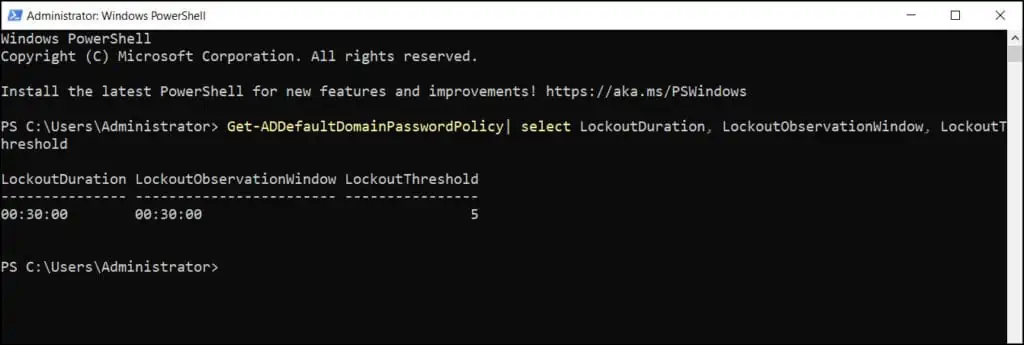
On a domain controller, you can view account lockout policy settings by running a simple PowerShell command. This makes it easy to find the lockout policy settings without having to edit the group policy.
To view the Active Directory account lockout policy settings using PowerShell, launch the PowerShell as administrator and run the below command.
Get-ADDefaultDomainPasswordPolicy| select LockoutDuration, LockoutObservationWindow, LockoutThreshold
Check Account Lockout Policy Settings using RSOP
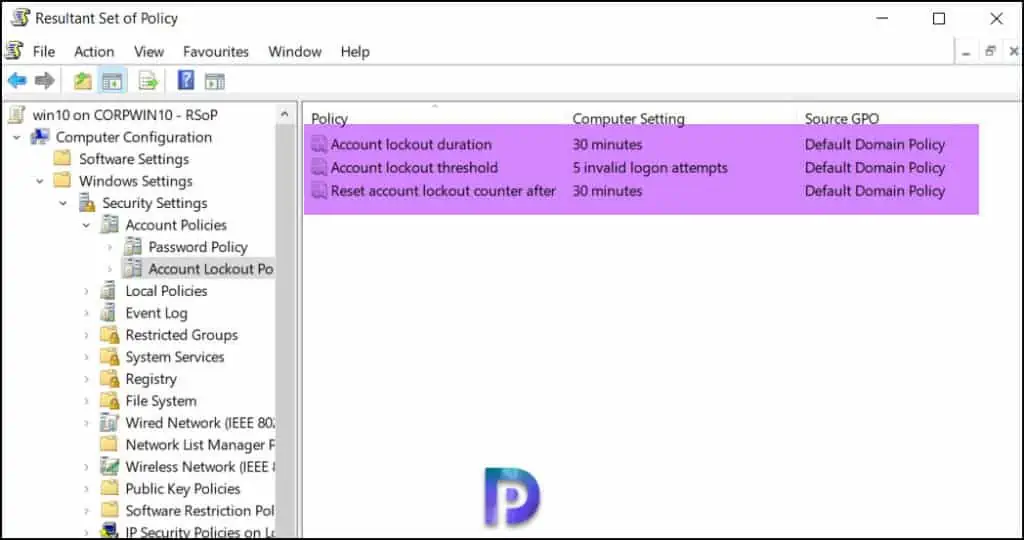
If a previous system administrator has configured the account lockout policy for your organization, you can find out the Account Lockout Policy settings by checking the Resultant Set of Policy on the computer.
The Resultant Set of Policy tool allows you to discover what policy settings are applied to local and remote computers. Log in to a client computer and run the command rsop.msc.
In the Resultant Set of Policy console, go to Computer Configuration > Windows Settings > Security Settings > Account Policies > Account Lockout Policy. On the right pane, you can see the values for Account Lockout duration, threshold and reset account lockout counter after settings.
Best Practices for Configuring Active Directory Account lockout policy
When are you asked to configure account lockout policy in Active Directory for your organization, it must be done with the utmost care. Ideally, the value for each policy should be defined to strike a good balance between security and convenience. Here are values that you could follow:
- Account lockout threshold value set to 20.
- Account lockout duration value set to 15 minutes.
- Password policy to require all users to have at least 8 characters.
- Reset account lockout counter after value set to 30 minutes.
Test Account Lockout Policy for Users
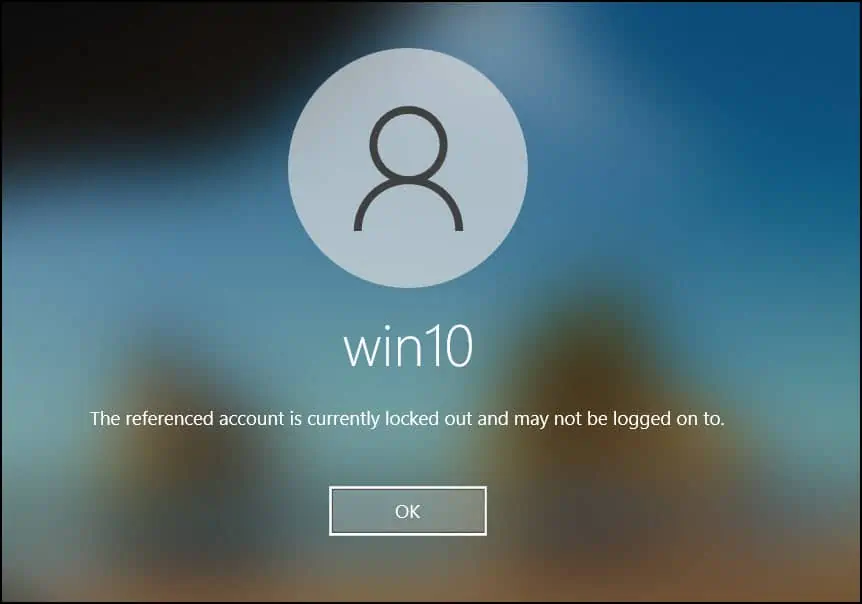
After you have successfully applied the Account Lockout policy, it’s time to test if this policy works in your organization. If the GPO is applied to entire domain, pick a client computer and try entering the wrong password for few times until the account is locked.
When the account is locked out, you’ll see the following message: The referenced account is currently locked out and may not be logged on to. This confirms the Active Directory account lockout policy that you applied is working.
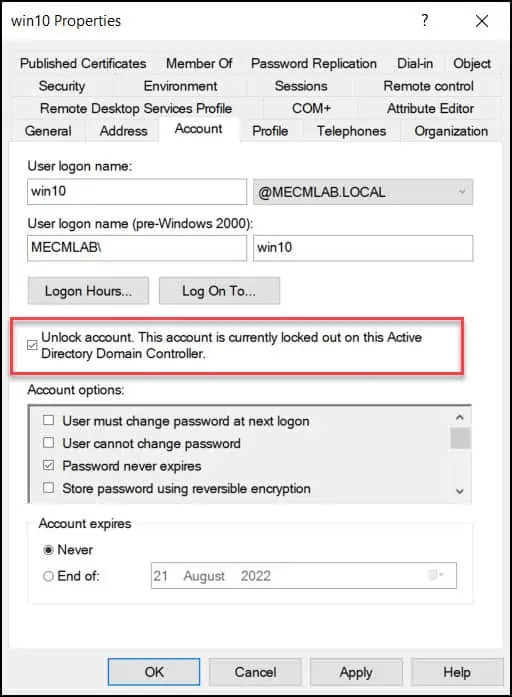
To unlock the user account, you can either use Active Directory Users and Computers console or a PowerShell command. Open Active Directory Users and Computers. Right-click on the User whose account needs to be unlocked and select Properties from the context menu. In the Properties window, click on the Account tab. Select the Unlock Account checkbox and save the changes.
