


In this post, I will show you how to install Windows Autopatch Client Broker using Intune and PowerShell. You can deploy Autopatch Client Broker across all Autopatch devices or specific Entra groups via Intune, or manually install it on individual devices using a PowerShell script.
Windows Autopatch Client Broker is a component of the Windows Autopatch service, designed to help automate the deployment of updates to Windows devices and applications. The client broker allows Autopatch registered devices to communicate update readiness data and log collection information to the Autopatch service.
Key Functions of the Autopatch Client Broker
The Autopatch client broker serves three key functions:

- Device Readiness Check Plugin: This client broken plugin performs readiness checks on devices and reports the results back to the Autopatch service. The plugin determines whether the device is prepared for management by Windows Autopatch.
- Supports Log Collection: When a support request is created, the Client Broker enables automated log collection to help diagnose and resolve issues more quickly. Without the broker, you must manually collect and share logs with the support team, thus, potentially delaying issue resolution.
- Update Coordination: Ensures devices receive, schedule, and apply patches according to your tenant’s Autopatch policies.
Method 1: Install Windows Autopatch Client Broker using Intune
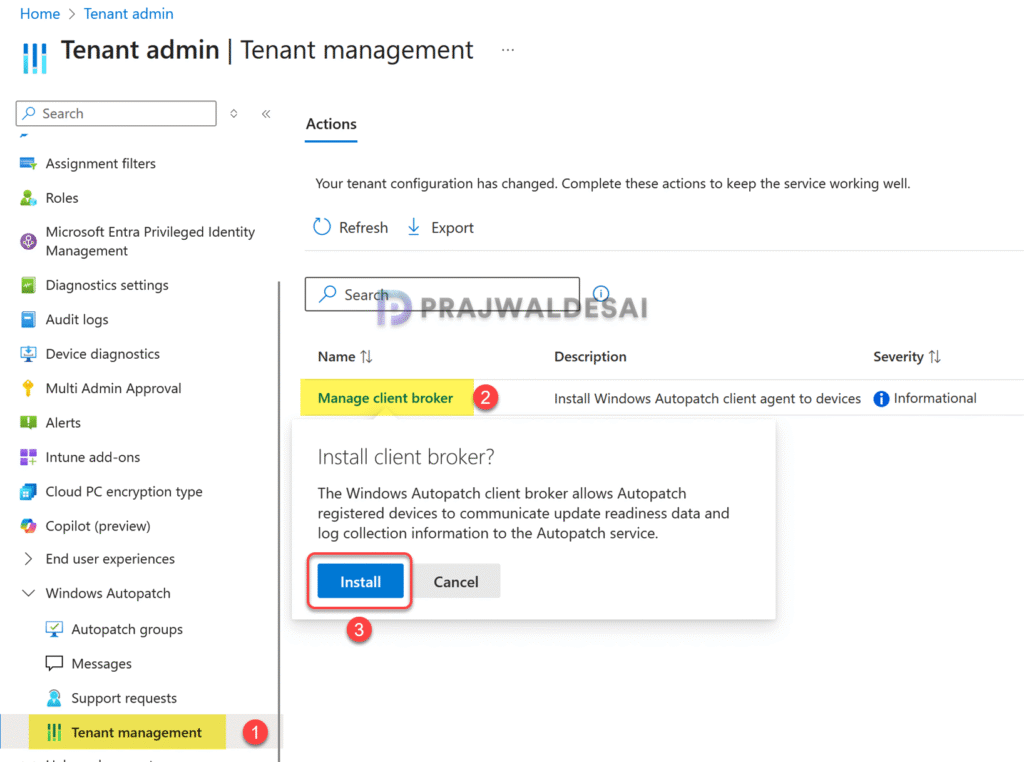
To deploy or install the Windows Autopatch Client Broker, sign in to the Microsoft Intune admin center. Navigate to the Tenant administration menu. In the Windows Autopatch section, select Tenant Management and then, select Manage client broker. When prompted to install client broker, click Install.
Once you have performed the above steps, a new Win32 app known as Windows Autopatch Client Broker is created by the Autopatch service. This app is initially deployed to the Windows Autopatch – Devices All group by default. However, you can also deploy the app to other Entra Groups as needed.
Note: Starting September 22, 2025, Microsoft has transitioned to using Win32 App as the default mechanism to install the client broker agent. You don’t have to manually create this app as it will be automatically taken care of by Autopatch service.
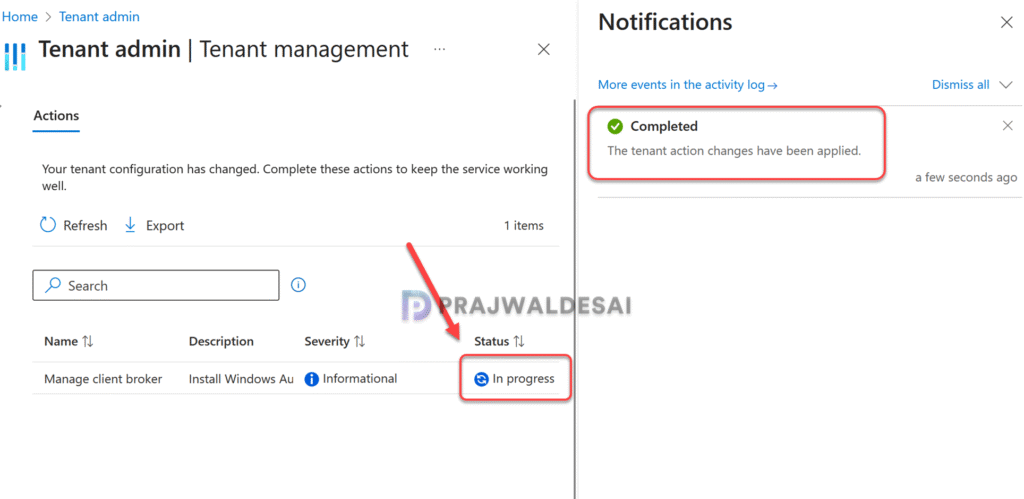
Allow a few minutes for the client broker installation to complete. A status notification will appear in the top-left corner of the Intune portal. In the below image, look at the notification that states “Completed – The tenant action changes have been applied“.
As I mentioned earlier, you can install the optional Client Broker app on-demand across all Autopatch devices, or to specific Microsoft Entra groups. If you want to deploy the Autopatch client broker plugin to specific Entra groups, you can do so by going to Windows Autopatch Client Broker blade and selecting Add Groups.

Verify Client Broker App creation
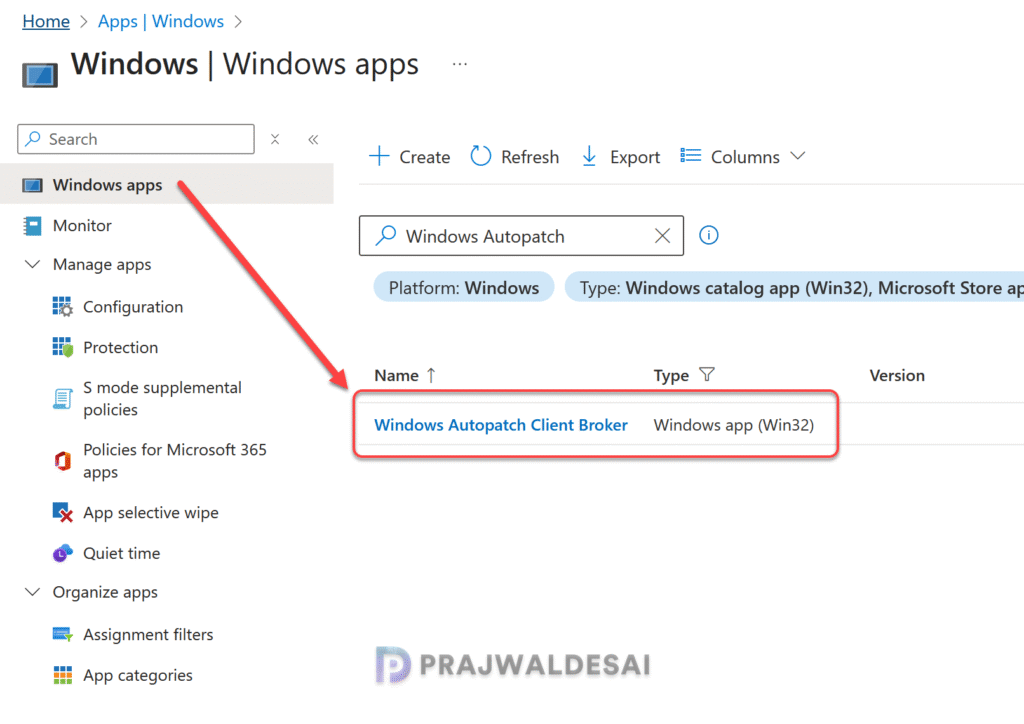
To check if the Autopatch service has successfully created Win32 app for Windows Autopatch Client Broker, go to Apps > Windows, and use the search box to locate the Windows Autopatch client broker app.
Client Broker Win32 App Assignments
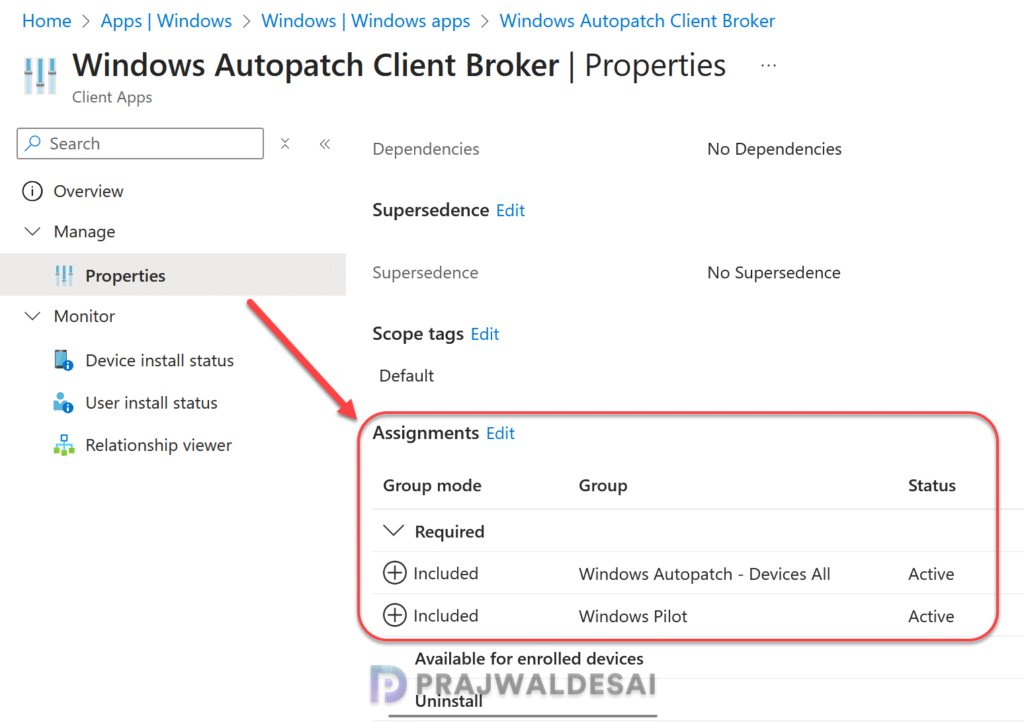
Let’s review the assignments for the Autopatch client broker app and determine where they are assigned. From the app properties, we see that this app is deployed as ‘Required‘ to Windows Autopatch – Devices All by default and other Entra groups if you have explicitly specified them in the above step.
Monitor Autopatch Client Broker Installation
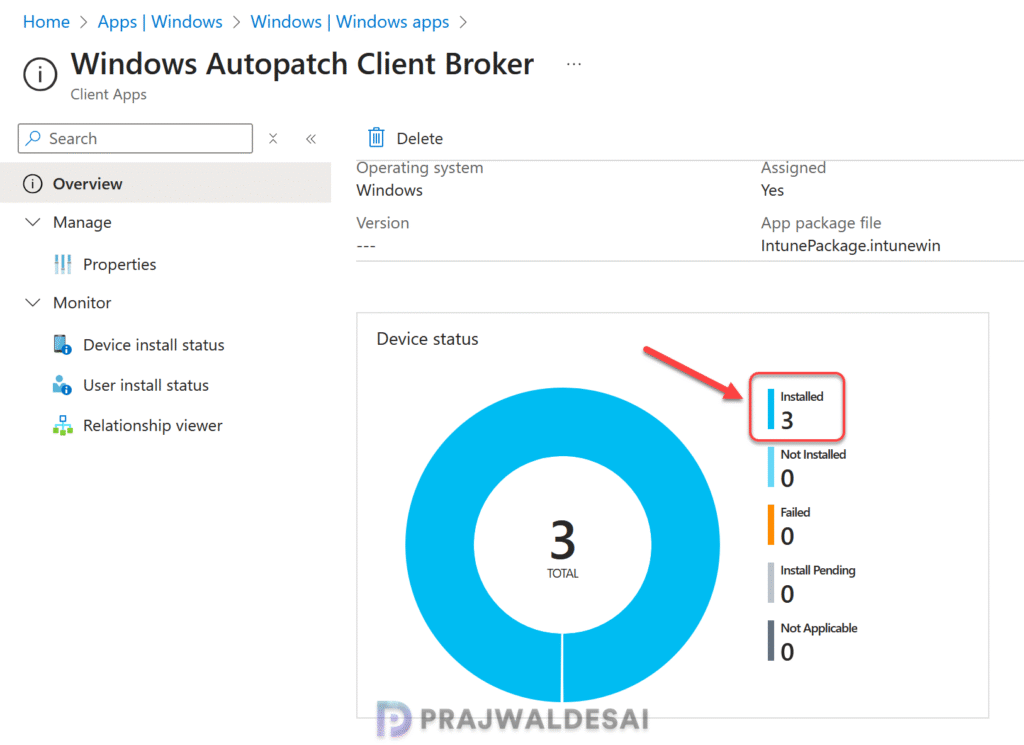
To see how many devices have been installed with Autopatch client broker app, go to Apps > Windows > Windows apps and select the client broker app. The overview page displays the total count of devices where the app has been successfully installed.
If the devices have not received the Client Broker app, consider manually syncing the Intune policies as an initial troubleshooting step. If that doesn’t help, review the Intune IME logs for advanced troubleshooting.
Method 2: Install Windows Autopatch Client Broker using PowerShell
If you encounter issues deploying the Autopatch client broker Win32 App in your environment, you can alternatively use a PowerShell script to manually install the Windows client broker on your devices.
To begin with, first copy the Install Autopatch Client Broker PowerShell script provided by Microsoft. Paste the script data to a file and name it as InstallAutopatchClientBroker.ps1. Copy this script onto the computer where you want to install. Open the PowerShell console and execute this script as shown in the below image.
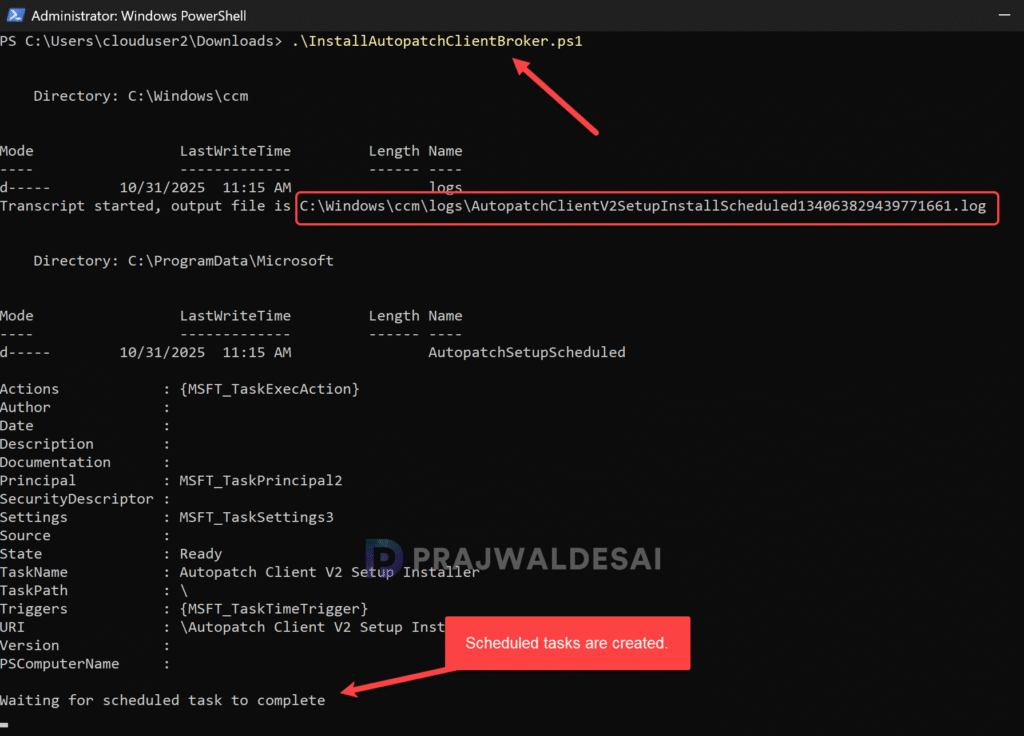
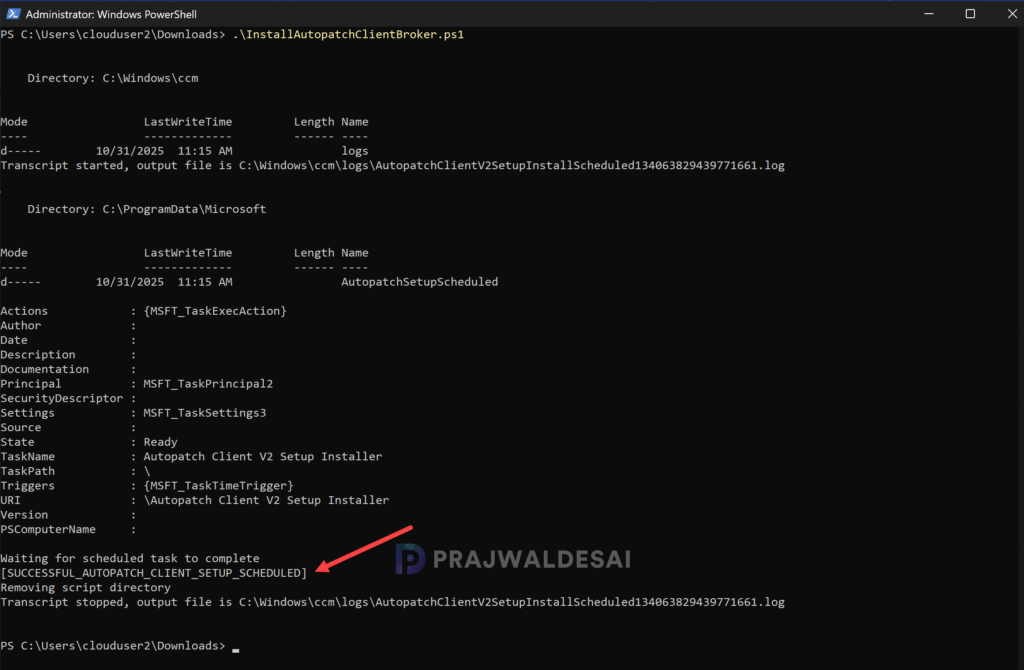
The script takes a few seconds to run and once the execution is complete, in the output we see [SUCCESSFUL_AUTOPATCH_CLIENT_SETUP_SCHEDULED] indicating that new scheduled tasks are created.
Autopatch Client Broker Scheduled Tasks
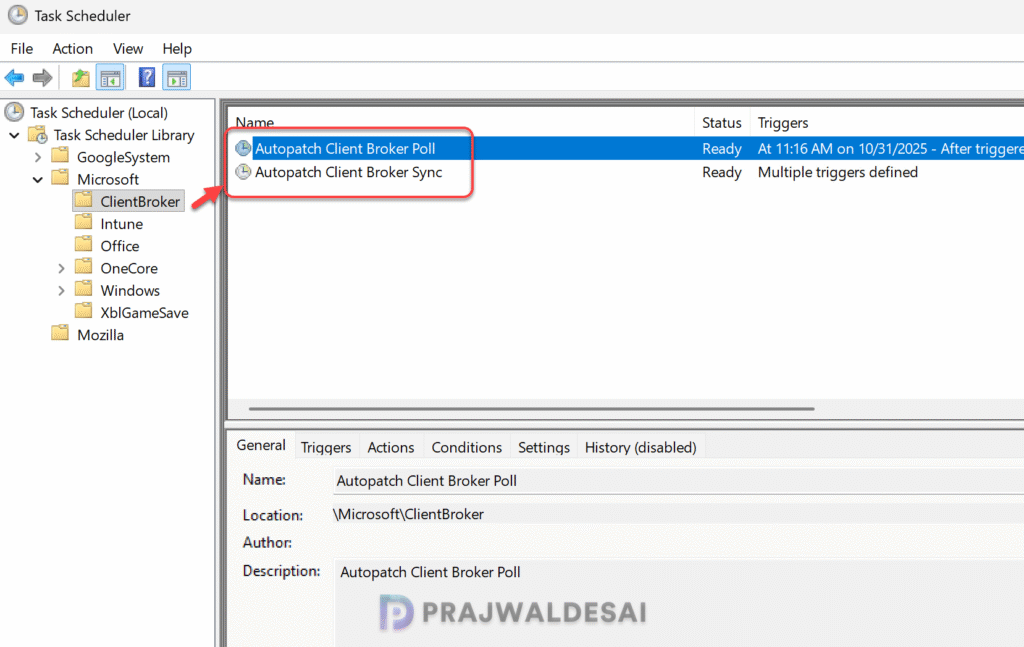
Let’s look at the new scheduled tasks created by the Autopatch client broker script. Open Task Scheduler by typing “Task Scheduler” into the Windows search bar and clicking the app. In the task scheduler, expand Task Scheduler Library and select Microsoft > ClientBroker. Here you see two scheduled tasks: Autopatch Client Broker Poll and Autopatch Client Broker Sync.
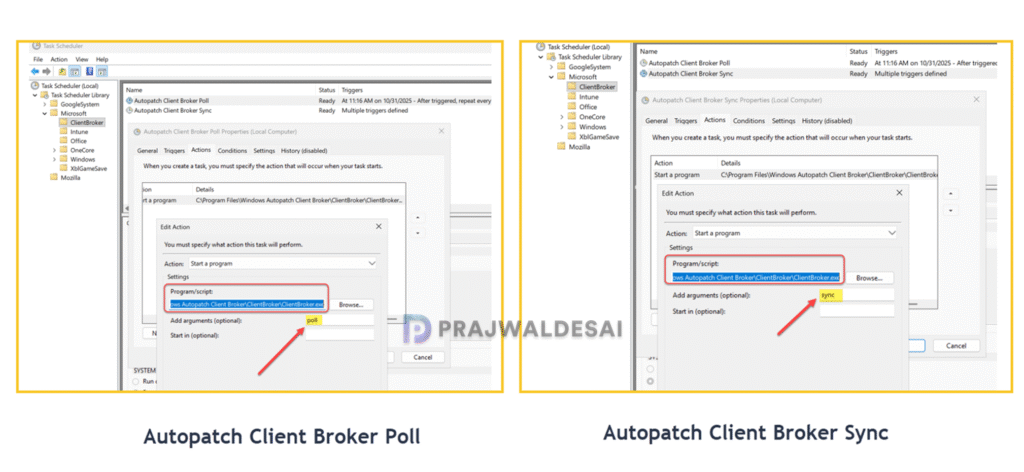
Autopatch Client Broker Poll vs. Autopatch Client Broker Sync
If you open each of the scheduled tasks and go to the Actions tab, you will find the task triggers a common program located at C:\Program Files\Windows Autopatch Client Broker\ClientBroker\ClientBroker.exe.
Microsoft has not clarified the distinction between these two in their documentation, but here are my observations. The Autopatch Client Broker Poll task executes clientbroker.exe with the argument “poll,” while the Autopatch Client Broker Sync task runs clientbroker.exe with the argument “sync,” as illustrated in the image below.
From what I understand, the “Poll” here refers to a client-side communication where the client checks with server for updates, while “sync” could mean that the client actually waits for a server’s response before proceeding or initiating tasks. If you have a better understanding about these, let me know in the comments section.
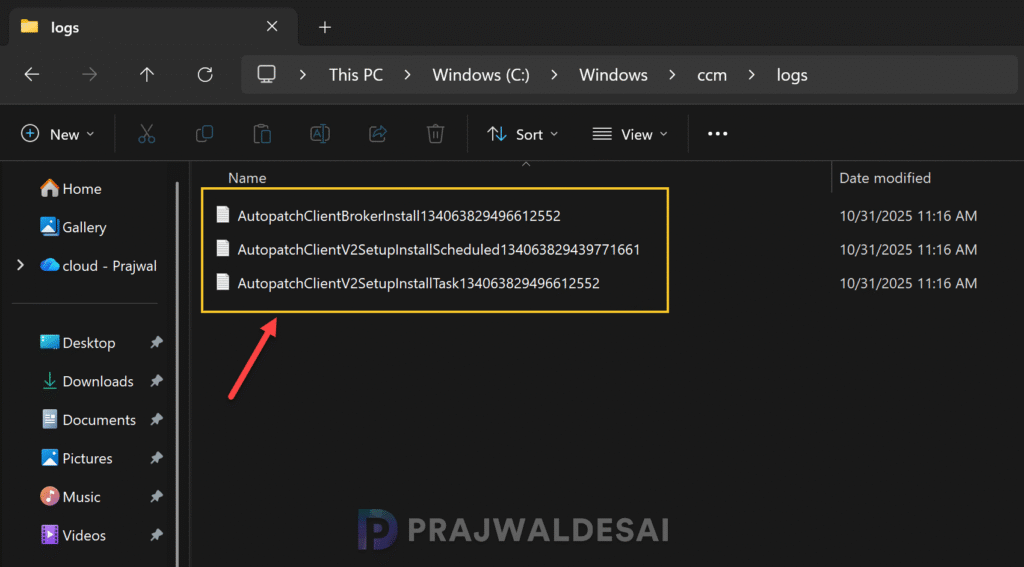
Windows Autopatch Client Broker Logs
Lastly, I want to show you the logs created by Autopatch client broker PS script. Looking at the script output, the logs are stored in C:\Windows\CCM\Logs folder. If the client broker script fails during execution, review these logs for troubleshooting. You can use CMTrace or similar tools to review these logs.
Conclusion
I hope this guide makes it easier to deploy Windows Autopatch client broker using Intune and PowerShell. When the Windows Autopatch service is set up in your tenant, the Client Broker facilitates seamless communication of update readiness data and log collection details to the Autopatch service. This ensures your devices stay secure, compliant, and up to date with minimal manual intervention.
Feel free to share any questions or thoughts in the comments section below!

I wonder if MS have done a conscious decision to make the schedule task to run only when AC is connected.
I know that this is the default behavior if you create a schedule task in with powershell. 🙂
Anyways, if the sechedule task is in queued mode then check if the computer is on battery.