


In this post I will show you how to rollback or uninstall a Windows 10 feature update. If you notice that a feature update on your Windows 10 computer is causing issues, you can go back to previous version of Windows 10.
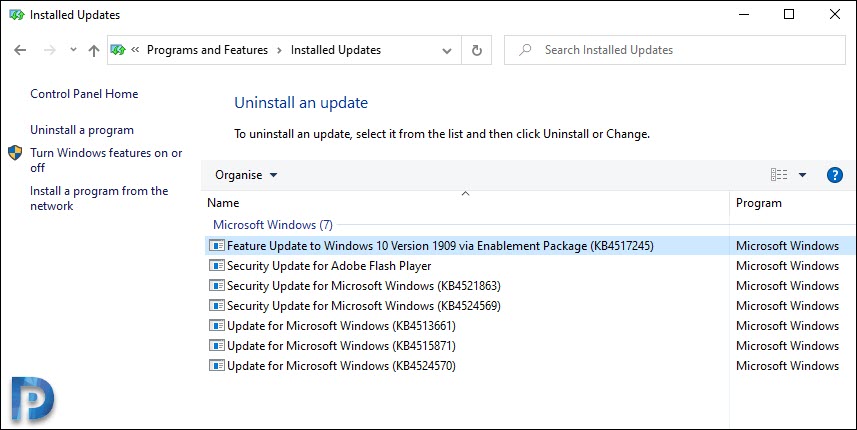
So how difficult is to uninstall a feature update?. Let’s consider an example of KB4517245 feature update to Windows 10 version 1909. In my lab this update has been deployed by SCCM and you can read this post to know how it’s deployed. And for a list of new features in Windows 10 1909, click here.
Suppose that you are running Windows 10 version 1909 on your computer. You notice issues on your computer and now you want to revert back to previous version. Microsoft allows you to do that and it is done via Windows 10 Recovery Options.

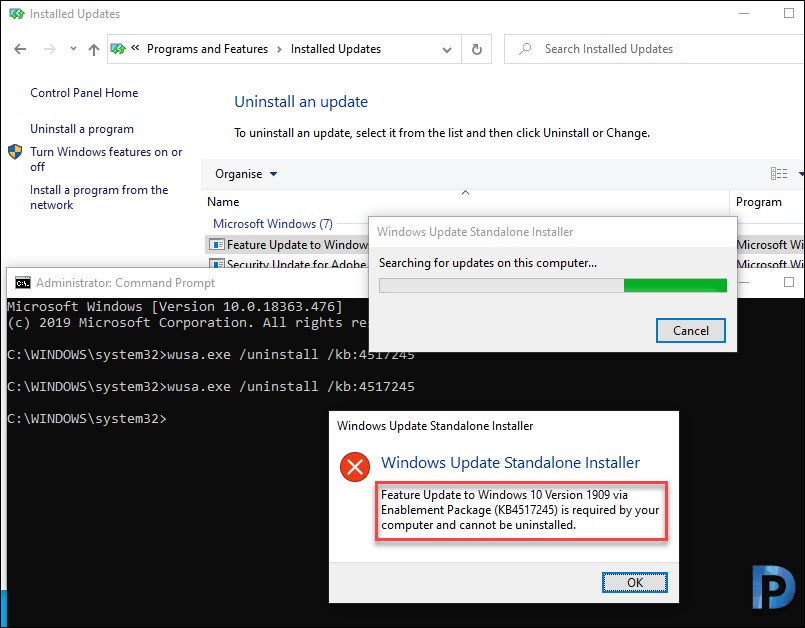
You cannot uninstall a feature update from your Control Panel > Programs and Features > Installed Updates. This is simply not possible because you don’t find the uninstall option when you select the Windows 10 feature update. This is true for every feature update.
If you think you can uninstall the feature update using the command wusa.exe /uninstall /kb:kbnumber, you get the below error.
The Feature Update to Windows 10 version 1909 via Enablement Package KB4517245 is required by your computer and cannot be uninstalled. So how do you uninstall it then ?.
How to Uninstall Windows 10 Feature Update
The high level steps to uninstall a Windows 10 feature update are as follows.
- On your Windows 10 computer, click Start > Settings > Update and Security.
- In the left pane click Recovery. Under Go back to the previous version of Windows 10, click Get Started.
- You need to specify why you want to uninstall or rollback to previous version. Select the appropriate options from the list and click Next.
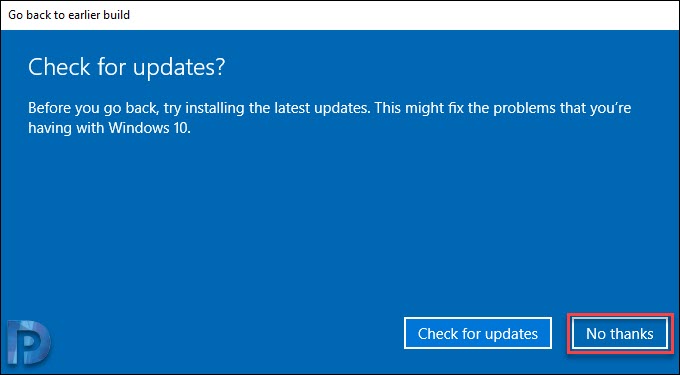
- Microsoft recommends to check for updates and see if the latest updates resolves the system issues. Click No Thanks.
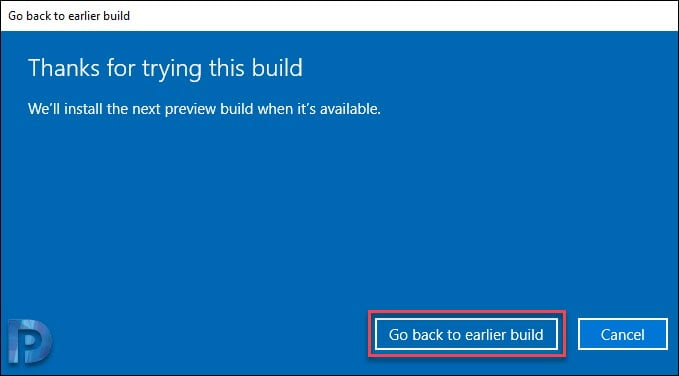
- Click Go back to earlier build. The system now reboots and restores your previous version of Windows.
- Congratulations, you have successfully uninstalled a Windows 10 feature update.
Now let’s look at the screenshots that will make it easier for you to rollback to previous build.
On the Recovery screen, look for Go back to the previous version of Windows 10, click Get Started.

Select either one or multiple options letting Microsoft know the reason for rollback. Click Next.

If you haven’t updated your Windows 10 since feature update install, you may click Check for Updates. Or click No Thanks.
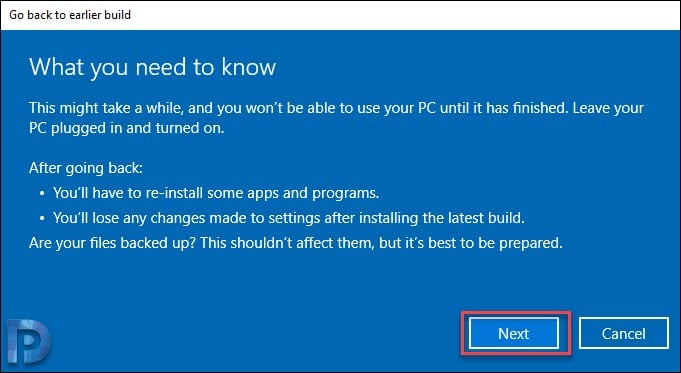
After you go back to previous build, you’ll have to re-install some apps and programs. In addition to that, you’ll lose any changes made to settings. Most of all back-up your files before you go back to previous build. Click Next.
Click Next.
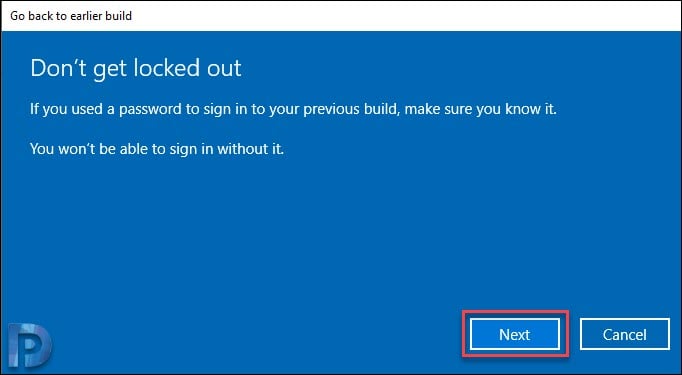
The final step before you begin the rollback. Click Go back to earlier build.
Wait for the restore process to complete. Login back to your Windows 10 computer and check the Windows 10 version.


I do not see this option under recovery
One thing you don’t mention is that you have 10 days to rollback, after that, you are not able to rollback.
But from my environment we successfully able to restore into windows 10 1903 version by uninstalling the 1909 Enablement update from installed updates list with out any issues.