


Using the SCCM Client Log Collection, you can trigger a SCCM client device to upload its client logs to the site server. This can be done by sending a client notification action from the Configuration Manager console.
The SCCM Client Log Collection is a feature introduced with SCCM Technical Preview 1912. I am excited to test this feature in my ConfigMgr Technical Preview 1912 lab.
Believe me this is a very useful feature. Suppose that you want to examine SCCM log files on a remote computer. Asking the user to zip and send the logs files for troubleshooting is a painful task. This is because the user has no idea about the location of log files. A lot of time is spent on collecting the log files.

With the client log collection feature, you can collect the log files from the online client without bothering the user.
While we will explore the client log collection feature, if you want to know all the SCCM TP 1912 new features, click here.
Before you start, make a note of the permissions for client log collection. To collect client logs, your account needs Notify resource permission on the Collection. The Full Administrator and Operations Administrator built-in roles have this permission by default.
In addition to that, ensure your client is online and running the latest version of agent.
SCCM Client Log Collection
The steps to collect SCCM client logs files are :-
- In the Assets and Compliance workspace, go to either the Devices or Device Collections node.
- Right-click a device collection.
- Select Client Diagnostics, then select Collect Client Logs.
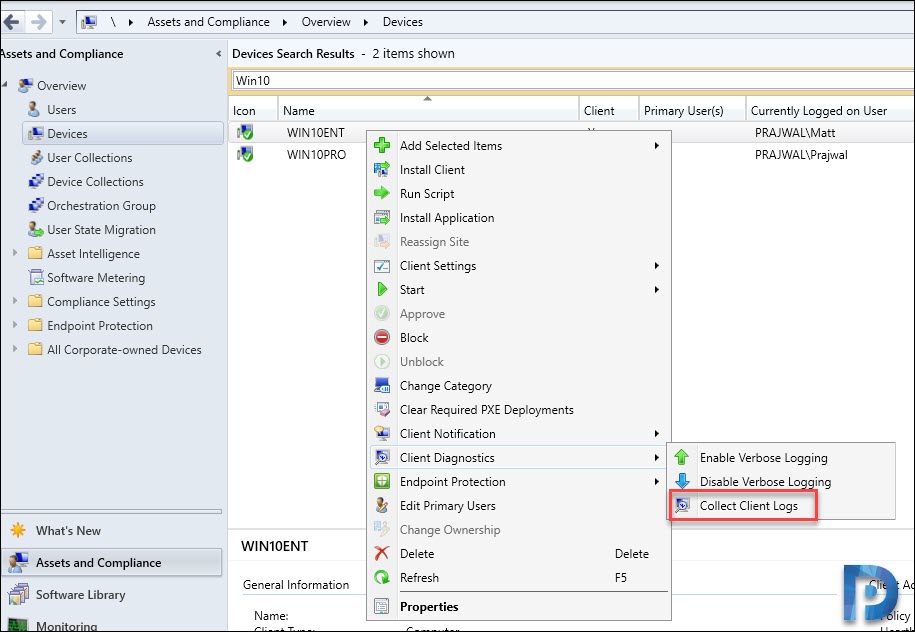
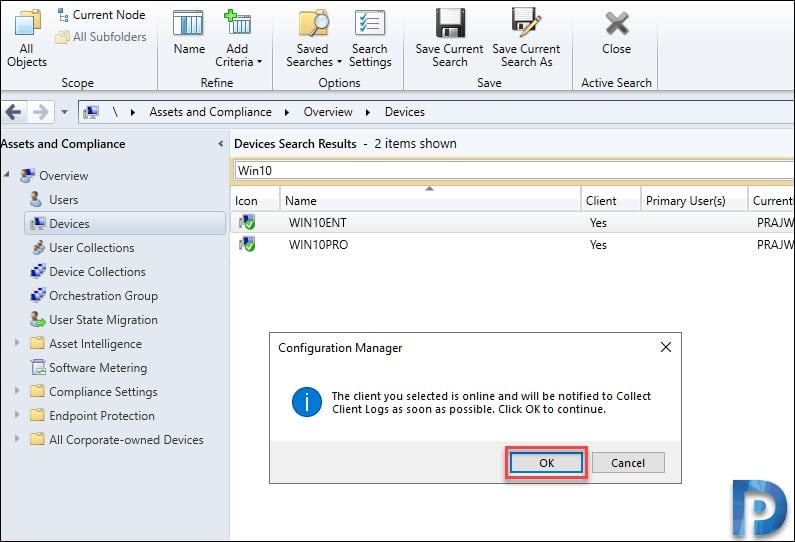
When you click Collect Client Logs, a box appears with a note The client you selected is online and will be notified to collect the client logs. Click OK.
Basically a client notification message is sent to the selected clients to gather the CCM logs. The logs are returned using software inventory file collection.
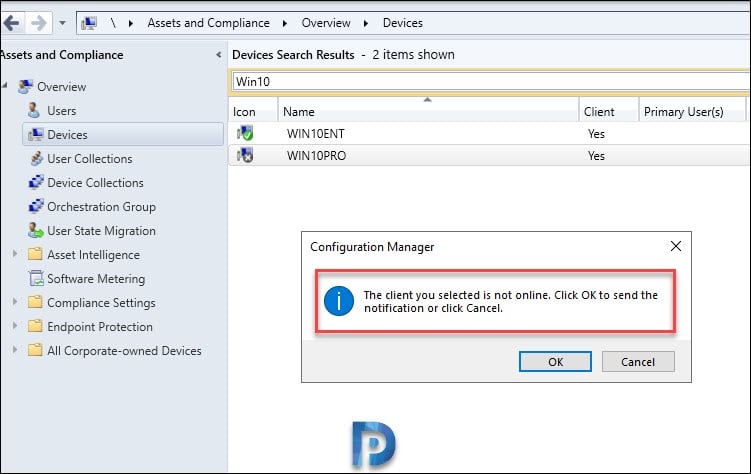
Most of all, your client device should be online in-order to collect the log files. Otherwise you will see something like this.
After you trigger the client log collection, open Diagnostics.log on the client computer. Look for the line “FileCollection: Successfully sent report“.
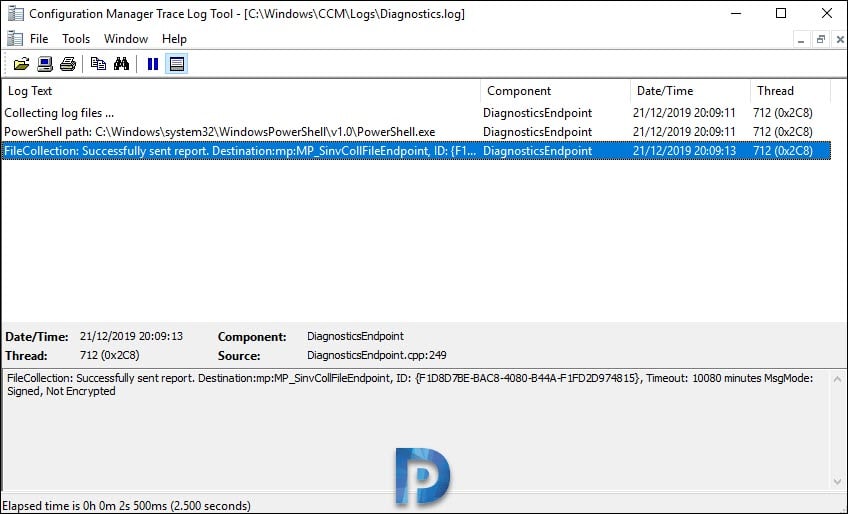
Collecting log files ...	DiagnosticsEndpoint
PowerShell path: C:\Windows\system32\WindowsPowerShell\v1.0\PowerShell.exe
FileCollection: Successfully sent report.
Destination:mp:MP_SinvCollFileEndpoint, ID: {F1D8D7BE-BAC8-4080-B44A-F1FD2D974815}, Timeout: 10080 minutes MsgMode: Signed, Not Encrypted	DiagnosticsEndpoint
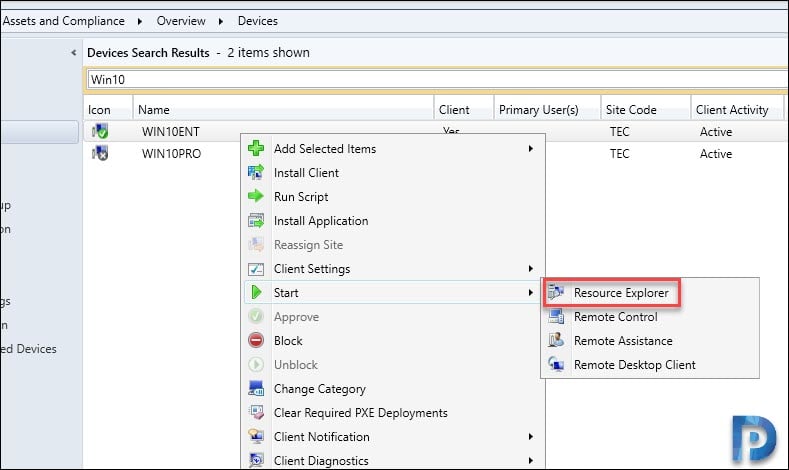
View the Client Log Files
From the Devices node, right-click on the device you want to view logs for. Click Start > Resource Explorer.
From Resource Explorer, click Diagnostic Files. When you right click the file, you will see some options.
- Open Support Center – Selecting this option will launch Support Center. However you must have installed the support center prior to using this option.
- Copy – Copies the information from Resource Explorer.
- View File – Opens the folder where the zip file is located with File Explorer.
- Save – Saves the Resource Explorer columns shown in Diagnostic Files.
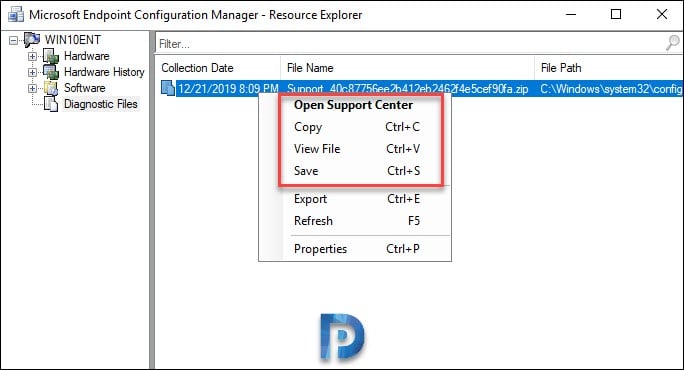
Since I have the support center installed on the computer, I am going to click Open Support Center. I see the zip file is extracted to folder.
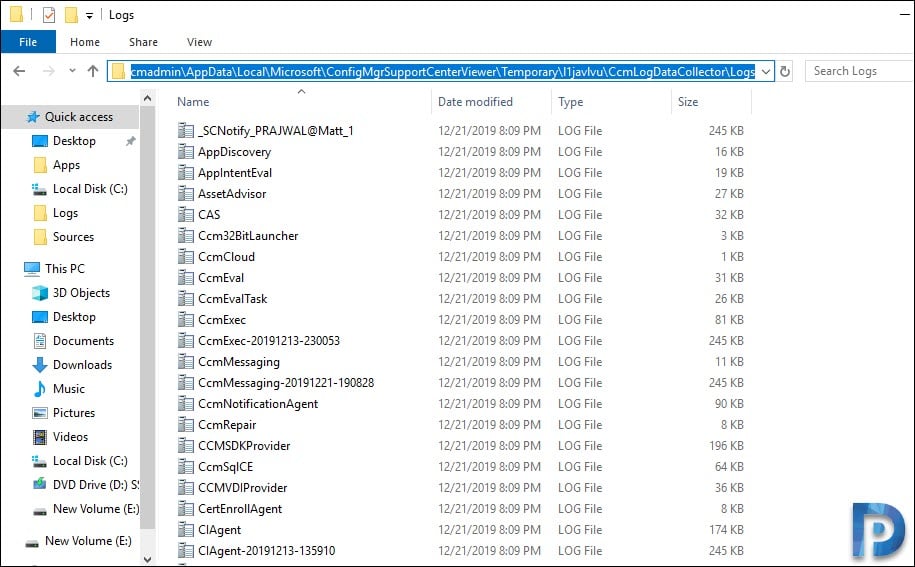
C:\Users\username\AppData\Local\Microsoft\ConfigMgrSupportCenterViewer\Temporary\l1javlvu
Browsing to the logs folder lists all the log files collected from client computer. This was all about SCCM client log collection feature.

Hi
I need to trigger this from a tasksequence. To you now or have an idea how this can be done?
What’s the goal here ?. You want to collect the logs from the client machine after OSD ?.
Hi
Yes, that is the goal. We have an automated test environment. After the OSD the VM’s are deleted. However, sometimes we need to have a look to the logs.
Let me know if this helps – https://www.prajwaldesai.com/capture-sccm-task-sequence-log-files-post-osd/
Not really. Our Servers are in many different domains. In addition, SMB is not allowed. Therefore, I would use the internal function from SCCM
In that case I am not sure if it can be done via the TS the way you want it.
I have found out that sccm is calling the local script datacollector.ps1
when I call the script as below, i have in c:\admin a zip with all logs in it. I have now to find out the correct path for outputpath
PS C:\Windows\CCM> .\datacollector.ps1 -OutputPath c:\admin\
It may be useful sometimes, but it is not live and may / may not work. but thanks for the description, it’s good.
However, Remote “\\\c$\Windows\CCM\Logs” seems more useful if you have the permissions
Hmm.
I just go to my file explorer and enter \\”pcname”\c$\windows\ccmcache\
enter my admin credentials and open the logs..
You find logs in ccmcache?
I find mine in %WINDIR%>CCM>Logs or %WINDIR%>ccmsetup>Logs