


This post covers the Microsoft Office 2019 deployment using ConfigMgr. We will deploy Office 2019 (on-premise) version using Configuration Manager to our endpoints.
The steps covered in this post are bit similar to the ones covered in deploying Office 2019 ODT using SCCM. However with Office 2019 on-premise version, you already have the installation files with you. So there is no need to download them separately.
Before I cover on Office 2019 deployment using ConfigMgr, let us know the differences between Microsoft 365 and Office 2019.

Difference between Microsoft 365 and Office 2019
There are few differences between Microsoft 365 and Office 2019, here are some details.
- Office 2019 (on-prem version) only gets security updates and no new features. Where as with Microsoft 365, you’ll get monthly quality updates.
- Office 2019 is sold as a one-time purchase, which means you pay and get Office apps for one computer. However, there are no upgrade options. This means if you plan to upgrade to the next major release, you’ll have to buy it at full price.
- Another difference is the pricing of these products. You can view the pricing page for more details.
Create Office 2019 Configuration.xml File
I have got Office 2019 on-premise version which has got all the data downloaded. What we need is a configuration.xml file that defines the entire setup.

Create a new text document and rename it as Config.xml. Open it with a notepad and enter the below details. I will be placing this file in Office 2019 folder.
Make sure you enter the correct source path. If you wish to add additional languages, you may do that by specifying under Language ID.
The PIDKEY is the product key for MAK activation. You don’t need to use PIDKEY if you’re activating Office 2019 with Key Management Service (KMS).
<Configuration>
<Add SourcePath="\\corpsccm\Sources\Applications\Office 2019" OfficeClientEdition="32" Channel="PerpetualVL2019">
<Product ID="ProPlus2019Volume" PIDKEY="" >
<Language ID="en-us" />
</Product>
<Product ID="ProofingTools">
<Language ID="en-us" />
</Product>
</Add>
<RemoveMSI All="True" />
<Display Level="None" AcceptEULA="TRUE" />
<Property Name="AUTOACTIVATE" Value="1" />
</Configuration>

Create Office 2019 Application in Configuration Manager
We will now create Office 2019 as new application in Configuration Manager. In the SCCM console, go to Software Library\Application Management\Applications.
Right click Applications and click Create Application. On the General page, select Manually specify application information. Click Next.

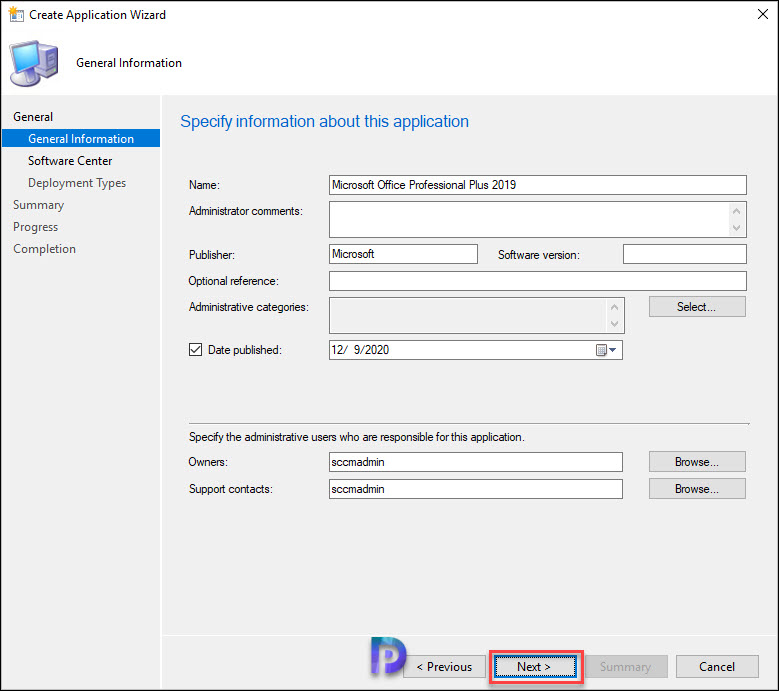
Specify the Microsoft Office 2019 details. Click Next.
Add a new deployment type. Select Manually specify the deployment type information. Click Next.

Specify the content location. This location contains the Office 2019 setup files.
Specify the installation program as “setup.exe” /configure config.xml.
Click Next.

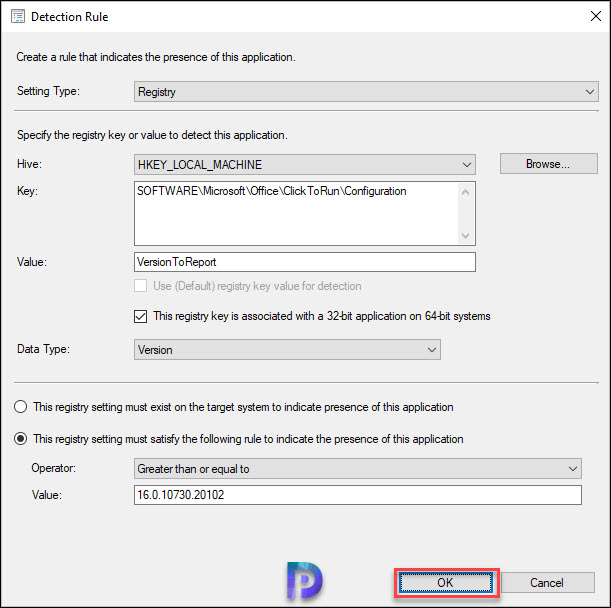
In this step we add a Microsoft Office 2019 detection rule. Enter the below configuration and click OK.
- Setting Type – Registry
- Hive – HKEY_LOCAL_MACHINE
- Key – SOFTWARE\Microsoft\Office\ClickToRun\Configuration
- Value – VersionToReport
- Enable “This registry key is associated with a 32-bit application on 64-bit systems”
- Data Type – Version
- Select “This registry setting must satisfy following rule to indicate the presence of this application”
- Operator – Greater than or equal to
- Value – 16.0.10730.20102
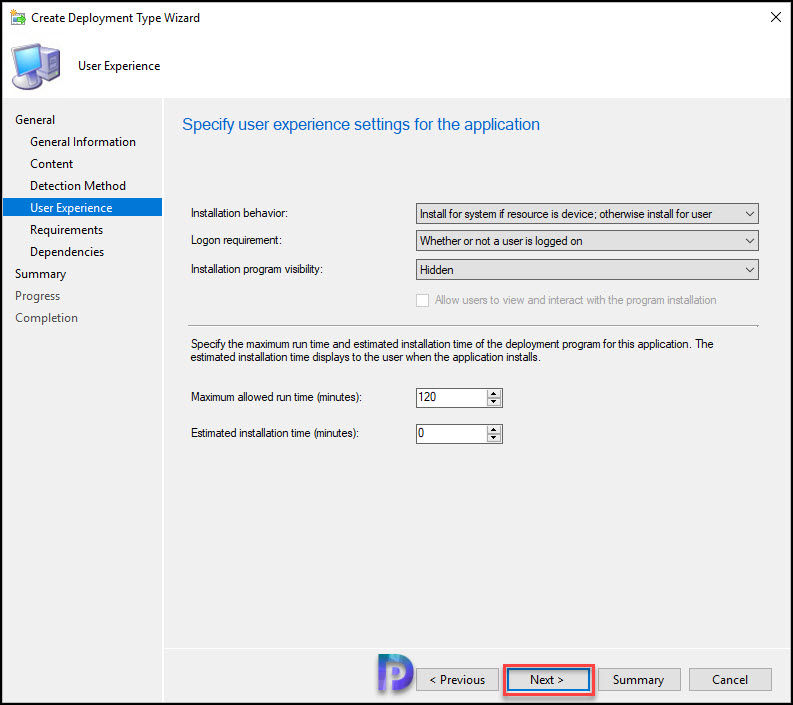
On the User Experience window, specify the settings and click Next.
You may specify the install requirements. Click Next.

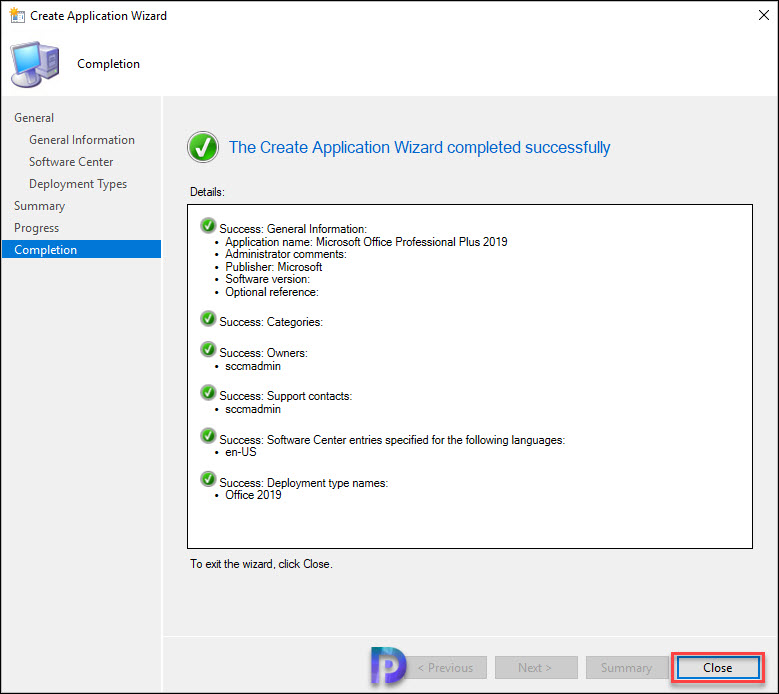
Click Next on remaining pages and finally on Completion windows, click Close.
Office 2019 Deployment Using ConfigMgr
Now that we have packaged the office 2019 application in ConfigMgr, it’s time to deploy the app to Windows 10 devices.
First of all, distribute the Office 2019 on-premises application to distributions points. Once the content is ready with DP, right click the Office 2019 application and click Deploy. You may either deploy to a user collection or a device collection.
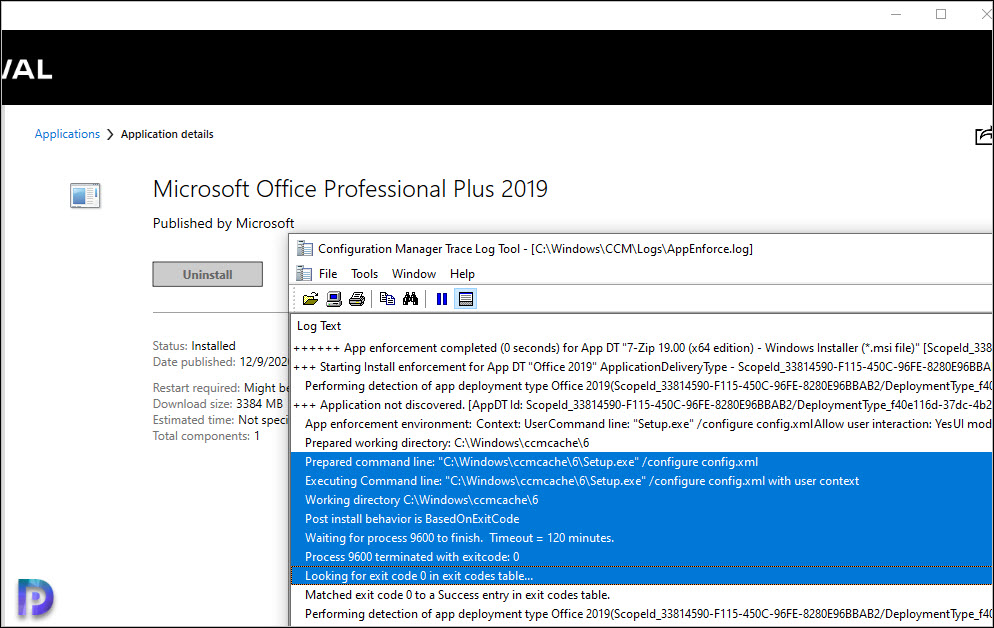
Login to one of the client machine and launch Software Center. Select Microsoft Office Professional Plus 2019 and click Install.
Using CMTrace tool, open the AppEnforce.log file to monitor Office installation process. The exit code 0 means the application installed successfully.
 Prepared command line: "C:\Windows\ccmcache\6\Setup.exe" /configure config.xml
Executing Command line: "C:\Windows\ccmcache\6\Setup.exe" /configure config.xml
Working directory C:\Windows\ccmcache\6 AppEnforce
Post install behavior is BasedOnExitCode AppEnforce
Waiting for process 9600 to finish. Timeout = 120 minutes. AppEnforce
Process 9600 terminated with exitcode: 0
Looking for exit code 0 in exit codes table...
Matched exit code 0 to a Success entry in exit codes table
This completes the Office 2019 deployment using ConfigMgr and I hope this post helps.

Hello and thank you for all the work, testing and sharing you do on this website that saved me some headaches a few times.
In the school I work for, we have 3 sites with 2 types of MS Office installations : offices (with Outook and without Access) and classrooms (with Access and without Outlook). This has been going on as such since Office 2003, and went through Office 2010, 2013, 2016 and now 2019 (only 2007 was skipped).
Came the latest version, Microsoft decided to “spice up” things regarding Office 2019 : I could no longer get an iso file to install and Wsus would not download updates. That bummed me big time…
So, I had to figure other ways to :
1 – get the sources on a server,
2 – manage the two different types of installation on each site, update the clients, and lastly
3 – deploy via Mecm.
1st – I downloaded the setup.exe via the MVLS center. Then via this site https://config.office.com/ (Apps Admin Center Microsoft 365), I generated an unique xml file to specify which version I wanted to download (32 or 64 bits, latest build or a specific one, etc.).
On each site, I set an automatic task on a server to run a batch script (containing among others “setup.exe /download file.xml”) each Wednesday at 1 AM local time to download the sources from Microsoft in a shared folder in which computers have read only rights.
2nd – Using Apps Admin Center Microsoft 365 once again, I generated 6 xml files in which I specified where the clients can find the sources (the local shared folders used above), where they can find the updates (same local shared folders) and what kind of components they have to install (with or without Outlook/Access).
Numerous other settings can be set within the same xml (be aware that it can take some time to review all of them).
3rd – I created a source folder containing only 7 files : setup.exe and the 6 xml files (say A.xml, B.xml, etc.) which weigh only 5.10 Mo in total, setup.exe being 5.04 by itself.
In Mecm console, I created a package using that source folder and got six programs in the same package with almost the same command line “setup.exe /configure x.xml” where x.xml is obviously replaced with A.xml, B.xml, etc. I named each program accordingly to get an idea of what they install and on which site they have to be installed.
The package has been distributed to the 3 distribution points.
From now on, within my task sequences, I created six tasks using the same package and specified in each one which program has to be run. Each sequence can be integrated in an OS deployment sequence, or deployed as is.
Works a charm ! Each client downloads the already up to date sources from a server other than the DP (no bandwith taken from it while other still download from it when mass deployment of classroom computers) and afterwards, they update on their own, not using Wsus, nor Mecm and no Internet bandwith.
I am no longer bummed and much more happy with the way Office 2019 works !
In comparaison, I still have to manage Office 2016 on Windows 7 clients and both updates via Wsus and deployment via Mecm take much more time, especially when it comes to keep an updated source of Office 2016 : each update has to be found reading a list on an MS webpage, downloaded individually, by hand from MS Update Catalog, copied in an updates folder, and the whole package has to be redone and redistributed each month…
It’s been six months since I created the one and only Office 2019 package and in the same time, I had to redo the Office 2016 package 6 times, 7th time coming soon…
I hope this can help some people.
Hi
Yes it will work with the source path, however in that situation the content will be downloaded from the DP to the cache. Then setup.exe will run from the cache and will look for the office files on the network share and redownload them to another location for installation. Content will only get downloaded from the DP once but also from the network share. Ideally do we not want to download the content from the DP and run locally?
Ok I haven’t tested that. But if have tested that and if it works, I will be happy to add your suggestion to the post.
Yeah it’s working for me, uses the files downloaded to the ccmcache folder. Give it a try and see how you get on.
Thanks for all your hard work Prajwal!
Hi
In this scenario do we need to define source path in the config xml? Will this not download the office files distribution point and then again from the network share?
Not defining a source path in the config xml should use the files already downloaded into ccm cache?
It worked fine when I used the source path in Config.xml. Honestly, I have tried without specifying the source path. Regarding the content download, I just now verified that content gets downloaded only once from the DP.