


In this post, I will show you how to enable Remote Assistance using group policy(GPO). We also allow access through the Windows Defender Firewall with Advanced Security using Group Policy.
We will also look at the steps to enable remote assistance on a Windows server by adding the feature using the Server Manager. This is applicable when you want to turn on remote assistance on a single machine.
However, the easiest way to enable remote assistance on your domain computers is by using the group policy. We will enable Configure Offer Remote Assistance setting. This policy setting allows you to turn on or turn off Offer (Unsolicited) Remote Assistance on this computer.

If you enable this policy setting, users on their computer can get help from their corporate technical support staff using Offer (Unsolicited) Remote Assistance.
Most of all, Remote Assistance is a Windows feature. To initiate the remote assistance, the user has to accept the request of the administrator. A machine cannot be remote controlled when no one is logged on.
Using the Remote Assistance feature, you can invite someone to connect to your computer. After he or she is connected, that person can view your computer screen and chat with you about what you both see.
With your permission, your helper can even use his or her mouse and keyboard to control your computer and show you how to resolve a problem. The Remote Assistance feature will not work in cases when the outbound traffic from port 3389 is blocked.
On a Windows Server, the remote assistance feature isn’t enabled by default. You must enable the feature before you can use it. Remote assistance can also be used with Configuration Manager. Refer to the guide on how to enable and configure Remote Assistance feature in SCCM guide for more details.
Remote Assistance Firewall Requirements
The remote assistance uses TCP port 3389. To allow users within an organization to request help outside your organization using Remote Assistance, port 3389 must be open at the firewall. To prohibit users from requesting help outside the organization, this port should be closed at the firewall.
If you enable Configure Offer Remote Assistance setting, you should also enable firewall exceptions to allow Remote Assistance communications. The firewall exceptions required to Offer (Unsolicited) Remote Assistance on Windows include.
Enable the Remote Assistance exception for the domain profile. The exception must contain:
Port 135:TCP
%WINDIR%\System32\msra.exe
%WINDIR%\System32\raserver.exe
Let’s look at the steps to enable Remote Assistance using group policy
How to Enable Remote Assistance using Group Policy
To enable remote assistance using group policy, use these steps.
- Login to a Domain controller or member server installed with Group Policy Management console.
- Launch the Group Policy Management console.
- You can either edit an existing Group Policy object or create a new one using the Group Policy Management Tool.
- Expand the Computer Configuration/Policies/Administrative Templates/System/Remote Assistance node.
- Enable Configure Offer Remote Assistance setting.
Alright, let’s do this step by step. I would recommend creating a new group policy to configure remote assistance. Do not edit the default policy because it applies to entire domain and is not the recommended method.
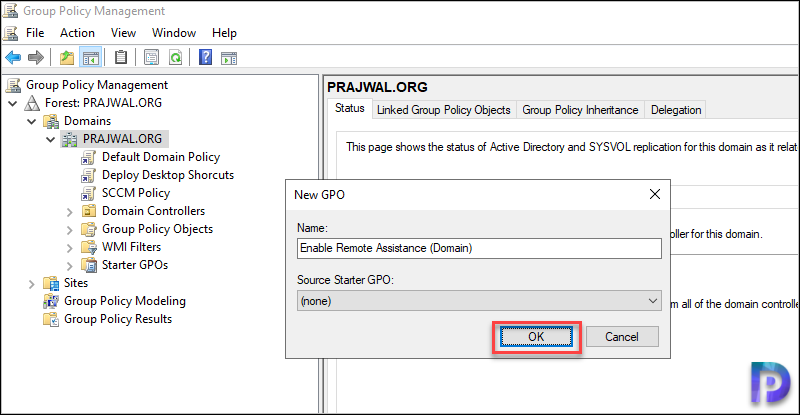
Before you apply this GPO, test the policy on a separate OU and then plan your GPO deployment accordingly. Since I am configuring the policy in my lab, I am applying it on a domain level. In the Group Policy Management console, right click your domain and click Create a GPO in this domain and link it here.

Specify a name for the group policy, such as Enable Remote Assistance. Click OK.
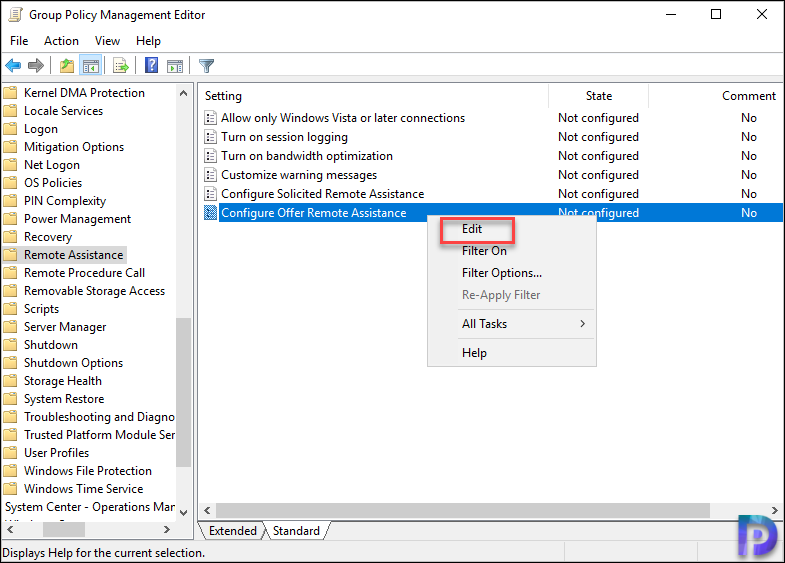
Go to Computer Configuration/Policies/Administrative Templates/System/Remote Assistance node. Right click Configure Offer Remote Assistance setting and click Edit.
On the Configure Offer Remote Assistance window, click Enabled. This enables the policy. You must permit remote control of the computer. So from the drop-down, select Allow helpers to remotely control the computer. Next to helpers, click Show button.
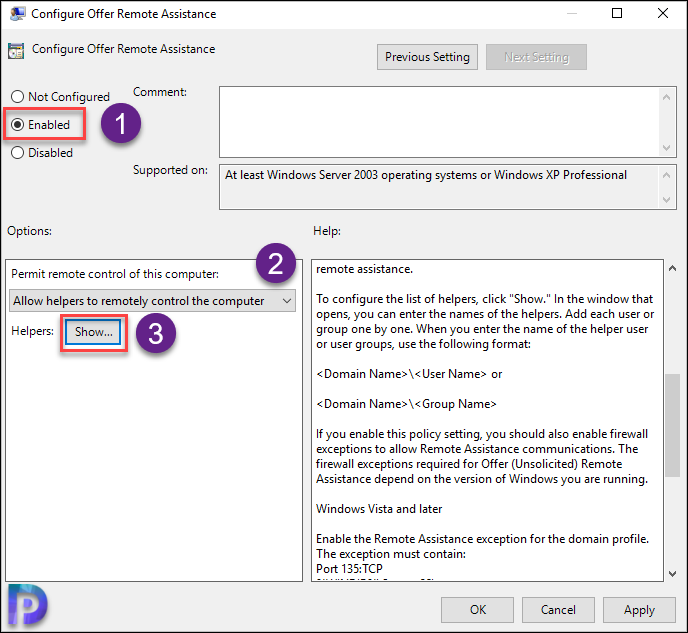
You can enter the names of the helpers. Add each user or group one by one. While adding helpers user or groups, use the following format.
- <Domain Name>\<User Name>
- <Domain Name>\<Group Name>
Click OK.

Close the GPMC editor. It’s time to update the group policy on the client computers and check to see if access to the taskview button has been disabled. You can use multiple ways to perform the group policy update on remote computers. On a test client machine, you can manually perform the group policy update by running the gpupdate /force command.
Create Firewall Exception to Allow Remote Assistance
In this step, we will allow Remote Assistance access through the Windows Firewall using Group Policy. Again, you can create a new policy or edit the existing remote assistance policy.
I am editing the same policy that we just created in the above step. In the GPMC editor, go to Computer Configuration/Policies/Windows Settings. Expand Security Settings/Windows Defender Firewall with Advanced Security/Windows Defender Firewall with Advanced Security.
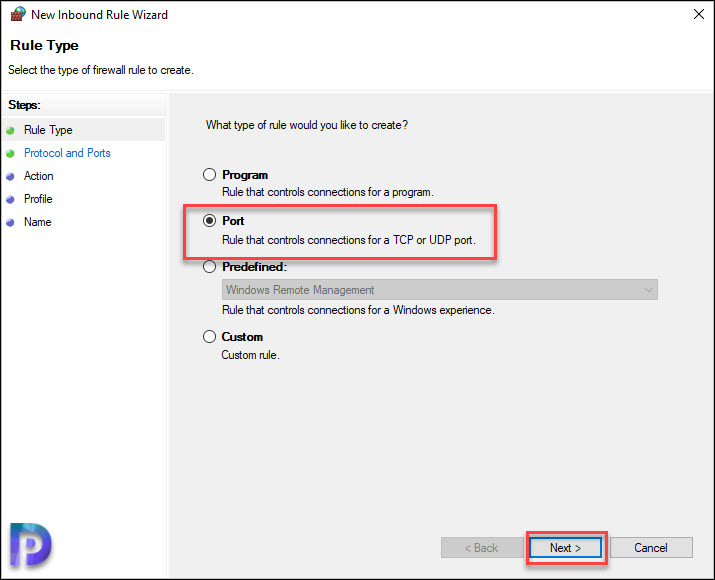
Right click Inbound Rules and click New Rule.

Under the Rule Type, select Port. Click Next.
On the Protocol and Ports window, select TCP and enter the port number 135. Click Next.

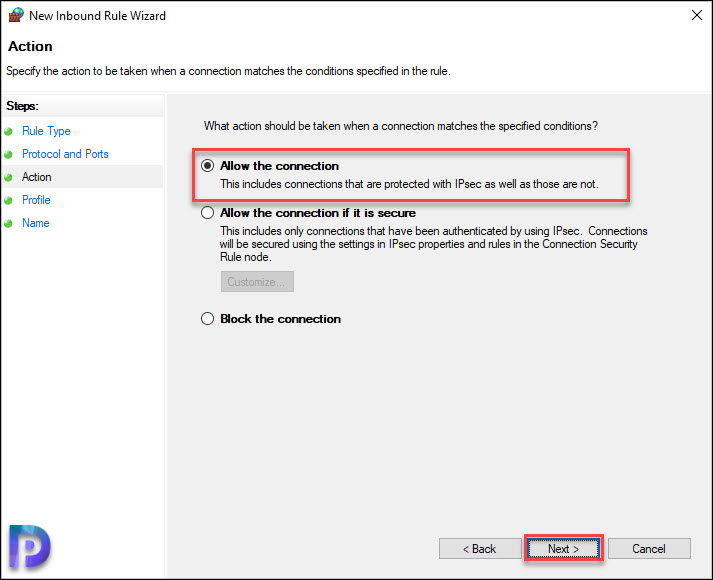
Select Allow the connection. Click Next.
Choose the profile to which the rule applies to. Click Next.

Finally specify a name to the firewall rule and click Finish.

Verify if Remote Assistance has been enabled or not
All you need to do now is wait for the policy to get applied on to your client computers. If the policy has been applied, you will notice the remote assistance feature is enabled.
Let’s check if the remote assistance has been enabled on our client computer. Login to the client computer and run the command systempropertiesremote.exe.
In the System Properties window, under Remote tab, look for Remote Assistance. The Allow Remote Assistance connection to this computer box is enabled.

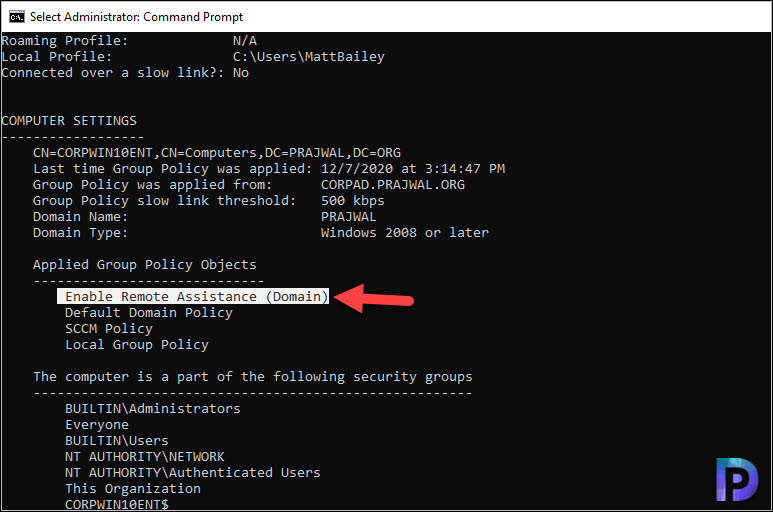
In addition, let’s verify the firewall policy has been applied or not. On the client computer, run the command prompt as administrator. Run the command gpresult /r and notice the Remote Assistance policy under Computer Settings.
Enable Remote Assistance on Windows Server
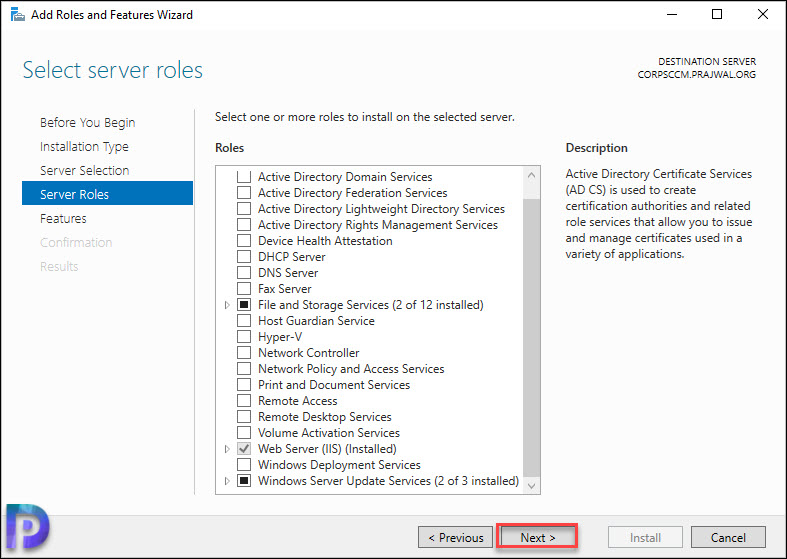
As mentioned earlier, on a Windows Server does not have remote assistance feature enabled. Therefore you need to enable this feature. Open the Server Manager, click on Manage, click Add Roles and Features. Select Role based or feature based installation. Click Next.

Click Next.
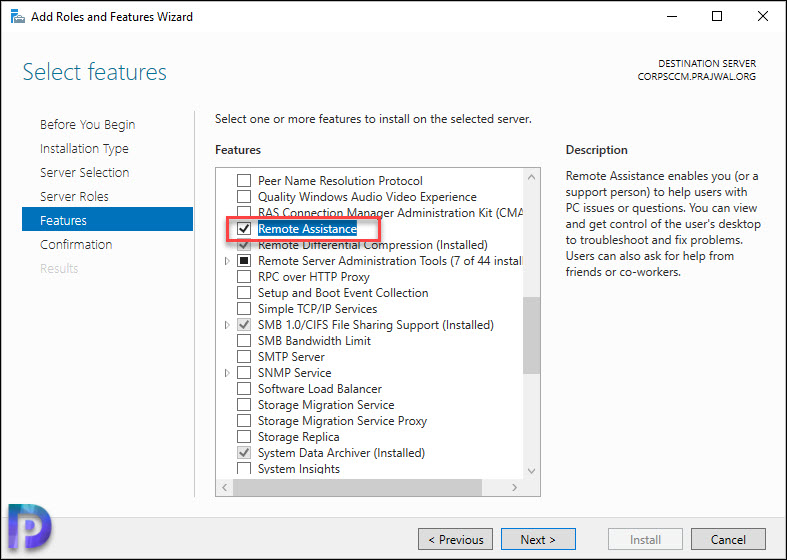
From the list of features, select Remote Assistance. Click Next.
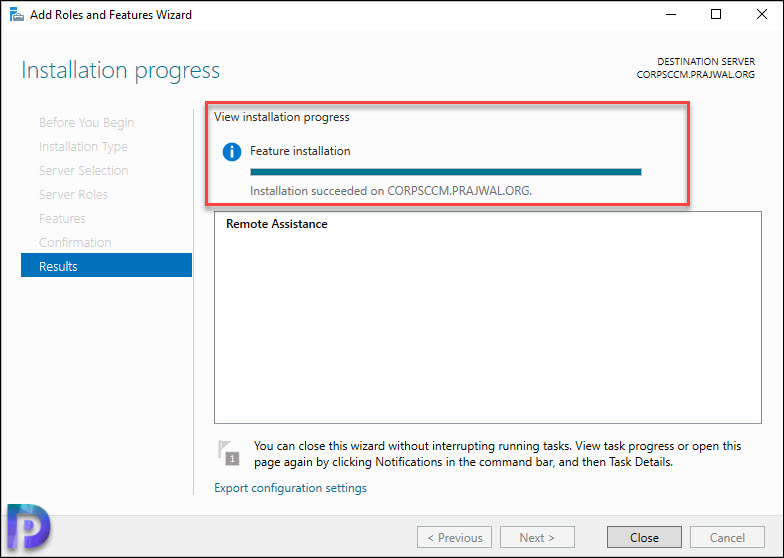
On the Confirmation window, click Install.

The remote assistance feature installation is complete. Click Close.

I am having an issue with a new build of my laptop at work. My old workstation I had no issues using remote assistance but now it fails, and I get the prompt that says Your offer to help could not be sent.
We have it set thru group policy and I am in all the correct groups to use remote assistance. Any suggestions on what else I should check or double check?
Thanks, John
Thank you for the article, very useful. It’s not clear to me how port 3389 is used in the process. Up at the beginning you say that if 3389 is not open in OUTBOUND, the remote assistance will not work… but then in the GPO, you create a firewall rule for TCP INBOUND 135.
Please can you explain how does the connectivity work inbound and outbound?
Its not working on windows server 2022 and Windows 10. After run command Runas session screen goes blank at Administrator side so its helpless to administrator to support users through MSRA tool. Earlier it was working fine with windows server 2k8 and win 7 OS
Please provide your feedback on this if you have good solution on this.
Hi
I hope this could be solve your problem.
go to Computer Configuration/Policies/Windows Settings. Expand Security Settings/Local policies/Security options
User Account Control: Allow UIAccess applications to prompt for elevation without using the secure desktop — Enabled
would welcome to know the Windows Server 2013 notes with diagrams
Windows Server 2013 is too old now.
Dear Prajwal,
Thank you for your guide. It is useful.
I followed your guide and implemented in my domain but I have a problem, all helpers need to have domain admin permission to use msra.exe /offerra
Could you please kindly help me to fix this problem.
I do not want to give domain admin permission to my support teams.
I look forward to hearing from you.
Best Regards,
Amir Kalhori
Thanks for this information!
Hi
We are running Windows 10 Pro and have a few machines which are missing the local group “Offer Remote Assistance Helpers”. They got the GPO applied, but we can’t access it because of missing rights and it makes sense when the local group are missing, where the security group with the helper-members should be added to.
Does anyone know why the local group “Offer Remote Assistance Helpers” are missing on the machines ?
Hi,
Do you have a way to configure Offer Remote Assistance for devices which are Azure AD Joined & Intune managed?
Thanks,
Ronan