This post covers the steps to install new SCCM macOS Client on Mac clients. The 64-bit SCCM macOS client allows you to manage Apple devices running the macOS using Configuration Manager.
If you are not aware, starting from macOS Catalina, you can no longer use the x86 applications. Therefore, Microsoft released a new client specially to support macOS Catalina clients. Yes, It’s a 64-bit application.
The steps to install SCCM client agent on Mac computers was covered previously. However, with the new MacOS 64-bit client, the installation changes. It is now easy to install the client agent compared to previous method.
Install New SCCM MacOS Client (64-bit)
Download New SCCM MacOS Client (64-bit)
Most of all, the macOS client installation package isn’t supplied with the Configuration Manager media. You can download the new SCCM client x64 for macOS here – https://www.microsoft.com/en-us/download/details.aspx?id=100850.
Extract MacClient.dmg out of ConfigmgrMacClient.msi
When you download the Mac 64-bit client, it is a .msi file – ConfigmgrMacClient.msi. You must extract the .msi file and when you do that you get macclient.dmg file. Only then you can install New SCCM MacOS Client (64-bit).
On your server run the ConfigmgrMacClient.msi. On the Welcome page of Mac client setup wizard, click Next.
Accept the license agreement by clicking I Agree. Click Next.
Install New SCCM MacOS Client
Leave the installation folder to default and click Next.
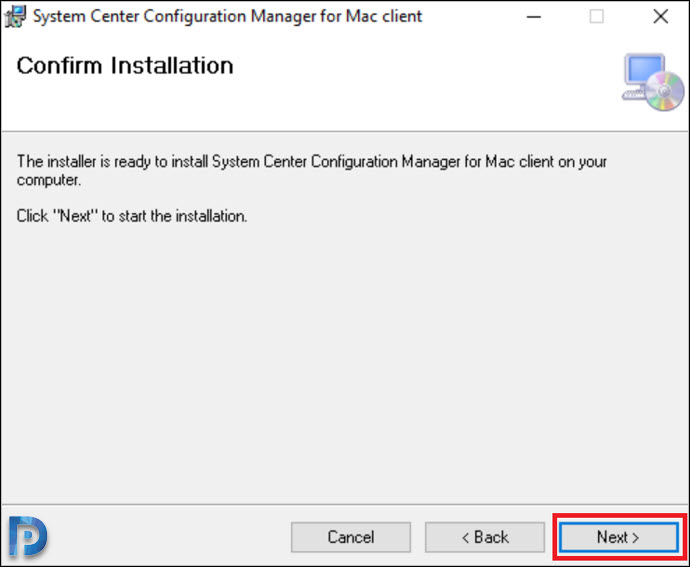
On the Confirmation page, click Next.
The extraction process is complete.
Finally we get the macclient.dmg file.
Install New SCCM MacOS Client (64-bit)
First of all, copy the macclient.dmg file located in “C:\Program Files (x86\Microsoft\System Center Configuration Manager” to your Mac client.
On the Mac client run the Macclient.dmg file that you just downloaded. This extracts the files to a folder on the local disk. Double click CMClient.pkg.
To allow the execution of CMClient.pkg, go to System Preferences and click Security & Privacy.
In the General tab, click Open Anyway.
Click Open.
The Microsoft Configuration Manager Client Installation wizard opens. Click Continue.
Now click Install.
Click Continue the installation. Note – You must restart the Mac to complete the installation.
Enter the login & password of the admin user and click Install.
The Mac client installation is successful. Click Restart.
Login to your Mac client. The Configuration Manager window appears, click Next.
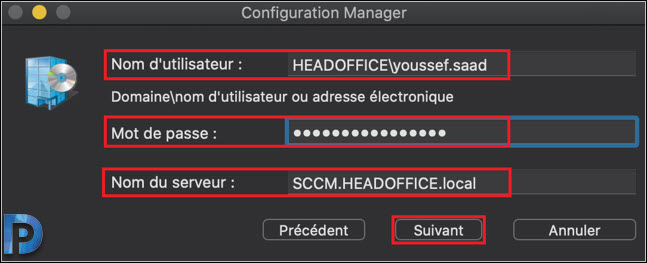
Enter the username, password and the FQDN of your Site Server.
Click Yes to approve.
The new SCCM MacOS Client (64-bit) installation is complete. Click OK.
Let’s check the MacOS client 64 bit client install. Open System Preferences and you should see Configuration Manager icon.
When you open the Configuration Manager item in System Preferences on the Mac computer you will see the client properties. The Enrollment status should be Enrolled.


Hi.
Does the new SCCM MacOS client (64 bits) work on the new version of MAC OS (11.0.1)?
Best,
Hello Prajwal!
Can we automatically deploy the client to my infrastructure? I have a Windows infrastructure … I have 10 MacOS in my company and I can see that there are more and more of them. is there a way to automatically deploy the client to Mac OS as it does to Windows systems? Thank you in advance for your help!
Hi Youssef,
Thank you for all of your help. I need to deploy .net framework 4.8 do you have a step-by-step guide? Thank you.
How long does it take for the client to show up in the console under Devices ?
If you run the system discovery the clients should be listed in the console.
Hi all,
we’re using sccm client on macOS for many years, everything was working till new 64-bit client on catalina. The setup itself is correct, because it’s running on mac OS 10.14 and earlier version with the new client.
But on catalina, when enrolling a new device i get the following error:
SecTrustSettingsSetTrustSettings error: errSecInternalComponent
ERROR: Failed to install certificate
The trusted root certificate is being installed, but the client auth cert not.
The sccm client shows enrolled but when trying to connect, it says:
Certificate has untrusted root
Do you have any advice?
Best, Stefan
SecTrustSettingsSetTrustSettings error: errSecInternalComponent
ERROR: Failed to install certificate.
Me too
Is there any possibility for automation client instalation? Or only manual installation is available on MAC client? Sorry for dumb questions, but I dont have any experience with MAC clients.
We’ve automated the client installation with scripts. So far the best solution for us.
I have attempted this install, but the client fails to contact the server. I verified I am able to ping it however.
Have you followed all other steps for managing mac clients? Did you configured Enrollment Point and Enrollment Proxy Point on your SCCM Server?
I honestly can’t remember what we did back then. The idea was abandoned.
Hi, your post doesn’t indicate if you are still required to do the server setup as outlined in this article?https://www.prajwaldesai.com/how-to-install-sccm-client-agent-on-mac-computers/
I’m trying to just install the new MacOS SCCM client on a system and I’m getting an error of “Unable to contact the server for this request”. Does the server still need configuring as per the referenced URL?
Thank you,
Yes, you need to do all neccessary steps as before.
Hijacking this post a bit, but has anyone tried using the new CMAppUtil command-line tools to convert Mac software’s to .cmmac to import into SCCM?
I am getting a ‘Segmentation fault: 11’ error every time I try to convert anything.
Is anyone else having this issue?