In this post, I will show you how to install fonts for Microsoft Paint on Windows 11/10 devices. Microsoft Paint doesn’t allow you to add fonts directly. Instead, install the desired fonts in Windows, and Paint will automatically recognize them.
MS Paint (Microsoft Paint) is a simple, built-in graphics program for Windows computers used for basic drawing, editing, and image manipulation. It offers rich tools for creating art, adding text, cropping photos, and using shapes in an easy-to-use interface.
Designers who use the Paint app to create text-based designs, invitations, and more often add new fonts to enhance their creations with stylish and complementary typography. This guide is designed for anyone looking to incorporate custom fonts into the Paint app for their projects.

Steps to Add New Fonts for Microsoft Paint
Microsoft Paint (and Paint 3D) simply lists all fonts installed in Windows. Before you add a custom font to the Paint app, I recommend checking if the font is already present or installed. If it’s a custom font designed specifically for your organization, here are the steps for getting it added to the Paint app.
Step 1: Check available fonts in the Paint App
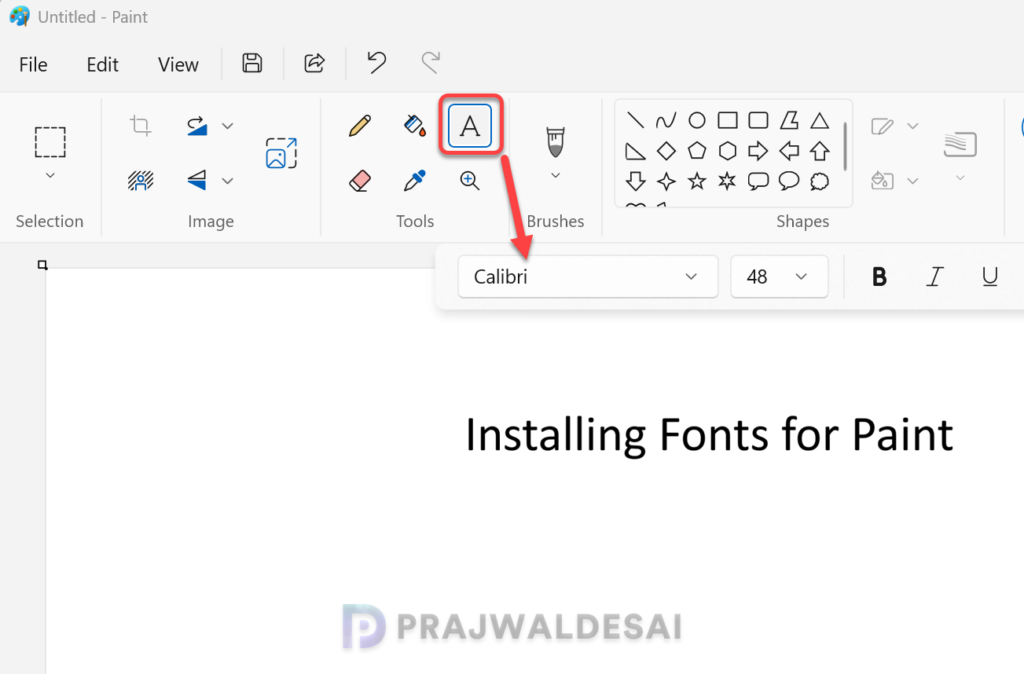
To open the Paint app, press the Windows key + R to open the Run box. Type ‘mspaint‘ and press enter. To add text in Paint, click the “A” (Text) tool in the Home tab. Click the drop-down to check the fonts available in the Paint app.
Step 2: Download the Font File
To add a new font for the Microsoft Paint app, you must first download the font file. I recommend getting the fonts from a trusted site such as Google Fonts, Font Squirrel, etc.
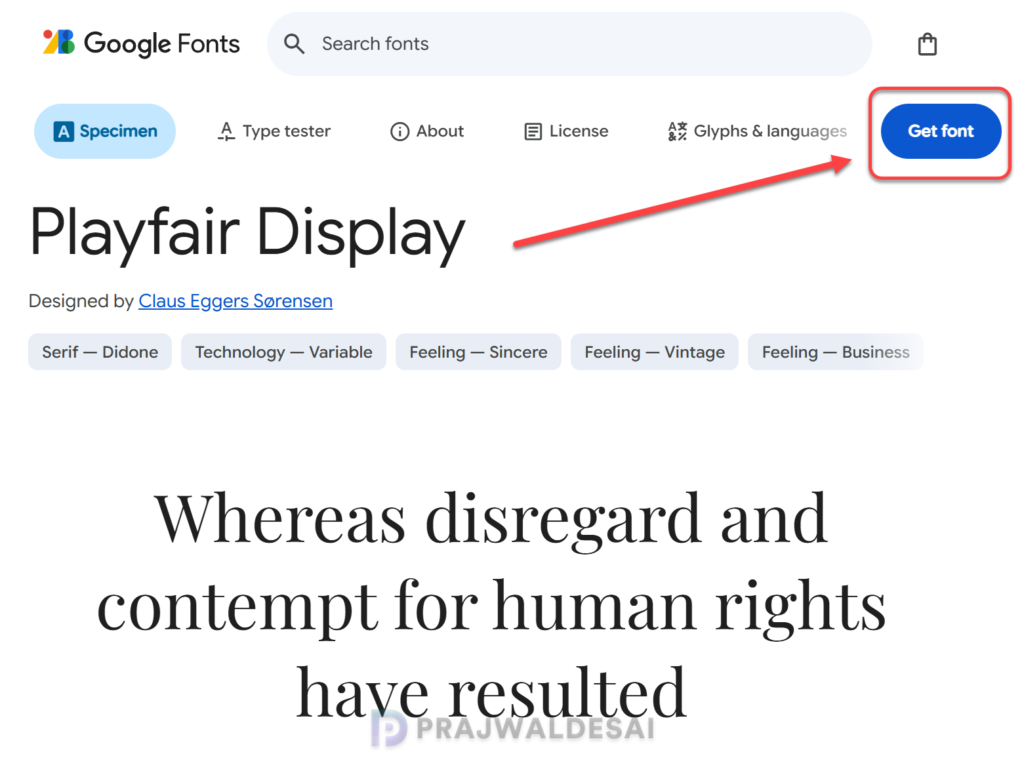
In this example, I am going to download the Playfair Display font that is available on the Google Fonts site. Search for the font that you want to download and click Get font. You’ll usually receive a .zip file that, when extracted, contains a folder with .otf (OpenType) or .ttf (TrueType) font files. Both work on Windows and will appear in Paint once installed.
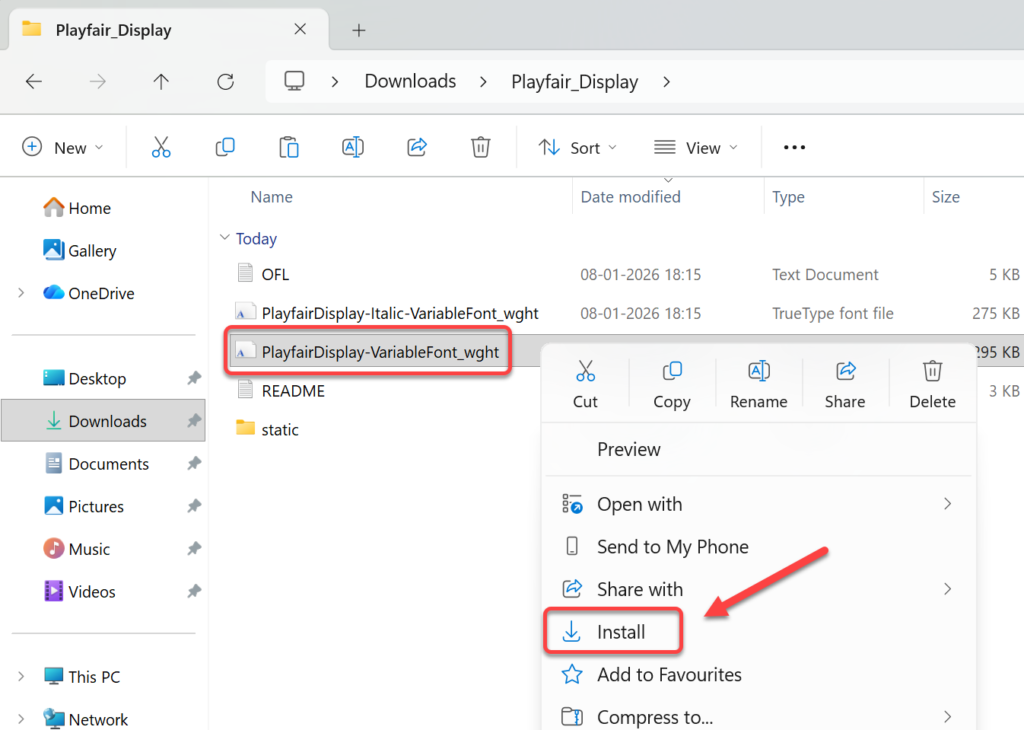
Step 3: Install Fonts for Microsoft Paint
To install the newly downloaded font, go to the folder where you extracted it. Right-click on the font and select Install. The font is now installed on your device (C:\Windows\Fonts), and the Paint app should automatically see them now.
Step 4: Verify Font Installation in Paint App
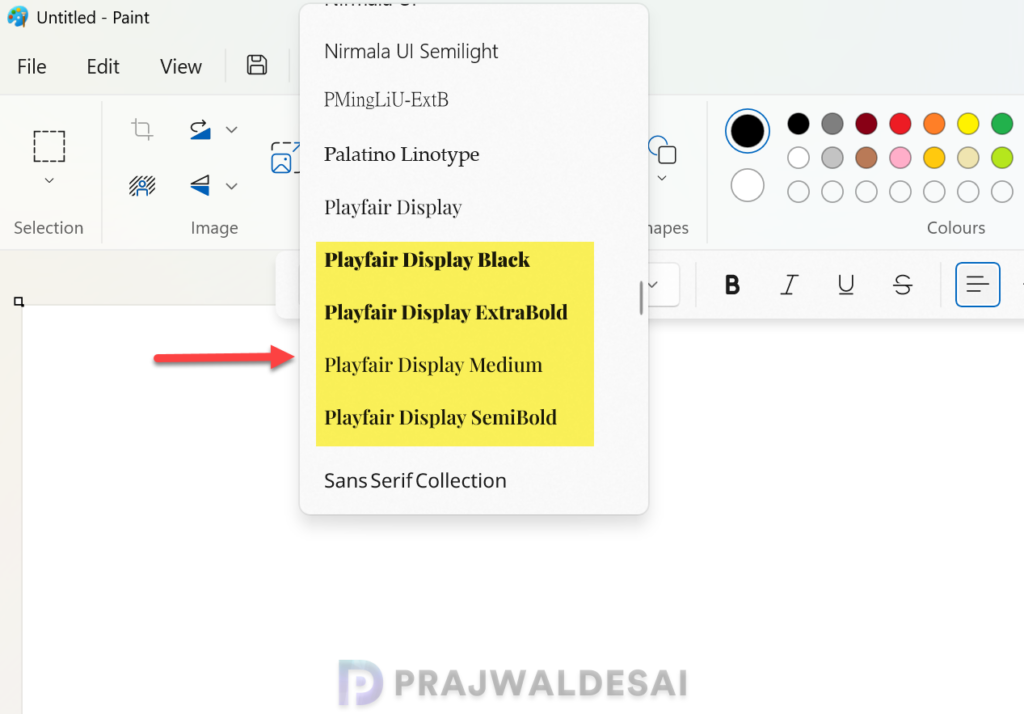
Close Microsoft Paint completely (and Paint 3D if it’s open). Reopen the Paint app and select the Text tool (the “A” icon). Look at the font drop‑down list at the top. Scroll to find your new font by name and select it. Your text should now use that font.
In the below image, you can see that the Playfair Display font is now visible in the Paint app for usage.
Uninstall a Font from the Paint App
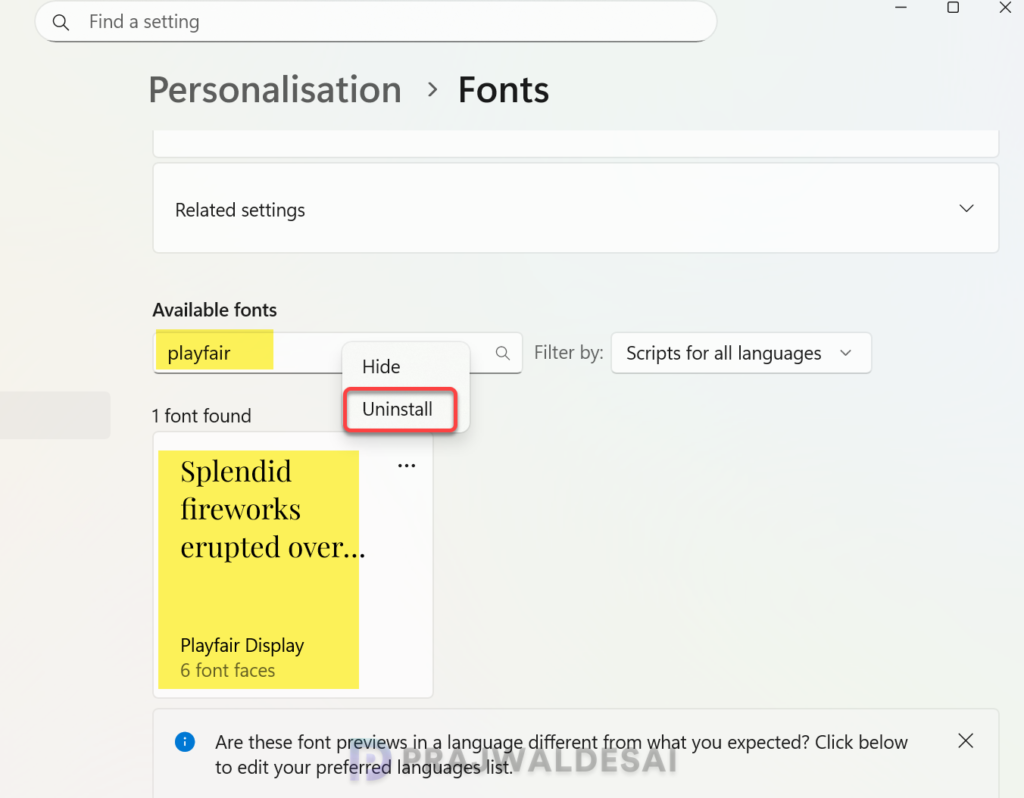
If you want to remove or uninstall the font that you imported for the Paint app, it can be manually deleted from the C:\Windows\Fonts directory, or you can do that via the Settings app.
Launch the Settings app and navigate to Personalisation > Fonts. Under Available fonts, type the name of the font that you wish to remove. Locate the font and click on the three horizontal dots and select Uninstall. That should completely remove the font from the system.
Open the Paint app, select the text tool, click the drop-down menu, and you’ll notice that the font no longer appears in the list.