


This post covers the steps to install Azure PowerShell module in Windows 10. If you are working on Azure, you know that most of tasks are done using Azure portal. The same tasks can be managed using PowerShell as well. When you install Azure PowerShell modules, it adds cmdlets with which you can manage Azure using PowerShell.
Azure services can be managed and accessed primarily either via PowerShell or the Azure Portal. The PowerShell automation is supported through the Azure Portal. In this post we will see the steps to install Azure PowerShell module in Windows 10. If you have Windows 7 or Windows 8.1, the steps are the same.
How to Install Azure PowerShell Module in Windows 10
There are different ways to install Azure PowerShell module. You could choose any of these methods listed below:

- Azure PowerShell from WebPI. Download Azure PowerShell and start the install.
- Using PowerShell Gallery. We will be using this method which I feel is the easiest one.
- MSI installer from GitHub. Click this link to download the msi installer file.
As mentioned above, we will install Azure PowerShell from PowerShell gallery. Ensure that your computer is installed with the Windows Management Framework 5. Next, open an elevated Windows PowerShell or PowerShell Integrated Scripting Environment (ISE). Type the commands in the shown order.
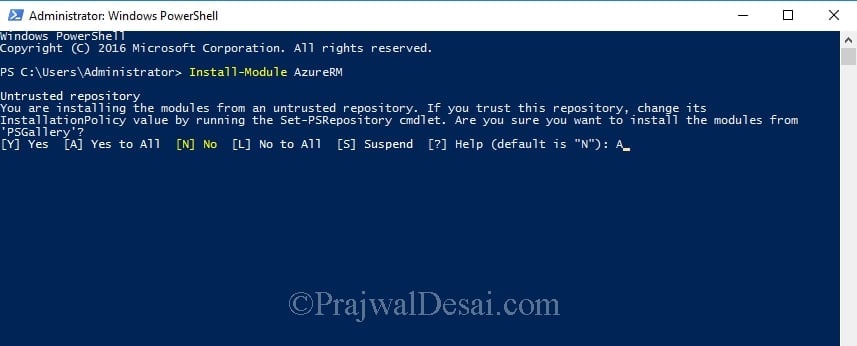
a) Install-Module AzureRm – This command installs the Azure resource manager module from PowerShell gallery. When you type the command, it asks you if you want to install modules from untrusted repository. Type A and hit enter.
 Wait for few minutes while the modules are downloaded and installed.
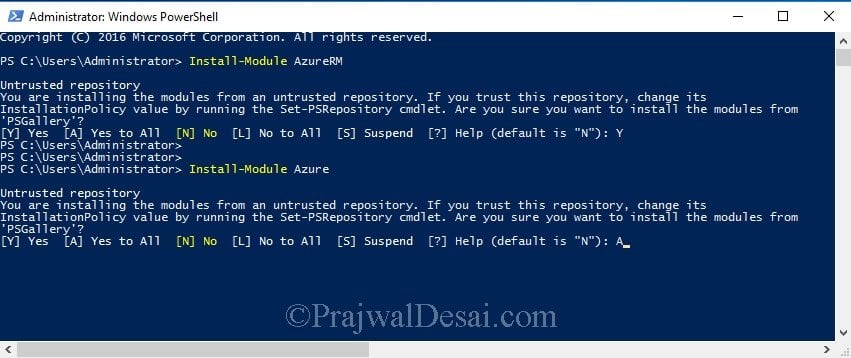
 b) Install-Module Azure – This command installs the Azure module for managing tasks such as creating, managing vm’s etc. Type A and hit enter.
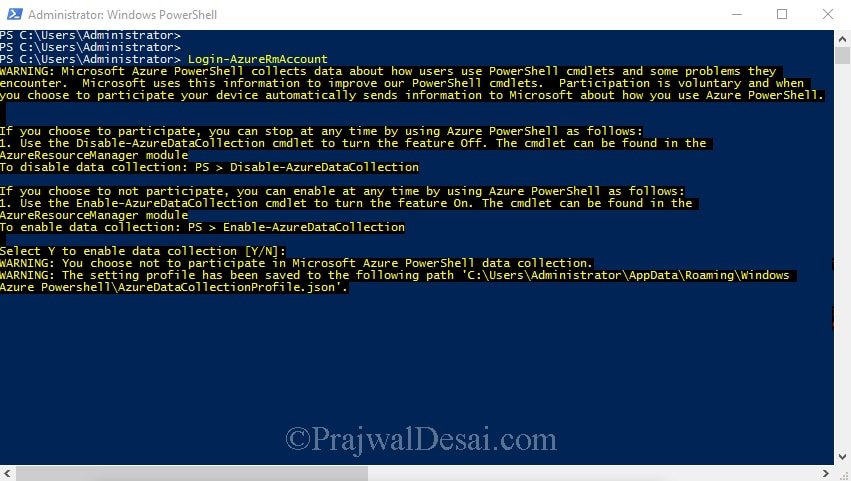
 c) Login-AzureRMAccount – Use this command to login to your Azure resource manager. When you enter this command, it brings up a page to enter your account and password. Type the email address and password associated with your account. Note that you should have an Azure subscription with the account that you have entered.
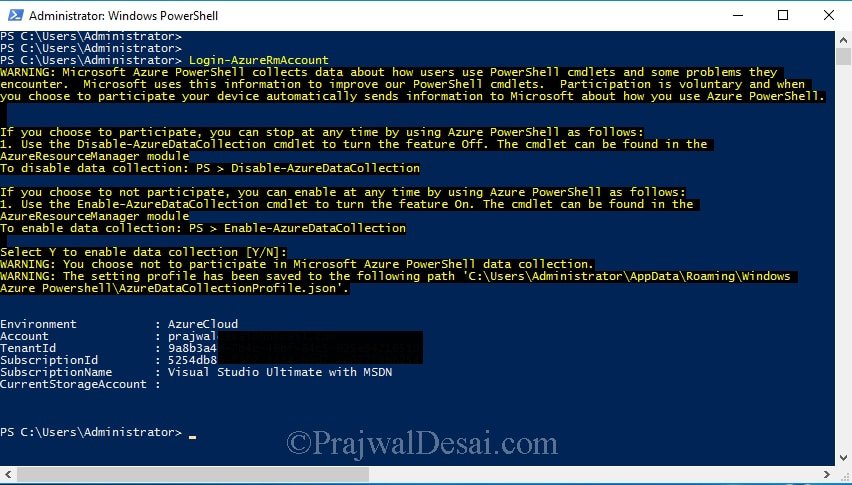
 You can now see your Account info, Subscription ID, Tenant ID and other details. You can view these details when you login to your Azure management portal as well. Using PowerShell, you can see how easy it is to get the information in lesser time.
 d) Get-Module -ListAvailable *Azure* – Lastly to explore the list of Azure modules available, you can type this command. You can see that the output shows Azure related modules available.


I installed the the azure and azureRM and when I when to to the part where I am suppose to put in my account info and it said that scripts are not allowed to run on this system. Do you know how to fix this issue
When I run the command : install-module AzureRM, the powershell windows closes automatically.
i run it with administrator rights.
Do you have an idea?
Thanks
I have never experienced that issue before. May I ask what is the powershell version ?.
Did you find a solution to this issue? I am experiencing the same thing.
When I run the command : install-module AzureRM, the powershell windows closes automatically.
i run it with administrator rights.
Do you have an idea?
Thanks