In this post I will show you how to deploy BlueStacks using ConfigMgr. BlueStacks is world’s most popular, safest and free Android emulator for Windows and Mac.
BlueStacks is a desktop emulator software that allows you to run Android games and apps on PC. I have been using BlueStacks application on my Windows 10 computer and I absolutely love it. It allows me run the Android apps and games even on my virtual machine.
Download BlueStacks Offline Installer
You can always download the latest version of BlueStacks by visiting their homepage. When you download BlueStacks you get a small installer file. Running this file on a PC downloads necessary files, and installs the emulator on your PC.

However we don’t usually prefer the small installer file because we don’t want multiple computers to run this file and download the same set of files. Instead we need a offline installer and with that we deploy BlueStacks using ConfigMgr. Yes, BlueStacks provides offline installer as well.
The offline installer for BlueStacks is available and it is referenced in a separate article.
- Download BlueStacks installer for 64-bit Windows
- Download BlueStacks installer for 32-bit Windows
- Download BlueStacks installer for BlueStacks with Hyper-V
I am going to download BlueStacks installer for 64-bit windows. I have got only 64-bit machines in my lab. Download the BlueStacks offline installer and save it to a folder within Sources folder on your server or a shared folder.
Download BlueStacks Uninstaller
It’s very rare that you download an uninstaller to uninstall an application. Normally we either use the application installer or an uninstall file to uninstall the application. But in this case I noticed that there is no silent uninstall command for BlueStacks application. There is a BlueStacks uninstaller file located in Program files along with other files but that needs an user input to proceed with uninstallation.
Hence I decided to use the BlueStacks Uninstaller (also known as BstCleaner_native.exe) which is again an executable file. This BstCleaner_native.exe file uninstalls the BlueStacks application and cleans up remaining traces of application.
Create BlueStacks Application in ConfigMgr
Let’s create a new BlueStacks application in ConfigMgr with following steps.
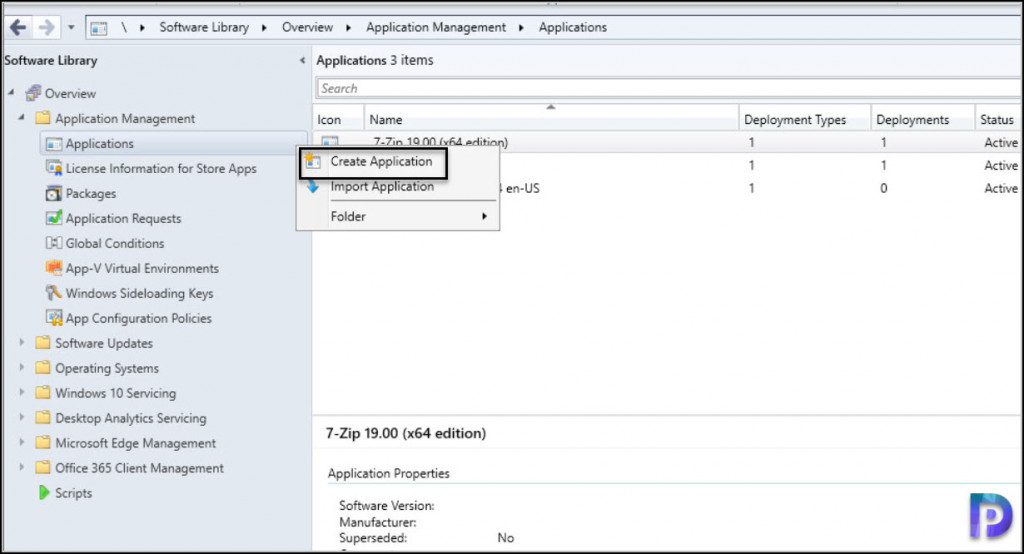
- Launch the ConfigMgr console.
- Go to Software Library\Overview\Application Management\Applications.
- Right click Applications and click Create Application for BlueStacks.
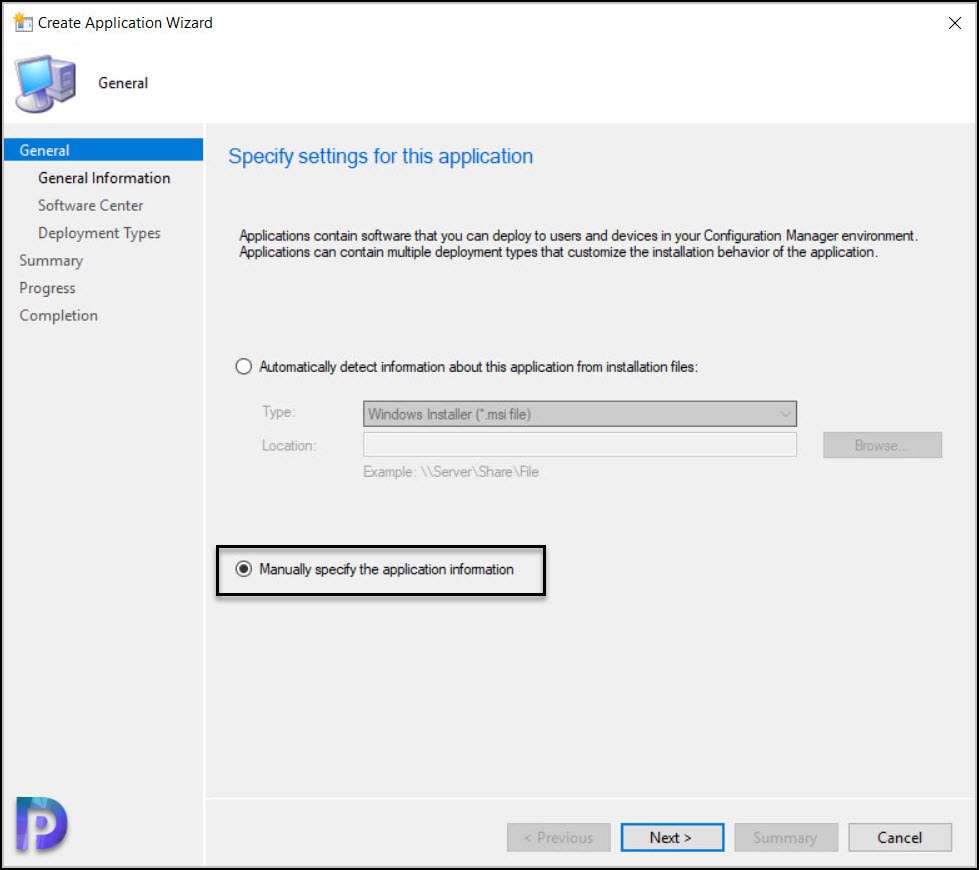
Since we have a BlueStacks executable file, we have to manually specify the install and uninstall commands. Select Manually specify the application information. Click Next.
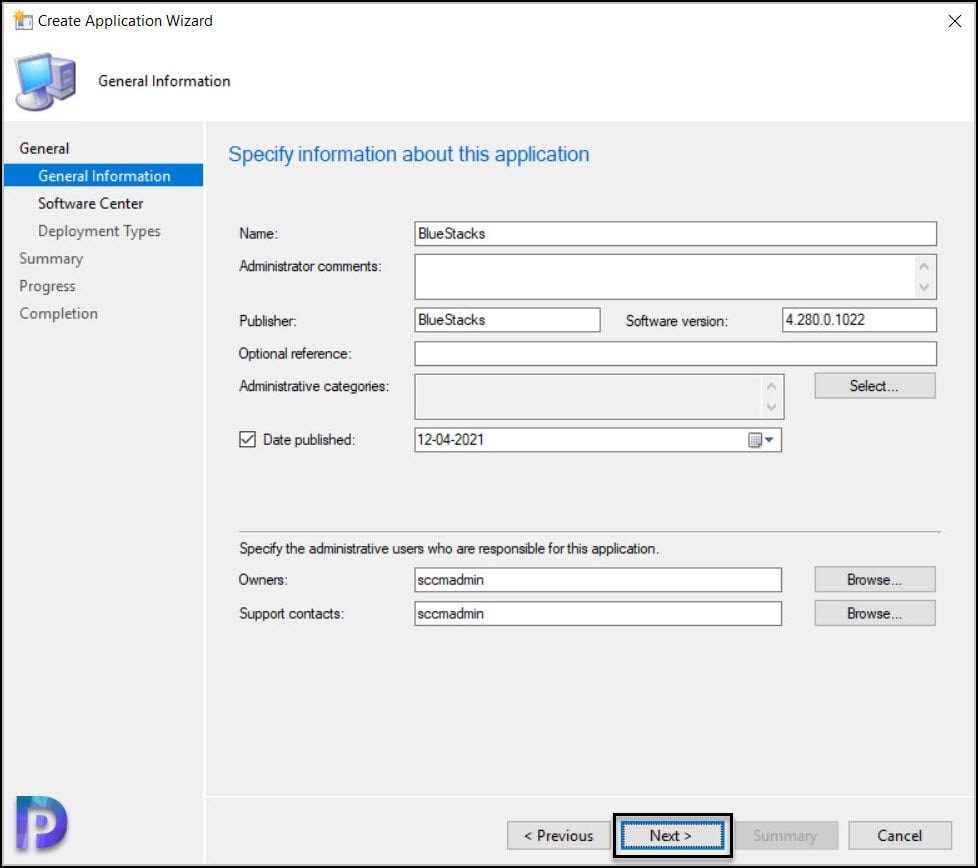
Specify the BlueStacks application information such as application name, publisher and software version. Click Next.
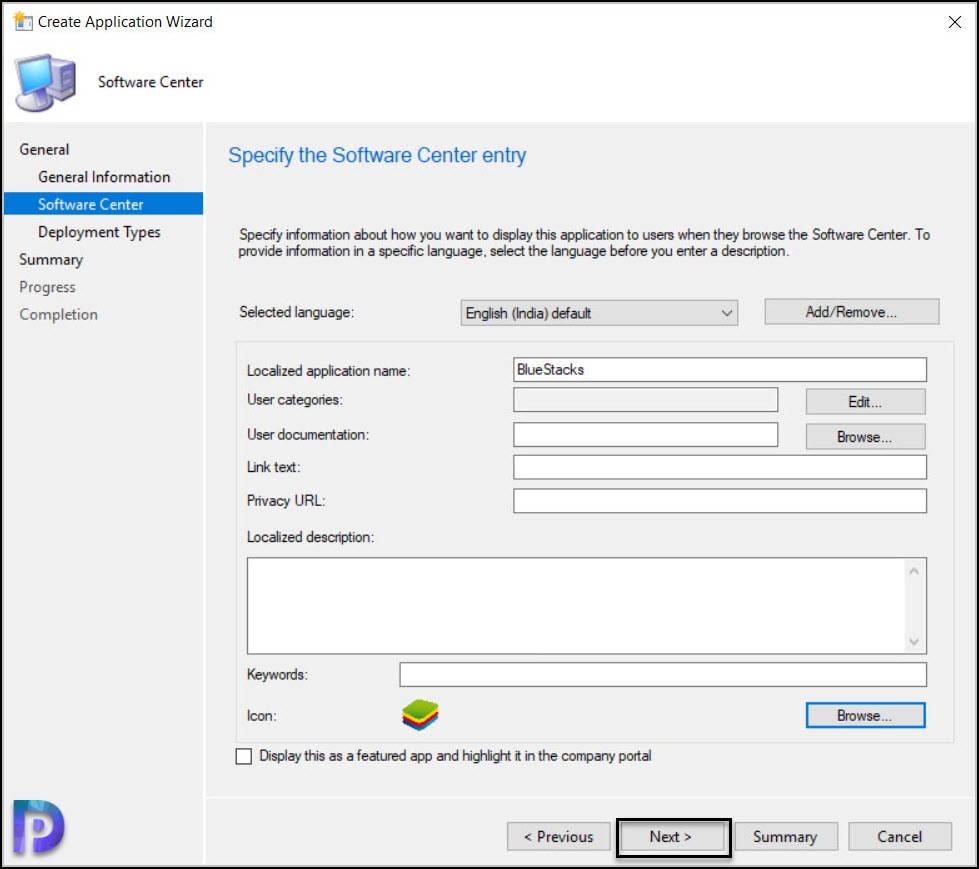
On the Software Center window, specify the BlueStacks icon. Click Next.
Tip – The BlueStacks icon can be found on a computer where you have already installed BlueStacks application. The icon is located in the following location – C:\Program Files\BlueStacks. You can use the same icon to display it in Software Center.
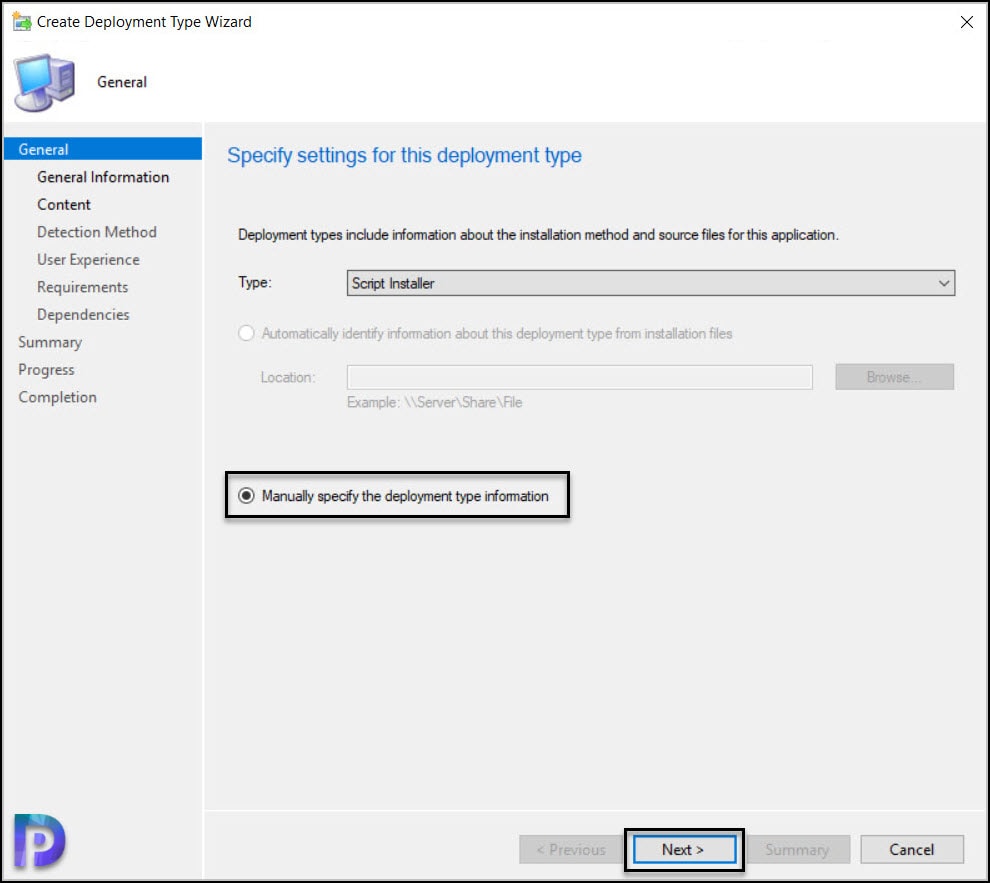
Add a new deployment type by clicking the Add button. On the General window of Create deployment type wizard, select Manually specify the deployment type information. Click Next.
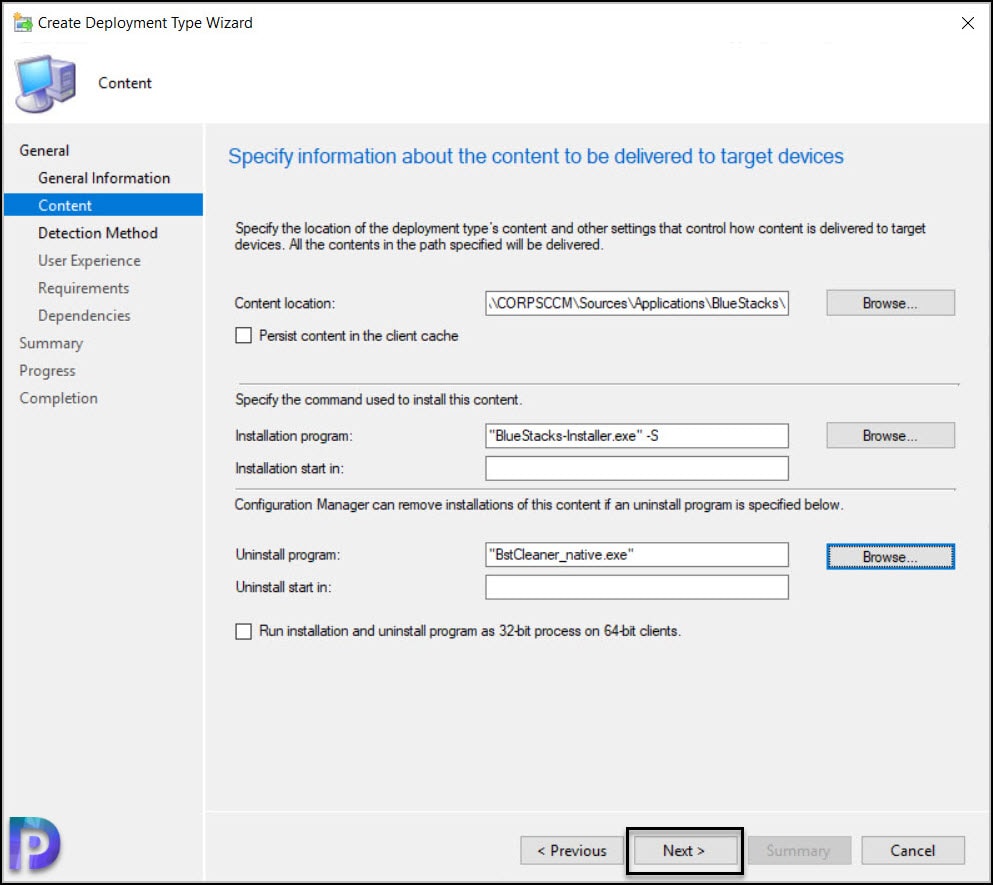
On the Content Window, specify the BlueStacks content location. This is a folder path where you have the BlueStacks application setup file.
Next, specify the install command and uninstall command. Click Next.
Install Program - "BlueStacks-Installer.exe" -S
Uninstall Program - "BstCleaner_native.exe"
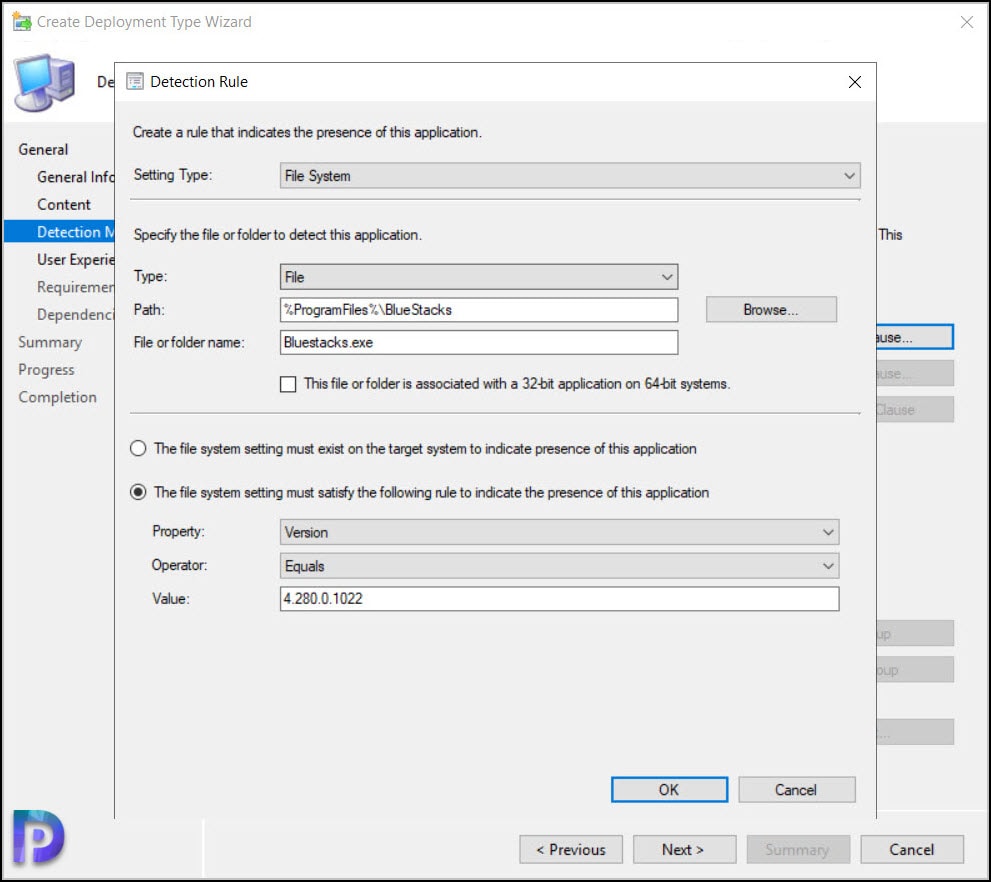
The detection method is important because it determines whether the application is installed or not. Add the following detection rule for BlueStacks.
- Setting Type – File System
- Type – File
- Path – %ProgramFiles%\BlueStacks
- File or folder name – Bluestacks.exe
- Property – Version
- Operator – Equals
- Value – 4.280.0.1022 (Specify the exact version of BlueStacks installer here).
Click OK and then click Next.
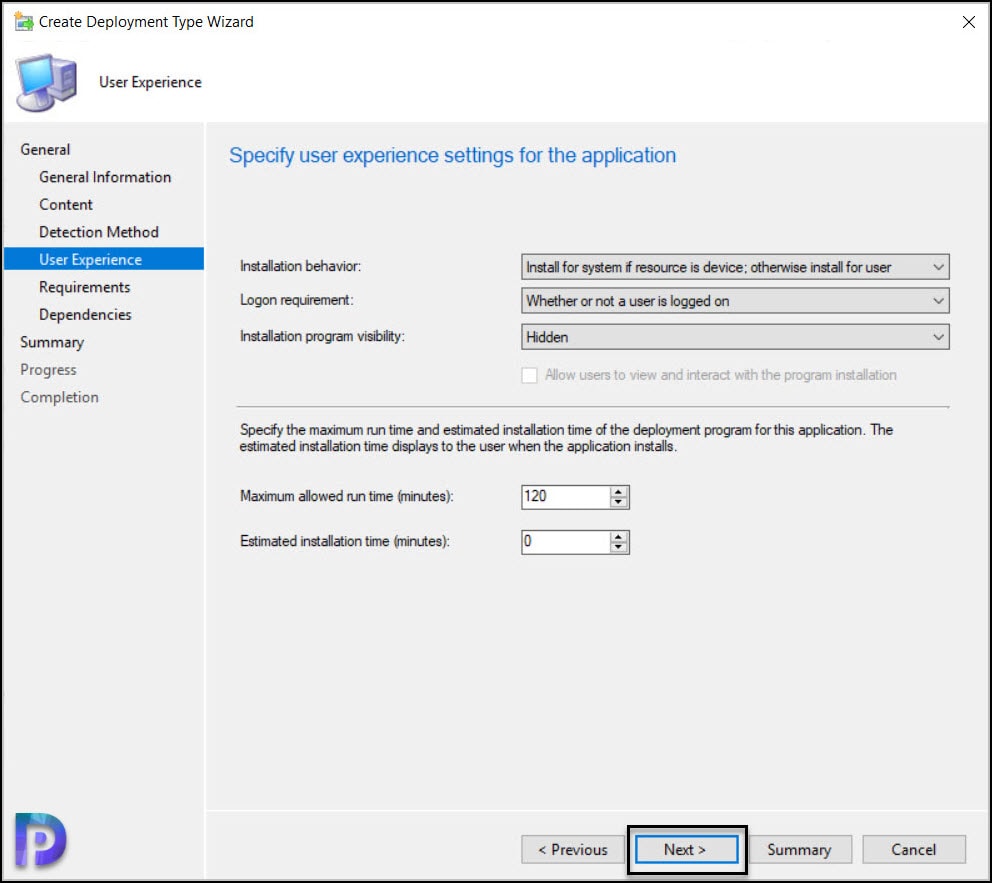
Specify the user experience settings for BlueStacks application and click Next.
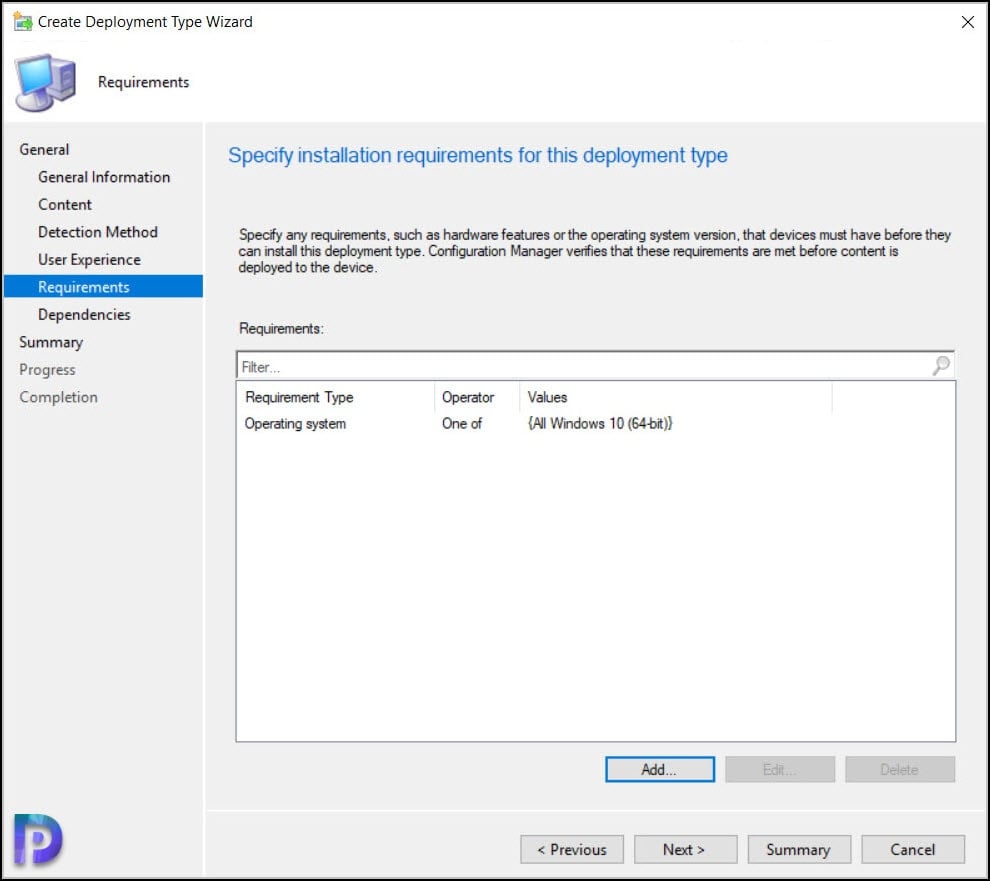
Since I want to deploy BlueStacks using ConfigMgr for only Windows 10 64-bit machines, I have added the OS requirements. This is an optional step. Click Next.
Complete the remaining steps of create deployment wizard. On the Completion window of Create application wizard, click Close.
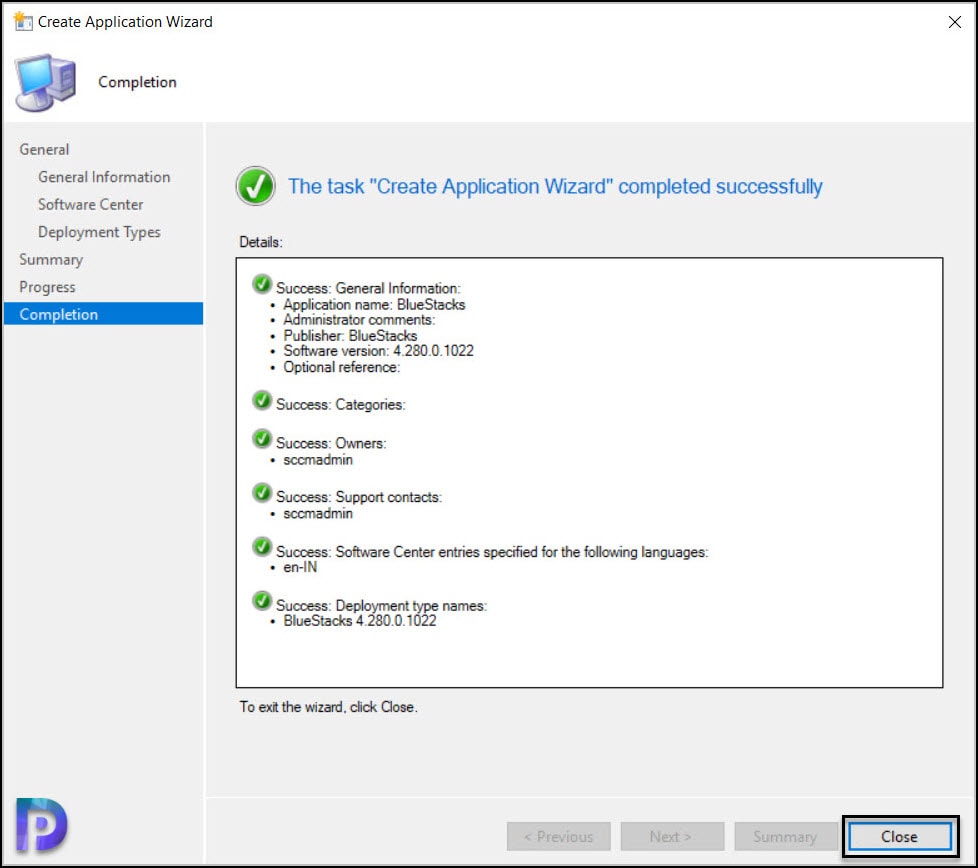
We have created the BlueStacks application. In the next step we will deploy BlueStacks application using ConfigMgr to our client machines.
Deploy BlueStacks Application Using ConfigMgr
The steps to deploy BlueStacks application using ConfigMgr.
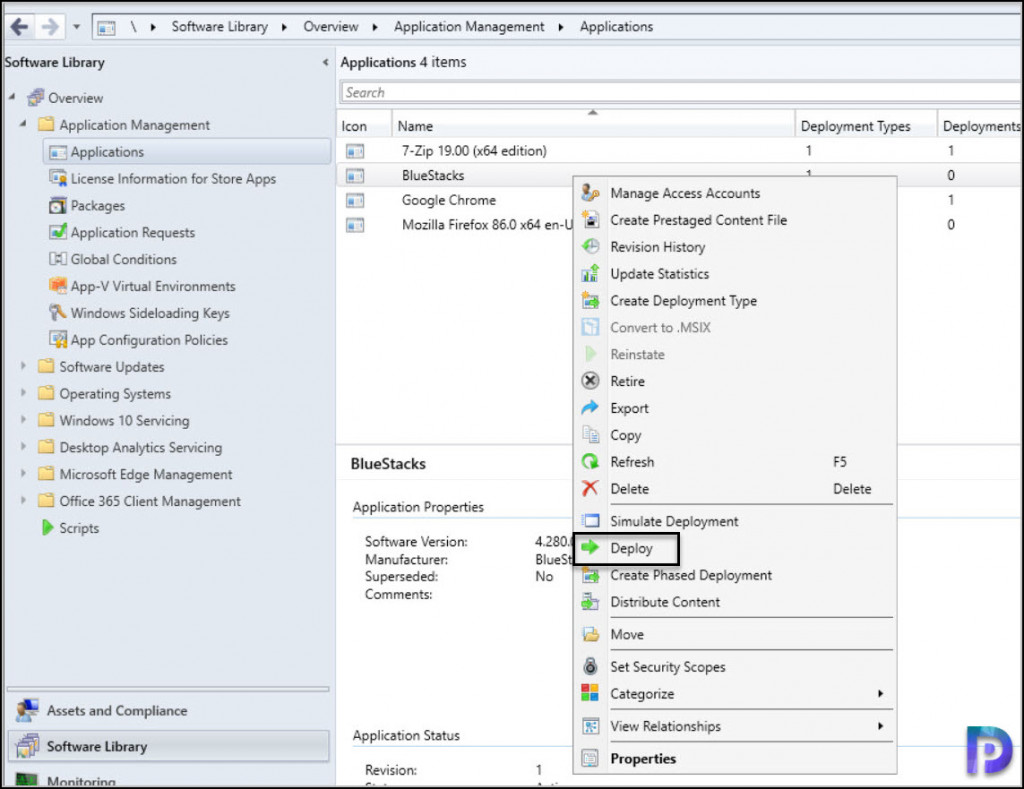
- Launch the ConfigMgr console.
- Go to Software Library\Overview\Application Management\Applications.
- Right click BlueStacks application and click Deploy.
Click Browse and select a ConfigMgr device collection to which you want to deploy BlueStacks. Click Next.
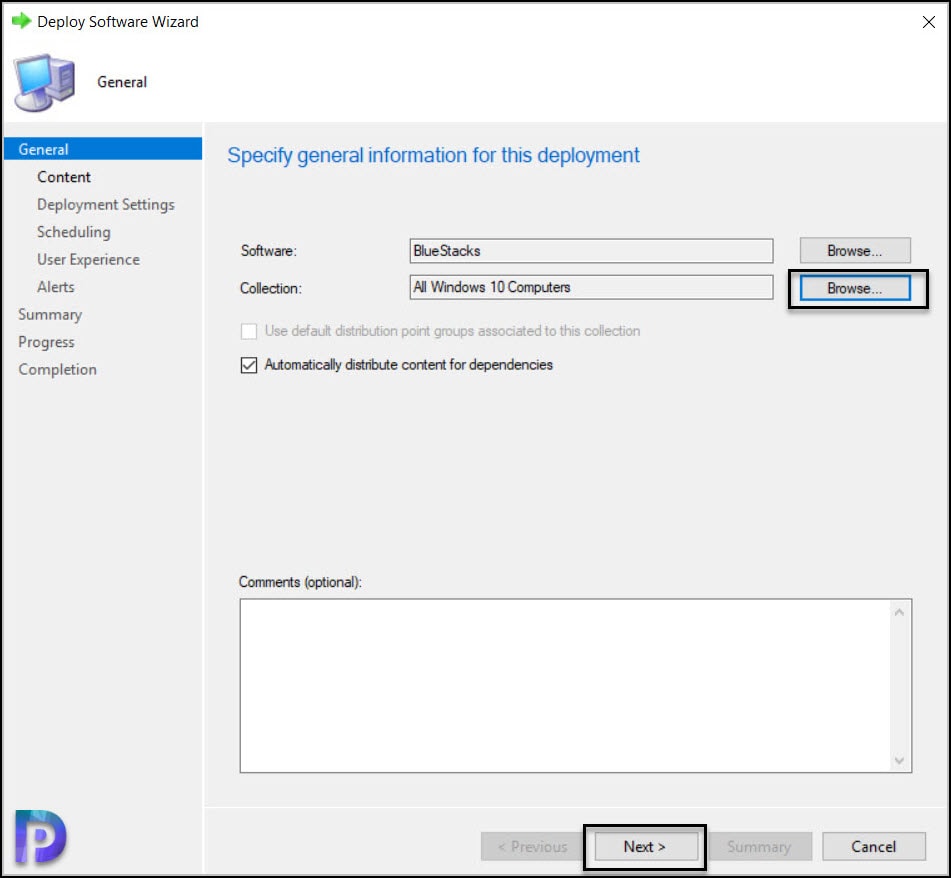
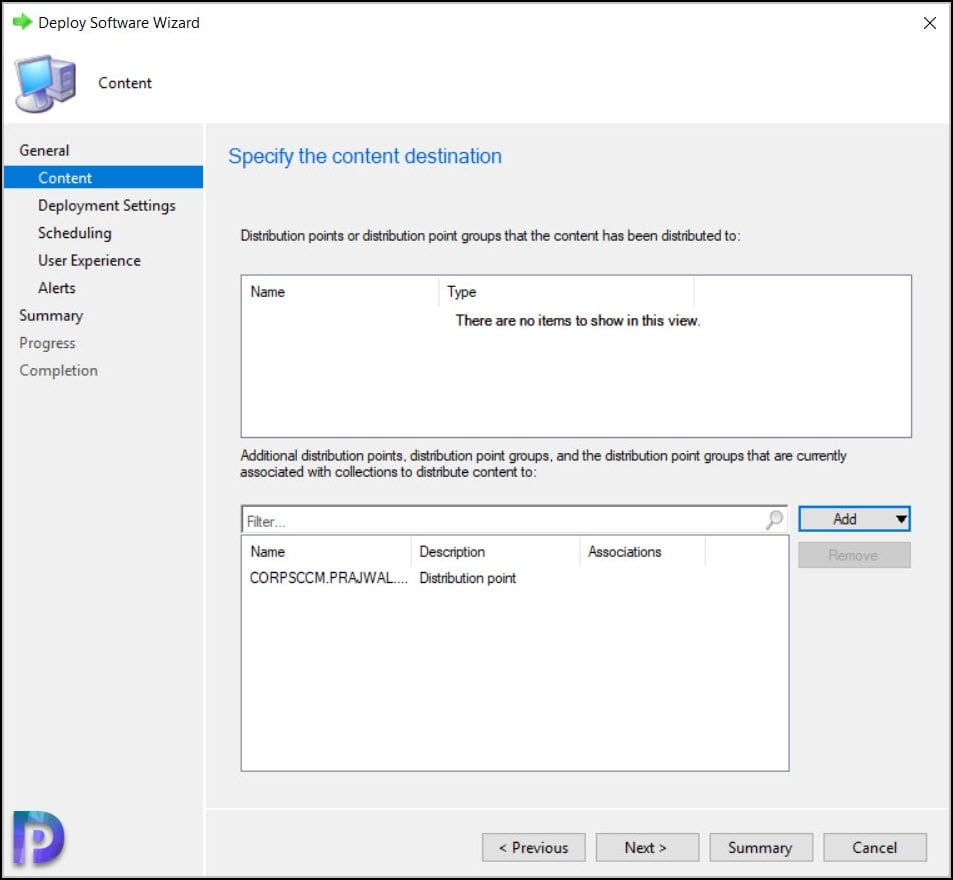
On the Content window, ensure you distribute the BlueStacks application to all ConfigMgr distribution point servers. Click Next.
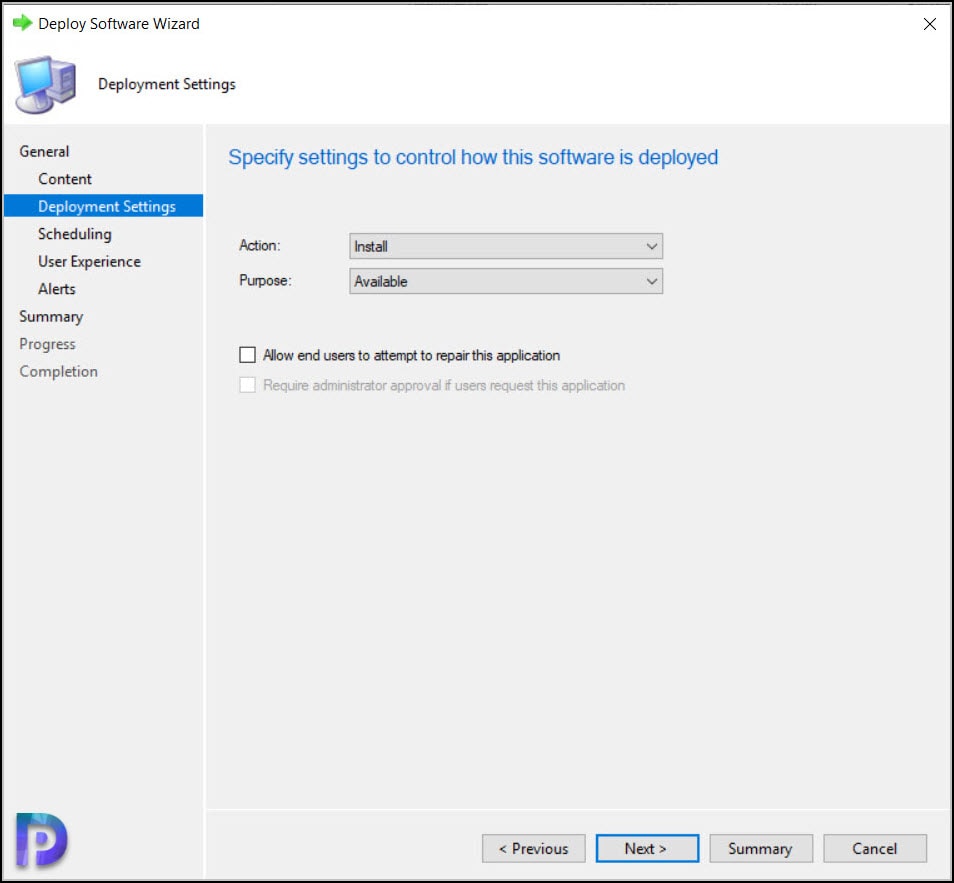
Specify the deployment settings based on your requirements. I am going to make the BlueStacks application available in Software Center. Click Next.
Complete the remaining steps and on Completion Window, click Close. The steps to deploy BlueStacks using ConfigMgr is now complete. In the next step we will test the BlueStacks application install and uninstall.

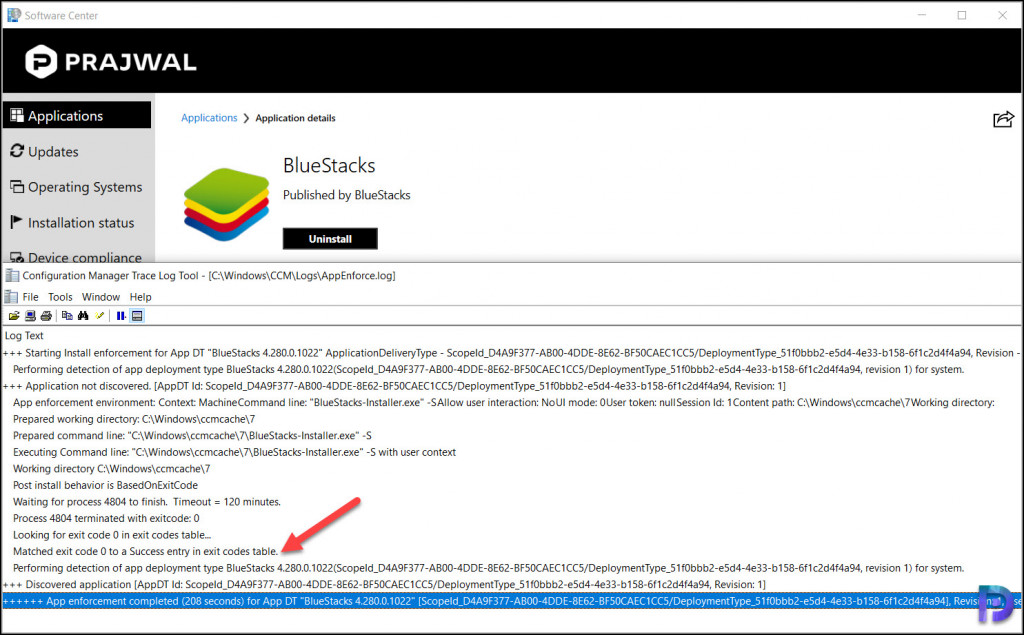
Launch the Software Center on Windows 10 client. Click Applications and from the list of apps, select BlueStacks and click Install. The client downloads BlueStacks application from ConfigMgr distribution point and install it.
The BlueStacks application installed successfully. This can also be verified from the SCCM log files.
You can monitor the application install progress by opening the AppEnforce.log file. This log file is located on the client computer in the following location – C:\Windows\CCM\Logs.
Prepared working directory: C:\Windows\ccmcache\7
Prepared command line: "C:\Windows\ccmcache\7\BlueStacks-Installer.exe" -S
Executing Command line: "C:\Windows\ccmcache\7\BlueStacks-Installer.exe" -S
Working directory C:\Windows\ccmcache\7
Post install behavior is BasedOnExitCode
Waiting for process 4804 to finish.  Timeout = 120 minutes.
Process 4804 terminated with exitcode: 0
Looking for exit code 0 in exit codes table
Matched exit code 0 to a Success entry in exit codes table.
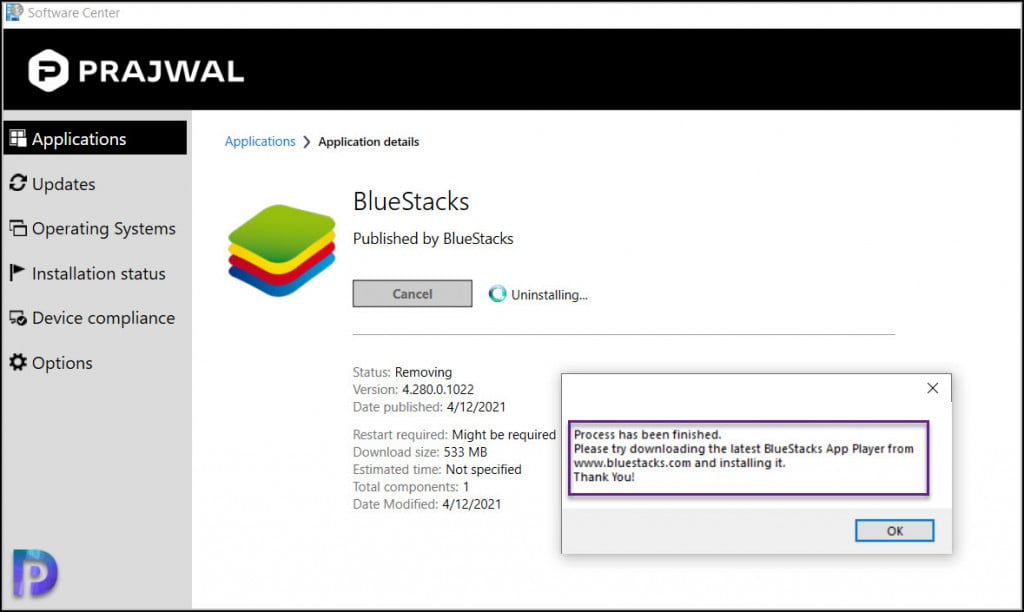
Let’s test the BlueStacks uninstall. Select BlueStacks application and click Uninstall. The BstCleaner_native.exe uninstalls the BlueStacks application. One thing that we see here is it launches a confirmation window after the uninstallation is complete.
Prepared working directory: C:\Windows\ccmcache\7
Prepared command line: "C:\Windows\ccmcache\7\BstCleaner_native.exe"
Executing Command line: "C:\Windows\ccmcache\7\BstCleaner_native.exe"
Working directory C:\Windows\ccmcache\7
Post install behavior is BasedOnExitCode
Waiting for process 2216 to finish.
Process 2216 terminated with exitcode: 0
Looking for exit code 0 in exit codes table…
Matched exit code 0 to a Success entry in exit codes table.