If you have got laptops with Intel vPro feature then you must explore more about this feature. This post shows the steps to configure Intel vPro AMT KVM feature. This will allow admins to remote control a device even if the OS isn’t running on it. One of the most popular features of an Intel vPro device is remote access via KVM. KVM stands for remote Keyboard, Video, Mouse. Furthermore Intel vPro KVM feature provides KVM over IP with no additional equipment required.
For more information about remote configuration for Intel AMT you can visit this link. Once you enable Intel vPro AMT KVM feature, you can remotely control the computer. Imagine a scenario where you have a remote site and there is no local IT present. The SCCM OSD is failing at remote site and you have no idea how you can fetch logs. Most of all once you configure Intel vPro AMT KVM, you need not physically visit the machine to troubleshoot issues.
What is Intel AMT ?.
What is Intel vPro ?.
Configure Intel vPro AMT KVM – SCCM Remote OSD Troubleshooting
Here are the steps to configure Intel vPro AMT KVM on a vPro supported machines.
The below steps are configured on Dell E7270 model laptop. Ensure that LAN cable is connected to laptop. Power on the laptop and press F12 at start up. On boot selection screen choose Intel(R) Management Engine BIOS Extension (MEBx) and press Enter.
 Select MEBx Login and press Enter.
 Enter the Intel(R) ME Password and press Enter. Note that the factory default password is admin.
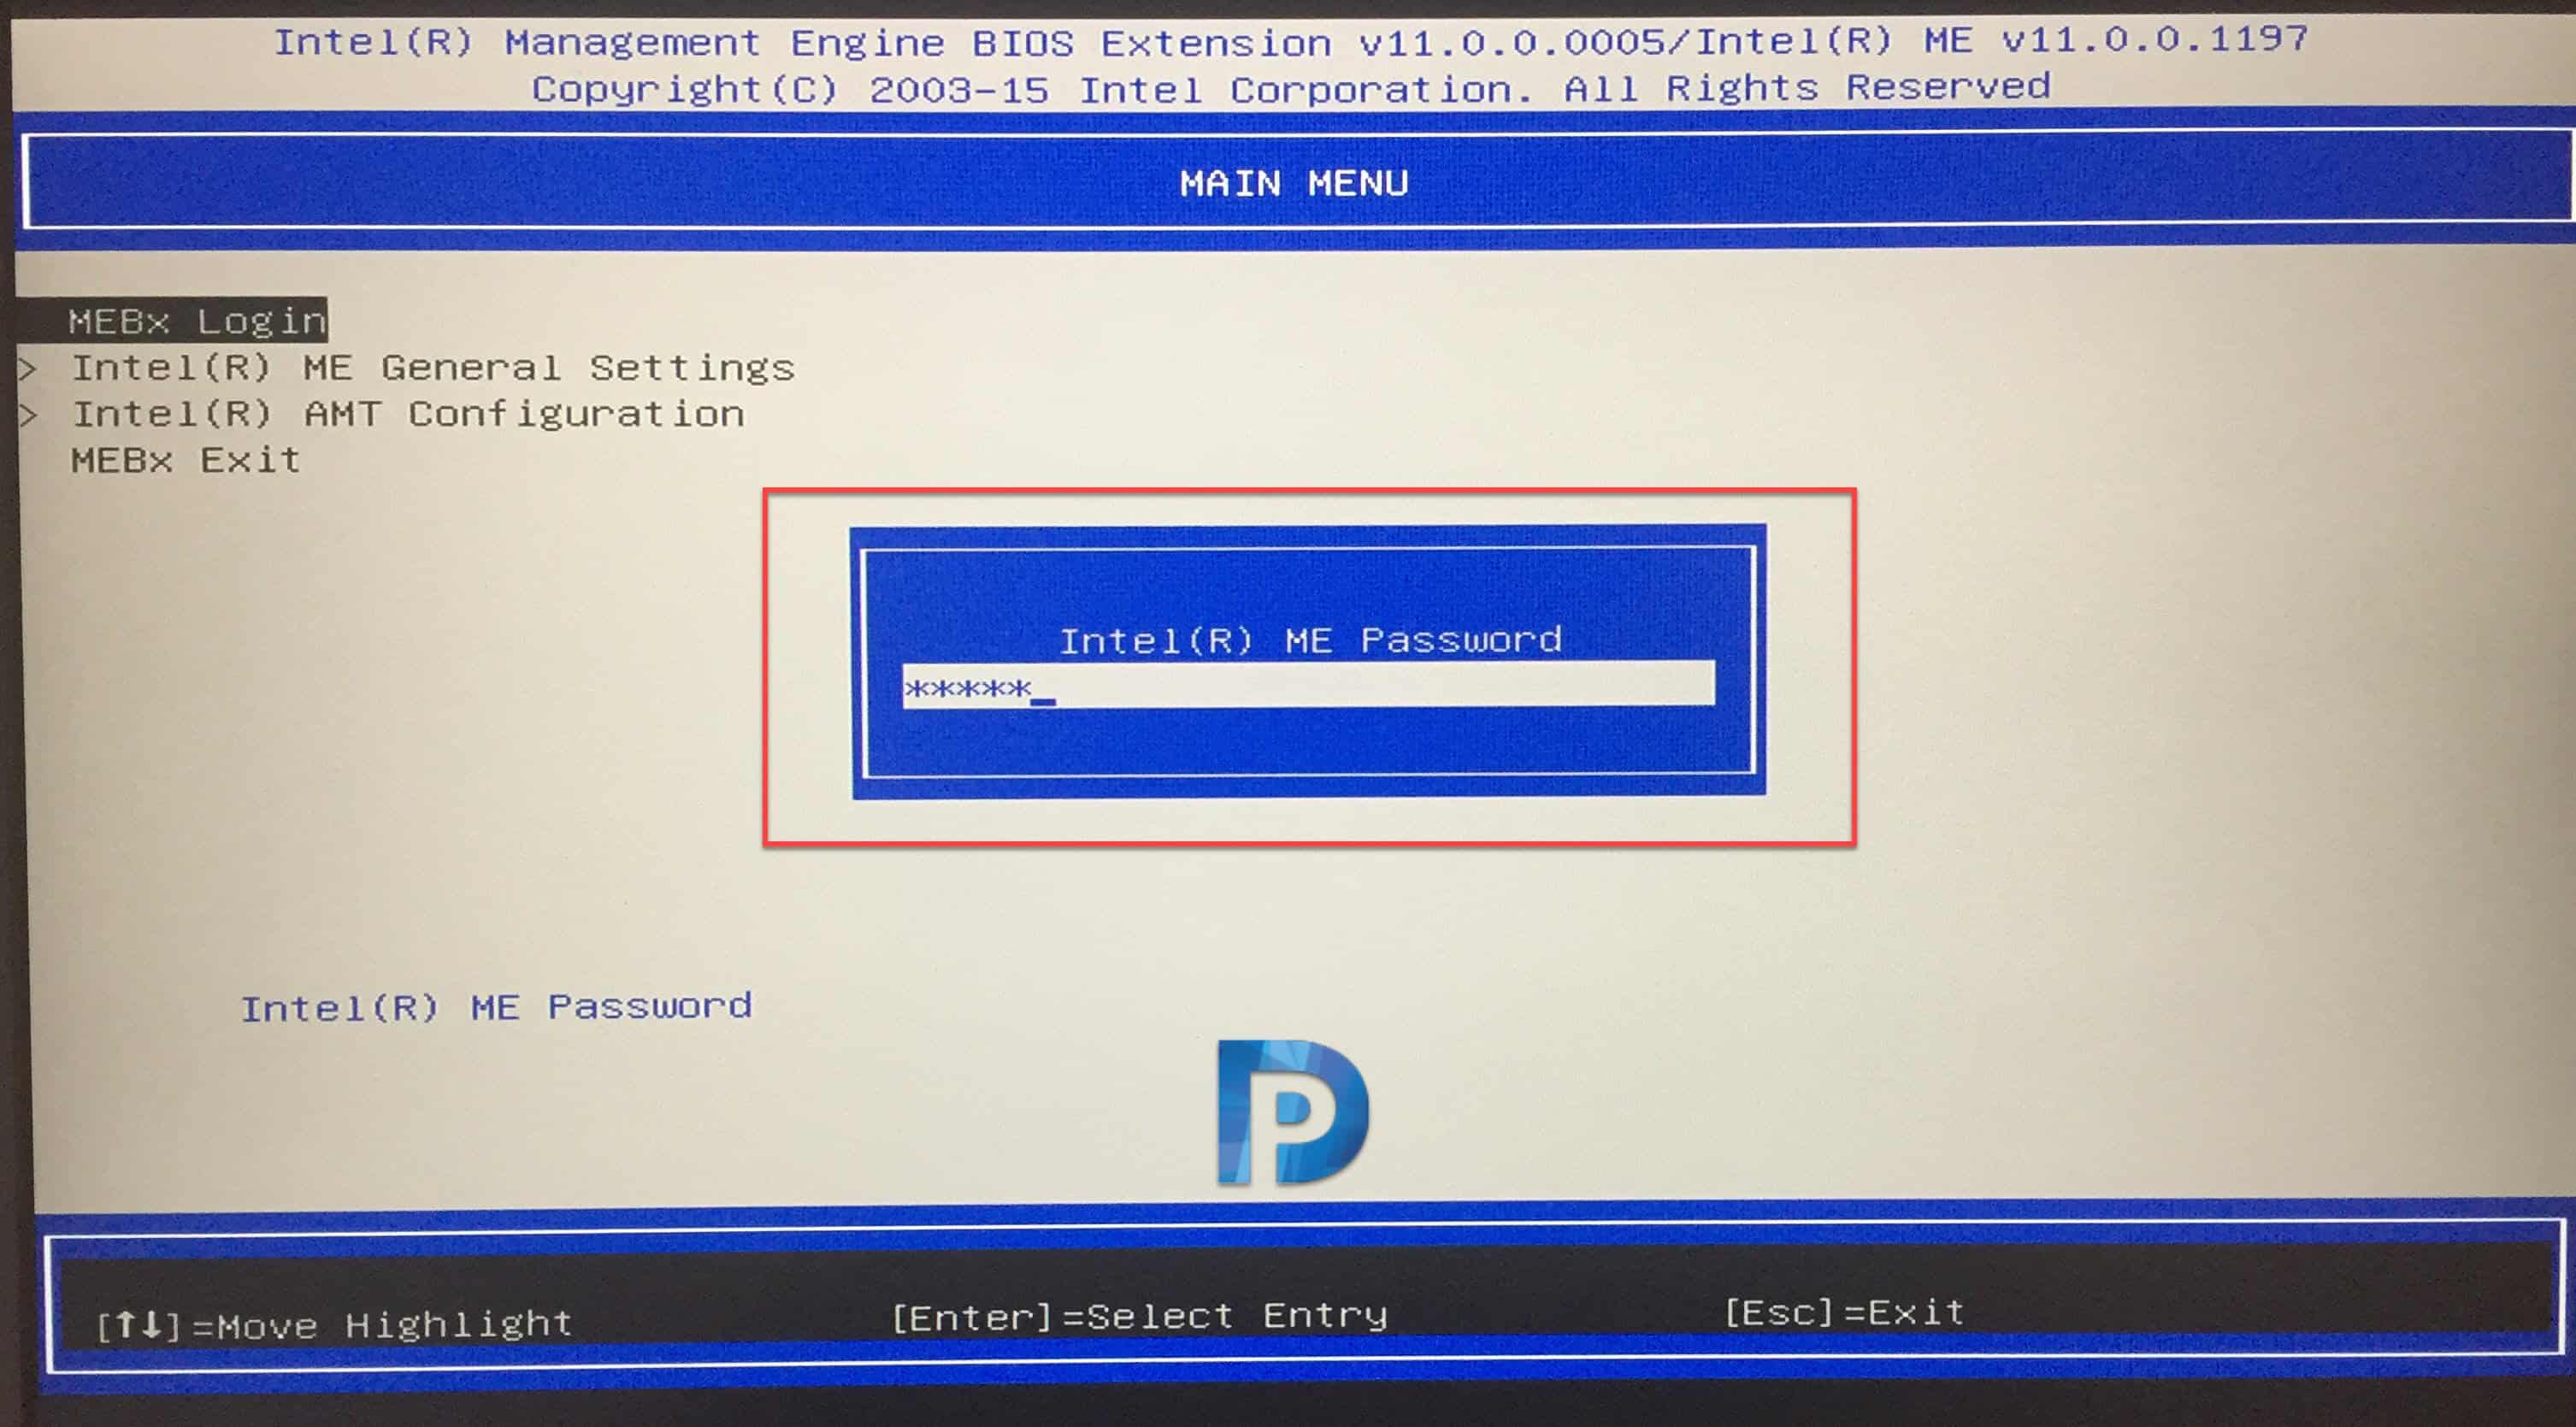 You have to set a new ME password in the next step. Enter a strong password and press Enter.
 Re-enter same complex password and ensure your password is verified.
 Once you setup new ME password, choose Intel(R) AMT configuration.
 From the Intel(R) AMT Configuration main menu, scroll to User Consent, and change the User Opt-in from <KVM> to <None>.
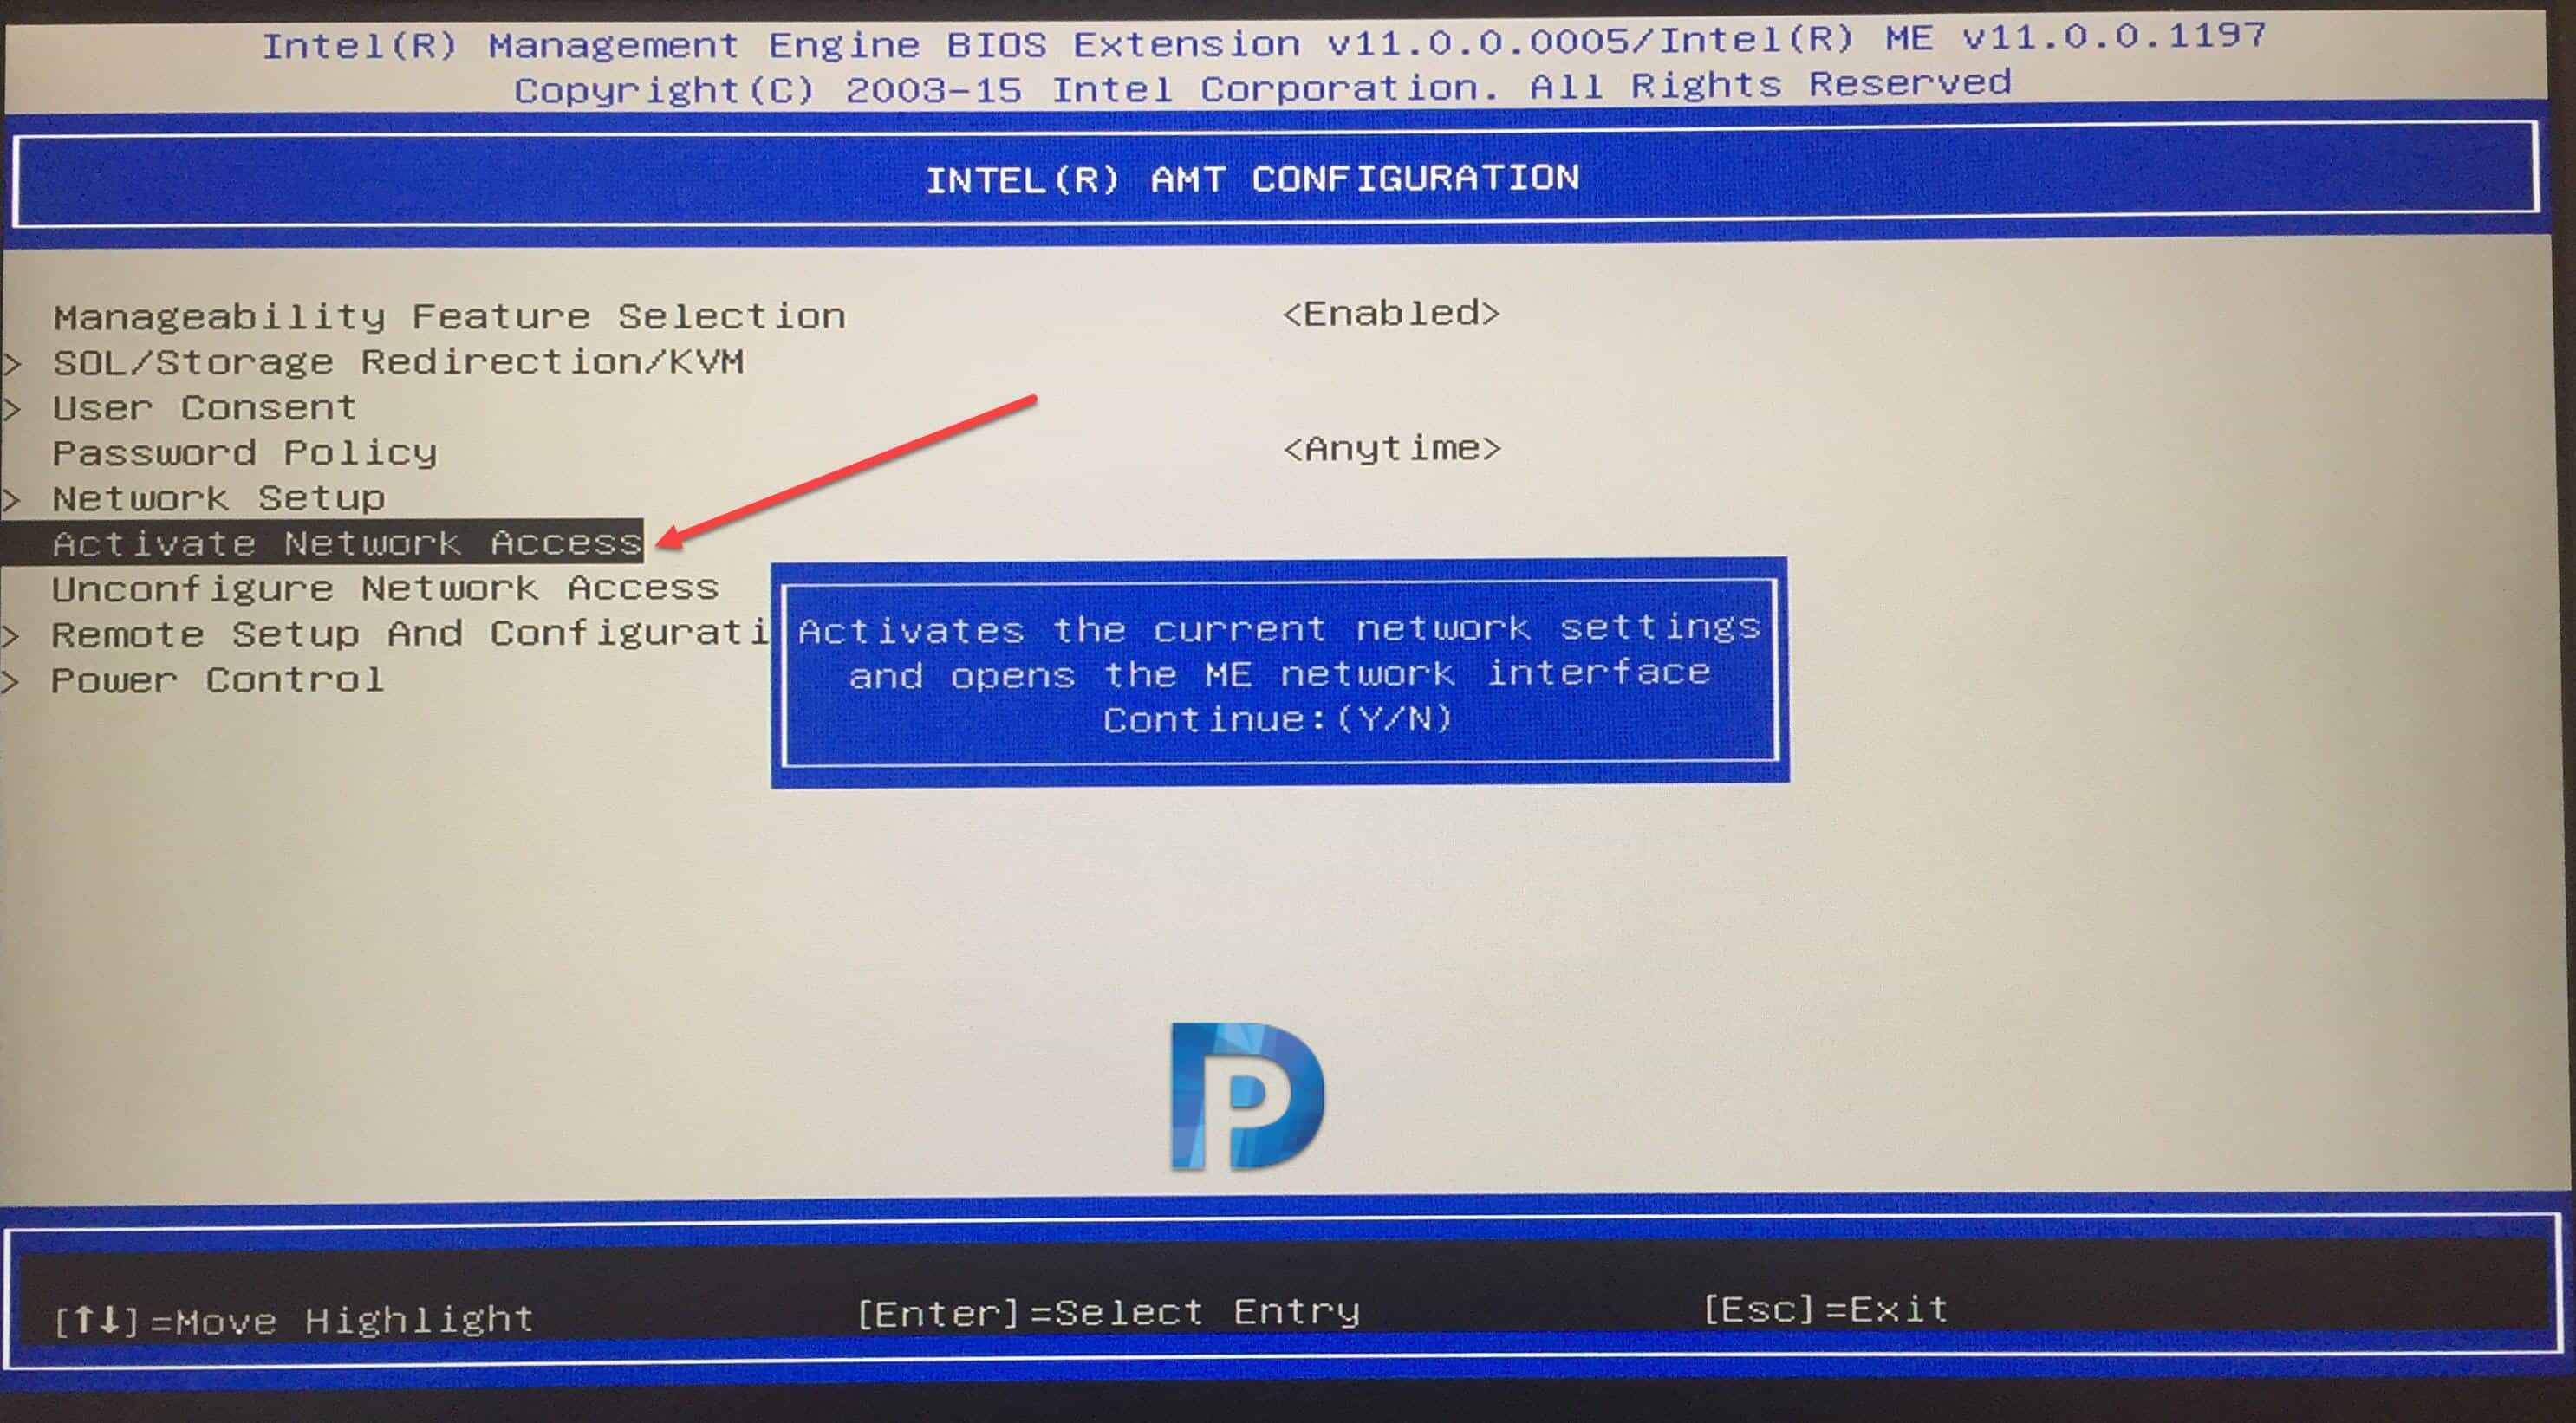
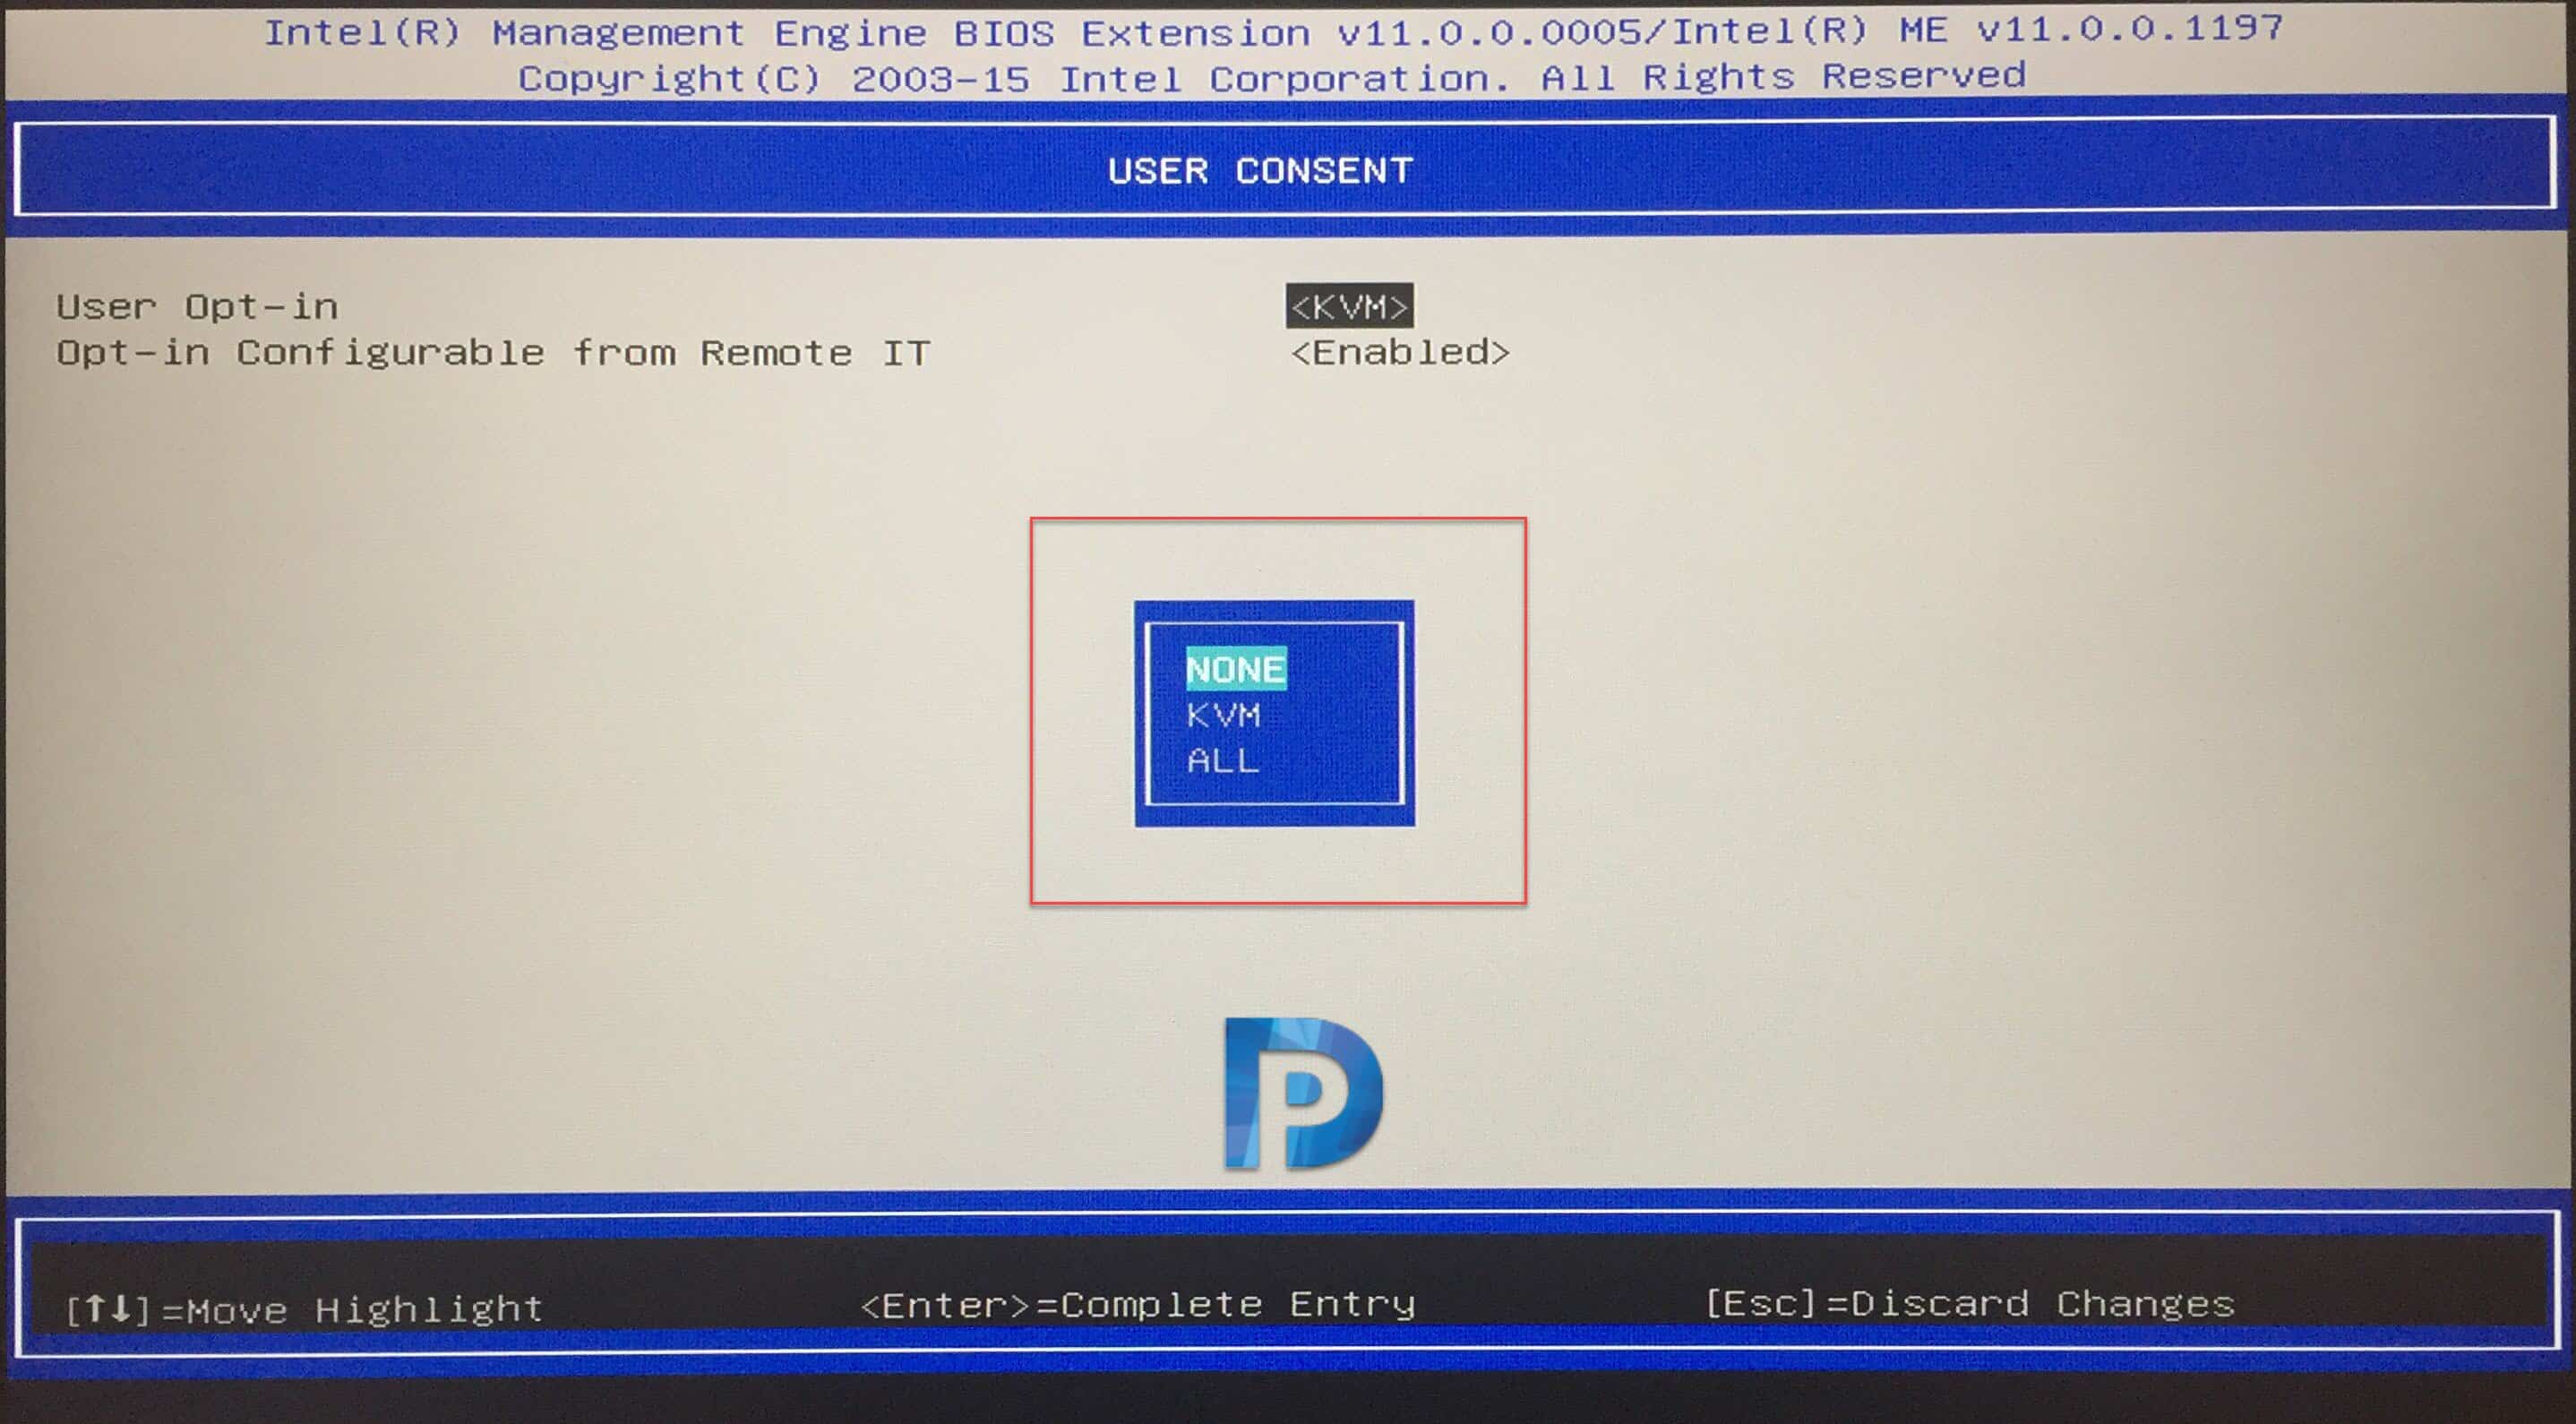 You must Activate Network Access. On the confirmation box press Y to continue.
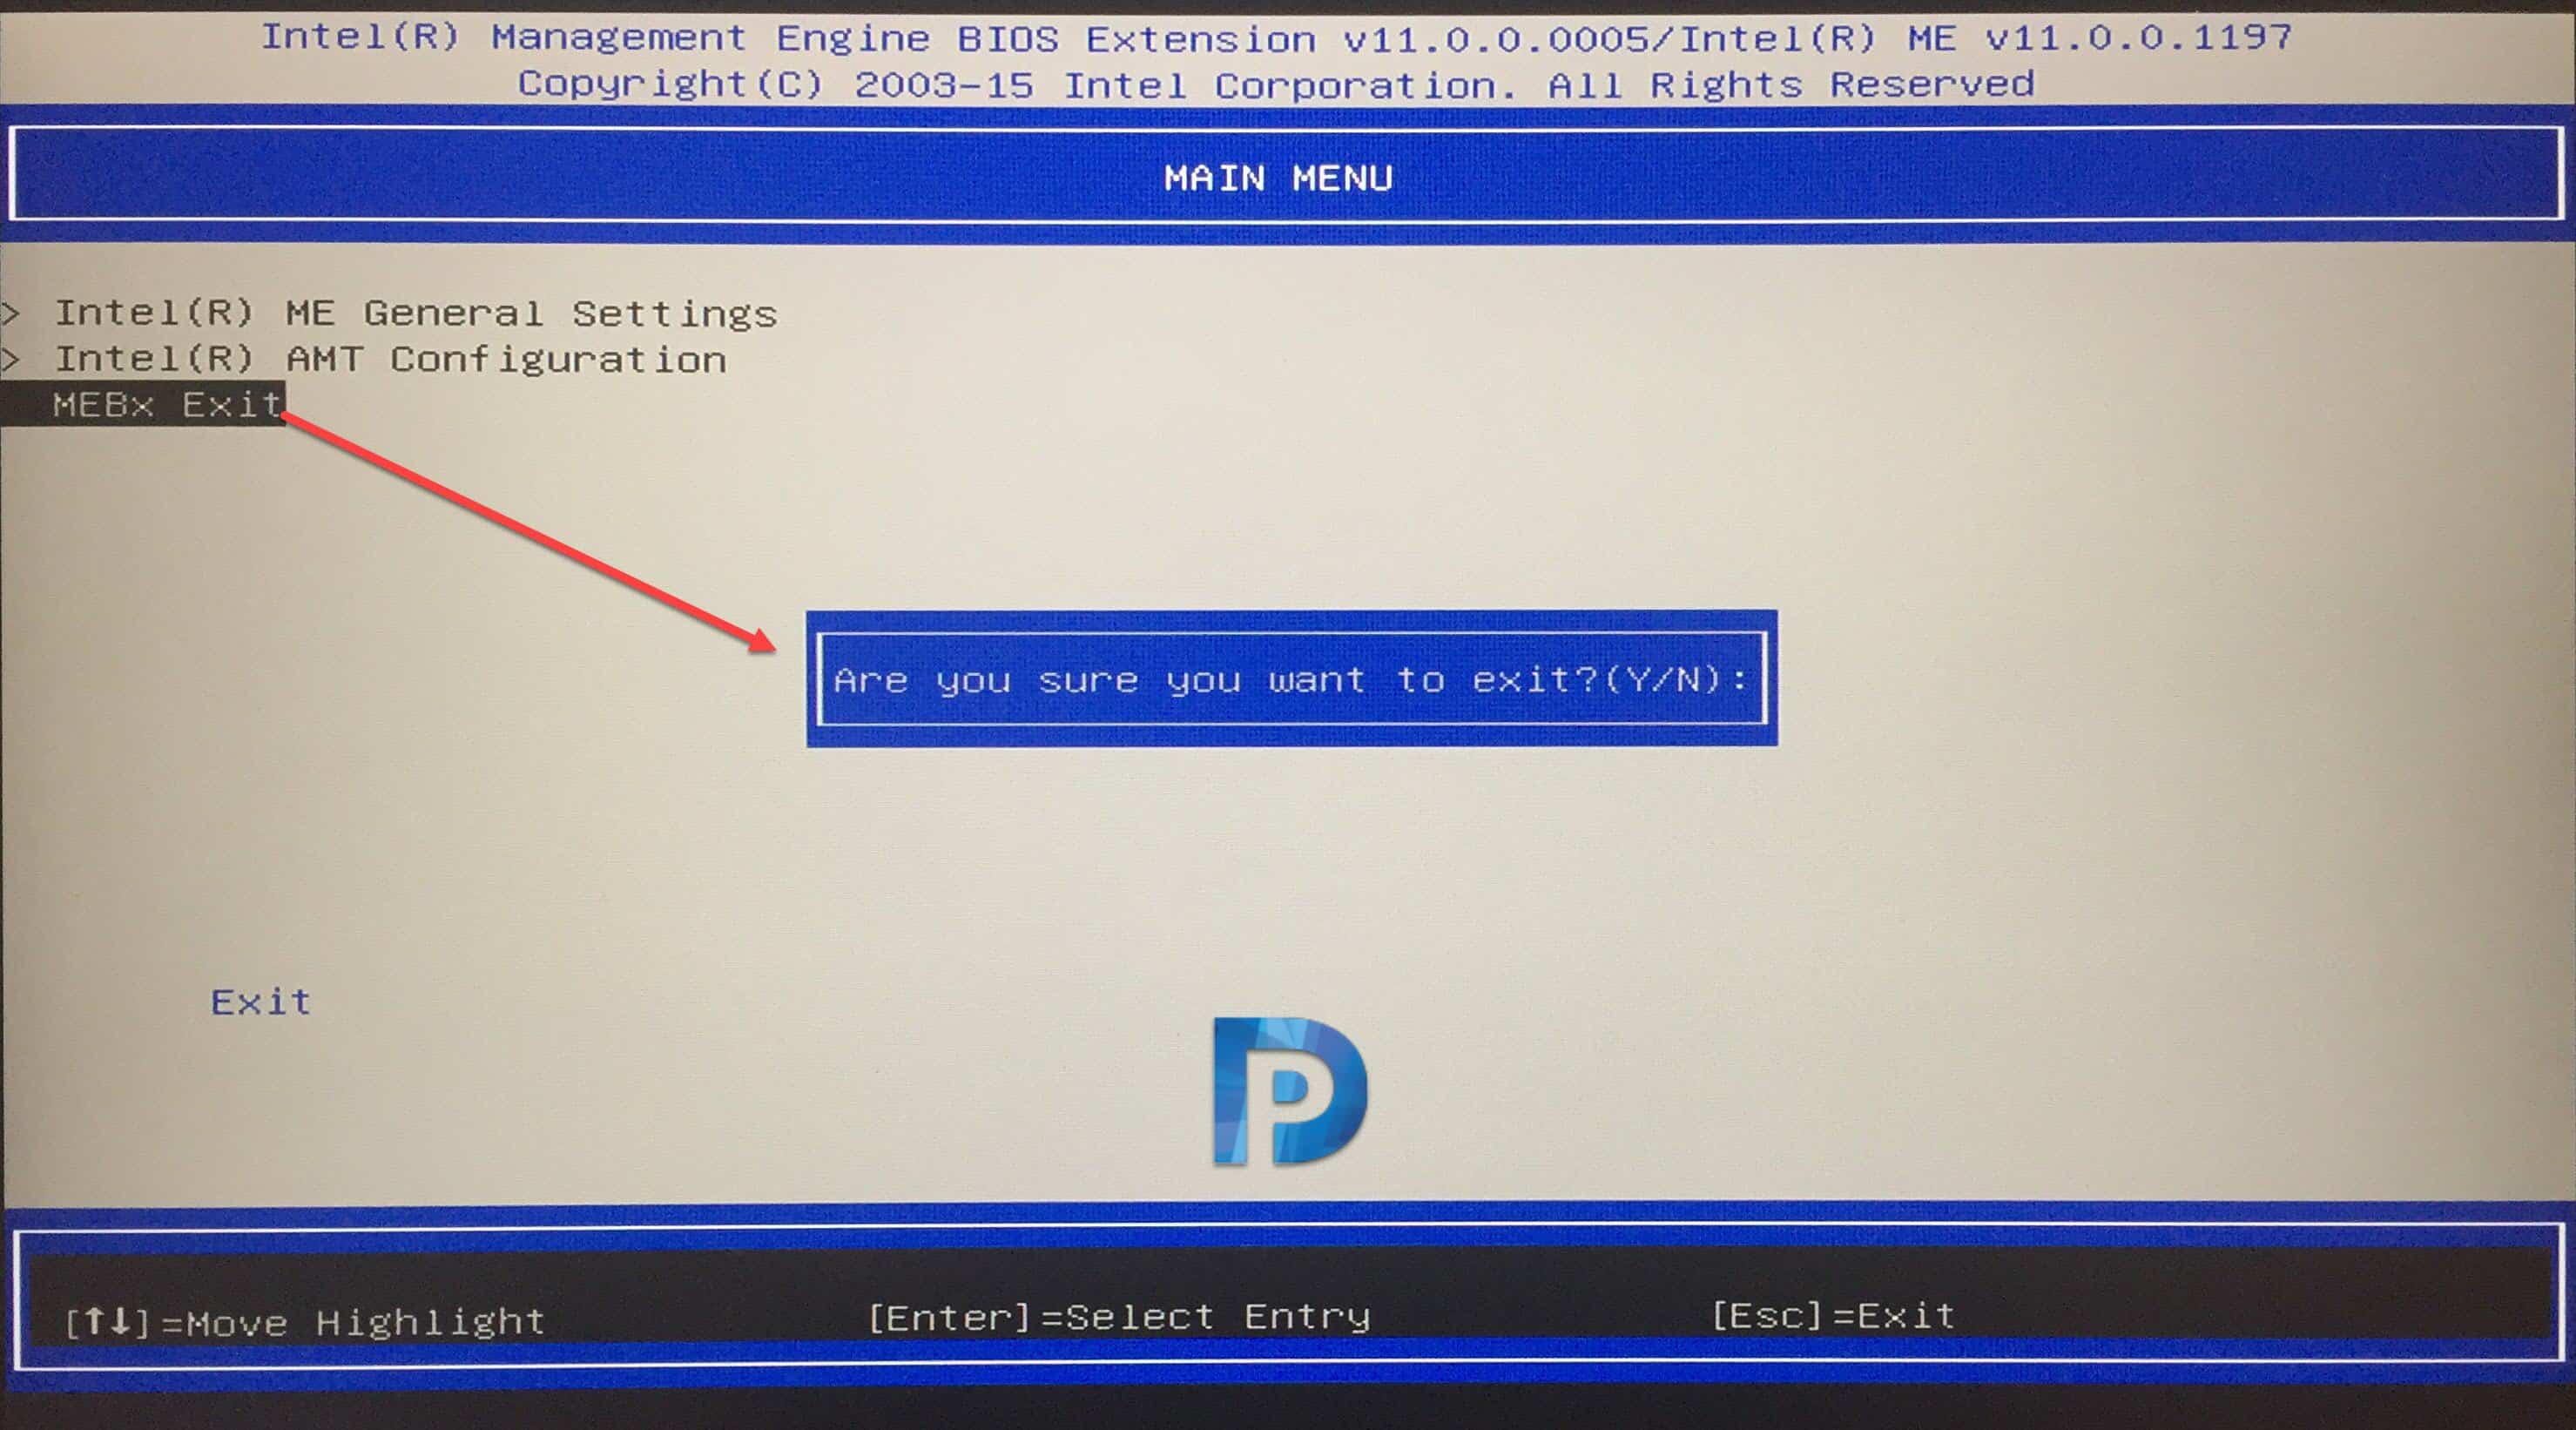
 Select MEBx Exit and type Y to exit. Reboot the laptop once.
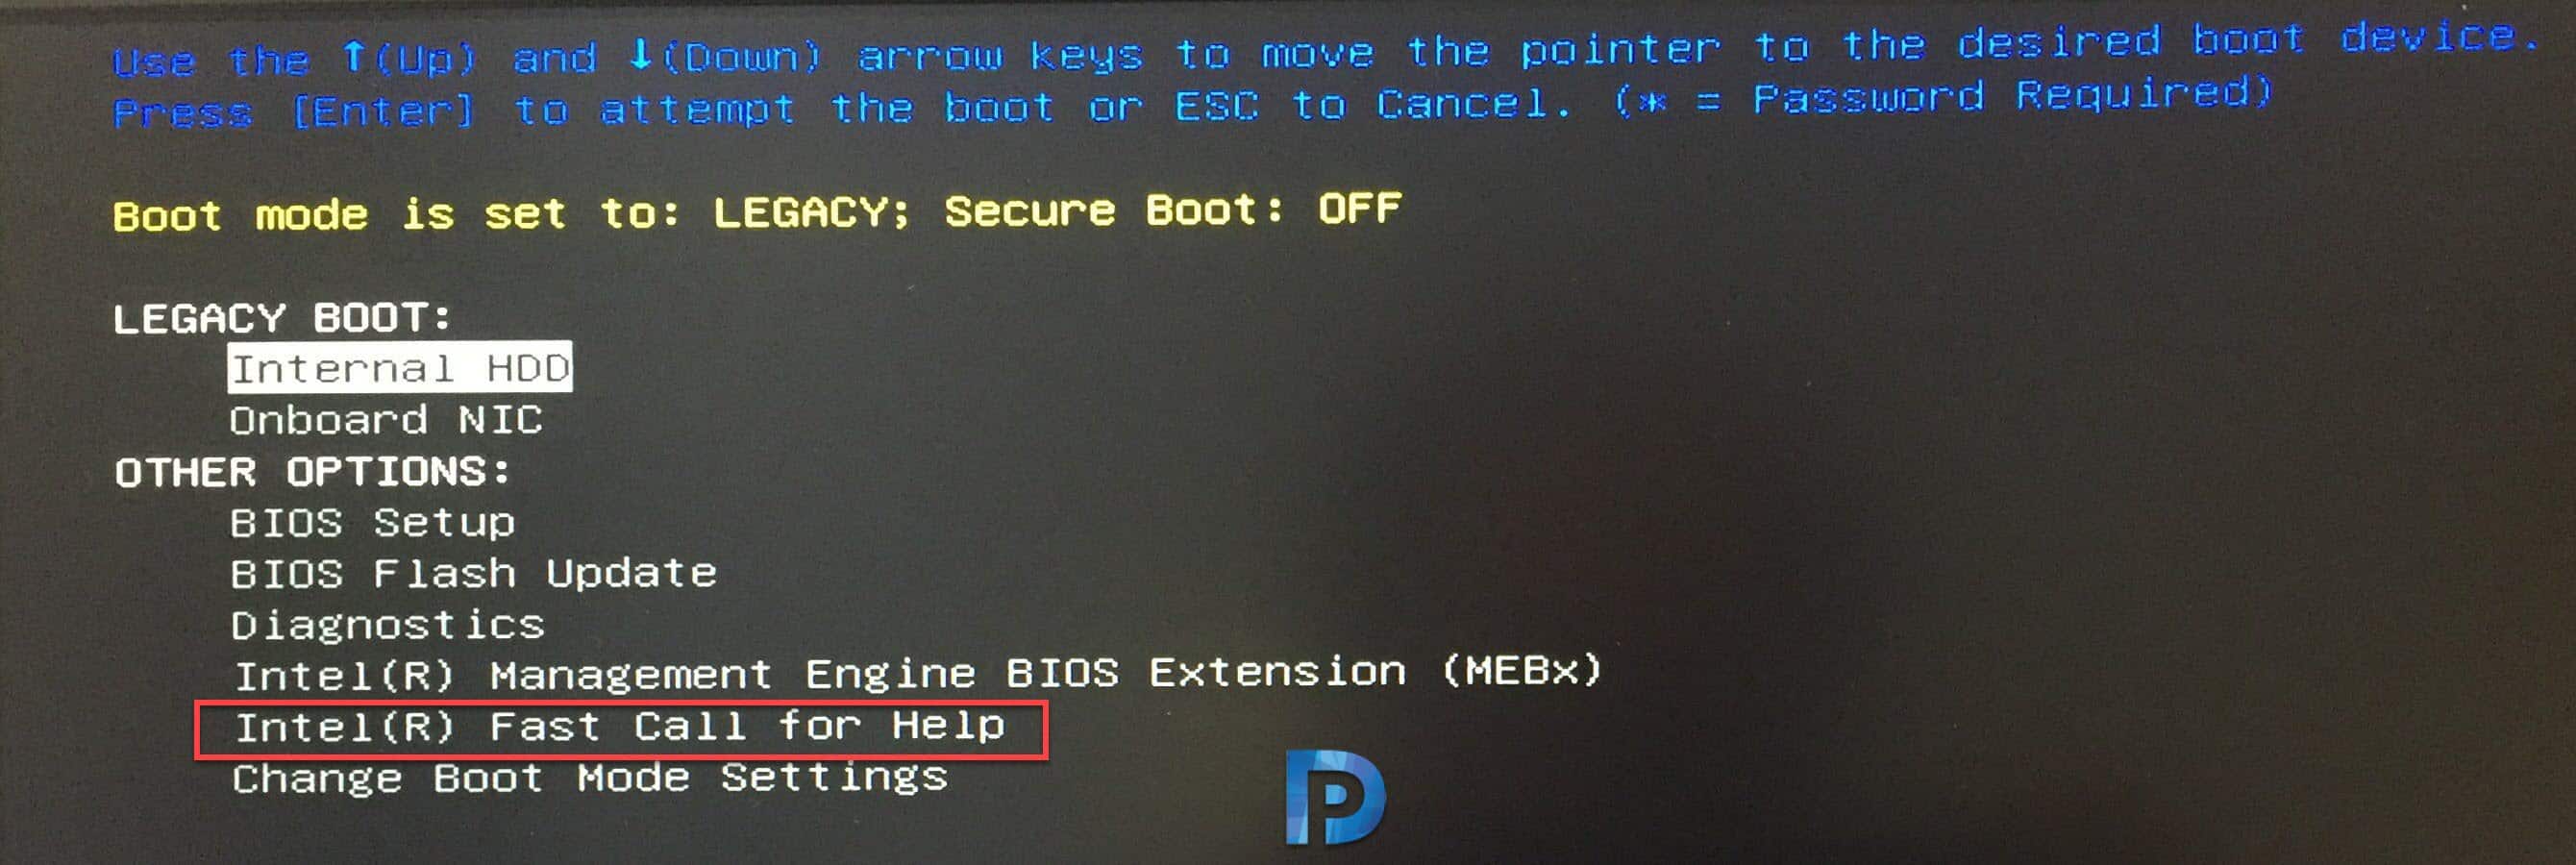
 Press F12 at startup and now you see a new option “Intel(R) Fast Call for Help“. Scroll to this option and press Enter.
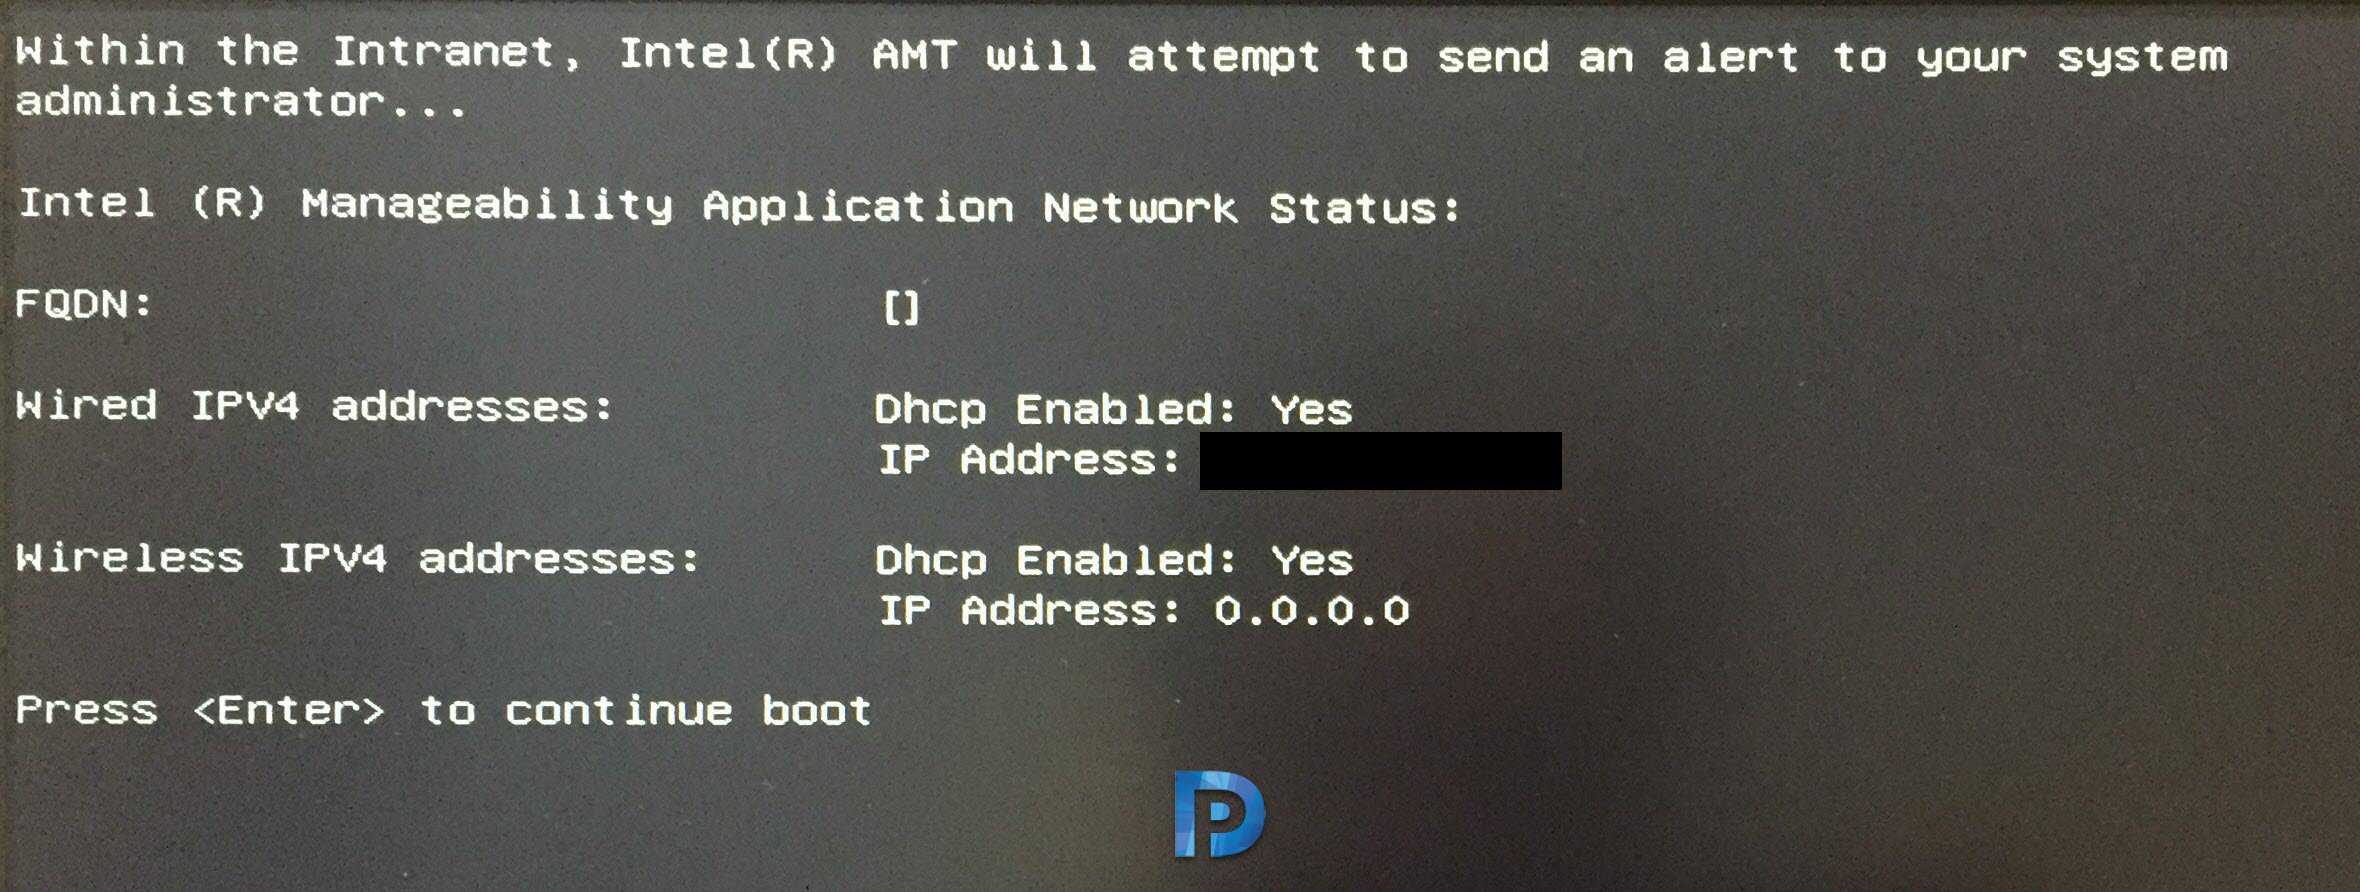
 Using the IP address (assigned by DHCP server) displayed on the screen, you can use multiple tools to connect to this laptop. In the upcoming post we will discuss Intel AMT tools. We will also see the actions that can be performed remotely using those tools.

