This post shows how to install SCCM current branch 1710 hotfix rollup. If you have SCCM current branch updated to version 1710, there is a hotfix rollup KB4057517 available. Most of all this is the first hotfix rollup released for SCCM current branch 1710. As always you can download and install this update under Updates and Servicing node of SCCM console. The SCCM Configuration Manager build numbers are documented here.
The link points to Microsoft article that lists the issues that are fixed in SCCM Current Branch 1710 Hotfix Rollup KB4057517. Installing this rollup should fix lot of issues mentioned in the previous link. You must install this update first on primary sites. Furthermore pre-existing secondary sites should be manually updated.
How to Install SCCM Current Branch 1710 Hotfix Rollup
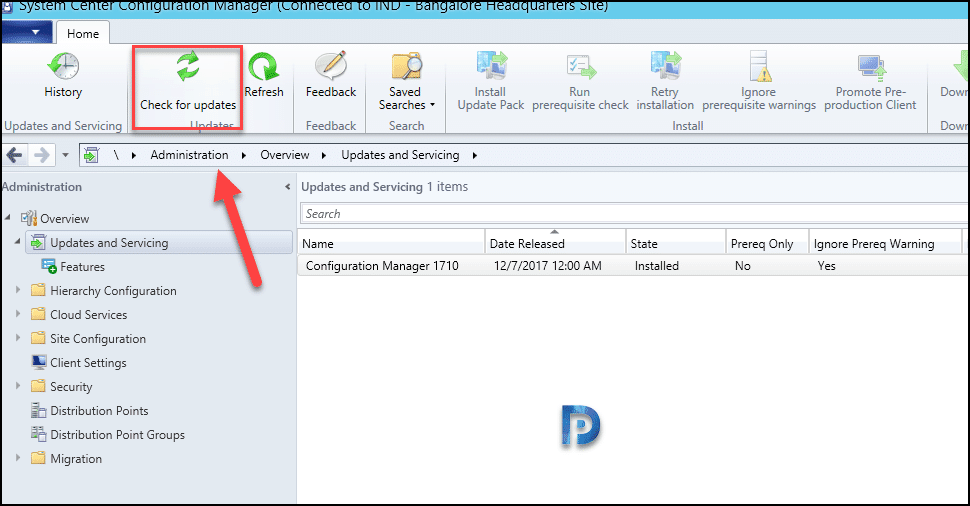
The steps to install SCCM Current Branch 1710 Hotfix Rollup are as follows. Launch SCCM console and go to Administration > Cloud Services > Updates and Servicing. If you don’t see the hotfix, click Check for updates.
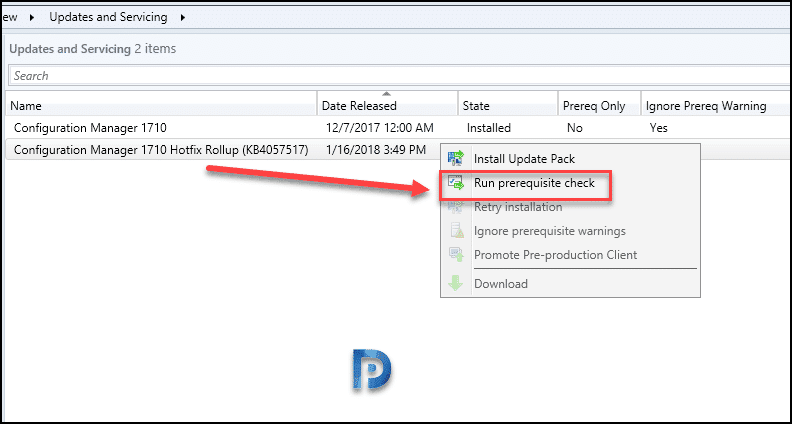
 Once the rollup is available under updates and servicing, right click the update and click Run prerequisite check.
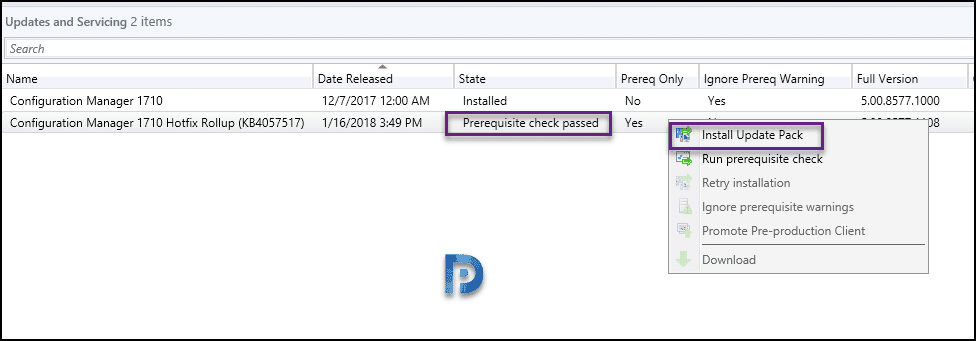
 Once the update state shows “Prerequisite check passed“, right click Configuration Manager 1710 hotfix rollup and click Install Update Pack.
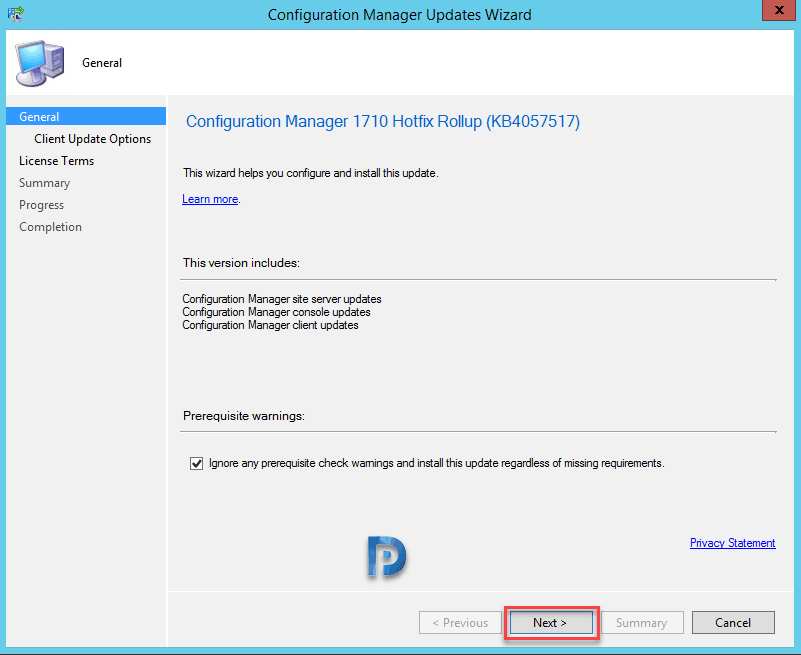
 You will now see updates installation wizard. On General page click Next.
 For Client Update Options, i will choose Upgrade without validating. Click Next.
 In the next step accept the license terms and click Next on Summary and Progress page. Finally on Completion page click Close.
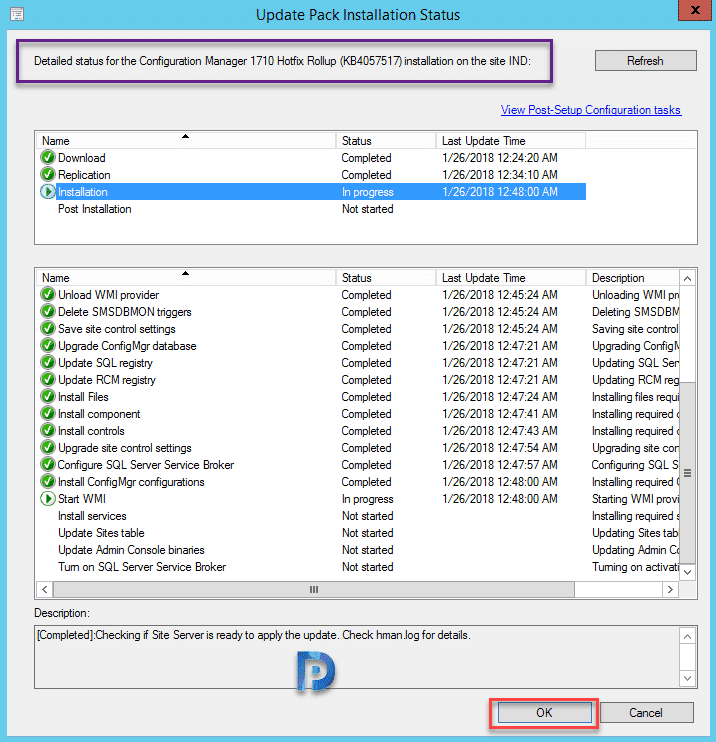
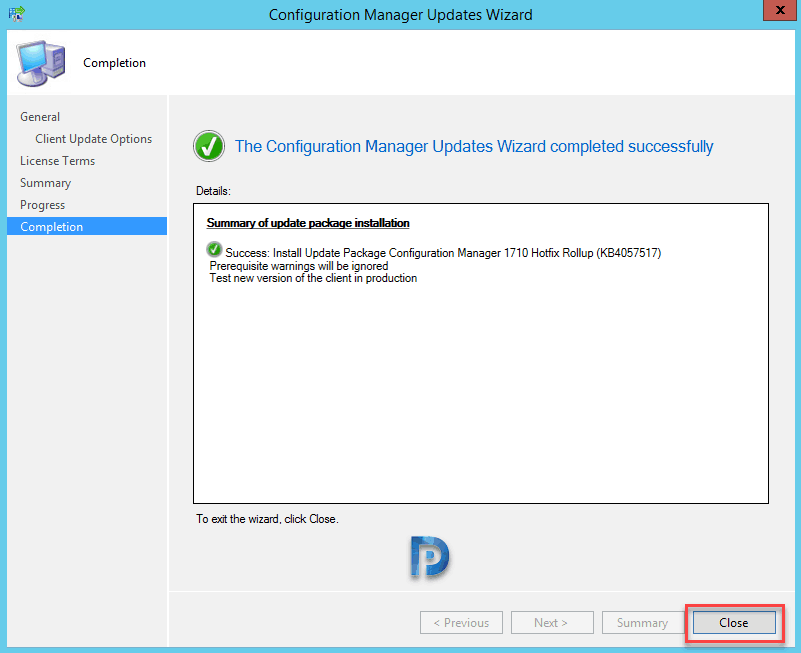 The Configuration Manager 1710 hotfix rollup is now being installed. To monitor the installation of SCCM 1710 hotfix rollup go to Monitoring > Site Servicing Status. Right-click Configuration Manager 1710 update and select Show Status. You can also open CMUpdate.log file using CM trace log tool to monitor rollup installation.
 Updating SCCM Console
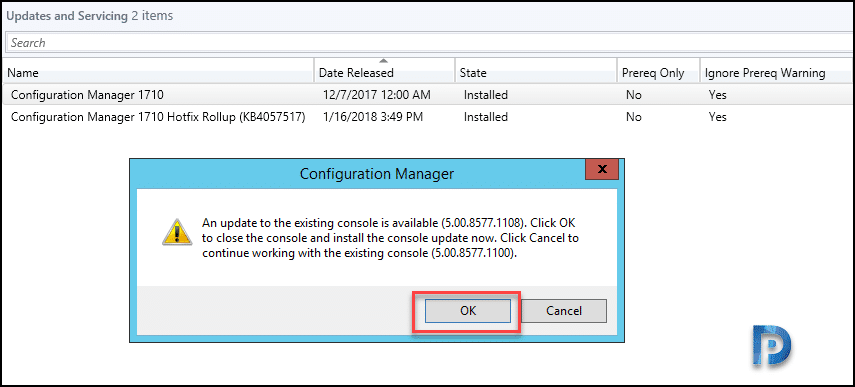
Post the installation of hotfix rollup, refresh the console “or” close and reopen the console. Click OK to update existing console from version 5.00.8577.1100 to 5.00.8577.1108.
 Wait for the console update to complete and on final setup screen click Finish.
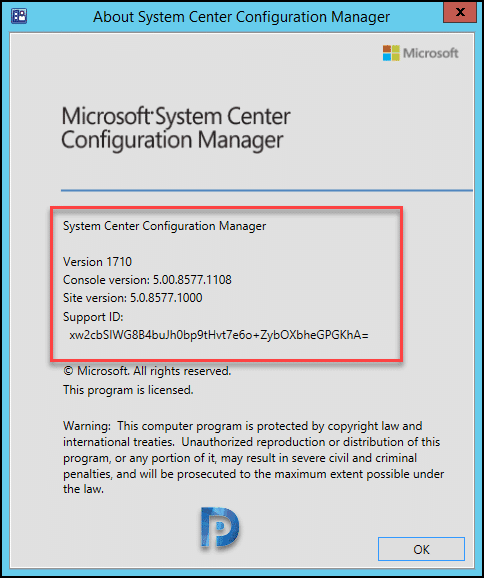
 Checking About System Center Configuration Manager shows the following.
Version – 1710
Console version – 5.00.8577.1108
Site version – 5.0.8577.1000
Click OK to close the box.
 Go to Software Library > Application Management > Packages. Look for Configuration manager client update packages. Update the packages to distribution points.
Updating Clients with SCCM 1710 Hotfix rollup
To update clients with SCCM 1710 hotfix rollup you should enable client upgrade feature under Hierarchy Settings. This is applicable for whole site, if you had enabled it before then you can ignore this step. Check the box Upgrade all clients in the hierarchy using production client. Set the number of days for client agents to upgrade and click OK.
 post client upgrade, checking the new agent version should show as 5.00.8577.1108.





I’m having an issue with automatic client upgrades after installing this hotfix rollup KB4086143. The ccmsetup.log file on them repeat the following entries every 10 minutes…
Checking the URL ‘HTTPS://TESTSERVER.DOMAIN.PRI:443/CCM_Client/ccmsetup.cab’
Begin searching client certificates based on Certificate Issuers
Certificate Issuer 1 [CN=TSTPKI-CA]
Finding certificate by issuer chain returned error 80092004
Completed searching client certificates based on Certificate Issuers
Unable to find any Certificate based on Certificate Issuers
Locate client certificate bypassing Certificate Issuers restriction
Begin searching client certificates based on Certificate Issuers
Completed searching client certificates based on Certificate Issuers
Begin to select client certificate
The ‘Certificate Selection Criteria’ was not specified, counting number of certificates present in ‘MY’ store of ‘Local Computer’.
There are no certificates in the ‘MY’ store.
MapNLMCostDataToCCMCost() returning Cost 0x1
PROPFIND ‘HTTPS://TESTSERVER.DOMAIN.PRI:443/CCM_Client’
Begin searching client certificates based on Certificate Issuers
Certificate Issuer 1 [CN=TSTPKI-CA]
Finding certificate by issuer chain returned error 80092004
Completed searching client certificates based on Certificate Issuers
Unable to find any Certificate based on Certificate Issuers
Locate client certificate bypassing Certificate Issuers restriction
Begin searching client certificates based on Certificate Issuers
Completed searching client certificates based on Certificate Issuers
Begin to select client certificate
The ‘Certificate Selection Criteria’ was not specified, counting number of certificates present in ‘MY’ store of ‘Local Computer’.
There are no certificates in the ‘MY’ store.
GetSSLCertificateContext failed with error 0x87d00280
GetHttpRequestObjects failed for verb: ‘PROPFIND’, url: ‘HTTPS://TESTSERVER.DOMAIN.PRI:443/CCM_Client’
Failed to check url https://TESTSERVER.DOMAIN.PRI:443/CCM_Client/ccmsetup.cab. Error 0x87d00280
Accessing the URL ‘HTTPS://TESTSERVER.DOMAIN.PRI:443/CCM_Client/ccmsetup.cab’ failed with 87D00280
Next retry in 10 minute(s)…