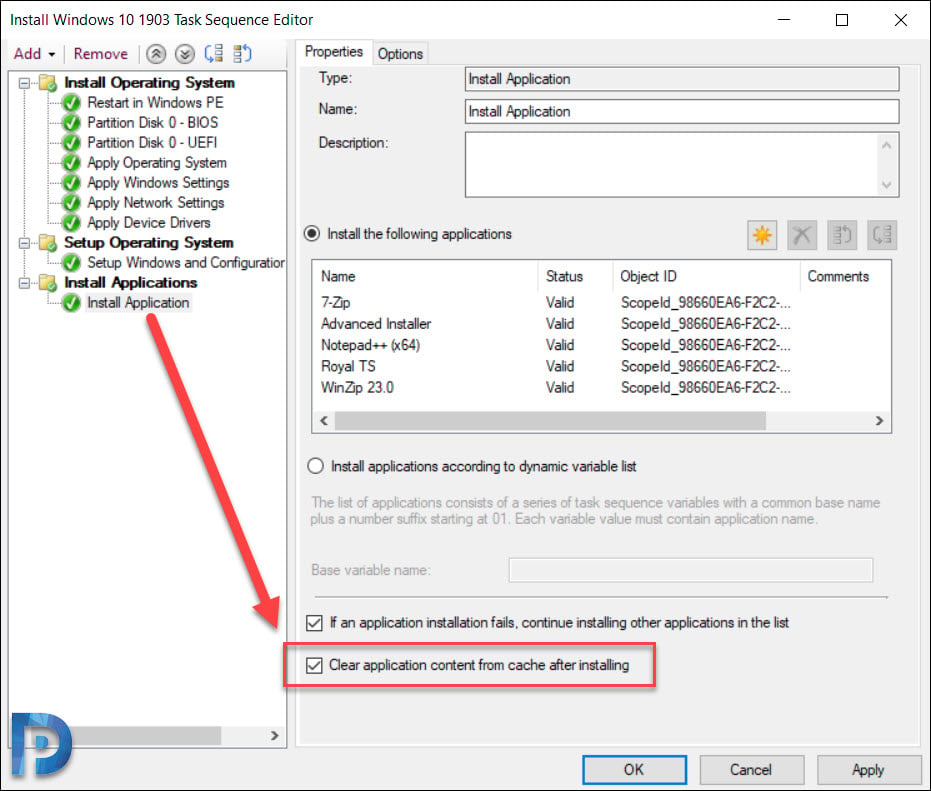
Starting with SCCM 1906 you can delete or clear the application content from the SCCM client cache. In the Install Application task sequence step, you get the option to delete or clear Application content from cache after installing.
I find this option useful when the devices have got small hard drives or when installing lots of large apps in succession.
So what is client cache folder (ccmcache) – In simple terms the client cache is a temporary download location for software, applications and updates deployed to a client. The client cache is located in %windir%\ccmcache.
By default the cache size is 5120 MB which can increased. To increase the client cache size, you can use VBScript, PowerShell or even deploy a package and modify the cache size.
When you deploy multiple large apps to a client, before installing, the client attempts to download content first. If the size of content is greater than the size of the cache, the deployment will fail due to insufficient cache size. In such cases the CAS.log shows “Not enough space in cache”. I am sure we have dealt with this issue and we manually increased the ccmcache folder size to fix this.
Until now there was no way to clear app content from client cache during task sequence. But with SCCM 1906, you should the find the option in task sequence.
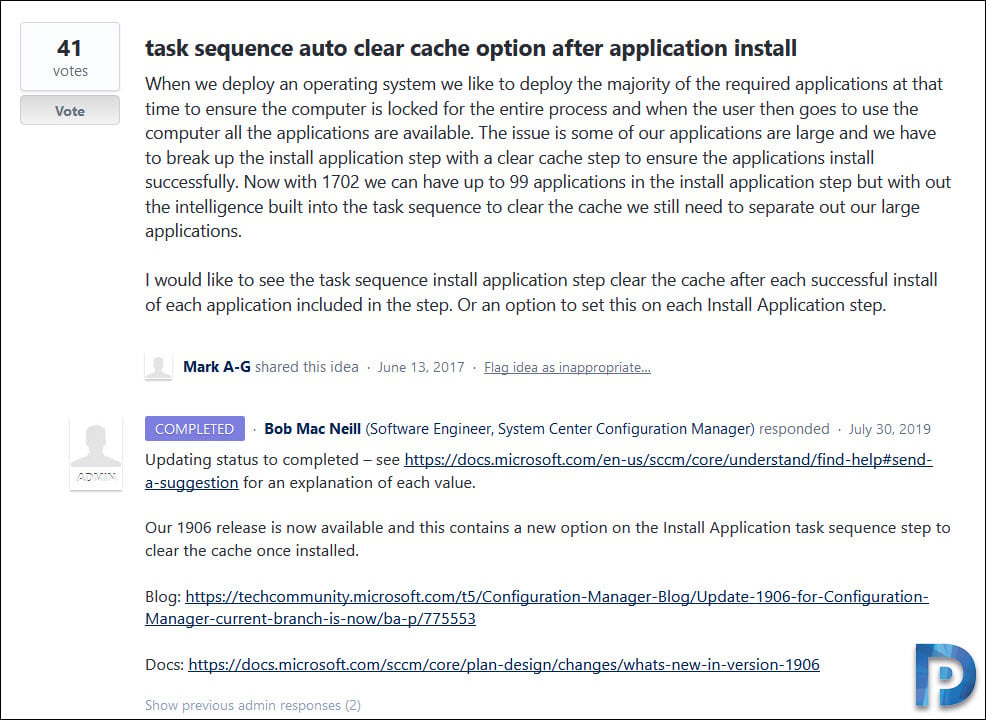
Upon some research I found that this feature was requested by a user. The idea was marked as Completed with a note that 1906 release contains a task sequence step to clear the application content from cache.
How to Clear Application Content from SCCM Client Cache
The procedure to delete or clear application content from SCCM client cache is.
- Launch the SCCM console.
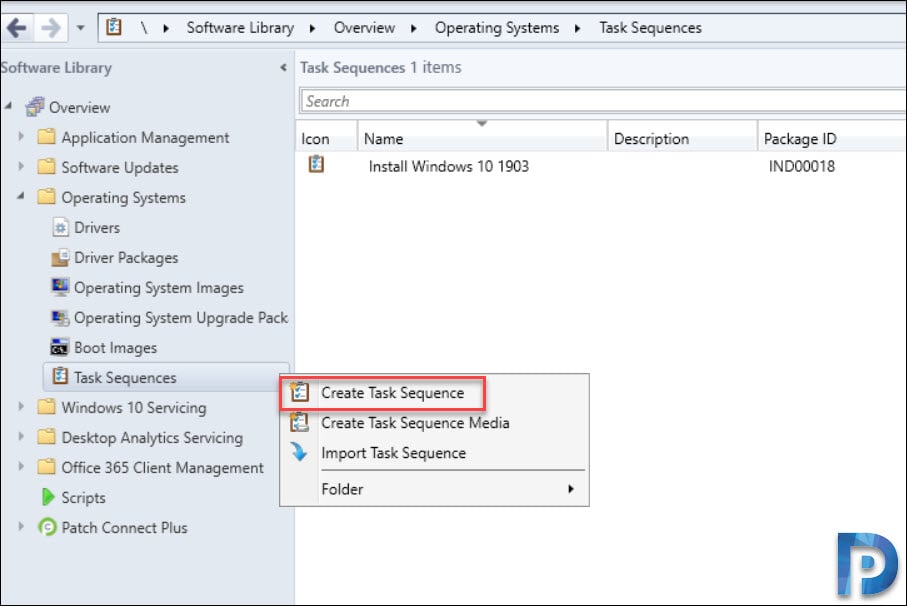
- Navigate to Software Library > Operating Systems > Task Sequences.
- You can either create a new Task Sequence or Edit an existing Task Sequence.
- In the Task Sequence editor, click Add > Software > Install Application.
- Select the applications that you want to deploy to client computer.
- At the bottom, check the box “Clear Application Content from cache after installing“.
Create Task Sequence
To test this feature, let’s create a new task sequence that deploys multiple apps. Furthermore we will enable the clear application content from cache after installing.
Navigate to Software Library > Operating Systems > Task Sequences. Right click Task Sequences and click Create Task Sequence.
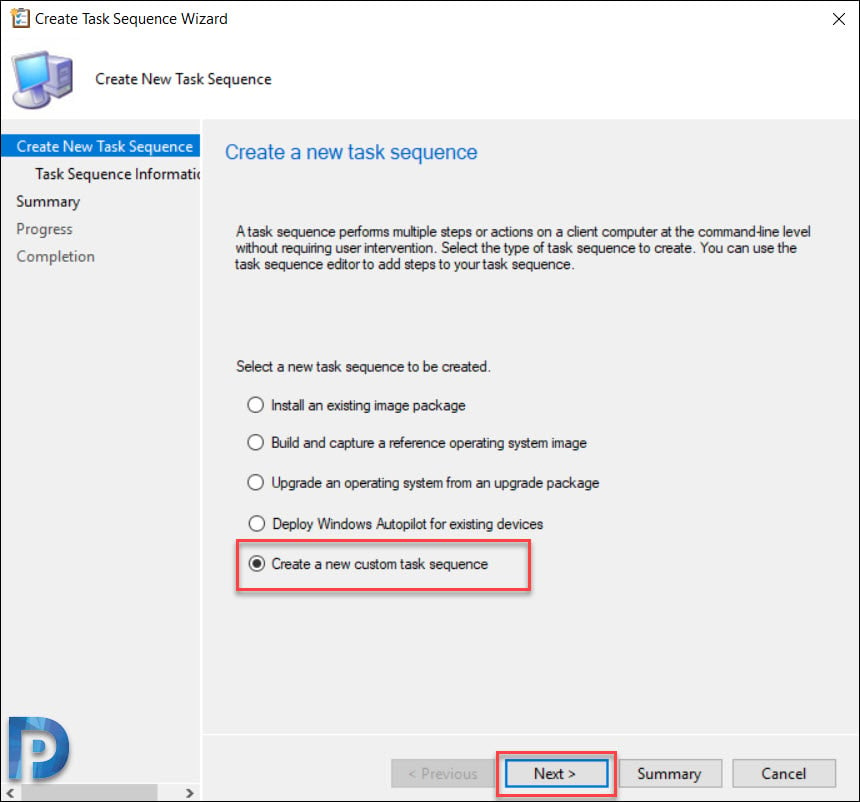
Select Create a new custom task sequence. Click Next.
Specify Task sequence name and click Next.
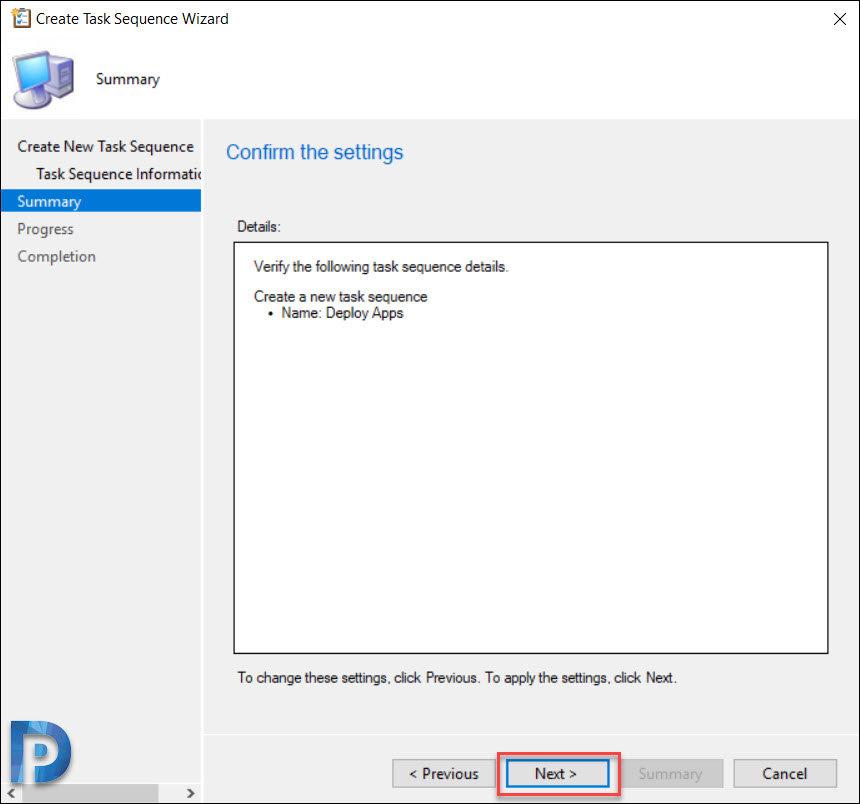
Click Next on the summary page.
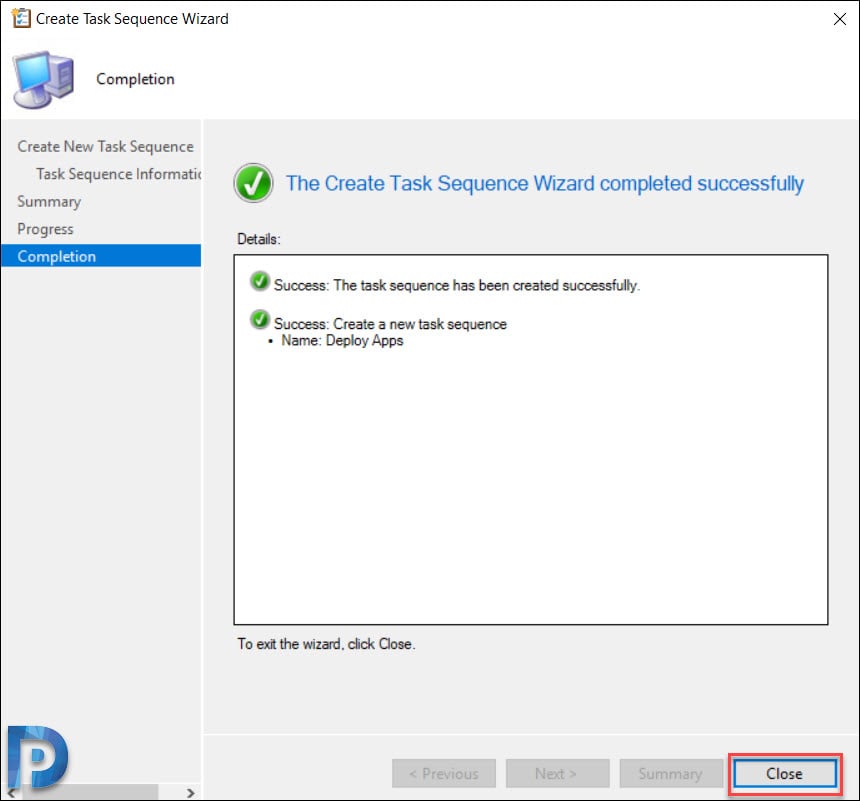
Finally on the Completion window, click Close.
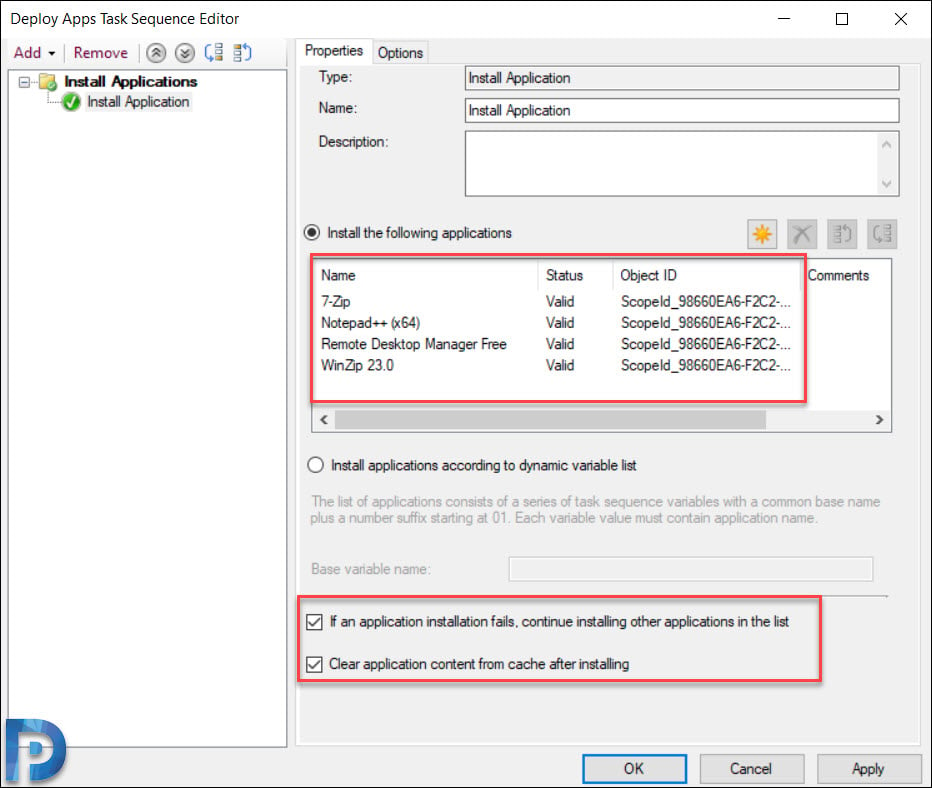
Right click the task sequence that you just created and click Edit. Click Add and then click New Group. You can name it as Install Applications. Now click Add > Software > Install Application.
Click the Yellow icon and select the apps that you wish to deploy to client computers.
At the bottom check these options and click OK.
- If an application installation fails, continue installing other applications in the list.
- Clear application content from cache after installing.
Deploy the task sequence as Available to a device collection.
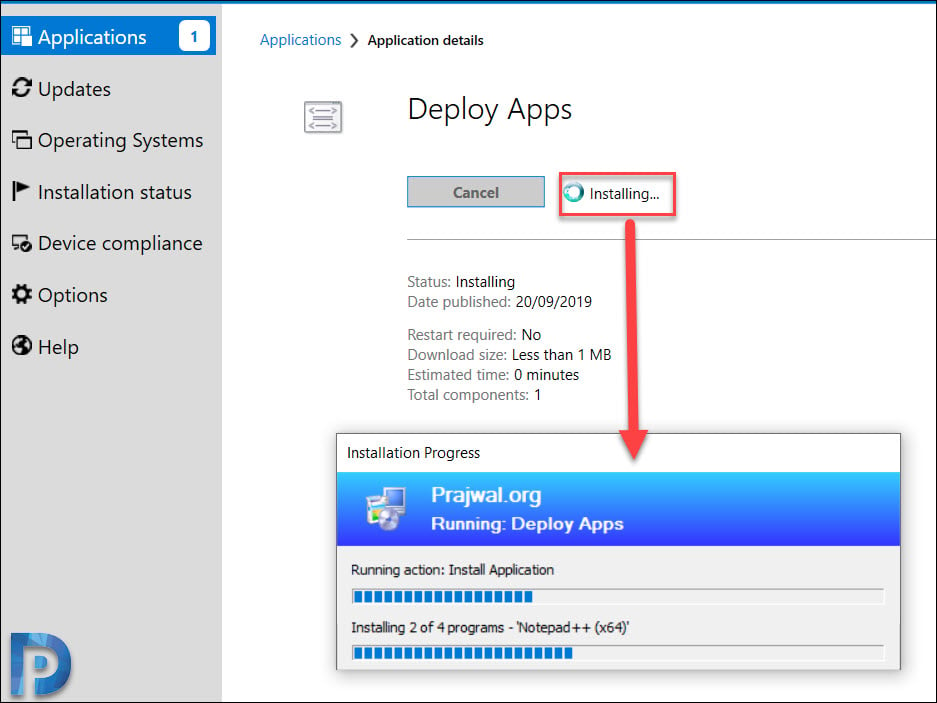
On the client computer, launch Software Center and click Applications. Select the task sequence and click Install.
The app installation begins and you can see an installation progress window. At this point open AppEnforce.log file on the client computer to monitor the application installation. The applications will be installed one after the other.
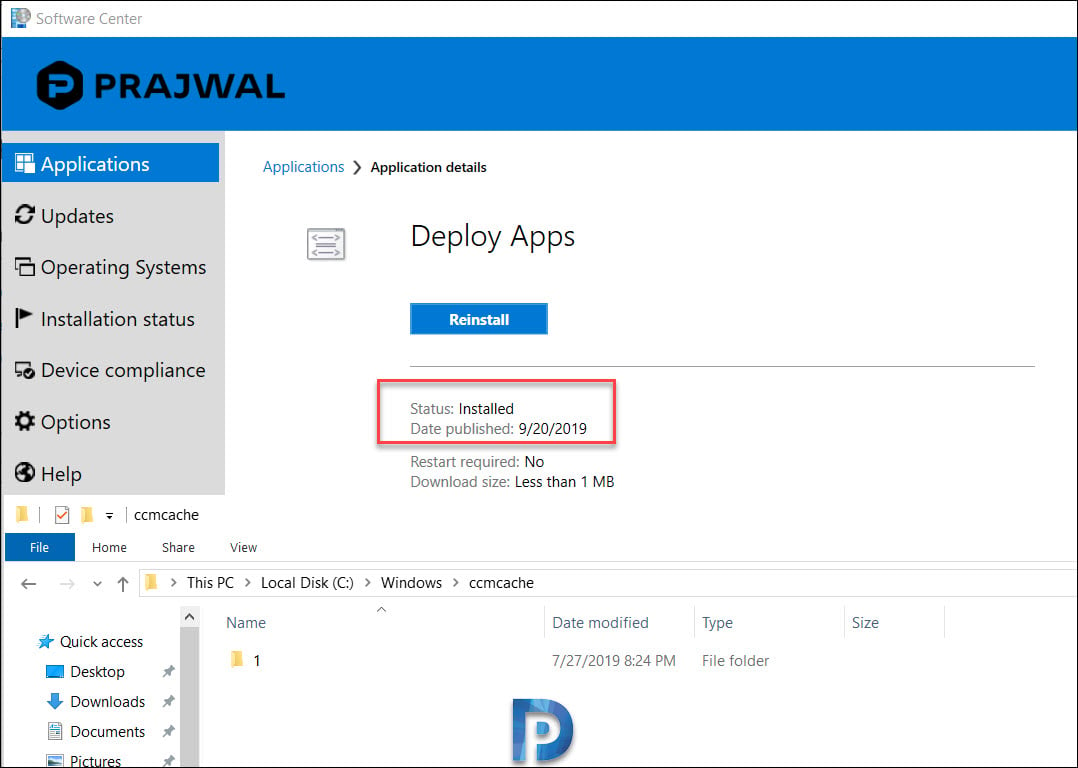
Here is an interesting thing. The task sequence show the apps are installed. If you open ccmcache folder on the client computer, you won’t see any folders. Since we know that folders are created per app install, in this case we don’t see any.
So the task sequence installed all the applications but also cleared application content from cache after installing. Try this feature in your setup and share your experience in the comments section.





So close to what I need. I wish the “Download Package Content” task also had this feature. I’m using a task sequence to stage drivers in c:\windows\temp\FeatureUpdate\drivers. So, they end up in ccmcache and in c:\windows\tempFeatureUpdate\drivers. I would like the copy in ccmcache to be removed after the task sequence runs (to make more room for the upcoming feature update).
Hi, if I install, example, Greenshot with .cmd for the install command and for the uninstall command, when the cache will be cleared, the uninstall.cmd will be also cleared. How work in this case? Is the content will be re-download to use the uninstall.cmd? Thank you
yes, the content will be downloaded prior to uninstall
Have you ever tried to clear the cache before running a task sequence that has to be downloaded locally? EX. 1909 inplace upgrade over VPN. Task sequence currently fails on test laptops, cache is full. Cache needs to be cleared before running task sequence. I got a script to do this, but I can only seem to get it to run in a task sequence.
Hi Prajwal,
Thanks for the useful information and can we have the same for updates section (Patches )
in software center ?
Hello Sir,
This was useful to me. but my query is if we have lot of machine and application installed in 1 may not be present in second. In that case will that be useful.
Also I just want if I deploy this task sequence on any machine it clear all recent ccmcache on it.
Please let me know how can I do this.
Thanks
RajNandini
Request for clarification, is this clearing the entire cache or just clearing what was deployed as a part of this TS action? As someone who employs BranchCache-enable SCCM clients I’m not looking to vigorously keep those caches empty. Left wondering why this was implemented this way without adding a general client-action accessible via the devices…
No this doesn’t clear the entire cache. Only the applications that you install via TS, those folders will cleared after TS runs.
Excellent content as always 🙂
I was wondering if this method will only action after installing an application. Aside from using other methods (scripting / compliance setting) is there an inbuilt process which can be used to periodically go through and clear client caches?