

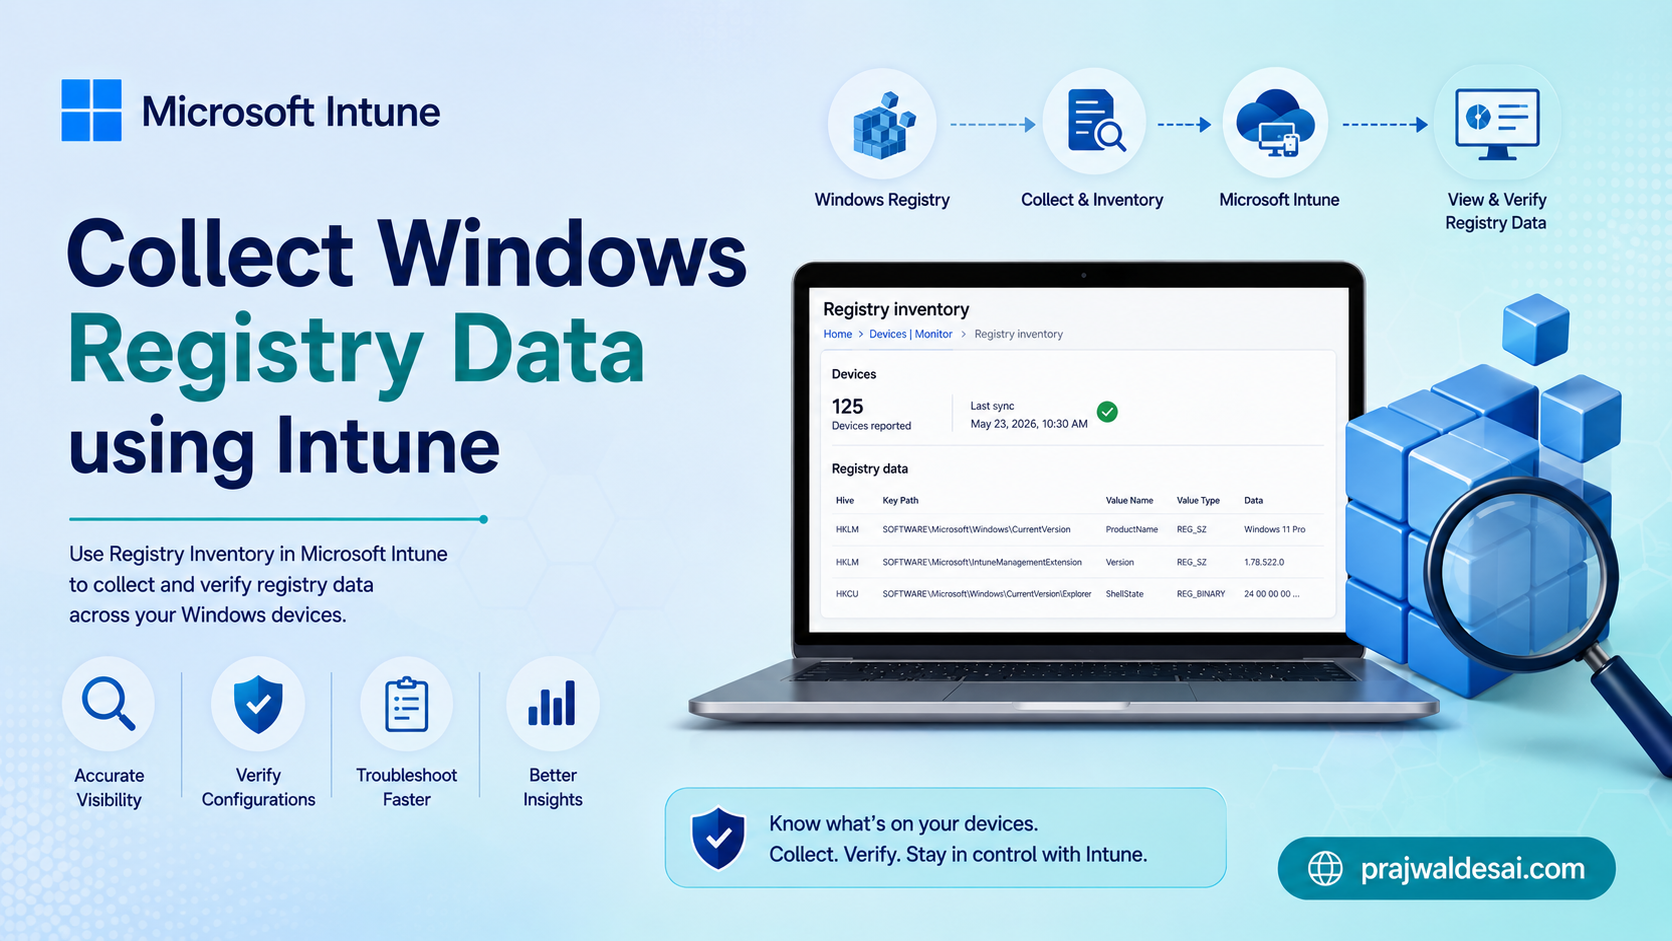
In this guide, I will explain how to use Intune registry inventory to collect registry keys and values from Windows devices with Properties Catalog and device inventory without custom scripts.
This feature was first announced with Microsoft Intune’s July (2607) release, allowing admins to collect registry keys and associated values without relying on custom PowerShell scripts, and the data collection happens through the Microsoft Device Inventory Agent.
With this new capability, IT administrators can collect selected HKEY_LOCAL_MACHINE registry data natively and view it per device in device inventory. With this, you can confirm whether expected registry values exist after policy deployment. It is a very useful capability, and I believe it will be one of the most popular features in Microsoft Intune. Intune registry data collection in device inventory is included with Microsoft Intune Plan 1.
Note: At initial release, the registry data appears in device inventory on a per-device basis. This means you’ll have to view the inventoried data by going to every device. Microsoft has also indicated that broader reporting and exploration experiences are expected to expand over time.
What Registry Data can Intune Collect?
Registry data collection is configured using a Properties Catalog profile in the Microsoft Intune admin center. Once the profile is assigned, the Microsoft Device Inventory Agent performs the inventory collection on targeted Windows devices. The collected information is then reported back to Intune and displayed in the device’s inventory view.
The Intune registry inventory feature can collect the following data:
| Collected Registry item | Description |
|---|---|
| Registry key path | The HKLM registry path being queried |
| Value name | The specific registry value name, where applicable |
| Value type | The registry value type, such as string, DWORD, or other supported type |
| Value data | The actual data stored in the registry value |
Intune Registry Inventory Limitations
It is important to understand that the inventorying registry data is a newly introduced feature and has some limitations. However, I believe Microsoft will enhance this feature in the near future, and you will see more new capabilities compared to its current limitations.
- The registry data collected appears in device inventory on a per-device basis only.
- Collection is limited to HKEY_LOCAL_MACHINE (HKLM) paths, which represents device-level configuration. User-specific registry hives, such as HKEY_CURRENT_USER, are not supported for this inventory feature.
- Each collected registry value is capped at 6 KB, and each device can collect up to 100 registry keys.
- If the registry path or value name doesn’t exist on a device, that device reports ‘Not found‘ for the collection result.
- Intune includes detection logic to help prevent collection of values that may contain sensitive or confidential data, such as credentials, tokens, certificates, private keys, or connection strings.
Collect Windows Registry Data using Intune
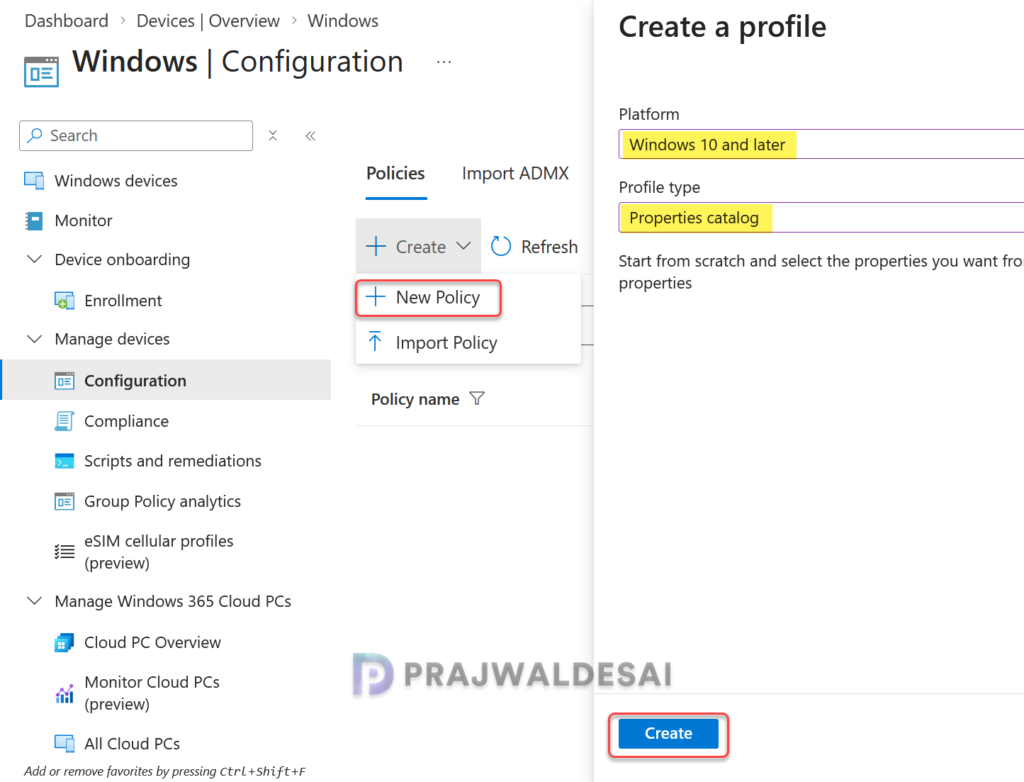
Let’s create a policy to inventory registry data on Windows devices in Intune. Sign in to the Microsoft Intune admin center. Select Devices > Windows > Configuration > Create > New policy. Choose Windows 10 and later for platform and the Properties catalog for profile type. Click Create.
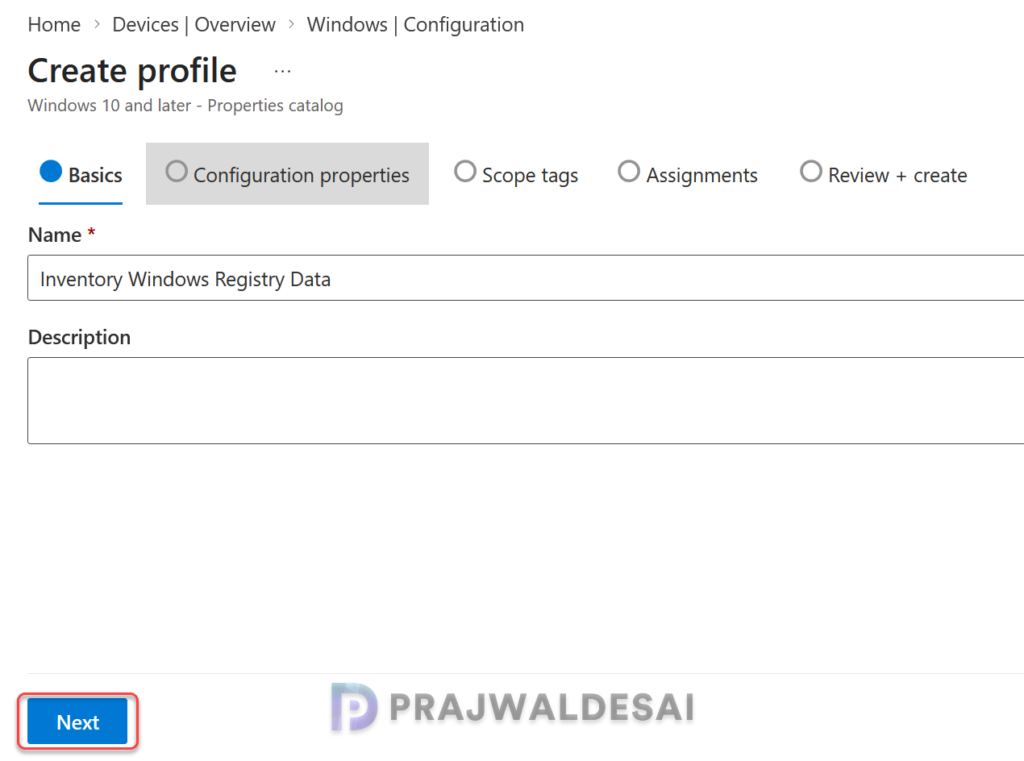
On the Configuration properties tab, specify the profile name and a brief description. Click Next.
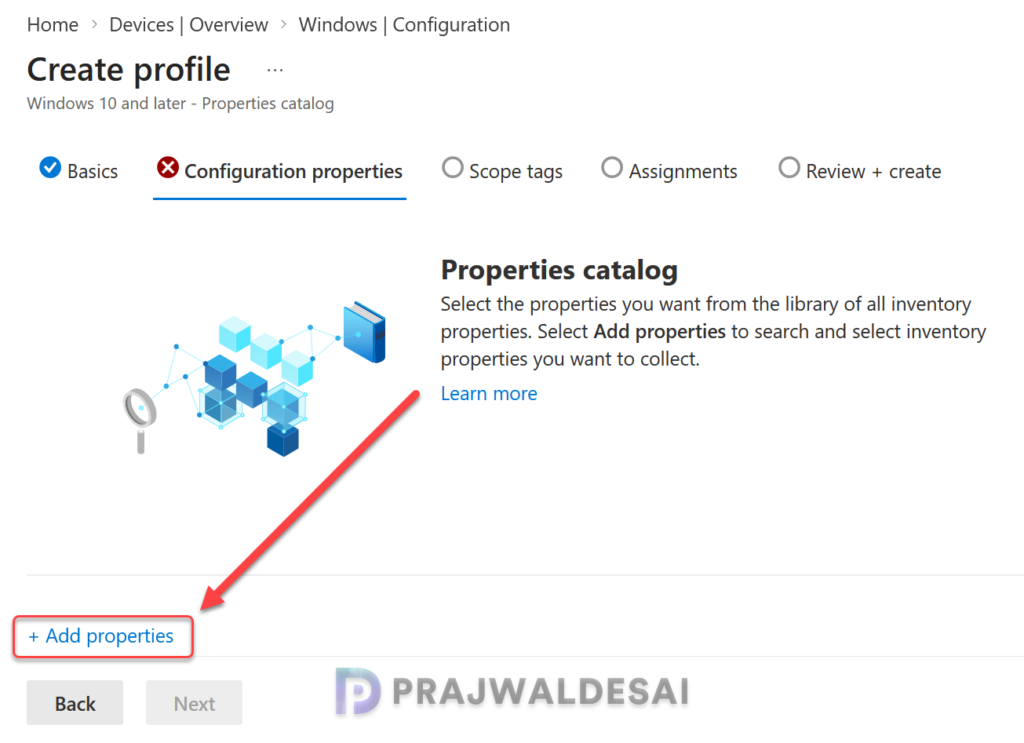
Registry data collection is configured through the existing properties catalog. In the Properties catalog window, select Add properties.
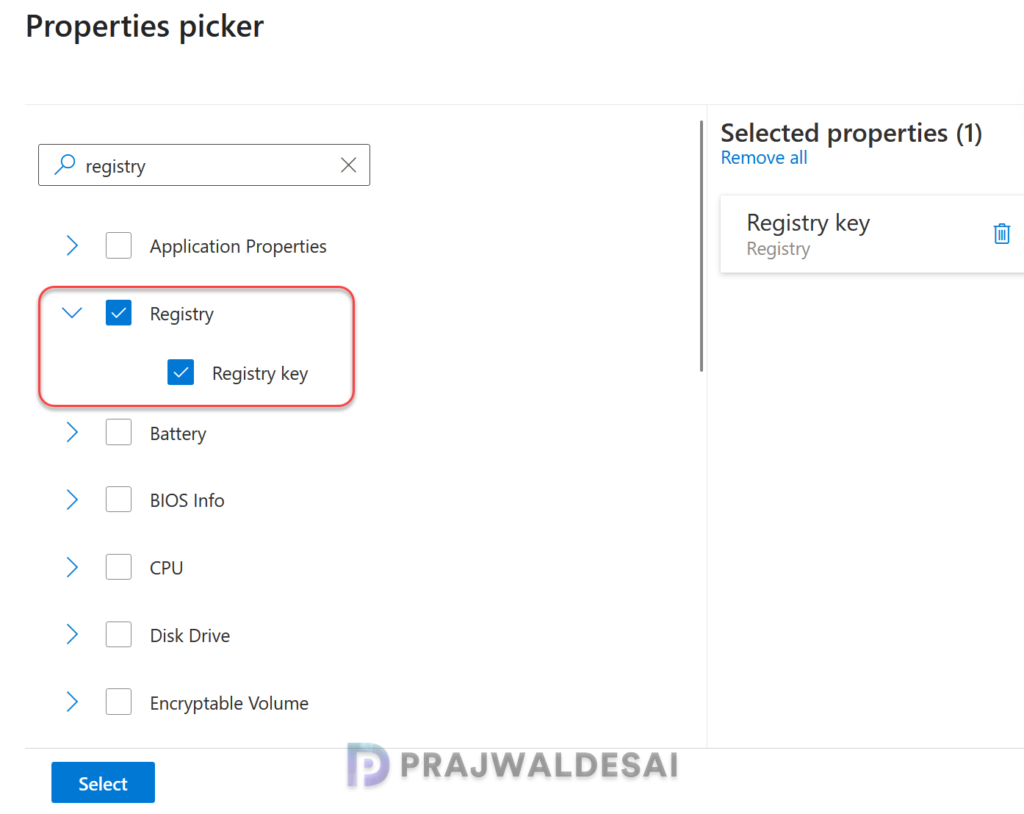
On the Properties picker screen, select the Registry category as shown in the below screenshot.
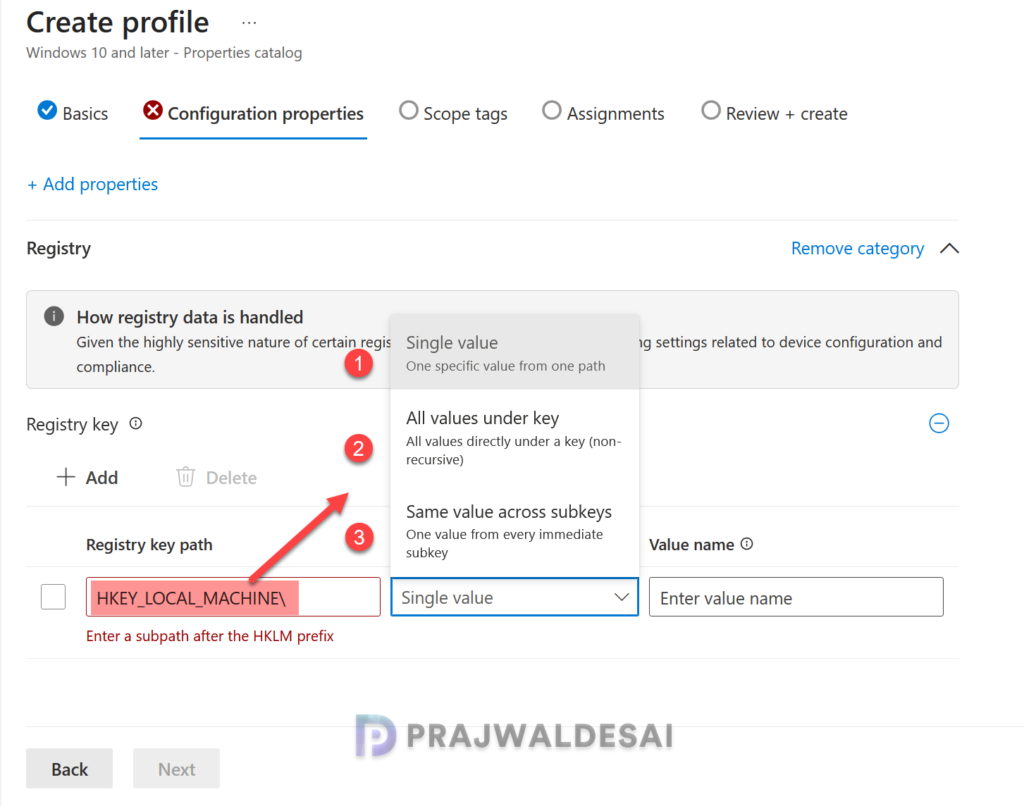
Add a new Registry key and specify the following details.
- Registry key path: Specify the HKEY_LOCAL_MACHINE path. This is populated automatically in the console.
- Collection pattern: You get three options to select from.
- Single value: Specify a registry path and value name to collect one value from that path.
- All values under key: Specify a registry path to collect all values directly under that path. This pattern doesn’t include subkeys.
- Same value across subkeys: Specify a base registry key path and a value name to collect that value from each immediate subkey.
- Value name: Enter the value name (only if you’ve selected to inventory a single value or same value across subkeys).
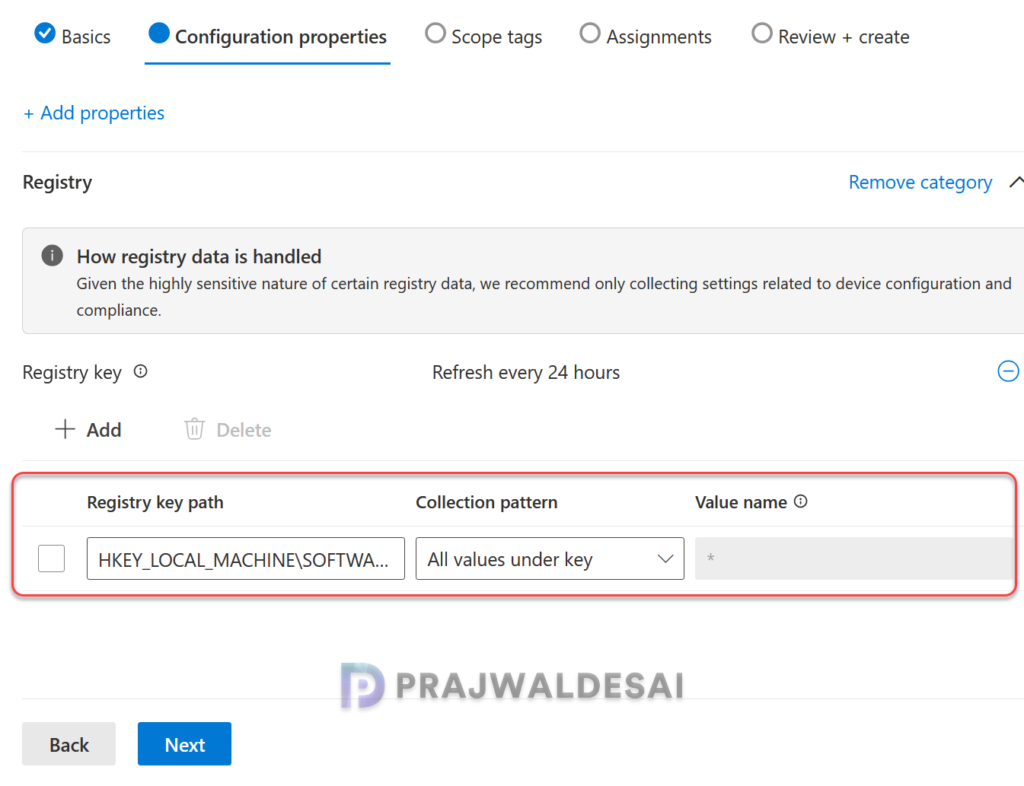
You can add additional registry keys and inventory multiple values under a single policy. To keep it simple, I am adding just one registry path and collecting all values under the defined key.
Click Next to continue.
In the scope tags section, add your scope tags. If you haven’t created them, I have published a step-by-step guide on creating Intune scope tags. Note that specifying scope tags is optional, and you may skip this step. Click Next.
In the Assignments window, select the Entra security groups to which you want to assign the policy. Start by deploying the profile to a select group of users. If the testing proves successful, gradually roll it out to a larger user base. Select Next.
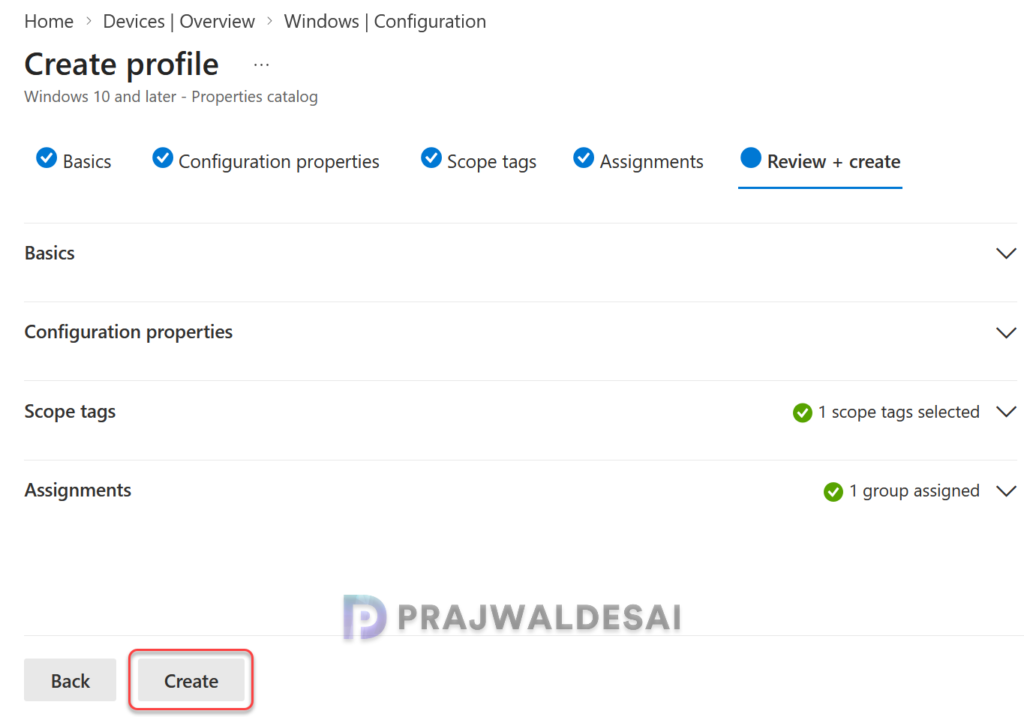
On the Review + Create tab, carefully review all the configured policy settings, then click Create. You should find this new profile in the list of all configuration profiles for Windows devices in Intune admin center.
To speed up the policy assignments, you can manually sync Intune policies using various methods on Windows computers.
Monitoring Intune Registry Inventory Policy
In the Intune admin center, go to Devices > Windows > Configuration and here select the Windows Registry data collection profile. On the Policy overview page, check the device and user check-in status.
The number of devices or users for whom the policy was successfully applied is listed here. The view report button displays the names of devices or users for which the policy deployments were successful.
Viewing Intune Registry Inventory Data
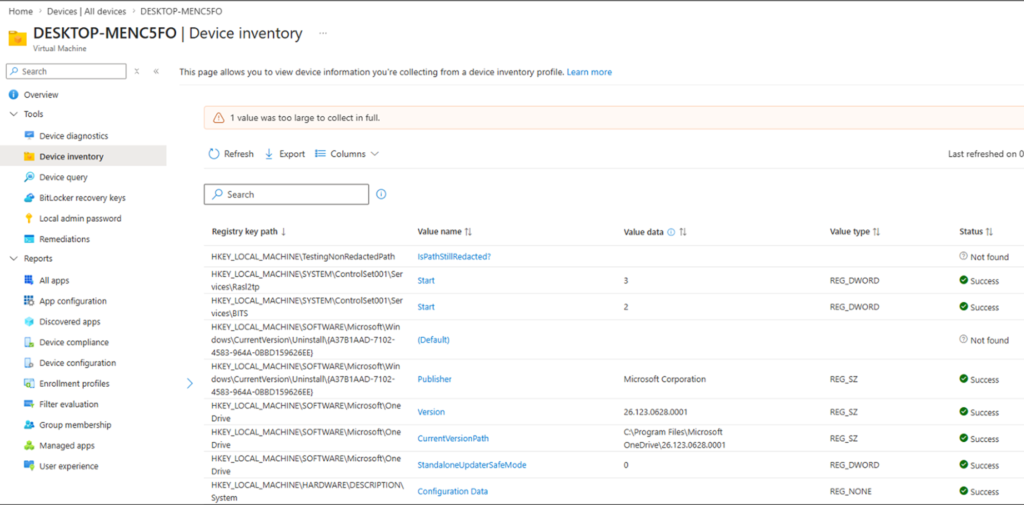
After registry data is collected, it can be viewed in the Microsoft Intune admin center. The data may take up to 24 hours to appear after configuration and assignment. Once available, it gives a detailed overview of the collected registry keys, values, and data.
To view the inventoried data in the Intune admin center, go to Devices > Windows. Select a device and go to Monitor > Device inventory. In the below image, you can see how Intune displays the inventoried data based on the registry paths and collection patterns you’ve chosen. It collects the complete registry path, value name, value data and much more. You can export the details to a CSV file by clicking on the Export option.
Troubleshooting
These are some basic steps that you can begin your troubleshooting Intune registry inventory issues.
- If Intune registry inventory is not working in your tenant, you must first verify that the device is properly enrolled, targeted by the policy assignment, and actively check in with the Intune service. You should also confirm that the registry path is under HKEY_LOCAL_MACHINE, that’s because HKCU registry inventory is not supported.
- If the collected result shows ‘Not found‘, I recommend verifying that the registry path and value name exist on the device and that the value was entered correctly in the profile. In numerous instances, registry inventory not showing in Intune is caused by an incorrect path, unsupported hive, or waiting for the device inventory data to refresh.
- When troubleshooting Intune registry data not found issues, review the configuration profile assignment status and then inspect the device inventory view to confirm whether the Microsoft Device Inventory Agent has reported the requested registry value.
- To troubleshoot issues with the Intune registry data collection, review the client logs at C:\Program Files\Microsoft Device Inventory Agent\Logs. These logs can provide insight into collection behavior and agent activity. You can also collect the logs by using the Device Action: Collect Diagnostics.
Note that the Microsoft Device Inventory Agent is automatically installed on a Windows device via a Configuration Service Provider (CSP) when an Intune Properties catalog profile is assigned and reports successfully.
Conclusion
Microsoft Intune registry inventory is a valuable addition for endpoint administrators who require better visibility into the actual configuration state of Windows devices. By bringing registry collection into the Properties Catalog and surfacing results in device inventory, Microsoft reduces the need for custom scripts in many common scenarios. Admins can now collect targeted HKLM registry data, validate configuration state, and confirm application or policy settings using a native Intune workflow.
The feature is not a complete replacement for PS scripting, especially when remediation, HKCU data, or complex logic is required. For organizations already using Microsoft Intune to manage Windows devices, I believe that the registry inventory should become part of the standard troubleshooting and configuration validation toolkit.
That concludes this guide 🙌. If you require any clarification before implementing this policy, or if you encounter any problems afterward, please let me know in the comments section below.
