In this post, I will share how to add or remove management group from SCOM agent. This process is typically performed manually through the Microsoft Management Agent control panel applet on the client computer.
When you integrate SCOM with Active Directory Domain Services (ADDS), the list of management group(s) are updated automatically by the operations manager agent. As per Microsoft, you can remove all management groups while leaving the agent installed.
Removing a management group will prevent it from receiving any new monitoring data from the agent. So when do you actually do this? Well, this is helpful in scenarios where you need to prepare a computer for imaging, ensuring the image includes the agent installed but remains unassigned to any specific management group.

Remove a Management Group from SCOM agent
Sign in to the Windows client computer installed with operations manager agent. Open the control panel and double-click Microsoft Monitoring Agent.

In the agent properties window, select the Operations Manager tab. Here you should see the list of management groups updated by agent. Select a management group, and then select Remove.
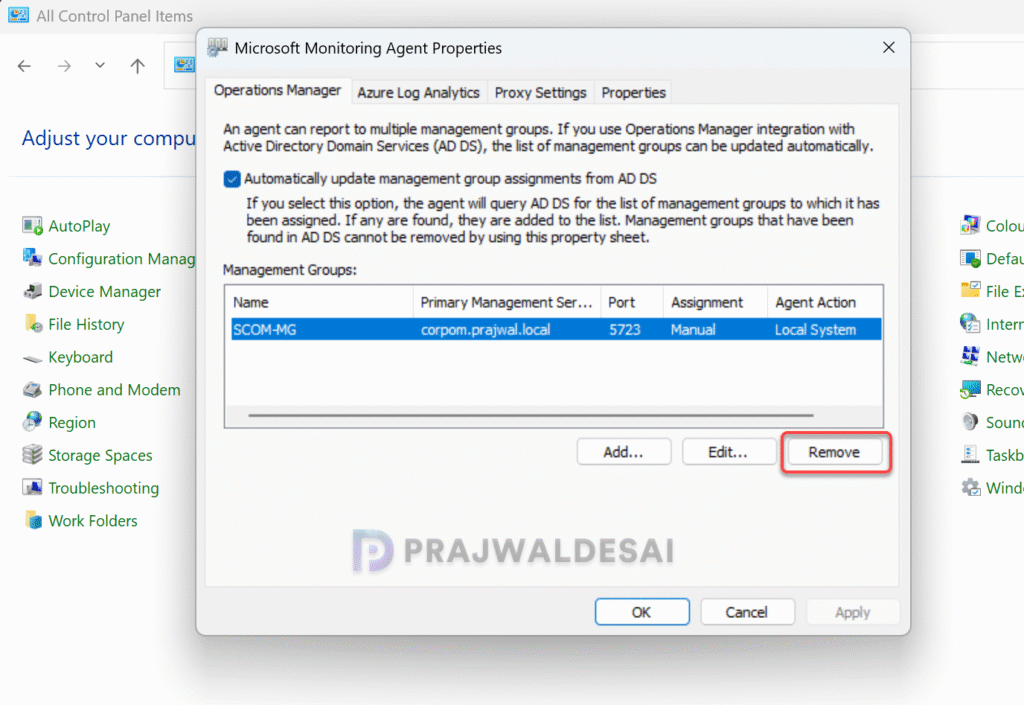
On the confirmation box, select Yes.

The management group is now removed from the agent properties. Click Apply and OK. This action restarts the monitoring agent on the client computer.

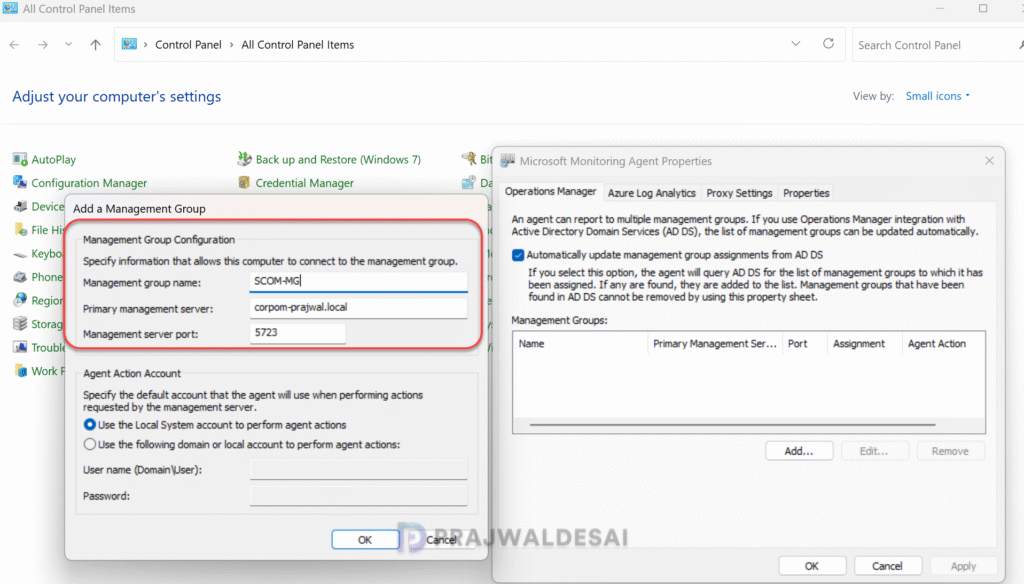
Add a Management Group for SCOM agent
If the operations manager agent fails to update management group assignments automatically from AD DS, you can enter this information manually. On the agent-managed computer, open the Control Panel, double-click Microsoft Monitoring Agent. In Microsoft Monitoring Agent, on the Operations Manager tab, select Add, enter the information for the new management group, and then select OK. This action restarts the monitoring agent on the client computer.