

In this guide, I will show you how to deploy FileZilla client using SCCM. I will download the latest version of the FileZilla application, package it in SCCM and deploy it to our endpoints.
FileZilla Client is a fast and reliable cross-platform FTP, FTPS, and SFTP client with numerous useful features and an intuitive graphical user interface. FileZilla supports FTP, FTP over SSL/TLS (FTPS), and SSH File Transfer Protocol (SFTP).
FileZilla Client is available for several operating systems, including Mac and Linux. For Windows OS, FileZilla client is available for 64-bit and 32-bit operating systems. In this post, I will download the 64-bit client and deploy it using SCCM.
Download FileZilla Client Installer
To download the latest version of the FileZilla client for Windows, go to the FileZilla downloads section. At the time of writing this post, FileZilla 3.53.0 is the latest client version. Download the 64-bit FileZilla app and save it to the sources folder on the SCCM server.
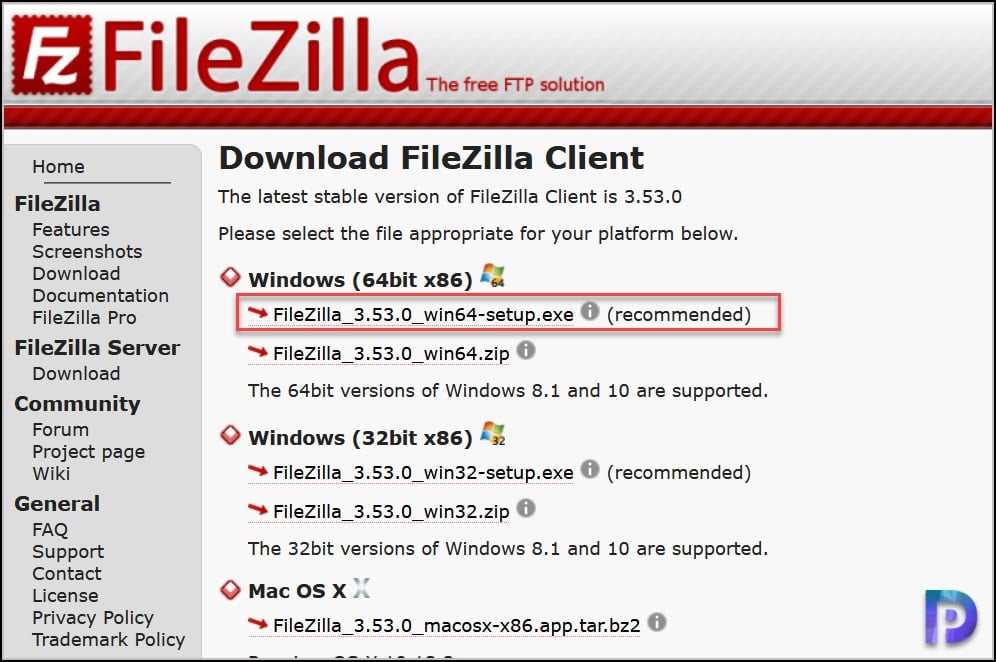
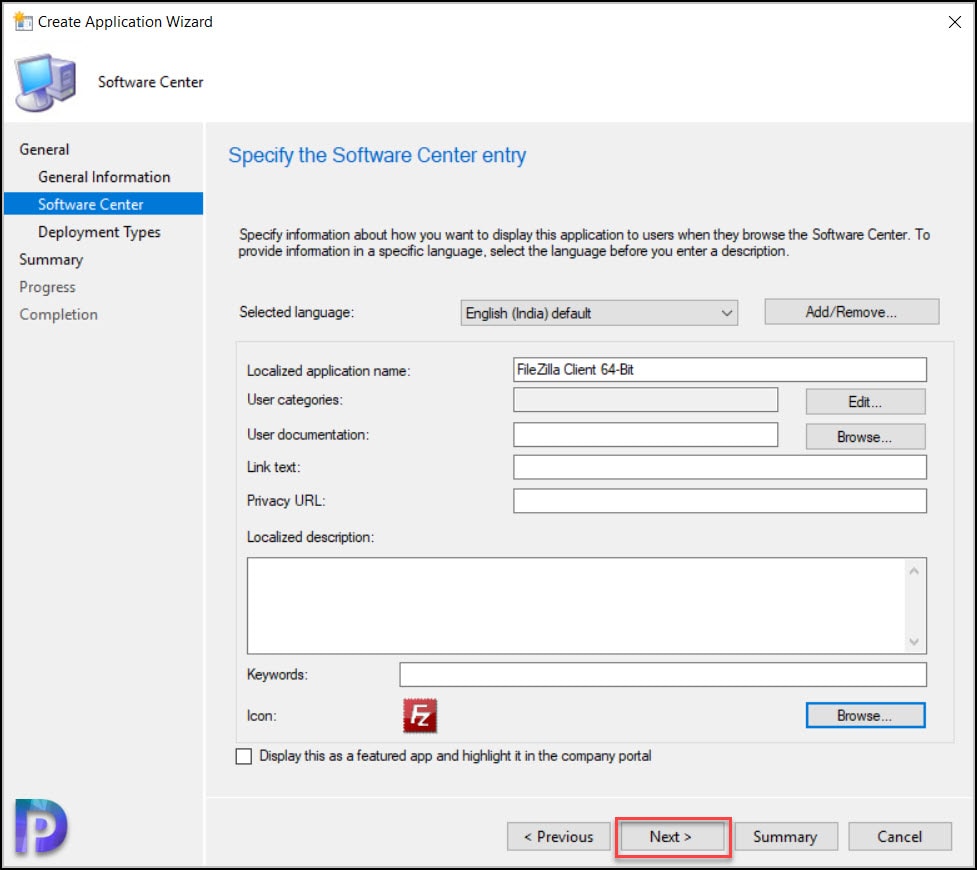
Along with the FileZilla application, you can also download the FileZilla icon. You can specify the icon while packaging the application. The icon will appear in Software Center along with the application.
Create FileZilla Client Application in SCCM
Follow the below steps to create a FileZilla client application in SCCM.
- Launch the SCCM console.
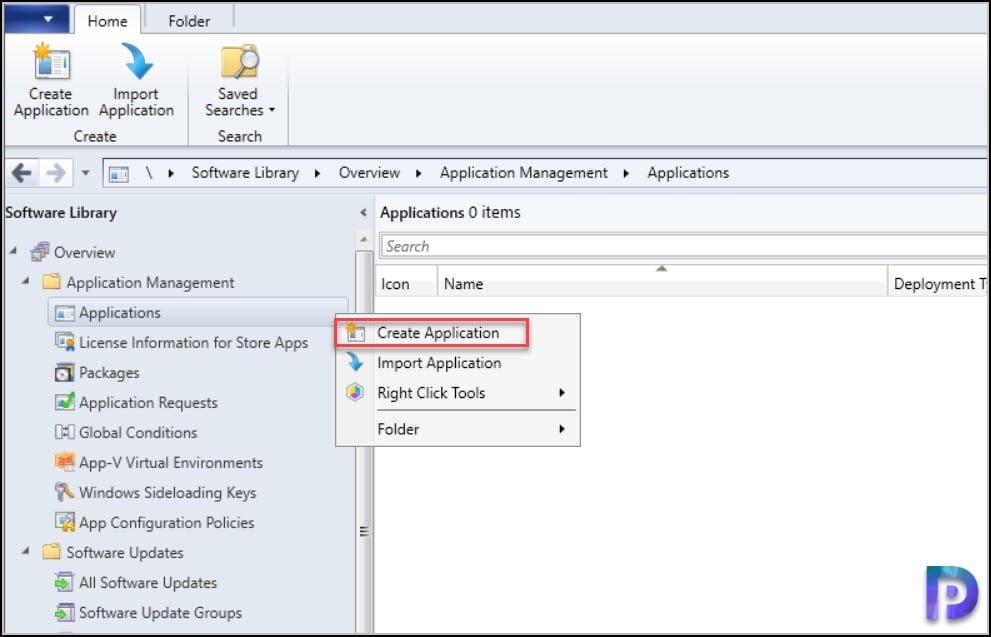
- Go to Software Library\Overview\Application Management\Applications.
- Right click Applications and click Create Application for FileZilla client.
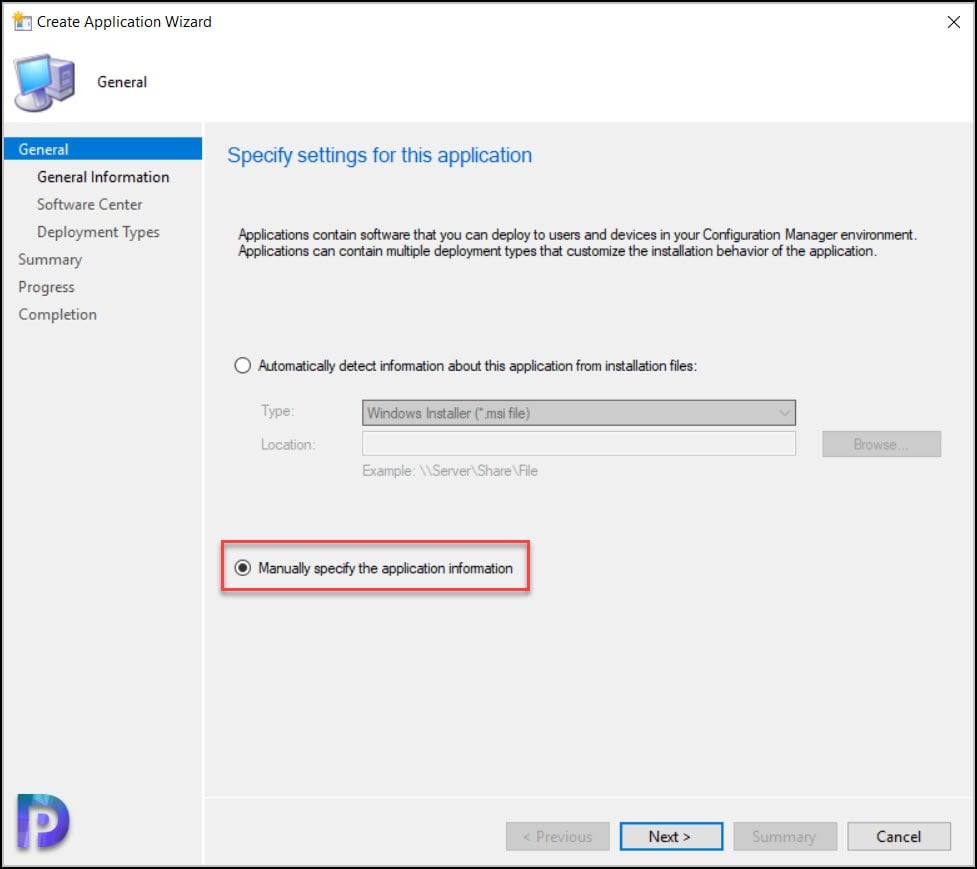
On the General window of the Create Application wizard, select Manually specify the application information. Click Next.
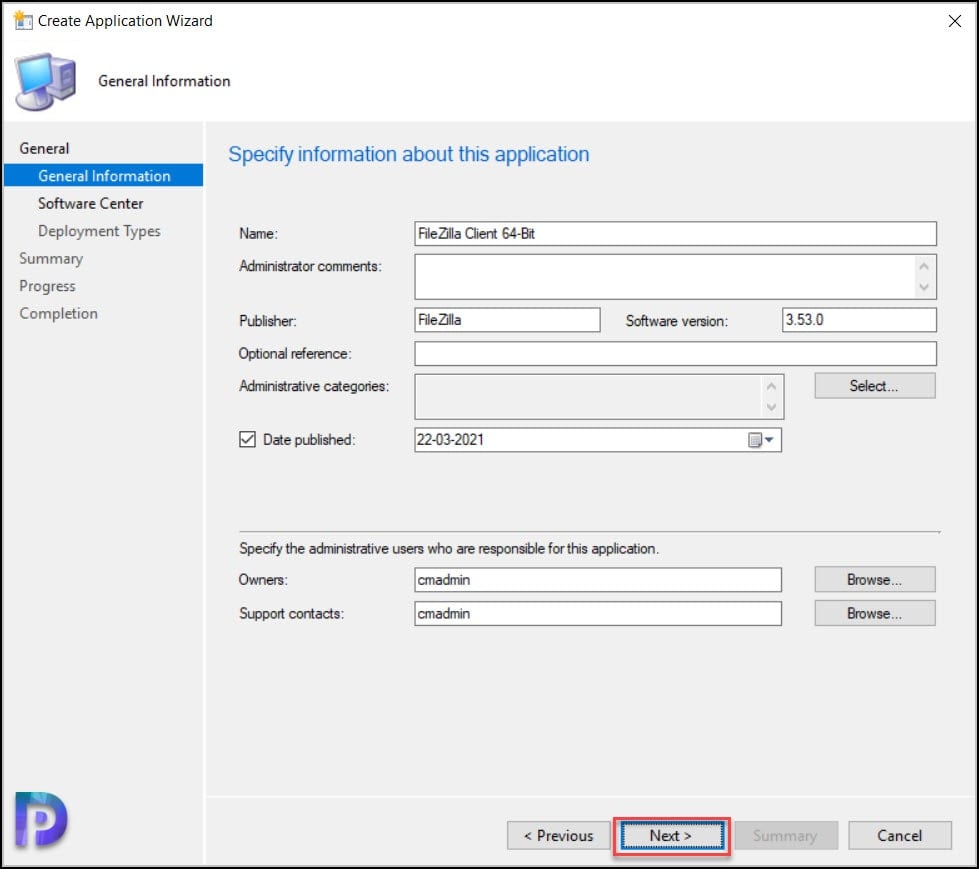
Enter the details of the FileZilla application, including the publisher, version, and application name. Click Next.
This is an optional step. In the Software Center window, specify the FileZilla icon. Click Next.
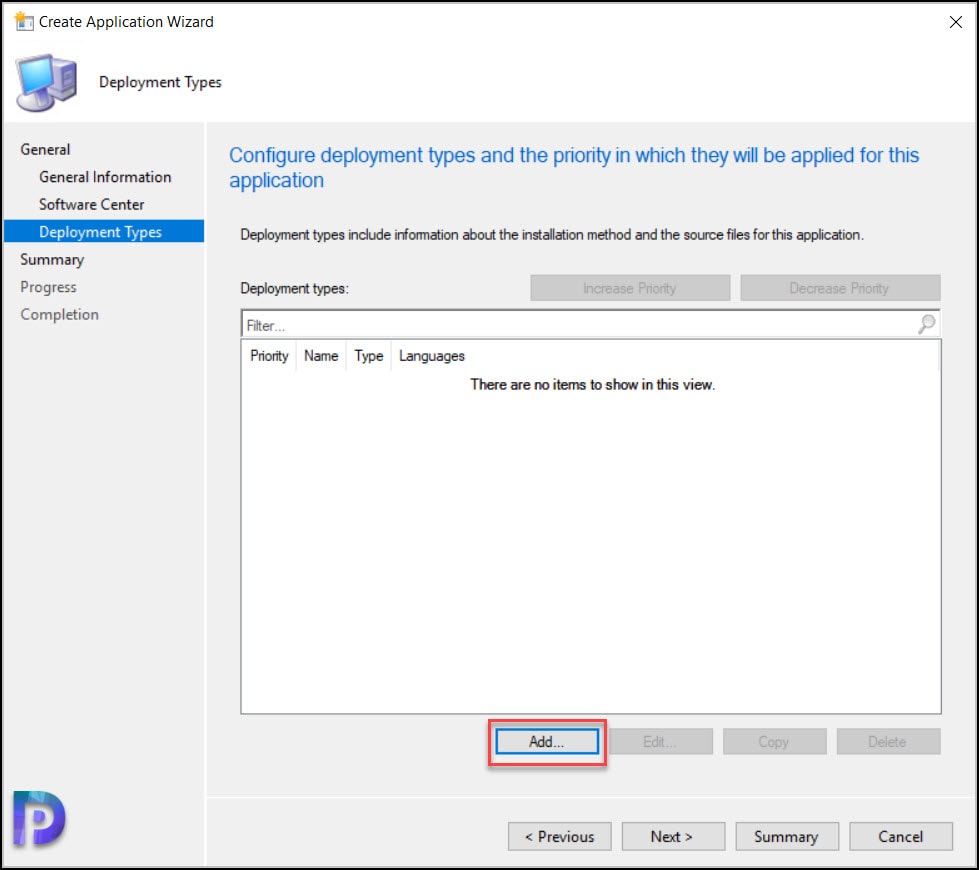
Add a new deployment type by clicking the Add button.
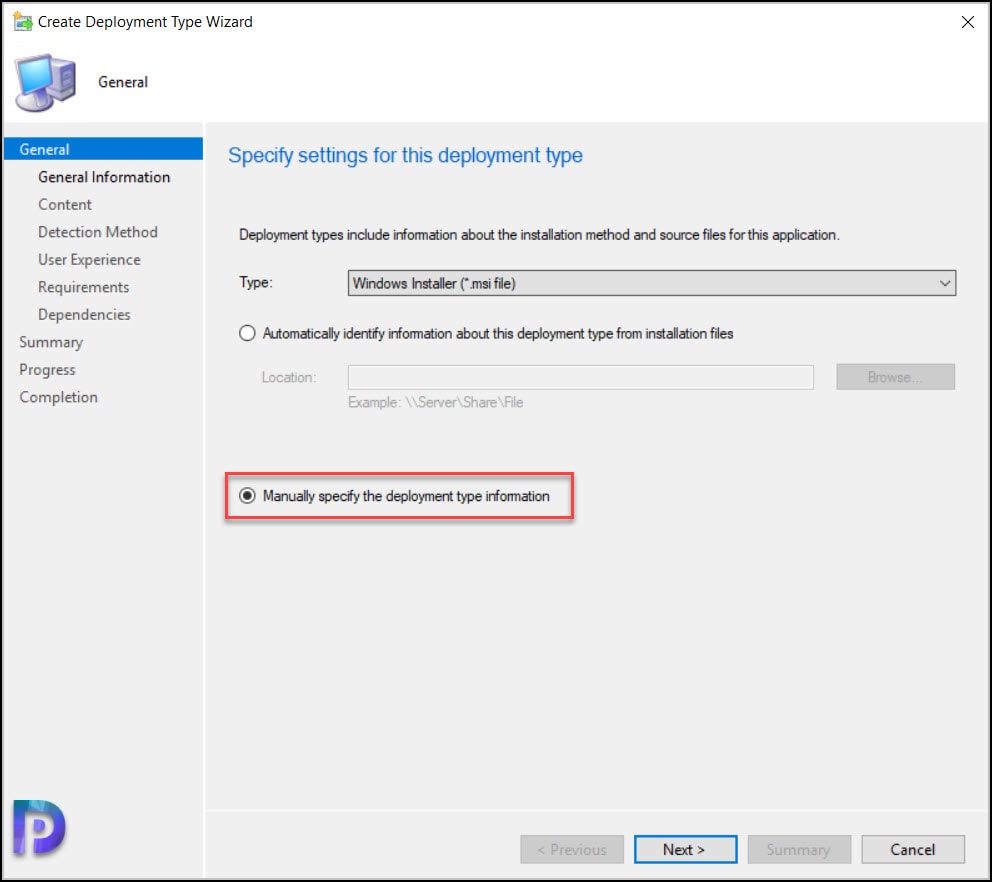
On the General window of the Create Deployment Type Wizard, select Manually specify the deployment type information. Click Next.
Choose the folder where you have the FileZilla client setup files on the Content Window. Next, specify the install command and uninstall command. Click Next.
Install Command - FileZilla_3.53.0_win64-setup.exe /SUninstall Command - "%ProgramFiles%\FileZilla FTP Client\uninstall.exe" /S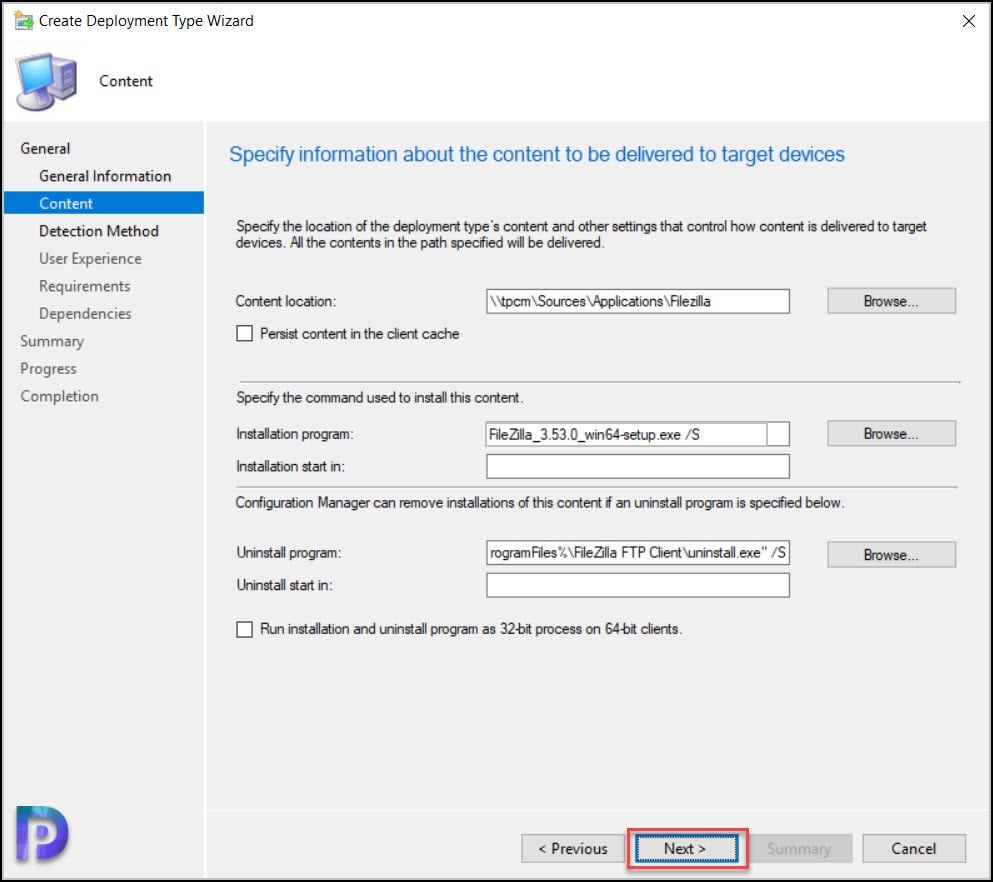
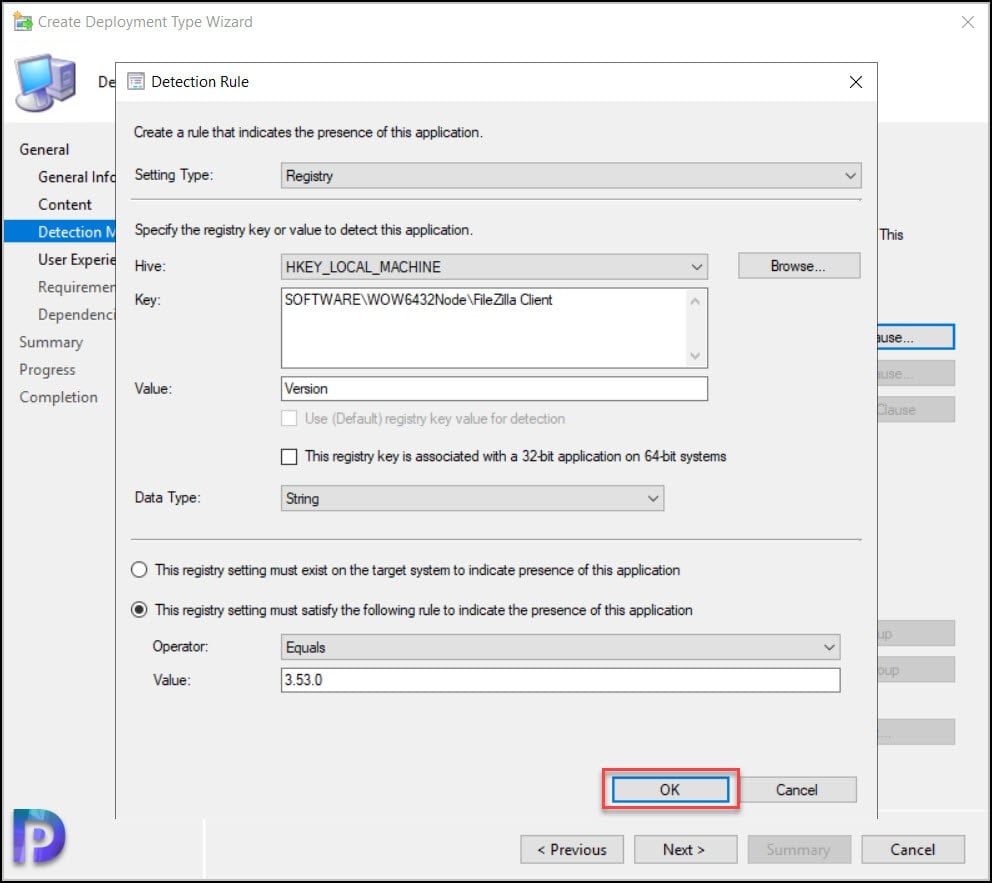
In this step we will specify a detection method to indicate the presence of the FileZilla application on a computer. Specify the following details for FileZilla application detection.
- Setting Type – Registry
- Hive – HKEY_LOCAL_MACHINE
- Key – SOFTWARE\WOW6432Node\FileZilla Client
- Value – Version
- Data Type – String
- Operator – Equals
- Value – 3.53.0
Click OK and then click Next.
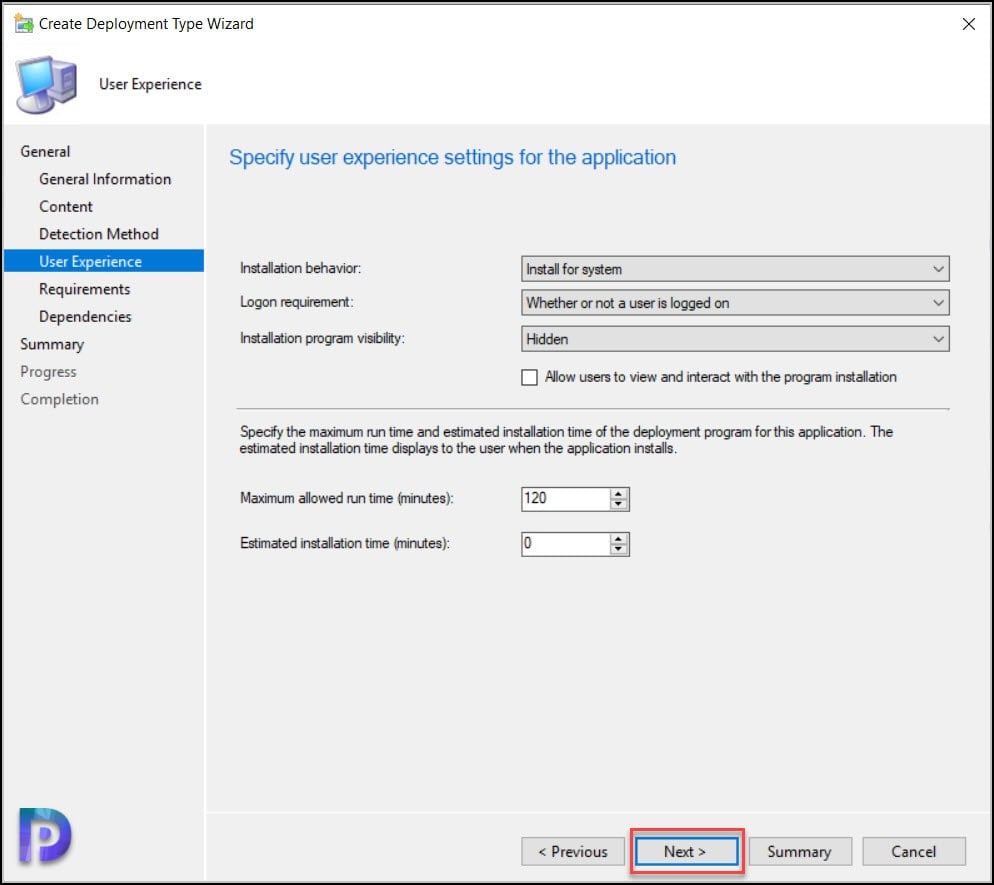
You can specify the user experience settings for FileZilla application. I have specified the following in my setup.
- Installation behavior: Install for system
- Logon requirement: Whether or not a user is logged on.
- Installation program visibility: Hidden.
Click Next.
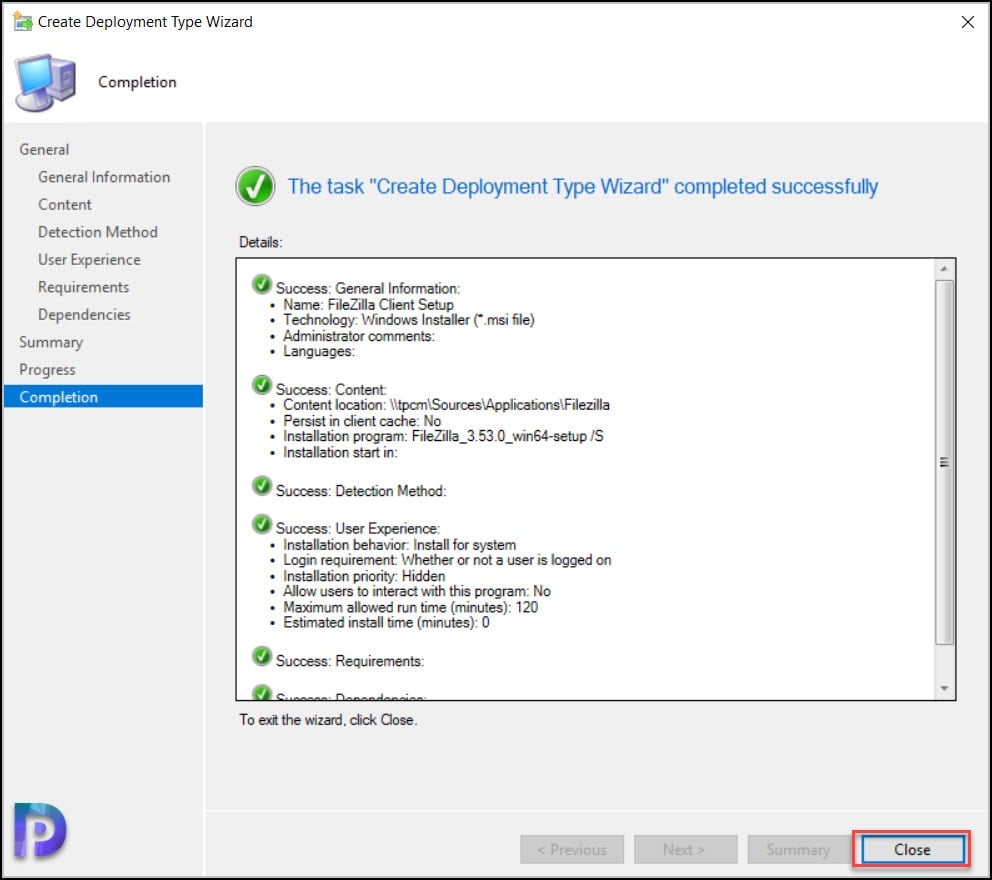
You can also list the dependencies and requirements for this application. Click Next and on the Completion window click Close.
Close the Create Application Wizard.
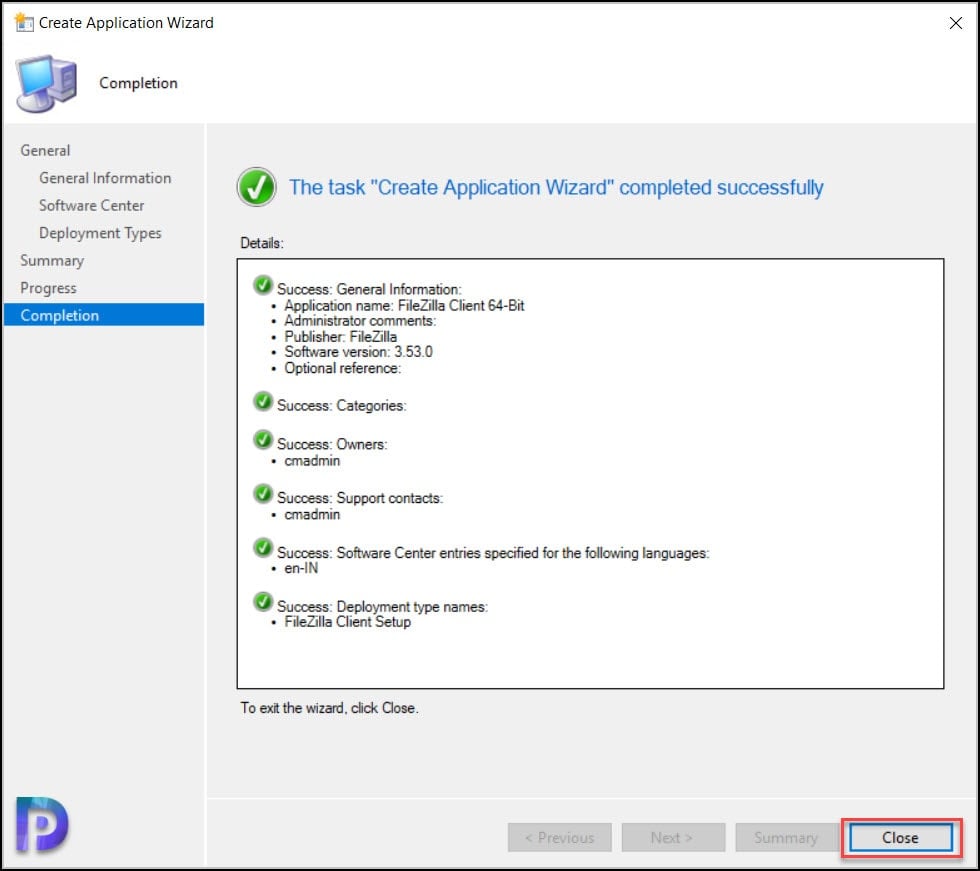
With the above steps, we have packaged the FileZilla application in SCCM. In the next step, we will deploy the FileZilla client using SCCM.
Deploy FileZilla Client using SCCM
In the Configuration Manager console, go to Software Library\Overview\Application Management\Applications. Right-click the FileZilla application and click Deploy.
When you deploy the application, you need to specify the target device collection. I would recommend deploying the application first to a set of test machines. If the application install works fine, you can deploy it to a larger set of devices.
During the application deployment, you will also be asked to select the distribution points to distribute the content. Pick all the distribution points to which the content needs to be distribute.
Testing the FileZilla Installation
Launch the Software Center on the client PC after logging in. Click the Applications tab and select the FileZilla application. Click Install.
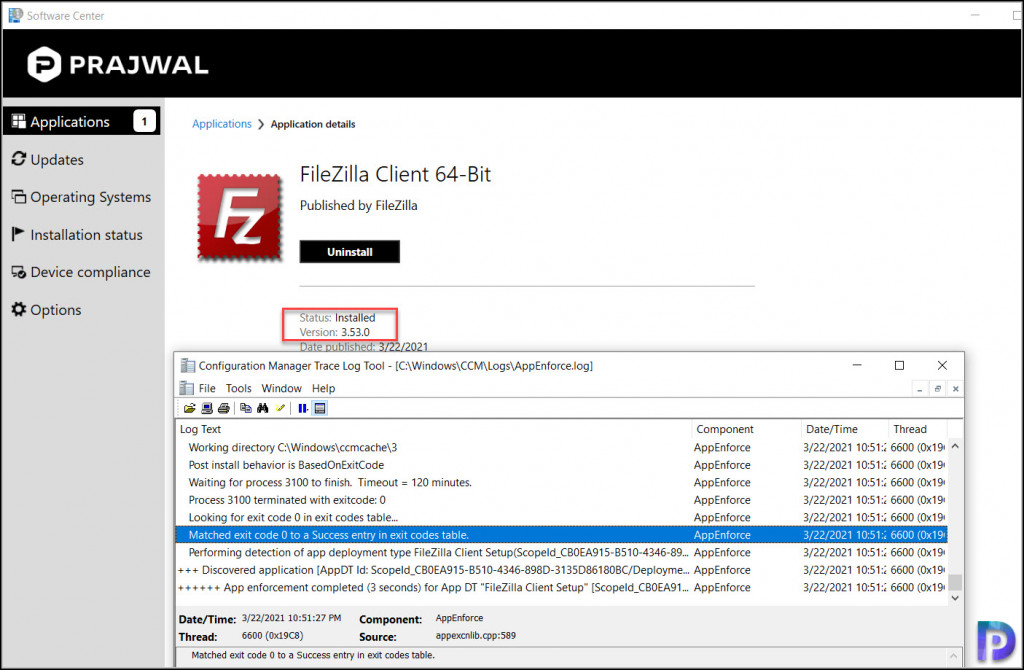
You can review the FileZilla application installation progress with the help of AppEnforce.log. Matched exit code 0 to a success entry in the exit codes table confirms the FileZilla client has been installed.
Prepared working directory: C:\Windows\ccmcache\3
 Prepared command line: "C:\Windows\ccmcache\3\FileZilla_3.53.0_win64-setup.exe" /S
 Executing Command line: "C:\Windows\ccmcache\3\FileZilla_3.53.0_win64-setup.exe" /S with user context
 Working directory C:\Windows\ccmcache\3    AppEnforce
 Post install behavior is BasedOnExitCode
 Waiting for process 3100 to finish.  Timeout = 120 minutes.
 Process 3100 terminated with exitcode: 0
 Looking for exit code 0 in exit codes table…
Matched exit code 0 to a Success entry in exit codes table.Let’s test the FileZilla client uninstall command. Click Uninstall and again open the AppEnforce.log. Matched exit code 0 to a successful entry in the exit codes table confirms the FileZilla client has been uninstalled.
Prepared working directory: C:\Windows\ccmcache\3
 Prepared command line: "C:\Program Files\FileZilla FTP Client\uninstall.exe" /S
 Executing Command line: "C:\Program Files\FileZilla FTP Client\uninstall.exe" /S
 Working directory C:\Windows\ccmcache\3    AppEnforce
 Post install behavior is BasedOnExitCode
 Waiting for process 4716 to finish.  Timeout = 120 minutes.
 Process 4716 terminated with exitcode: 0    AppEnforce
 Looking for exit code 0 in exit codes table…    AppEnforce
 Matched exit code 0 to a Success entry in exit codes table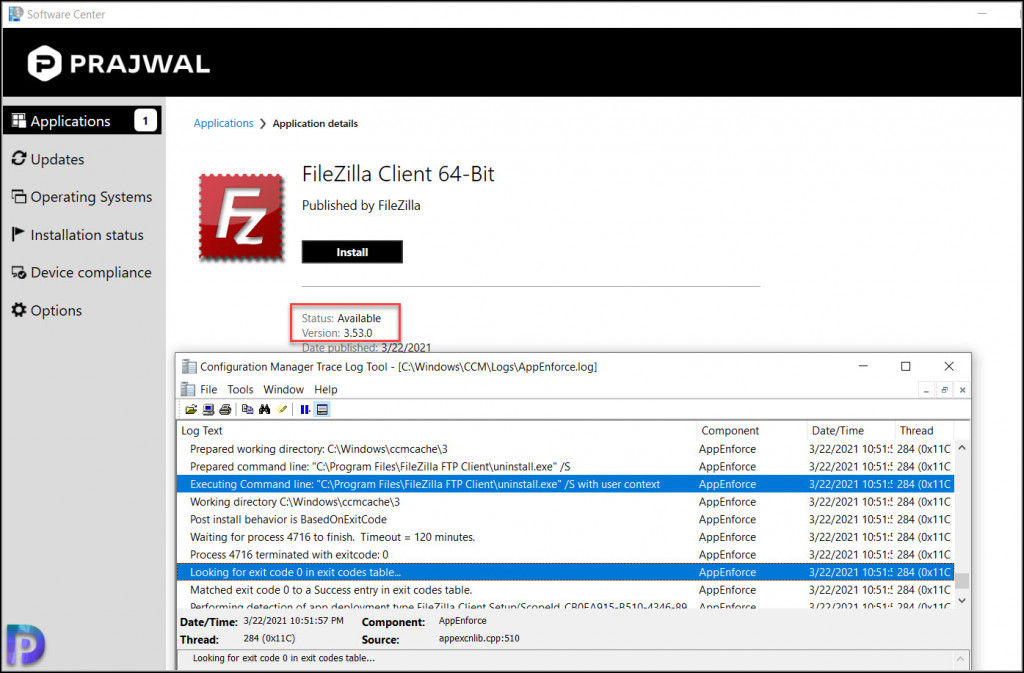
I hope this post helps you to deploy the FileZilla client using Configuration Manager in your setup. Please consider using the comments section below to ask any questions you may have.
