


In this post, we’ll look at all the SConfig options for the Windows server core installation. You can use the Server Configuration Tool (SConfig) to configure and manage a Windows Server.
When you install Windows Server Core, you can use the Server Configuration Tool (SConfig.cmd) to set up and manage different parts of Server Core installations. However, note that you must be a member of the Administrators group to use the tool.
SConfig is the primary way to configure and manage common aspects of the Windows Server operating system, including:

- Network configuration
- Active Directory domain membership
- Installation of Microsoft updates
- Operating system activation
Launch SConfig on Windows Server Core
SConfig starts automatically with Windows Server 2022 (deployed in the Server Core installation option). To launch SConfig on the server core, login to your Windows server core. Type SConfig and press Enter.

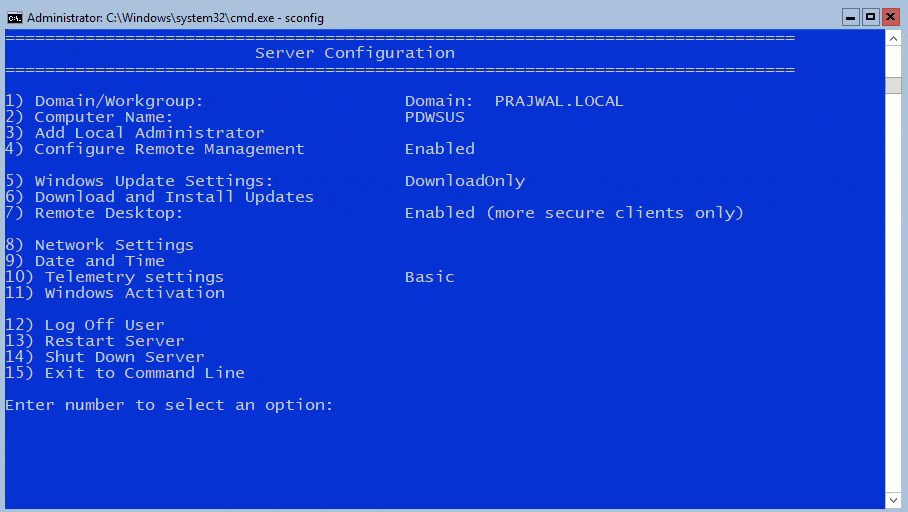
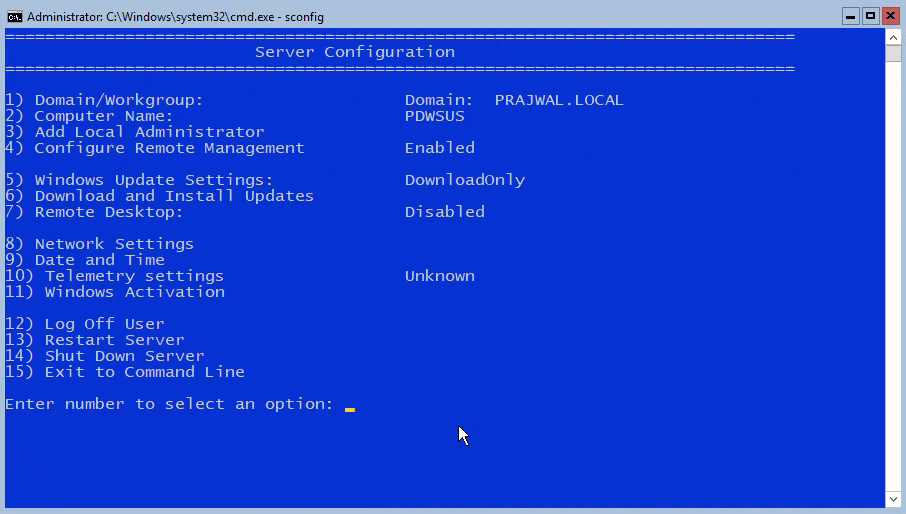
This brings up the Server Configuration Tool. At the time of writing this post, the Server Configuration tool has 15 options displayed on its main menu.

SConfig Options on Windows Server Core
When you start the Server Configuration Tool (SConfig.cmd), you see a list of options or settings. I will cover each of them along with screenshots.
Domain/Workgroup
Using the Domain/Workgroup option, you can join the server to an Active Directory domain or a workgroup. A detailed post on how to add Windows server core to domain is posted here – https://www.prajwaldesai.com/how-to-join-a-windows-server-core-to-domain/
Computer Name
With this option, you can change the server name. You also get the option to change the computer name while you join it to the domain. Most of all, a restart is required when you change the computer name.
Add Local Administrator
To add additional users to the local administrators group, use the Add Local Administrator option. On a domain joined machine, enter the user in the following format: domain\username. On a non-domain joined machine (workgroup machine), enter only the user name. The changes take effect immediately.
Configure Remote Management
Option 4 lets you configure remote management. Note that Configure Remote Management is enabled by default. When you type 4 and press enter you see three options and they are all self-explanatory.
- Enable Remote Management
- Disable Remote Management
- Configure Server Response to Ping

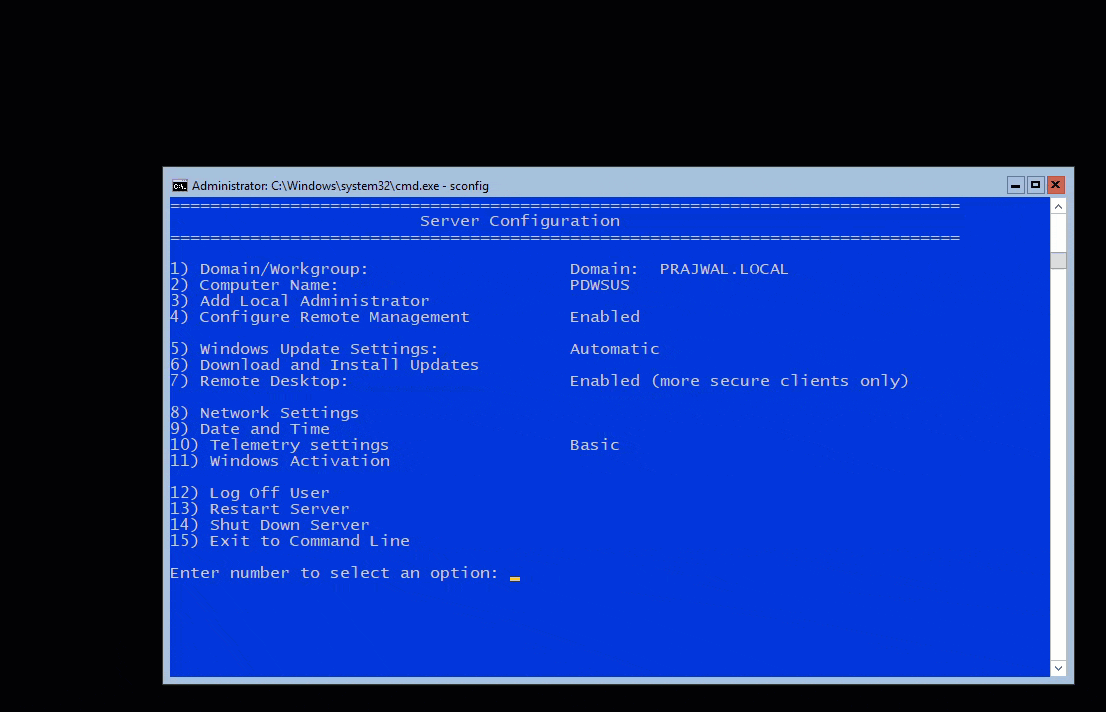
Windows Update Settings
The server can be configured to use Automatic or Manual updates using Windows Update Settings. When Automatic Updates is turned on, the system will check for updates every day at 3:00 AM and install them if there are any. When Manual updates are chosen, the system will not automatically check for updates.
Download and Install Updates
At any time, you can download and install applicable updates from the Download and Install Updates option on the main menu.
The Download Only option will scan for updates, download any that are available, and then notify you in the Action Center that they are ready for installation. This is default option.
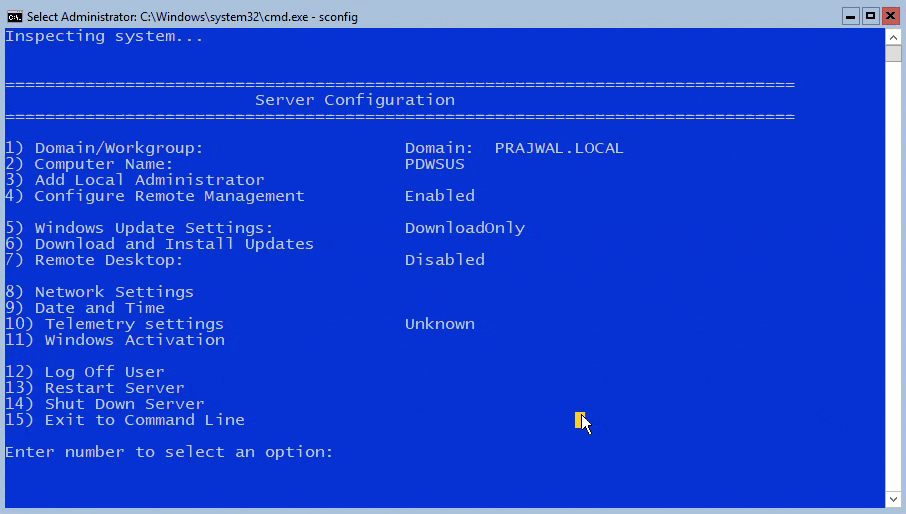
Remote Desktop
When you install Windows Server core, by default the Remote Desktop is disabled. However, you can use the option 7 to enable remote desktop.
Type 7 and press Enter. You should see two options.
- Allow only Clients running Remote Desktop with Network Level Authentication
- Allow clients running any version of Remote Desktop
Type either 1 or 2 based on your requirement and press Enter key. On the confirmation box click OK.

Network Settings
Using Network Settings you can configure the Server IP address. You can select IP assigned by a DHCP Server or you can assign a static IP address manually. This option allows you to configure DNS Server settings for the server as well.
Type 8 and press enter. Select your network adapter, and you will see some more options like :-
- Set Network Adapter Address
- Set DNS Servers
- Clear DNS Server Settings

Date and Time
You can change date and time settings by accessing the Date and Time main menu option. Type 9 and press Enter.
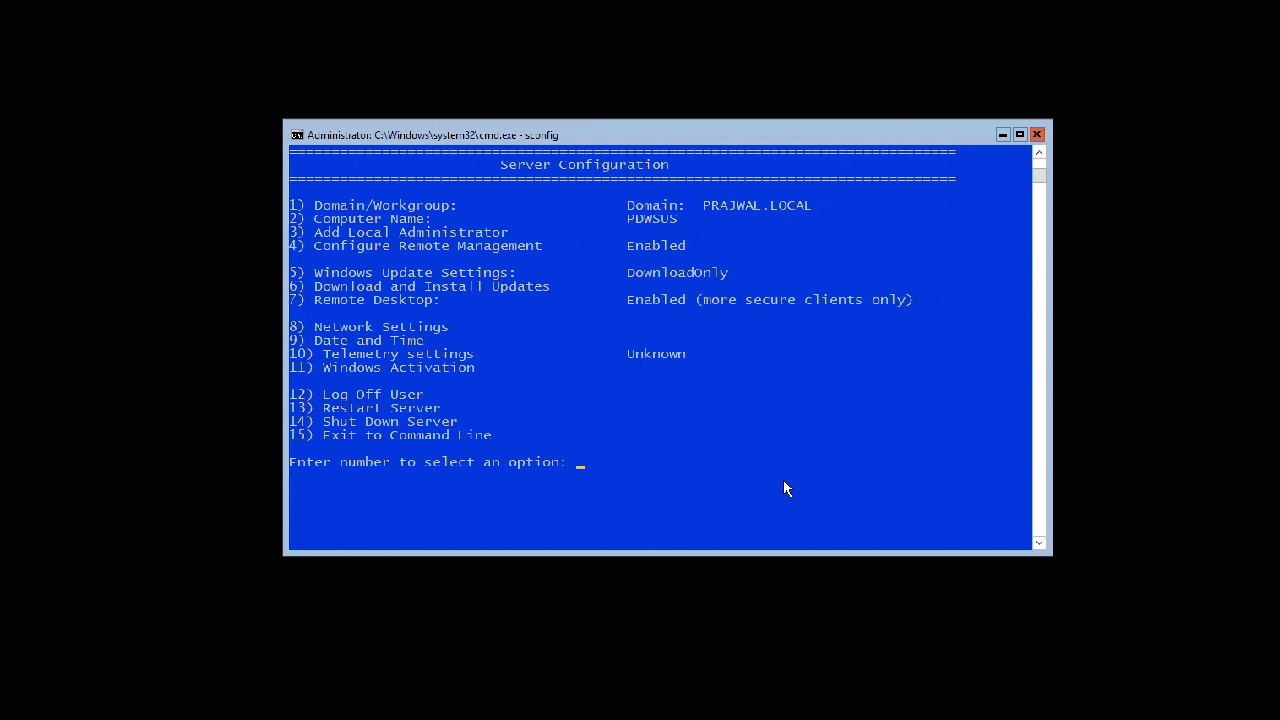
Telemetry Settings
This option lets you configure the data that’s sent to Microsoft. Type 10 and press Enter. Click Yes if you want to change Telemetry Settings.
The available Telemetry options include :-
- Security
- Basic
- Enhanced
- Full

Windows Activation
This option lets you configure Windows Activation. Type 11 and press Enter.
You can perform the following actions.
- Display License Info
- Activate Windows
- Install Product Key

Log Off User
Use this SConfig option to log off from the server.

Restart Server
Use this option to restart your Windows Server. Type 13 and press Enter. Click Yes to restart the server.
Shut Down Server
Use this option to Shut Down the server. Type 14 and press enter. Click Yes to confirm the server shutdown.

Exit to Command Line
This option lets you exit the Server Configuration Tool and go back to the command line. To return to the Server Configuration Tool, type SConfig.cmd, and then press ENTER.

Very helpful, Thanks!
I know the command ‘set-sconfig -AutoLaunch $false’ would disable the auto launch for the local computer.
Is there a way to disable the SConfig autolaunch property at logon for multiple servers at once? May be using a script or GPO.
Regards,
Jethro
yeah, how to get out from sconfig to windows ;-0
Windows Server Core SConfig Options……very helpful.
how can we move from dos screen to windows screen to install the server