


In this post, I will show you how to join Windows Server Core to AD domain using SConfig. If you’ve already installed Windows Server Core, it’s easy to connect it to an Active Directory domain. Using the SConfig command, you can join a Windows Server Core to an Active Directory domain.
The Windows Server Core option is a minimal installation option that is available when you deploy Windows Server. The majority of server roles are included in Server Core, but not all of them. Due to its smaller code base, the Server Core has a smaller disk footprint and, as a result, a smaller attack surface. To learn more about the server core, visit this link.
Let’s say you have Windows Server Core installed and want to add it to your AD domain. But before you join the server to the domain, you might want to rename this server. The SConfig utility will be used because a Server Core lacks a Desktop Experience GUI.

Here are some useful guides related to Windows server core:
- Find Who Restarted Windows Server Core
- SCCM Software Center on Windows Server Core
- How to Install SCCM Client on Windows Server Core
- Windows Server Core – Enable PXE Responder Without WDS
- Enable Remote Desktop on Server Core
Using SConfig to Join Windows Server Core to AD Domain
Here are the steps to use SConfig to join Windows Server Core to an Active Directory domain:
- Login to the Windows Server core with local administrator account.
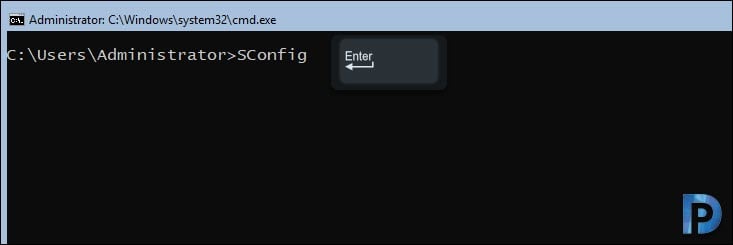
- Type SConfig at the command prompt and press Enter.
- From the list of options, choose Option 1 (Domain/Workgroup) by typing 1 and press ENTER.
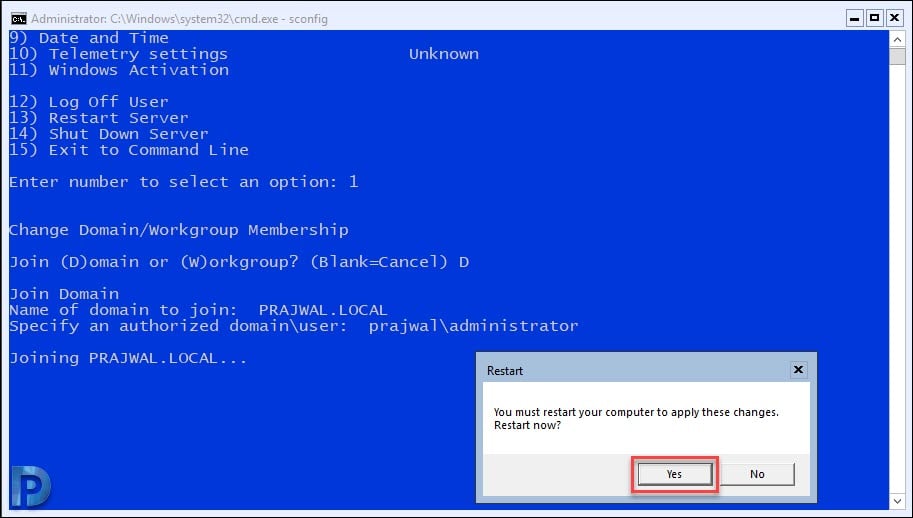
- To join the server to the domain, type D and press ENTER.
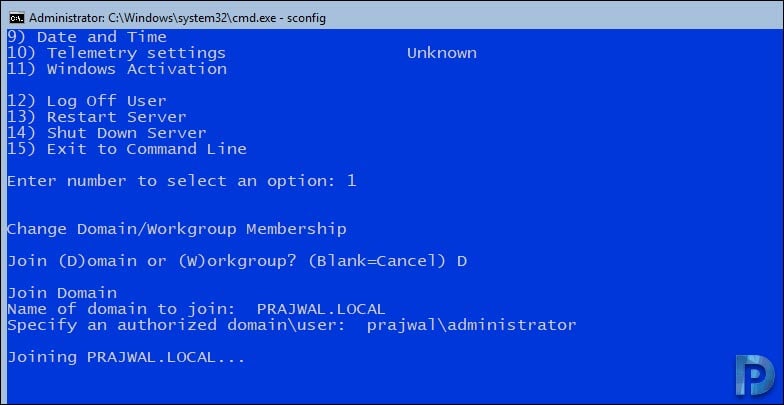
- Specify the domain name and a valid user for this domain (domain\user). Type the user password when prompted.
- Reboot the server.
Every organization has a computer naming scheme. Windows Server Core is given a random computer name when you install it. Using the SConfig utility, you can change the name of the computer when you join Server Core to an Active Directory domain. Type “SConfig” and press Enter.
On the Server Configuration windows, you’ll see a list of server management options. From the list of options, select type 2, which is typically used to change the computer name. Enter the new computer name for Server Core and press Enter. You see a pop-up asking you to restart the computer; click Yes.

Login to the server again and type SConfig to get to the Server Configuration screen. The computer name is now changed. To join the Windows server core to an Active Directory domain, type 1.
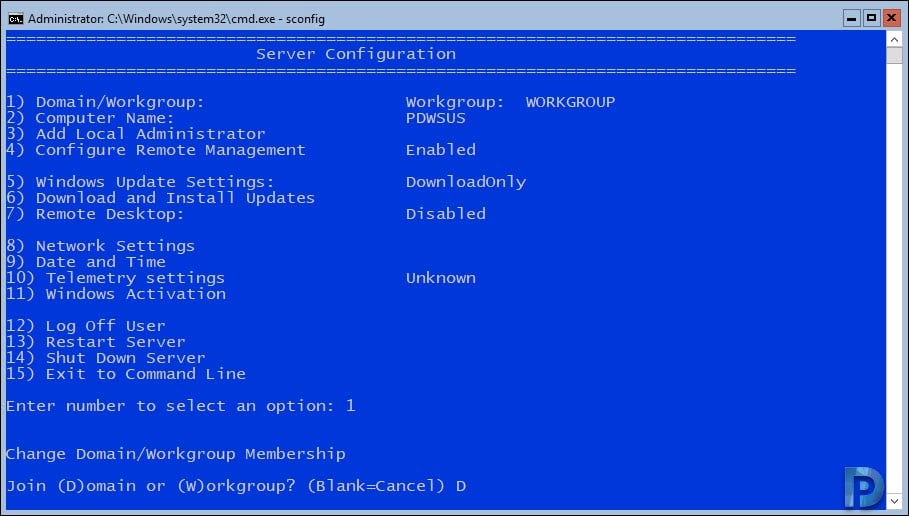
Now you see the option to Change Domain or Workgroup Membership, type D and press Enter. Specify the domain name and the authorized domain/user. The password for the domain account must be entered at a new command prompt that appears.
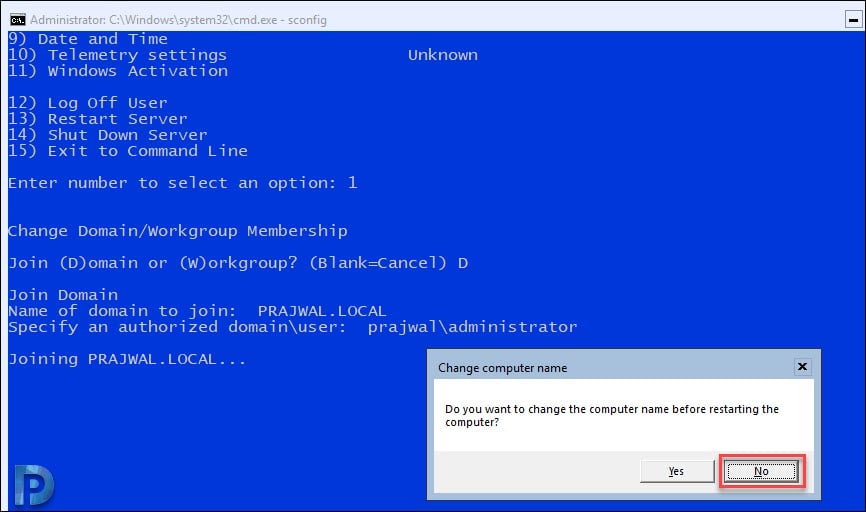
While joining the server core to the domain, you also get an option to change the computer name before restarting. Since we have already changed the computer name in the above step, click No.
After joining the Windows Server core to the AD domain, you must restart the server to finish the joining process. Click Yes to restart the server.
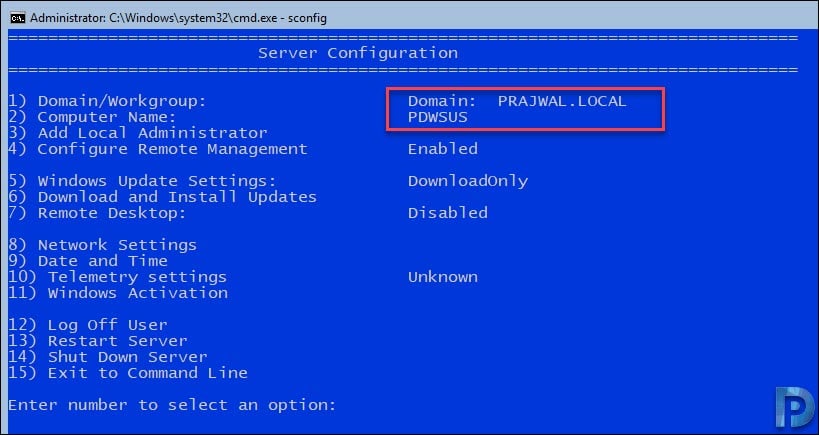
After the system reboots, login to the server and type SConfig. Now we see that the server core is joined to the AD domain. You can now log in to the server with domain credentials and manage other aspects of the server.

I have a problem
I cant type the password when i add the username
What can i do?
i have a problem
I cant type the password when i add the username of my domain
What can i do?
It will show up in a new cmd-like windows (like a 3rd part), so just enter admin-username.
But my issue is that I can’t join to the DC (the next step after PWD).
Me either