


In this article, I will explain how to increase the size of SCCM site server log files. The default log file size for all site server logs is 2 MB, and this can be increased to a higher limit.
To review the log file over a 5-day period, the site server log file size be increased to at least 10 MB. I still stand by that advice because looking back over a 5-day period in a log file is quite helpful when solving a problem.
We know in SCCM, the troubleshooting is performed mainly with the help of log files. The log files contain the error codes, which are really useful in troubleshooting the issue. Take a look at all the SCCM log files required for troubleshooting issues. Also read how to translate SCCM error codes to messages.

Keep in mind that you don’t have to increase the log file size for every SCCM component. Only the components that perform extensive logging requires expanding the size of log files. Let’s get started with some basics, and then we’ll look at increasing the log file size.
Recommended Article: 5 Best Tools to Read Configuration Manager Log files
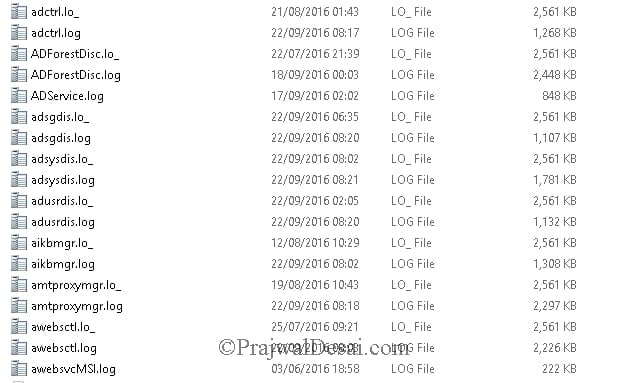
MAXIMUM LOG FILE SIZE REACHED – FILE RENAMED
In Configuration Manager, the default log file size for all site server log files is 2 MB. When the site server log files size reaches 2 MB and above, you see a line MAXIMUM LOG FILE SIZE REACHED – FILE RENAMED. In the below screenshot, we see that once a log file reaches its maximum size, a new log file is automatically created. This new log file has .lo_ extension, indicating the file is newly created after the original log file (.log) has reached the size of 2 MB.
To avoid creating the .lo_ log files and resolve “MAXIMUM LOG FILE SIZE REACHED – FILE RENAMED” issue, you can increase the size of the log files for SCCM components. There are two ways to increase the SCCM site server log file size – Registry and Configuration Manager Service Manager. I’ll go over both of these approaches, and you can choose the one that seems the simplest to you.
Also Read: How to Restart SMS Agent Host Service
Manually Increase the Size of SCCM Site Server Log Files
You can manually increase the size of SCCM site server log files by introducing changes to the registry. Before you make any changes to the registry, backup the entire registry and save the backup to a file on the server.
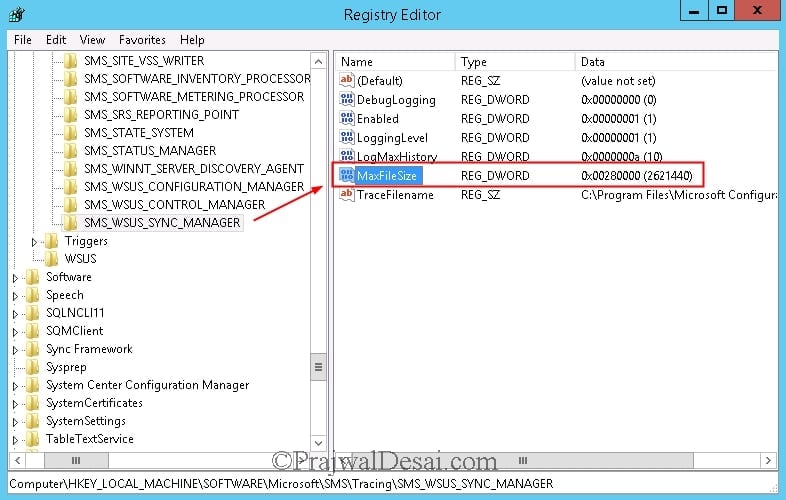
A straightforward registry change can alter the size of the SCCM site server log files. On the site server, open the registry editor by running the command regedit. In the registry editor, navigate to HKEY_LOCAL_MACHINE\SOFTWARE\Microsoft\SMS\Tracing.
The Tracing folder contains many SCCM components and for every component, you can alter the log file size by modifying the registry key value. Select the component for which you intend to increase the log file size and in the right pane you will notice the MaxFileSize entry which is of type REG_DWORD. The default value for MaxFileSize is 280000.
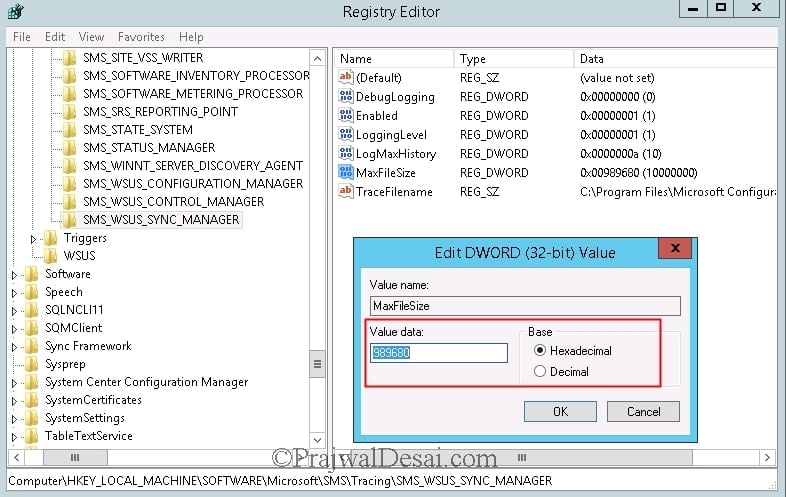
To change the size of the log file, double click MaxFileSize. The value 280000 is represented using the Hexadecimal system. In the below screenshot, we see that I have entered the hex value of 989680. The decimal equivalent of the number 989680 is 10000000, or 10 MB. This means I have increased the size of log files from 2 MB to 10 MB.
Also Read: How to delete SCCM IIS Log Files
How to Increase the Log File Size with Configuration Manager Service Manager
Apart from using the registry method, you can increase the log file size using Configuration Manager Service Manager. You can use the Service Manager to control Configuration Manager services, and to view the status of any Configuration Manager service or working thread.
To launch the service manager, in the Configuration Manager console, go to the Monitoring workspace, expand System Status, and select the Component Status node. In the Component group of the ribbon, select Start, and then choose Configuration Manager Service Manager.

When the Configuration Manager Service Manager opens, connect to the site that you want to manage. If you don’t see the site that you want to manage, go to the Site menu, and select Connect. Then enter the name of the site server of the correct site.
Expand the site and navigate to Components or Servers, depending on the location of the components that you want to manage. For example, I am going to increase the log file size of SMS_WSUS_SYNC_MANAGER component. Right-click the component and select Logging.

On the Configuration Manager component logging window, change the Log size from 2 MB to 10 MB and click OK. With that, you have increased the size of the SCCM site server log files for a specific component.
After you increase the log file size for a component, in some cases, the component needs a restart. To restart a component, right-click on the component and select Query. This will now update the current status of component which is either “Running” or “Stopped“. Right-click on the component again and select Stop and then select Start.
If you feel the above steps are too complex, simply restart the SCCM Site Server and that will do the job for you.


How about increasing the size of the PatchDownloader.log?
Same question for me where could I increase the PatchDownloader size?
Thanks,Dom
That’s correct.
It may have changed since you first posted this, I have no idea. But this is possible directly through SCCM itself now (or more specifically through the Configuration Manager Service Manager). Details are on Technet here: https://technet.microsoft.com/en-us/library/hh427342.aspx
Back in the old SMS 2.0 days we would simply drop a “Dial_Me_In_Baby.sms” file on the root and it would turn on all the logging. Those were the days!