In this post, you will learn how to import or add Adobe custom catalog in SCCM. By adding the Adobe custom catalog to Configuration Manager, you can deploy updates for Adobe reader natively without using SCUP.
Custom catalogs help you import the third-party application updates in SCCM. For example, if you want to import Adobe reader updates in SCCM, you can use the free catalogs provided by Adobe.
Last week I updated my post that covered about SCCM Catalogs for Third-Party Software Updates. If you are new to deploying third-party updates in SCCM, that guide is very useful and important. Also, to manage the update catalogs, you can read how to manage SCUP software update catalogs.
SCCM can easily deploy software updates and most organizations today use SCCM to deploy updates to endpoints. However, when it comes to deploying third-party updates using ConfigMgr, there are many third-party tools that offer more functionality than SCCM.
To deploy third-party software updates using SCCM, Microsoft allows you to import the custom catalogs in ConfigMgr. When you import the custom catalog, you can deploy the third-party updates such as Adobe, like normal software updates.
Microsoft recently published a list of supported software update catalogs for Configuration Manager. Some catalogs are freely available, and some catalogs have an additional cost associated with them.
Download Adobe Custom Catalog
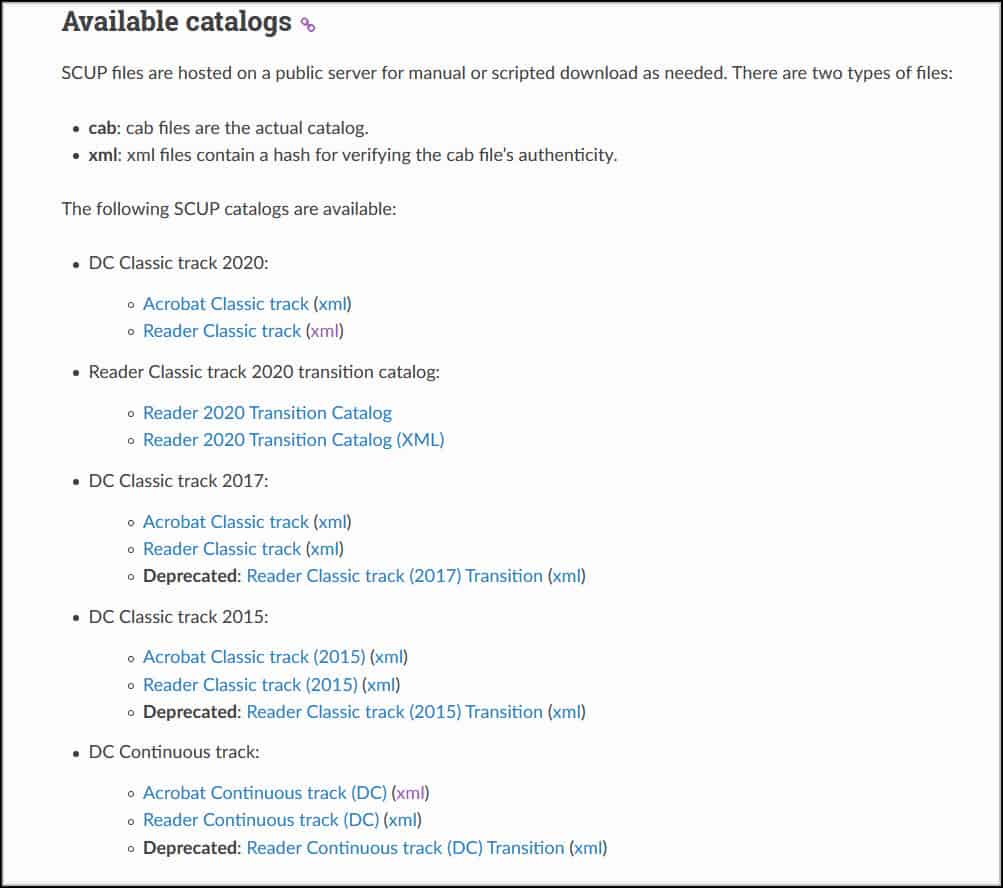
Before you add or import Adobe custom catalog in SCCM, you need to download the Adobe custom catalog. The Adobe custom catalogs are provided by Adobe itself. Visit the Adobe SCCM SCUP catalogs site to download the custom catalog URL for Adobe Reader.
Add Adobe Custom Catalog in SCCM
Use these steps to import or add Adobe Custom Catalog in SCCM
- Launch the Configuration Manager (SCCM) Console.
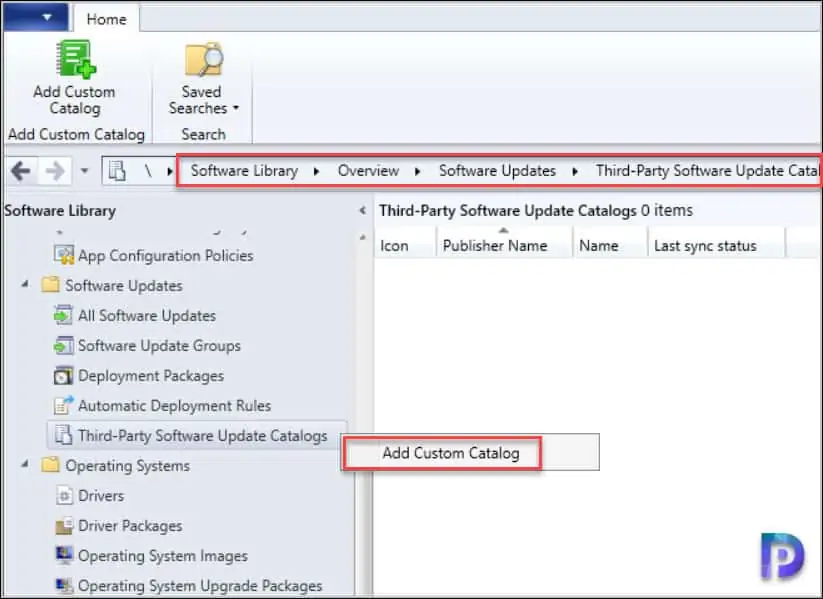
- Navigate to Software Library\Overview\Software Updates.
- Right click Third-Party Software Update Catalogs and click Add Custom Catalog.
You should now see Third-party software updates custom catalogs wizard. On the General window, specify the following details.
- Download URL – This is the Adobe reader catalog URL that is provided by Adobe. The URL should end with .cab.
- Publisher – Specify the Publisher as Adobe
- Name – Specify the name, for ex. Adobe Reader Catalog
- Description – Enter the description for the custom catalog
- Support URL – Optional
- Support Contact – Optional
After you specify all the details, click Next.

On the Summary page, click Next.

On the Completion page, click Close. This completes the steps to add Adobe custom catalog in SCCM.

Subscribe to Adobe Custom Catalog
You can subscribe to Adobe Custom Catalog in SCCM with following steps.
- Launch the SCCM console.
- Go to Software Library > Overview > Software Updates.
- Select Third-party software update catalog.
- From the list of catalogs, right-click the Adobe custom catalog and click Subscribe to Catalog.

On the General page, you don’t need to specify anything. The details that you provided in earlier section are displayed. Click Next.
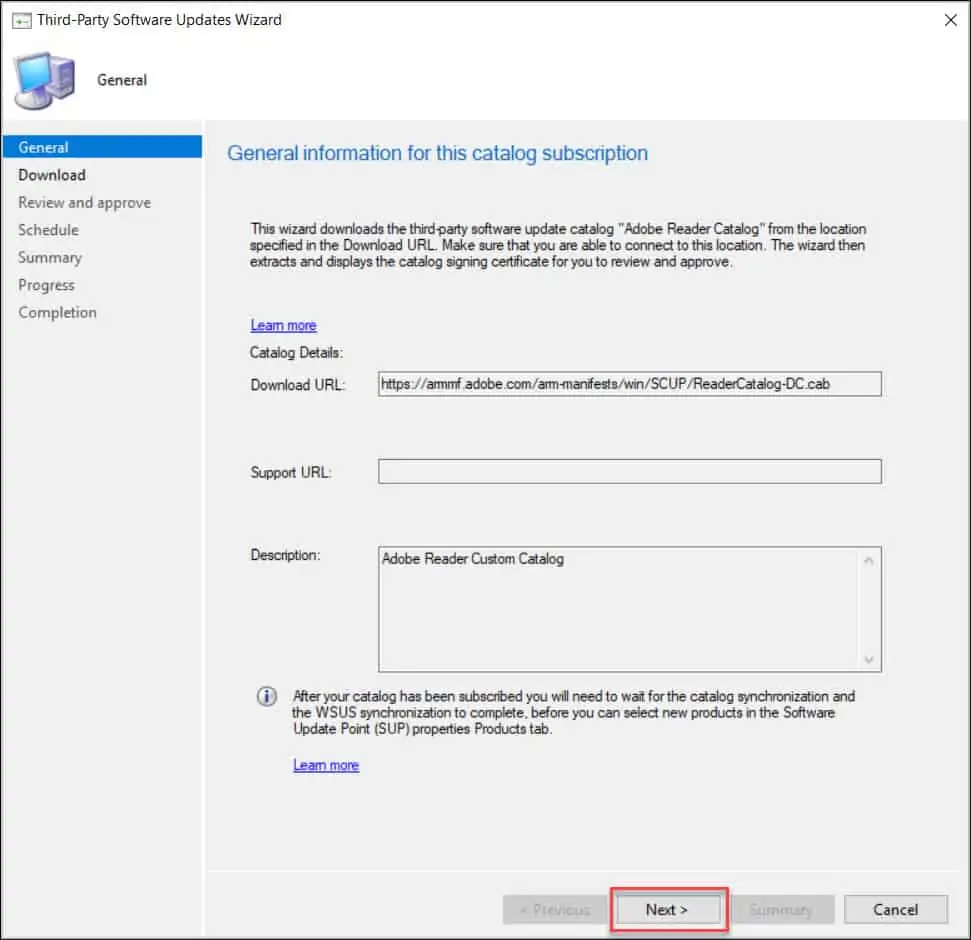
On the Download window, wait until you see a Download Successful message. Click Next.

Approve Catalog Signing Certificate
Before you complete the process of subscribing to Adobe custom catalog, you must review and approve the catalog signing certificate.
By approving the certificate, you accept the Adobe reader updates from the Adobe. On the Review and Approve window, click View Certificate.

Click Install Certificate.

On the certificate import wizard window, choose the store location as Local machine and click Next.

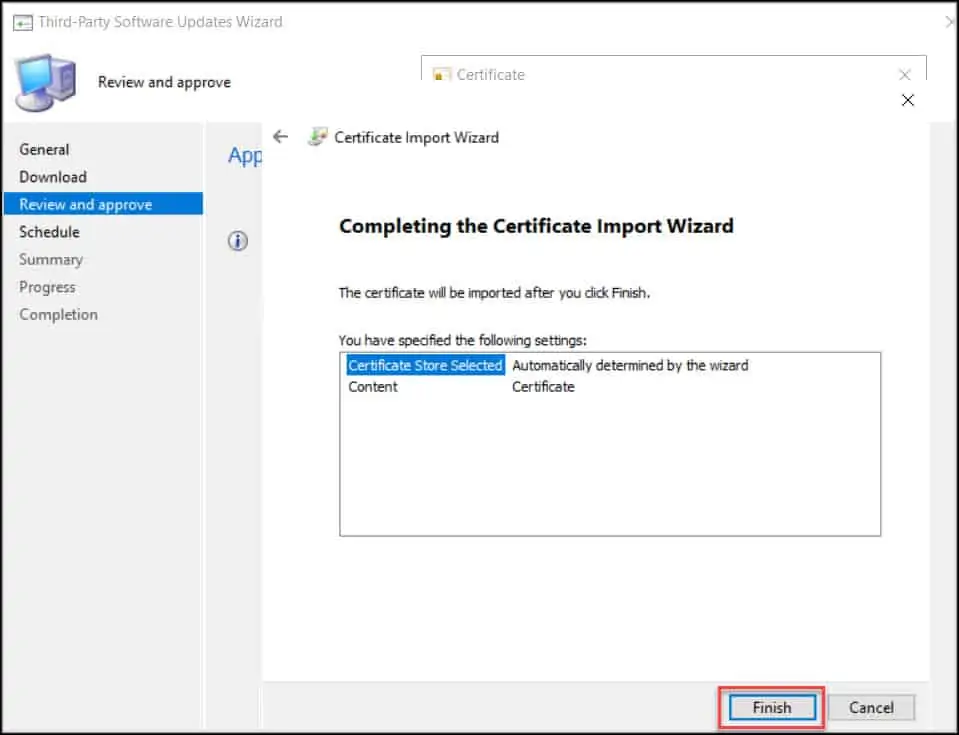
Select Automatically select the certificate store based on the type of certificate. Click Next.

Click Finish. This completes the steps to review and approve Adobe catalog signing certificate.
We will now continue with Adobe custom catalog subscription. On the Review and approve window, click I have read and understood this message. Click Next.

You can set a custom schedule for the catalog and determine when you want to sync Adobe reader updates. This is optional, and you can do it later as well. I am going to set the schedule to run every 2 days. Click Next.

On the Summary window, verify the settings and click Next.

Finally, to complete the Adobe custom catalog subscription, click Close.

Synchronize Adobe Reader Updates in SCCM
Perform the following steps to synchronize the Adobe reader updates in the SCCM console.
- Launch the Configuration Manager (SCCM) Console.
- Navigate to Software Library\Overview\Software Updates\Third-Party Software Update Catalogs.
- Right click Adobe Catalog and click Sync now.
- On the Sync Catalog window asking to confirm the sync, click Yes.

To monitor the Adobe Reader updates synchronization, you can review the SMS_ISVUPDATES_SYNCAGENT.log. This log file is located in C:\Program Files\Microsoft Configuration Manager\Logs folder.
From the log file you can see that the synchronization has been completed successfully. Total 138 Adobe reader updates have been synchronized to WSUS.

Enable Adobe Products in Software Update Point
You can enable the Adobe Product category in SCCM with following steps.
- Launch the SCCM console.
- Go to Software Update Point component properties and click Products tab.
- From the list of products, select Adobe and all the sub products. Click OK.

After you make any changes to products or classifications in SUP, you must manually synchronize the updates once. Go to Software Library\Overview\Software Updates\All Software Updates and click Synchronize Software Updates.
You must review the software update point synchronization details using wsyncmgr.log file. In the wsyncmgr.log, you can clearly see that it’s synchronizing the Adobe Acrobat Reader updates. Wait until the sync completes.

Once the SUP synchronization is complete, you can verify if the Adobe reader updates are now visible under all software updates. Since the list of software updates is usually long, to make it easier, type Adobe Reader in the search box and click Search.
Now again a lot of Adobe reader updates are displayed. Notice that updates have a blue icon instead of Green icon and when the updates have a blue icon its only metadata. You cannot download and deploy those updates.
What I am guessing is the blue icon updates are old updates and probably aren’t applicable to machines.
Sort the updates using Date Released column to see the new released updates first. The first two Adobe Reader updates show as Green icon and can be deployed using SCCM.




Hi Prajwal,
I’m only getting the metadata updates.
What can be the cause?
thanks
Paresh
Will updates through SCCM Third Party Update Catalog force close the users Acroboat client? Is there any documentation which identifies the anticipated behavior when updated? Our prior update processes used PSAppDeploy for the benefit of user coordination for updating the client to make sure in-use documents were not forceably closed.
I’m only getting the metadata updates.
What can be the cause?
Hello,
I can’t enable the Adobe Product category in SCCM. Adobe is not in the product list
Hello, I have the same issue.
Surprised this step was missing from the instructions as I ran in to the same thing.
After you enable third party updates and select “Configuration Manager manages the certificate” in the SUP – you need to synchronize updates (Software Library -> Overview -> Software Updates -> Right Click All Software Updates & Synchronize Software Updates) – this will cause SCCM to generate a certificate and then Adobe was available in the Products list.
Do we need to install the certificate in client workstation?
great steps guide
also, can we use ADRs for Adobe update deployment via ConfigMgr?
I believe so. I will deploy them to my lab VM’s and confirm.
thank you prajwal, really appreciate it